
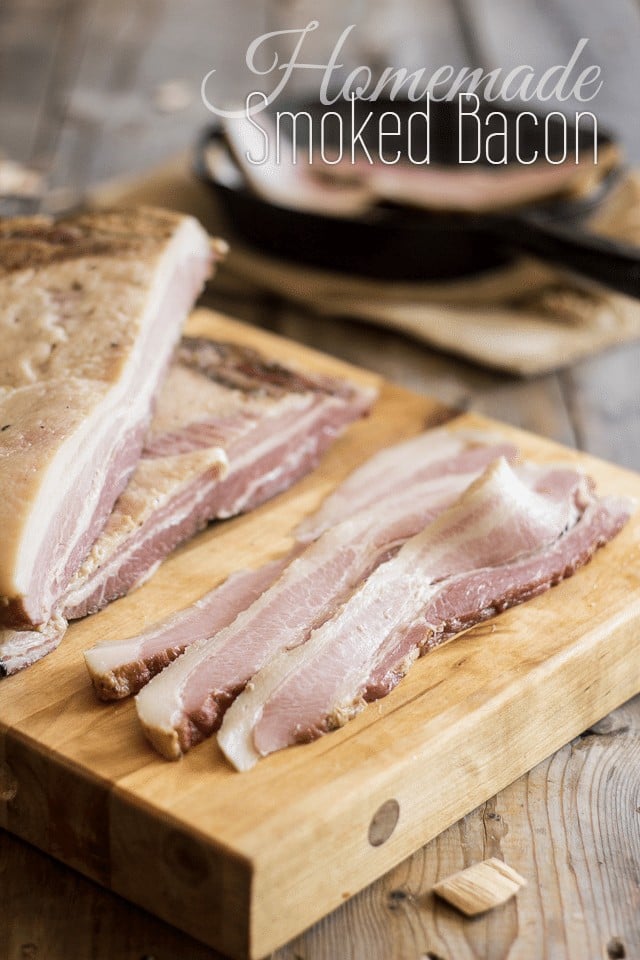
Homemade Smoked Bacon
From the moment I bought my first half hog, I knew for a fact that the day would come when I would be trying my hand at making my own bacon. Because let’s face it. Bacon tastes so GOOD, but bacon that’s actually good for you is kinda hard to come across.
What better way to control what goes into it than by making your own at home? Plus, it’s such an incredibly rewarding experience.
And you know what? I thought for sure that it would be super complicated and require a degree in rocket science, but nothing could be further from the truth.
Honestly, making your own smoked bacon couldn’t be easier.
Sure, it does require a little bit of time because first, the meat has to cure for an entire week, but it doesn’t require your attention at all during that time. Then it needs to smoke for about 4 hours, but again, you don’t have much to do while that’s happening either.
Then it needs to chill overnight. Again, it really doesn’t need your help for that.
In all fairness, making bacon is a fairly passive activity that will require only a few hours of your time and will reward you with heavenly goodness.
And rest assured. No science degree is required…
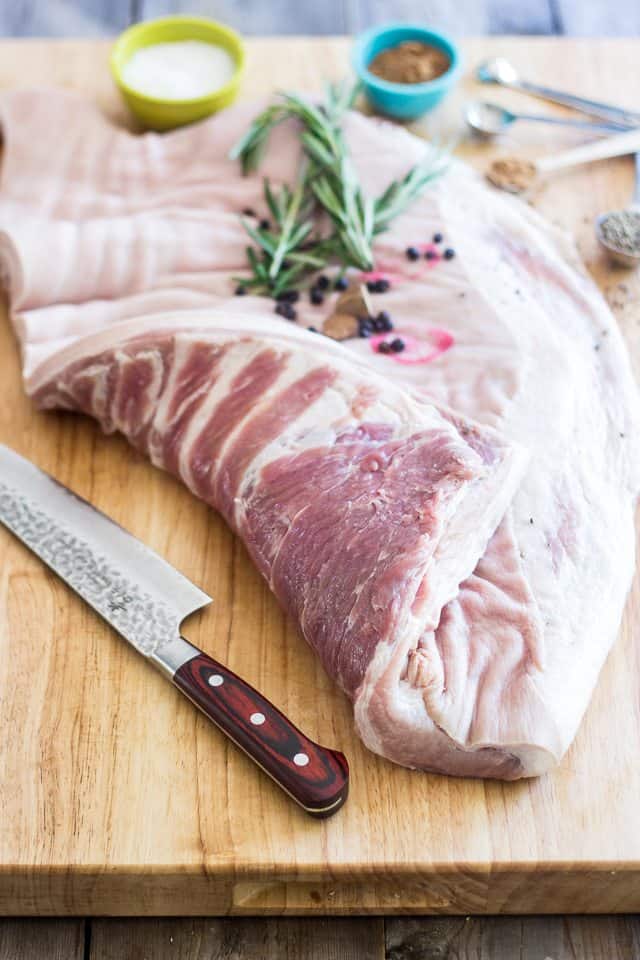
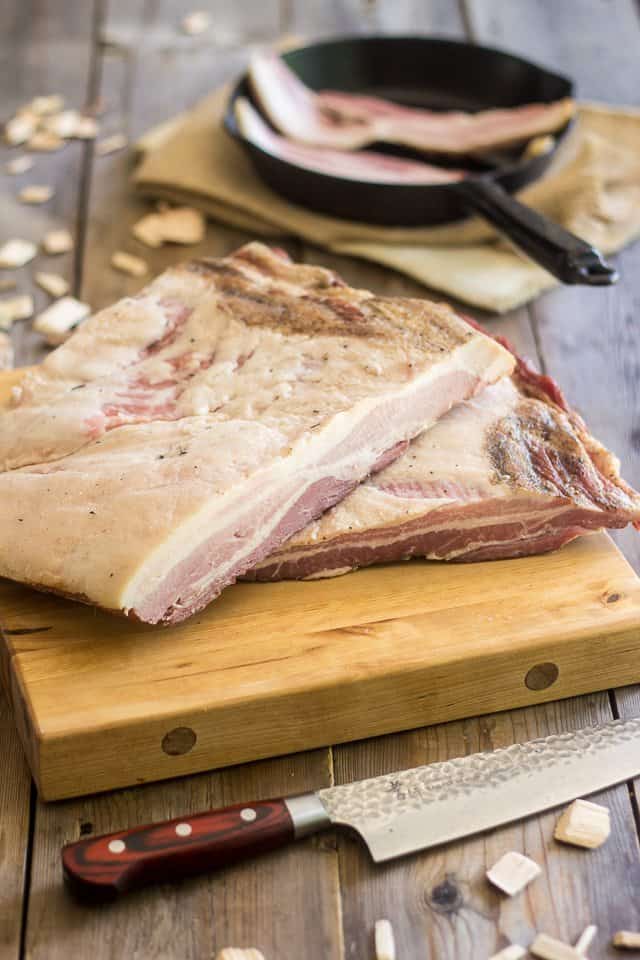
First, you need to get your hands on a pork belly. I don’t know about you, but when I embark on time consuming projects such as this one, I always like to make it worth my effort: I like to do big batches that will last me for months!
So I went and bought the whole belly. That was roughly 8 pounds of meat.
As you can see, mine still had the skin attached to it. If yours has it too, you’ll want to leave that on for now. It’s easier to remove the skin AFTER the belly has been smoked.
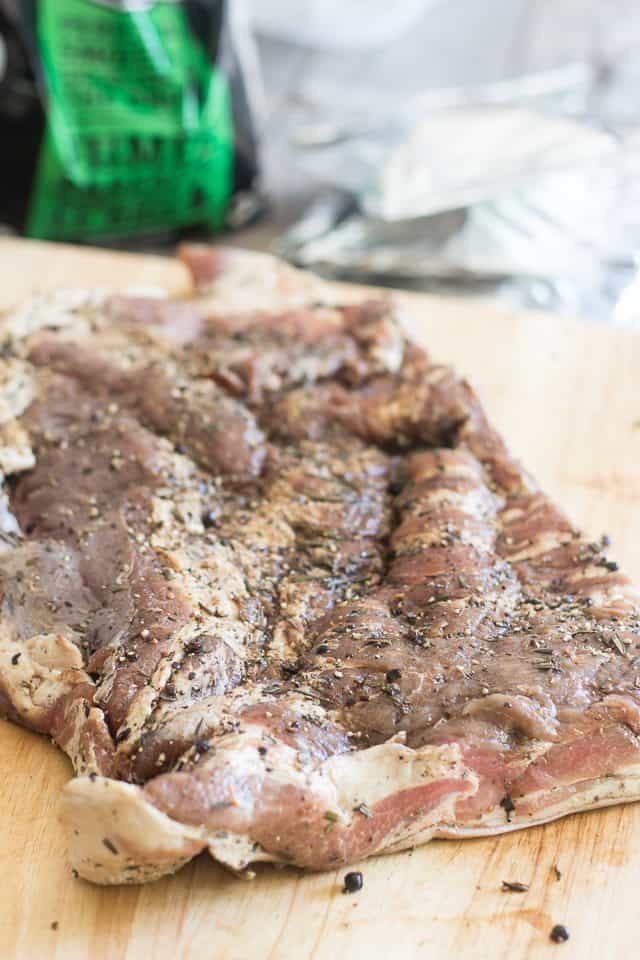
For now, you only want to rinse your pork belly and then pat it really dry.
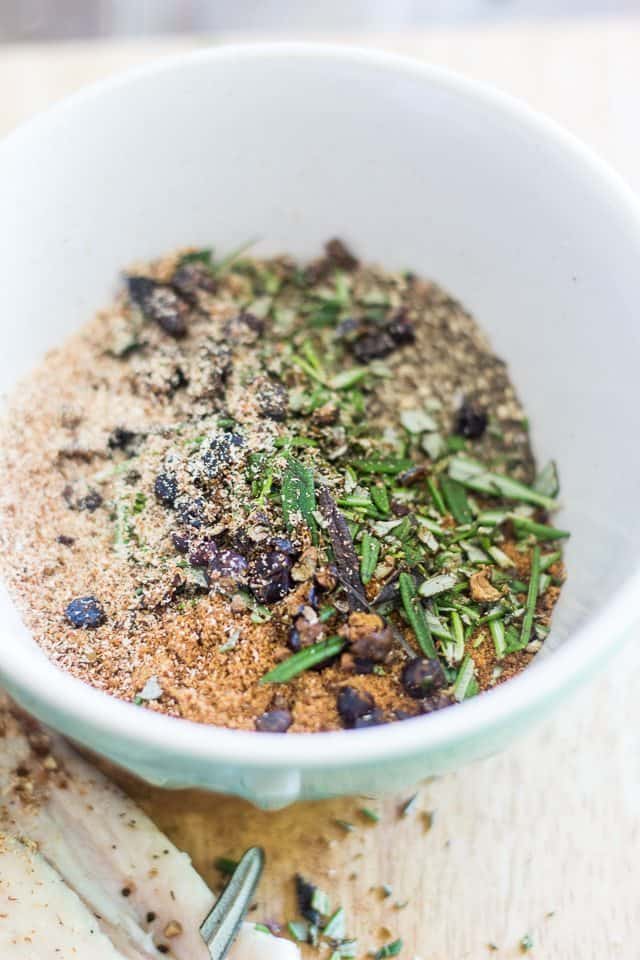
Then, mix all your spices together in a small bowl.
Now, these are the spices that I chose to use, but there are millions of other combinations out there, so feel free to change them up a bit. Just make sure that you use an adequate amount of salt, i.e. roughly one teaspoon per pound of meat.
Also, I chose to use pink curing salt (not to be confused with pink Himalayan salt), which is basically a mixture of about 94% salt and 6% sodium nitrite. This curing salt really helps in preserving the meat and preventing spoilage by inhibiting the growth of fungus or bacteria. Also, it ensures that the cured meat will keep its beautiful pink color. Without it, the meat would likely turn an unappetizing shade of grey. The amount used is so minimal that I personally don’t have a problem using it, but if you firmly oppose to adding nitrites to your meat, you could experiment with using celery juice powder instead (not to be confused with celery salt) which pretty much plays the same role.
Same goes for sugar. Some people are firmly against the idea of adding sugar to their bacon. I feel so very little gets added, I’m not gonna fuss about it. It’s not like I’m turning my meat into candy here… plus, most of it gets rinsed off, so I figure in the end, each slice of bacon probably contains the equivalent of one grain of sugar. Personally, I don’t have a problem with that.
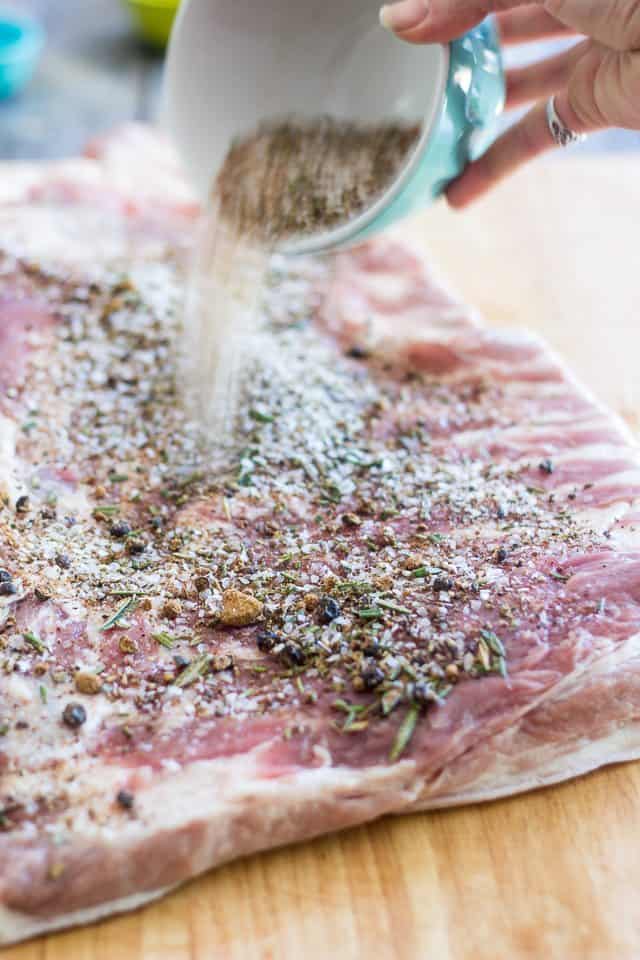
So… mix whichever spices and curing aids your choose to use and sprinkle that over both sides of the pork belly, then rub it in really well.
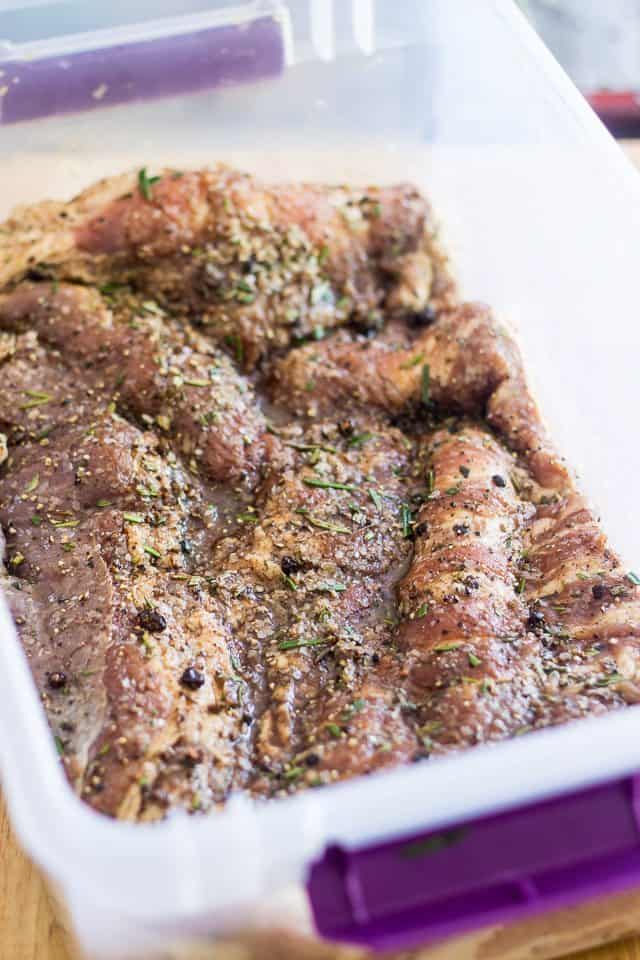
Place your slab of meat in a large resealable bag (if you can find one that’s large enough to accommodate it, that is) or in some kind of non-reactive container. I used a clean storage container with fitting lid, which worked beautifully.
You could also cut your pork belly into several smaller pieces to make it fit into smaller bags or containers.
Place your meat in the fridge and leave it to cure for 7 to 10 days.
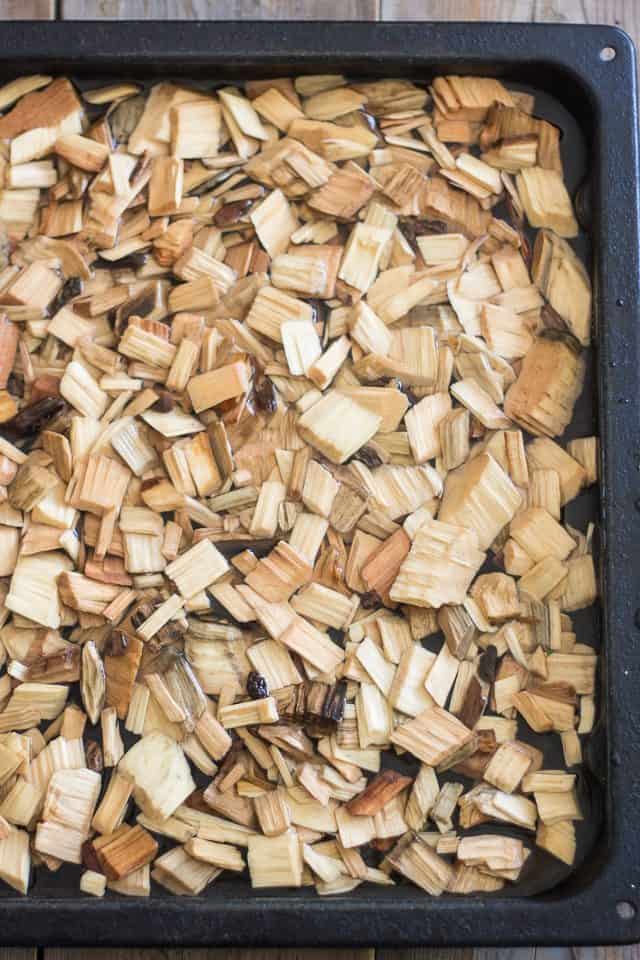
When you’re ready to smoke your bacon, soak 4 cups of wood chips in water for AT LEAST ONE HOUR prior to getting started.
The choice of which essence of wood chip to use is really up to you. I opted to use a mix of apple and maple and it yielded amazing results.
When your chips have soaked for a sufficient amount of time, preheat your outdoor grill to 200F. Turning on a single burner on low should do the trick
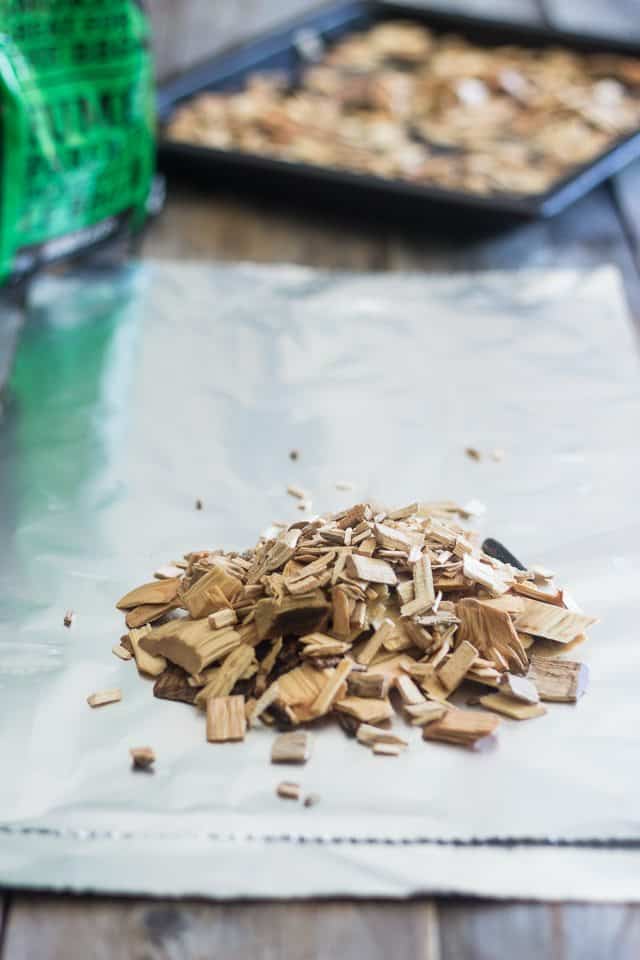
While the grill is heating up, make 4 wood chip pouches.
To make the pouches, cut out a 12” x 24” piece of heavy duty aluminum foil (double that up if using lighter foil) for each pouch and place about a cup of soaked wood chips on one end of the foil. Add a handful of dry chips to that, then fold the foil over the wood chips.
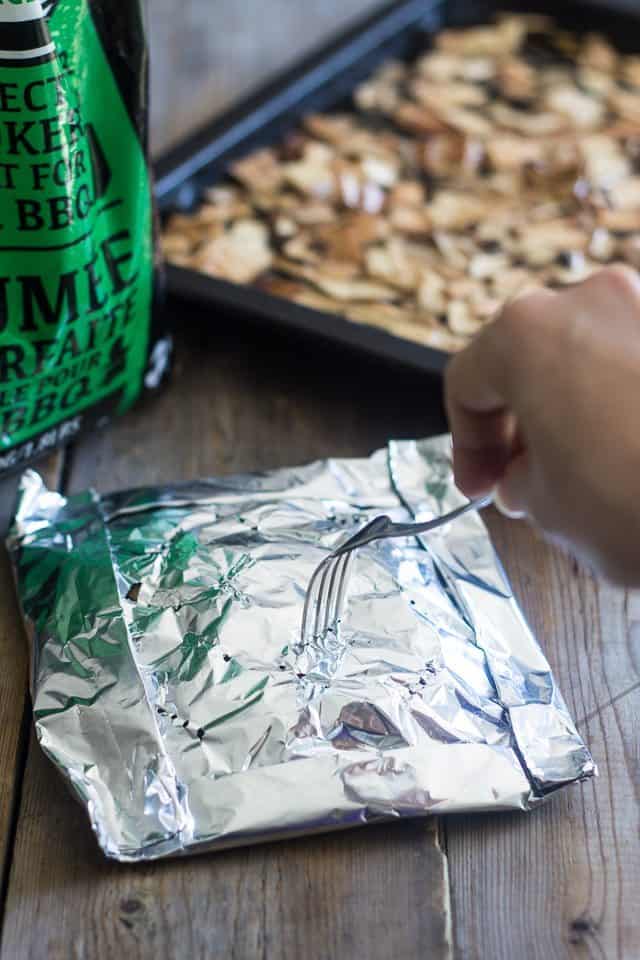
Fold all four edges toward the center at least twice, then poke a bunch of holes on the top of the pouch with a fork.
Lift the grill that’s above the lit element and place a pouch directly on the heat source. Close the lid and wait until smoke starts to escape from the foil pouch.
Rinse your pork belly thoroughly under cold running water to rid it of all the spices, then pat it real dry and place it skin side down (if skin is present) on the unlit side of your grill; close the lid.
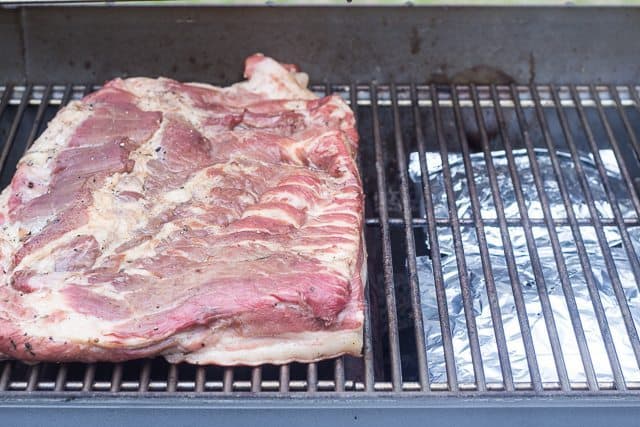
Smoke the pork belly for about 4 hours, replacing the foil pouch with a fresh one every hour or so. If necessary, crank up the heat under the new pouch until smoke starts to come out then bring the heat back down to low.
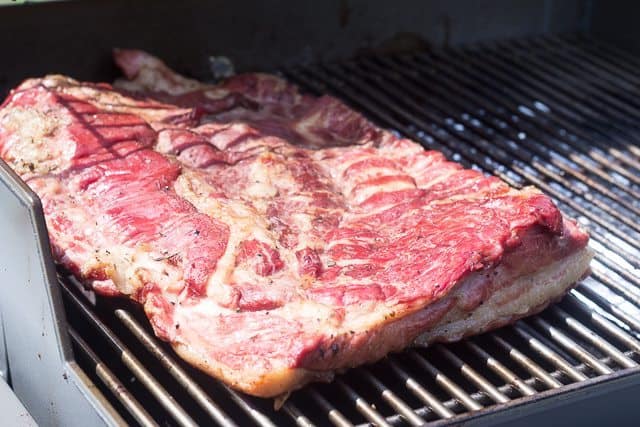
As you can see, I had plenty of room to fit 2 foil pouches at a time, so I chose to just add one after the initial hour and then replace the oldest one on every subsequent hour.
Try and keep the heat inside your grill as stable as possible, at around 200F. Crack open the lid from time to time to let some heat escape if you find it’s getting a tad too warm in there…
Also note that it’s not necessary to get crazy amounts of visible smoke in order to get good flavor from it. A little bit really does go a long way. However, if you feel you are not getting enough smoke, feel free to add more dry chips to your foil pouches, or place an aluminum container with a handful of dry chips next to your smoldering foil pouch.
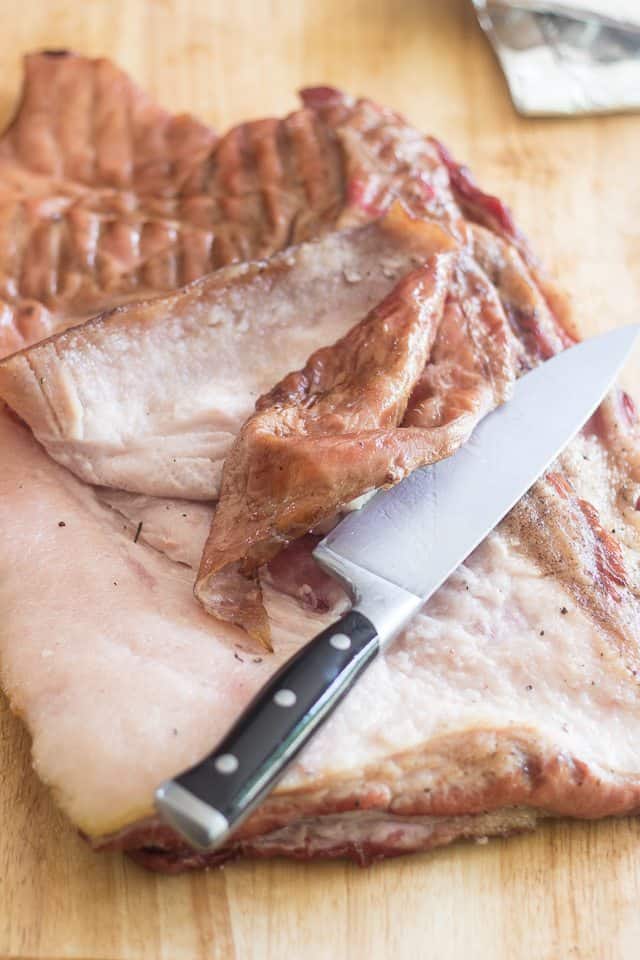
When your gigantic slab of smoked bacon registers 150F, take it off the grill and remove the skin if present. You should be able to remove it by gently yet firmly pulling on it, but if some spots refuse to cooperate, simply use the tip of a sharp knife to help cut it loose. Make sure you keep that blade as close to the surface of the skin as you possibly can so you don’t remove too much of the fatty layer.
Almost done! Soon, you’ll be eating some of the best bacon you’ve ever had in your entire life. Bacon whose existence you will be solely responsible for. Now isn’t that something!
As hard as it may be, you now need to put that bacon away in the fridge to chill for at least 6 hours, but preferably overnight. That fat needs to firm up again… then and only then will you be able to slice your beautiful homemade smoked bacon to the desired thickness.
To make the slicing easier, I even recommend that you place your bacon in the freezer for a couple of hours. You don’t want your meat to become frozen solid, you just want it to start to form little ice crystals. It should be really firm but you should still be able to pierce it with the point of a sharp knife.
If you’re lucky enough to own a meat slicer, by all means, take it out now. Otherwise, grab your bestest sharpest knife and slice away!

And here we finally are!!!! Now this calls for celebration! You are now the proud owner AND CREATOR of a great big batch of the bestest, awesomest smoked bacon you will have ever eaten in your entire life.
I believe it’s now time to cook that beauty. Just make sure that you are comfortably sitting down when you grab the first bite. Otherwise, chances are, you’d be swept off your feet!
Erm, you don’t need instructions on how to pan fry this baby, do you? Right… I thought not!

Homemade Smoked Bacon
Ingredients
- 1 x 3.75kg, 8.25lb pork belly
- 1/4 cup Himalayan salt
- 2 tablespoons coconut sugar
- 1 tablespoon juniper berries, crushed
- 1-1/2 teaspoon pink curing salt, prague powder #1
- 1 teaspoon freshly cracked black pepper
- 1 teaspoon fresh rosemary, chopped
- 1 teaspoon freshly grated nutmeg
- 1/2 teaspoon ground Ceylon cinnamon
- 1/2 teaspoon ground clove
Instructions
CURING THE MEAT
- Rinse your pork belly and pat it really dry.
- Mix all the spices together in a small bowl and sprinkle over both sides of the pork belly. Rub it in really well, then place your slab of meat in a large re-sealable bag (if you can find one that’s large enough to accommodate it) or in some kind of non-reactive container. A clean storage container with fitting lid works beautifully. You could also cut your pork belly into several smaller pieces to make it fit into smaller bags or containers.
- Place your meat in the fridge and leave it to cure for 7 to 10 days.
SMOKING YOUR BACON
- Soak 4 cups of wood chips in water for at least one hour prior to smoking your bacon.
- Preheat your outdoor grill to 200F. Turning on a single burner to low should do the trick.
- Make 4 wood chip pouches. For each pouch, cut out a 12” x 24” piece of heavy duty aluminum foil (double that up if using lighter foil) and place about a cup of wet wood chips on one end of the foil. Add a handful of dry chips to that, then fold the foil over the wood chips. Fold all four edges toward the center at least twice, then poke holes on the top of the pouch with a fork.
- Lift the grill that’s above the lit element and place a pouch directly on the heat source. Close the lid and wait until smoke starts to come out of the pouch.
- Rinse your pork belly thoroughly under cold running water, pat it real dry and place it skin side down (if skin is present) on the unlit side of the grill and close the lid.
- Smoke the pork belly for about 4 hours, replacing the pouch with a fresh one every hour or so. If necessary, crank up the heat under the new pouch until smoke starts to come out then bring the heat back down to low.
- Try and keep the heat inside your grill as stable as possible, at around 200F. Note that it’s not necessary to get huge amounts of smoke in order to get good flavor from it. However, if you feel you are not getting enough, feel free to add more dry chips to your foil pouches, or place an aluminum container with a handful of dry chips next to your smoldering foil pouch.
- When the pork belly registers 150F, take it off the grill and remove the skin if present. You should be able to remove it by gently yet firmly pulling on it, but if some spots refuse to cooperate, simply use the tip of a sharp knife to help cut it loose. Make sure you keep your blade as close to the skin as you possibly can so you don’t remove too much of the fatty layer.
- Place your bacon in the fridge to chill for at least 6 hours, but preferably overnight, then slice it to the desired thickness.
- To make the slicing easier, you can place your bacon in the freezer for a couple of hours. You don’t want your meat to be frozen solid, you just want it to start to form ice crystals. It should be really firm but you should still be able to pierce it with the point of a sharp knife.
- Store the sliced bacon in the refrigerator for up to 1 week of in the freezer for up to a year.
Notes
If you’ve tried this recipe, please take a minute to rate the recipe and let me know how things went for you in the comments below. It’s always such a pleasure to hear from you!
You can also FOLLOW ME on PINTEREST, FACEBOOK, INSTAGRAM and TWITTER for more delicious, healthy recipes!


47 Comments on “Homemade Smoked Bacon”
You are the Martha Stewart of healthy cooking – in a good way!! You’re passion for food is so inspiring! You are officially my favorite blogger!
Wow, thank you so very much for your very kind words, Ann. You are a real gem and definitely just made my day! Seriously, I’m flushed! Thank you! 😀
Hi Sonia,
Is there any reason you could not smoke the pork belly prior to brining it?
Not sure I understand your question, Ross? It’s simply the proper order in which to do things… You typically want to brine or marinate your meat before cooking it, unless you’re making tataki…
OMG this looks PERFECT! Like all your recipes, it’s unbelievable! So, I have a very simple question – WHEN are you writing a cookbook?? 😀 Please tell me you are! If you’re not, I just don’t get it because you’re SO talented, and every one of your recipes I have tried always turned out amazing! Have a great day! Love from Belgium!
HAHA! Thank you so much Paola, you’re such a rock star! That is so very nice of you to say! I’m speechless! Guess I’ll have to do something about that cookbook…. 😉
i can imagine how good this bacon tastes.. i have never tried the smoke cooking technique before, inspired now to give it a try. thanks!
It tastes like heaven, Thalia. I’ve always been a fan of bacon, but this surpasses any bacon I’ve ever had! Let me know how it went for you if you end up making it!
Can I just say: WOW. Like, OHMAHGAWD. I just made this and I actually can’t even believe how good it is. It might just be the best thing I’ve ever made. I think it’ll be sad how quick I consume this amount of bacon… Or amazing? You decide. 🙂 Thanks for all you do! Hey from Alberta!
HIGH FIVE! So happy to hear that I inspired you to make your own bacon, Alexandra. Amazing, isn’t it? I too will find it hard not to go through it all in a very short amount of time. I could easily have bacon at every meal. 😀
And I definitely vote for amazing. Nothing sad about this, that’s for sure! Oh, and hey, make sure you save your drippings to cook with or make mayonnaise. Bacon fat does make everything better, you know! 🙂
Hi, pink curing salt is not available in my area, can I use salt peter instead?
I personally wouldn’t, since saltpeter would be one of the preservatives I’m trying to avoid in curing my own bacon! Pink curing salt can be found online, though… I even linked to it in the recipe. Hope this helps!
Hey Sonia, I am a wild boar hunter and I will be trying your recipes for both the bacon and ham. I keep looking for ways to make healthier food for my family and your recipes look to be both the simplest and the healthiest on the net. FYI, I am also going to experiment with making ‘ham’ ribs by using the ham recipe and using the bacon curing and cooking. Once again, thank-you for posting these recipes.
Wild boar!? YUMMERS! I bet you’ll be making the best ham and bacon EVER! I say you should also try your hand at making your own sausage!!! Now those would be FAN-TAS-TIC!
Please let me know how things work out for you, Michael!
Hi,tried the bacon recipe and had the best bacon ever.Thanks the recipes and tips and greetings from Nakuru,Kenya.
Happy to hear, William! Thanks for letting me know! 🙂
Hey ? your not the first too make bacon?? Just kidding???? I just finished a batch. More people should try it, it really is easy.? The only mistake I ever made was too much salt? So its important to keep all you measurements and portions right? And don’t over cook it when your smoking it. smoke to 150 degrees f.
But im gonna try your cure recipe , its dif. then mine? Thanks MARK
Indeed heavenly! Thanks for sharing.
Hi, I just found your bacon recipe and will definitely try it. We just smoked a boned, butterflied leg of lamb (basted in salt/pepper/mustard/oil for a day) it was delicious. Ate it hot out of the smoker – meat was lightly pink, juicy and so tender. Heartily recommend it.
Oh, that sounds lovely! How long did you smoke it for?
we used a meat thermometer and cooked until internal temperature was 150 degrees C (I think it was around 2 hours)
Ooooh, I just bought a boneless lamb roast. I am SO trying that. Thanks a bunch for the tip!
You say to leave the skin on, every other recipe I have read says to remove the skin because the smoke cannot penetrate it. I was able to find pork belly at my local butcher shop. They removed the skin for me and included it in the package so I could cut it up to fry for pork rinds.
You remove the skin after the slab has been smoked, Chris. It just makes it so much easier to remove it, and the smoke still penetrates the rest of the meat and fat. But you can very well have your butcher remove the skin for you prior to smoking if you want, that’ll work too!
Hello Sonia,
Thank you for the reply. Before smoking my pork belly, I think I will remove the skin on one half and leave the skin on the other side to see how each method affects the pork belly and the ease of removing the skin.
I’d be very interested in knowing what comes out of this experiment! Please share, if you can! 🙂
Hi Sonia, I can’t wait to try this. I have 2full pork bellies in my freezer from 2 different sides of pork. My question is, do you put the foil packets directly on the flame of the gas grill? They don’t catch on fire? I’m just nervous about messing this up!
That is correct, Kassia. The wood chips will not catch fire because they are wet.
It looks amazing. I recently discovered that some healthy stores in my area sell smoked bacon, but I also noticed that many people don’t know you can eat it like this, without frying it. I like to cook with smoked bacon, mix it with veggies, but my favorite way is to eat it it just the way it is, with some good mustard and some homemade bread. Yumm.
You just slice it and eat cold, Roxy? I’ve never tried it, but I’m not sure I’d be a fan… I sometimes like to pick at the meat and eat it before the slices even have a chance to make it to the pan, but I couldn’t handle the fat. The texture would just put me off, I think…
I can’t wait to try this! Thank you for sharing. Out of curiosity, what brand knife is that?
I guess I should have specified that I was inquiring about the knife with the wood handle. Sorry!
Haha! I figured. It’s a Sakai Takayuki. Awesome, awesome blade! 🙂
Thanks for the nice write-up! I smoked the first of 3 parts of a pork belly last night, following your recipe and directions, with just a few variations. I didn’t want to put the nitrates in the bacon, so I added some celery salt. I chipped some apple and maple and used an electric smoker at 200 deg.
I could hardly wait to try it last night, so I fried up a little to see how it turned out. We love it! This was my first foray into butchering a pig, and I learned a lot in the process. I probably trimmed off more fat from the belly than some people might, but we like it more lean. I will try using hickory chips for the next round.
YAY! I’m very happy to hear that, Ralph! And thanks a bunch for the great feedback, I greatly appreciate it. 🙂
You’re my ‘go to’ webpage every time I make bacon, I found this site and keep it in my favourites and use it to remind me every time. Love it. Keep up the good work, youre inspirational to many people all over the world. I love making my own now.
Thank you! Thank you so very much Graham! That is incredibly nice of you to say. You just made my day (and gave me a craving for bacon, too! 😉 )
Think I will use this as my first smoking project.
Can I just ask, how long would the meat keep for once smoked?
A few weeks in the fridge, but it can be frozen for up to several months.
Hi thank you so much for the recipe my pork belly is curing as I type. Question, I have a Traeger, I assume I can use that for the smoking part of the recipe with the same temperature and times?
Thanks again love your amazing recipes!
Absolutely, Erik!
hi, i raised a pig this summer, just got it butchered, hams and bacon slabs are in the freezer. so if i thaw, brine, and smoke the hams, then refreeze it for later use, should it be considered a pre cooked ham that i should only reheat? or a ham that needs to be cooked thouroughly? like when you buy a ham in the store and want to cook it in oven and glaze, sometimes its called fully cooked, or needs to be cooked, wich one is mine? and how to use it for sandwiches for kids lunches,,just like it is? or roasted in the oven again before?
I’m afraid I’m not the right person to answer those questions unfortunately… you might want to ask a butcher!