
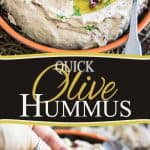
Quick Olive Hummus
Believe it or not, I whipped up this batch of Quick Olive Hummus specifically for my baby grand-daughter. She was spending the weekend at my house and I was looking for something nutritious and filling that I could give her for her morning and afternoon snacks.
I knew for a fact that she loved hummus, but for some obscure reason that I can’t even begin to comprehend, she doesn’t care for olives. AT ALL. I mean, hum… does she even know that she’s a member of *this* family? And does she not understand how much we happen to LOVE olives in *this* family? Plus, seriously, she’ll wolf down an entire pickle in less time than it takes to say it, but give her an olive and she’ll instantly grimace, fish the thing out of her mouth and then hand it back to you with a heartfelt “yuck”.
Pfff! What’s the deal with that? Babies… they can be such strange little things, wouldn’t you say?
One minute they totally LOVE something and want to eat nothing but that, only to turn their nose up at it the very next day.
So anyway, in an effort to get her to appreciate olives (hey, not only do they taste good, but they’re also good for you, you know) I decided to sneak some into her hummus…

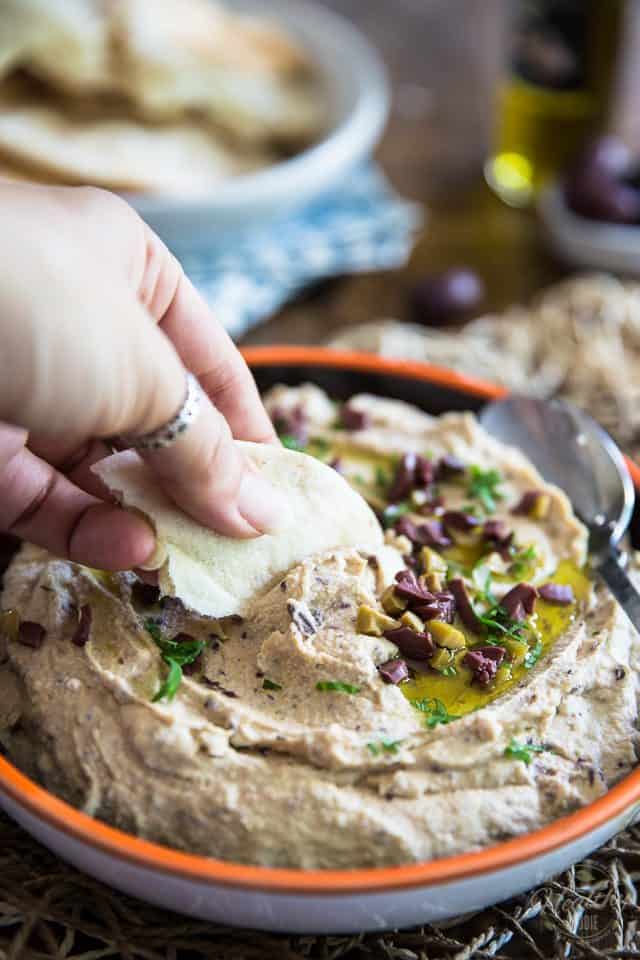
As you can see, my little diversion worked perfectly fine: she was totally all over my olive hummus!
Her favorite way of eating it? With her fingers, of course! Never that piece of pita bread. That one only served to cleanse her palate between bites. As for the spoon, while she knows perfectly well how to use it, she doesn’t seem to be much of a fan. Looks like she much prefers to use it as some kind of musical instrument…
Ha. I can’t blame her for that. Nothing like a little beat while you’re eating. Plus, doesn’t everything taste so much better when you eat with your fingers?
For the sake of speed and convenience, (I needed a snack for the baby *that* day, you know) I chose to make this batch of hummus with canned chickpeas. I mean, not only does it save a bunch of time, but personally, I find canned chickpeas to be almost as good as the home cooked ones, especially if you are going to turn them into hummus.
The only advantage – if there is one – to cooking your own for that purpose, is that you could add a little bit of baking soda to your soaking water as well as to your cooking water, which renders your chickpeas super tender, thus eliminating the need to “peel” them. But other than that, I think both options equally good.
Ultimately, the choice is yours. If you decided to cook your own, though, make sure that you give them ample time to cool before you use them to make hummus.
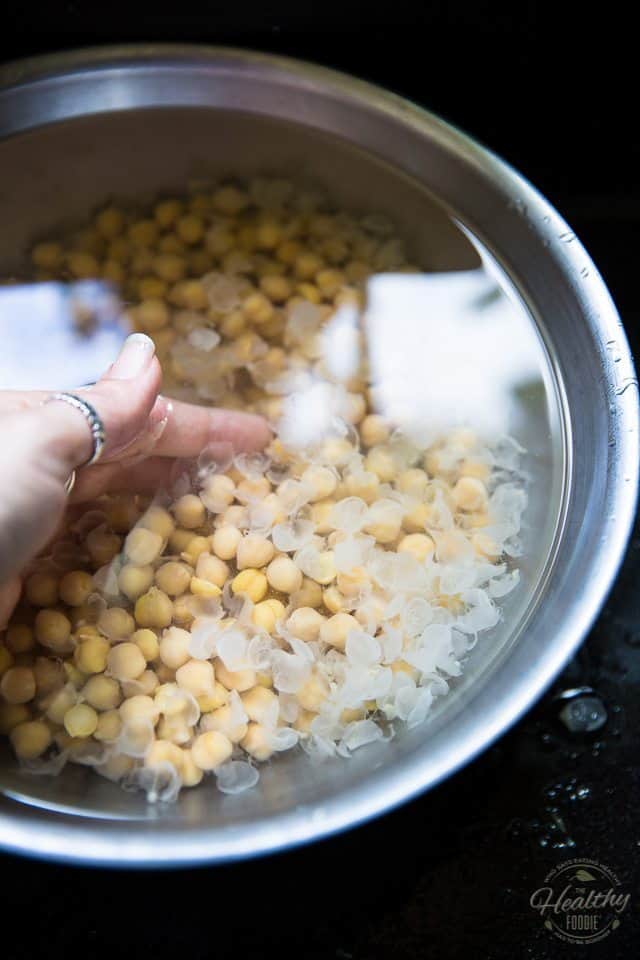
If like me you chose to go with the canned beans, (or if you cooked your own but didn’t do the baking soda thing) you’ll want to, ideally, remove the skins from your chickpeas. Although this step is not absolutely mandatory, I strongly recommend that you take the time to do it – this extra step will result in a MUCH smoother and creamier hummus.
I know peeling chickpeas may sound like an extremely lengthy and tedious process, but there are ways to make the job much faster and easier, too! My favorite trick is to do it under water — simply dump your chickpeas in a great big bowl filled with water and then rub/pinch the beans together between your hands and fingers. This will cause the skins to slide off the beans and start floating at the surface. You’ll then be able to fish them out with your hands or with a slotted spoon.
You could also place your bowl in the sink and let a steady stream of water run into it as you work: as the water overflows, it will take the skins with it and the heavier chickpeas will stay nicely put at the bottom of the bowl. Tilt the bowl slightly and move the beans around from time to time, to help speed up the process.
Oh, and make sure that you have your sink basket strainer in place to catch all those loose skins…
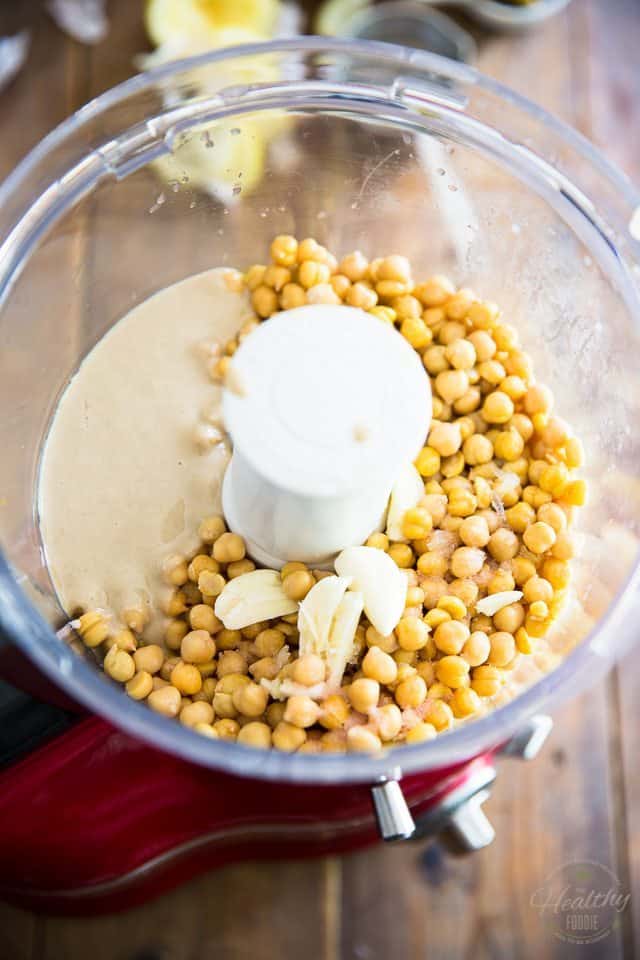
Now that your chickpeas have been relieved of their skin, throw them in the bowl of your food processor along with the tahini paste, water, extra-virgin olive oil, vinegar, lemon juice, garlic and salt.
Process these ingredients until they are reduced to a smooth and creamy puree, which should take about 5 minutes. Of course, you’ll most likely need to stop the motor and scrape the sides a few times…
Also too, if you find that your hummus is a little bit too thick to your liking, you may add a little bit more water, a few tablespoons at a time, until it has reached your preferred consistency.

And there you have it, this is your basic hummus!
At this point, you could add pretty much anything you liked to it and flavor it any which way you wanted. Classic add-ins include sun dried tomatoes, roasted garlic, roasted beets, roasted bell peppers, chili and chipotle powder, chopped spinach, kale, basil, pine nuts and feta cheese… just to name a few!
As you can see, the possibilities are pretty much endless…
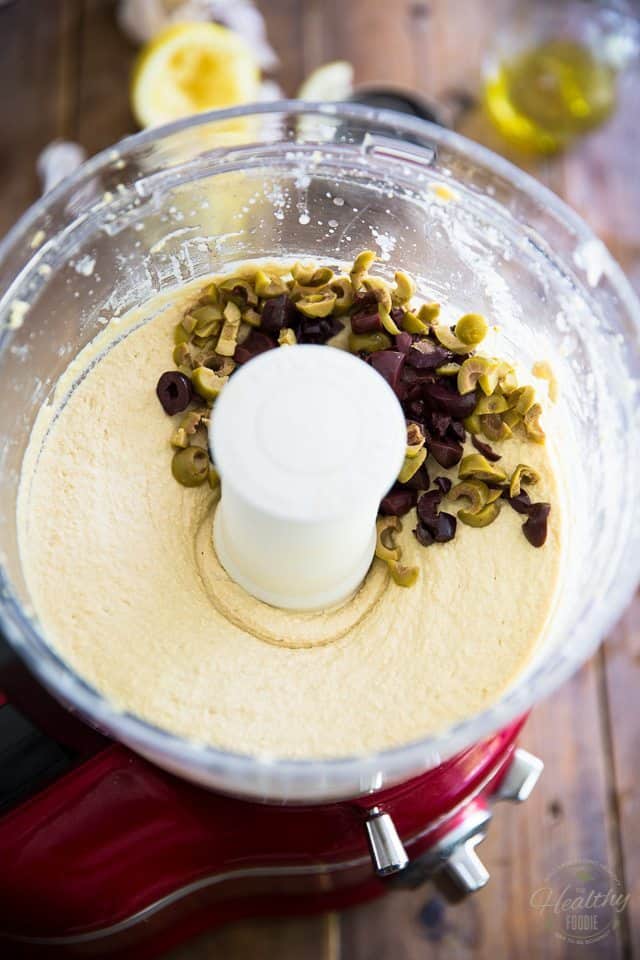
Since I have a major thing for olives, and since I’m trying to coax the little one into sharing my love for them, I chose to add olives to mine – I went for a delicious and tasty combination of both green and kalamata olives.
Just chop them roughly before you add them to the mix…
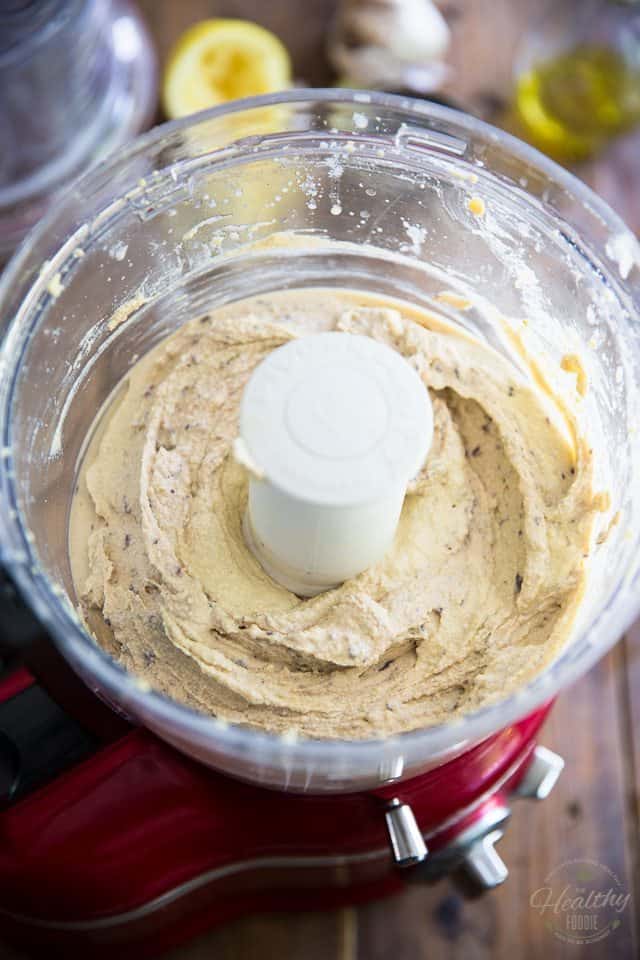
Now process them in on pulse, but don’t over do it… 5 to 6 short pulses should pretty much do the trick. You wouldn’t want to turn them to mush; you still want to feel chunks of olives between your teeth.
At this point, you’ll want to chill your hummus for at least an hour before serving. First off, because it no doubt got a little warm from all that grinding / processing action and hummus tastes much better when it’s cold — and secondly because the resting time will allow flavors to make friends and meld and develop.
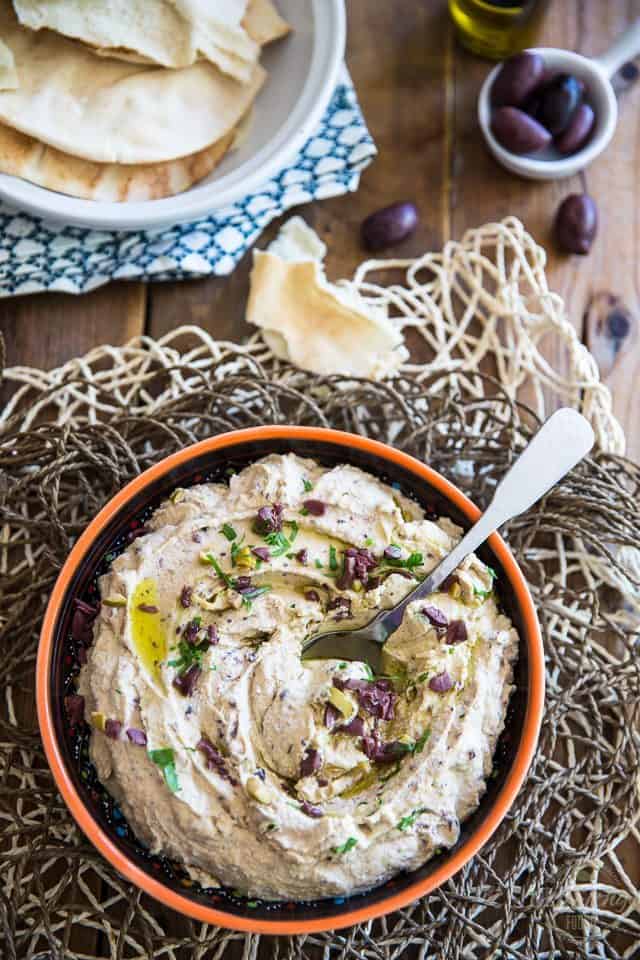
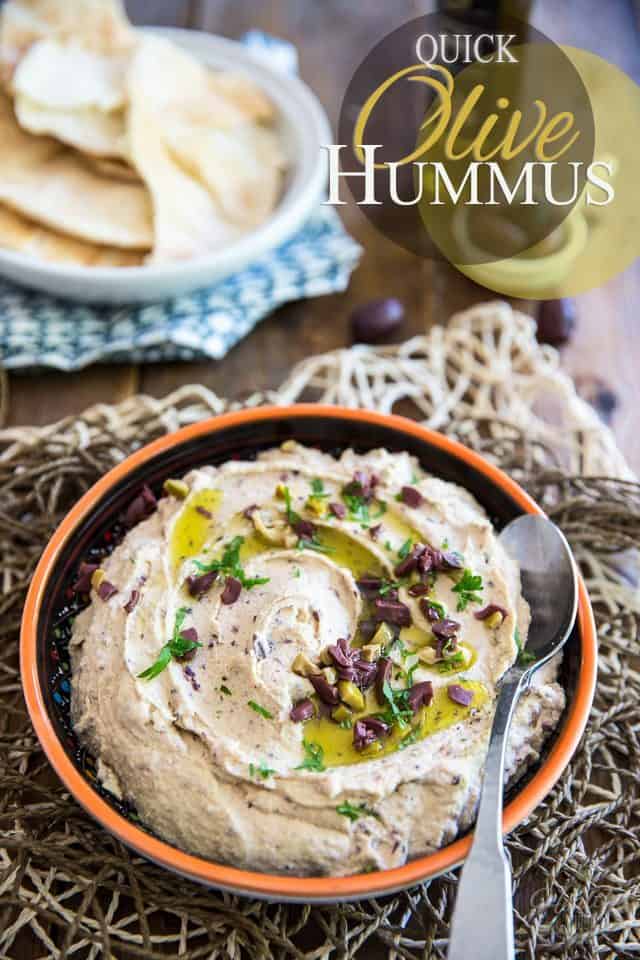
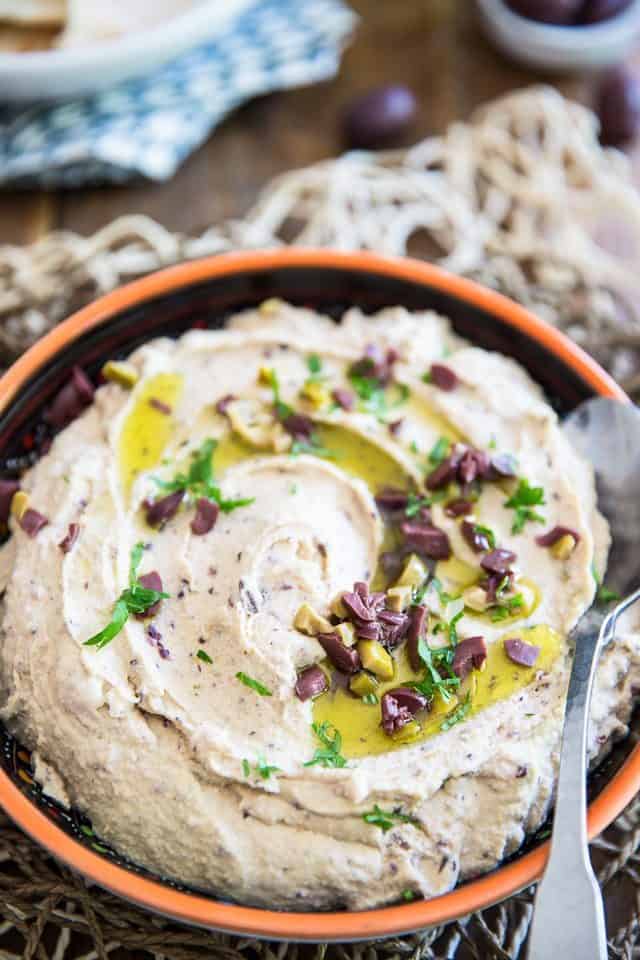
When ready to serve, garnish your hummus with a little drizzle of extra-virgin olive oil, more chopped olives and a little bit of freshly chopped parsley…
Serve with an assortment of crudités, tortillas or my personal favorite: torn pitas.
Some even like to eat the stuff by the spoonful — while for other (little) people, even your fingers will do the trick!
Choose your weapon and dig right in!
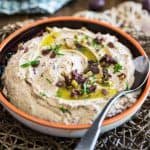
Quick Olive Hummus
Ingredients
- 3-1/2 cups canned chickpeas, (2 cans) rinsed, drained and skins removed
- 1/2 cup tahini paste
- 1/2 cup water
- 1/4 cup extra-virgin olive oil
- 1/4 cup fresh lemon juice
- 3 tbsp white vinegar
- 3 garlic cloves, peeled and smashed with the side of a knife
- 3/4 tsp salt, I use Himalayan salt
---
- 1/3 cup chopped kalamata olives
- 1/4 cup chopped green olives
Instructions
- Place all the ingredients except for the olives in the bowl of your food processor. Process until smooth and creamy, about 4-5 minutes. Stop the motor to scrape the sides, as needed. Also, feel free to add more water, a few tablespoons at a time, until your hummus reaches the desired consistency.
- Add the chopped olives and process on pulse until they are well incorporated; 5-6 short pulses should do the trick.
- Refrigerate for at least one hour before serving; garnish with a splash of olive oil, more chopped olives and a pinch of chopped parsley at the moment of serving, if desired.
Nutrition
If you’ve tried this recipe, please take a minute to rate the recipe and let me know how things went for you in the comments below. It’s always such a pleasure to hear from you!
You can also FOLLOW ME on PINTEREST, FACEBOOK, INSTAGRAM and TWITTER for more delicious, healthy recipes!


14 Comments on “Quick Olive Hummus”
She is so cute! I have just learned to like hummus and I am a great grandmother. HA!
It’s never too late, Charlotte! 🙂 <3
Do you know the nutritional information for this recipe?
It’s right below the recipe, Denise. For some reason it wasn’t showing before, but I can see it now. Hopefully it shows for you too!
It does, Thank you!
too delicious to eat!
Whether it’s the classic tahini and chickpeas olive hummus recipe or a little more daring recipe with spicy add-ins, there’s something about this snack that makes people frenzied. Very delicious is this olive hummus recipe.
Hi! I just wanted to let you know that I made this, and it’s very tasty! I halved the recipe as I only had one can of chickpeas, but by accident I still added the full amount of vinegar- it was still delicious! Haha! Tangy, but tasty 😉 I also only had black olives, so only used those, and added a pinch of cumin and dried parsley. Will definitely make again! Thanks 🙂
Real happy to hear that the hummus was to your liking, Pam, and thank YOU for taking the time to share your experience. 🙂
A foodie..such young one! Good taste & so cute! Lucky you!!
I made it per ingredients. Only over full with the olives and threw everything in the blender at once. Also 2 extra garlics. LOVED 💕 IT!
I love this easy recipe and have made it multiple times for family gatherings. Now a family favorite.
I made the recipe used black olives only, garlic powder, and black olive juice from the can instead of water, no added salt. I thought it was amazing. Will definitely make it again.
So easy. This has become my go-to recipe for hummus!