Home Made Pure Vanilla Extract
Ingredients
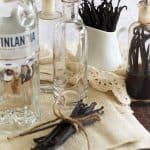
- 8 vanilla beans or more, if you like
- 1 cup good quality vodka use vodka made from potatoes or other non-grain vodka if you want to go gluten-free
- Mason jars or decorative bottles
Feel free to double or triple up this recipe, just make sure you keep this same ratio of 8 vanilla beans to 1 cup booze
Instructions
- Cut the vanilla beans to the length of your jar (you want to make sure they're all fully covered) and slice them lengthwise, but only through half of it. You want to expose the seeds but keep the ends attached.
- Place beans in the selected jar(s) or bottle(s) and completely cover with vodka.
- Place the lid on and shake gently. Put away in a cool, dark place (such as your cupboard!) and give it a couple of gentle shakes each day for about a week or so. You can also leave your bottles on the counter at this time if it helps you remember.
- After a week has passed, you can start shaking less often, like once or twice a week, for about a month. And don't worry, your vanilla isn't going to be ruined if you forget to shake it a few times.
- Your vanilla will be ready to use after 6 to 8 weeks, but I like to wait at least 3 months before I use mine. Just make sure you give it a little shake once in a while...
- When your bottle is about 25% empty, you can top it off with more vodka without affecting the taste too much, but ideally, when you do that, you want to let is sit again for a couple of weeks. That's why I prefer to have 2 bottles going simultaneously. That way, when I top one off, I can use the other one until it too, needs to be topped off, at which point I switch back to the other one. This allows your vanilla to rest without you having to ever hang dry!
- Of course, you can't just top off forever... else you're going to end up with that Vanilla Flavored Vodka again... When you find that your vanilla starts to be a little weak on the vanilla side and a little strong on booze, it's time to get a new batch started and let those bottles you already have go completely dry...