
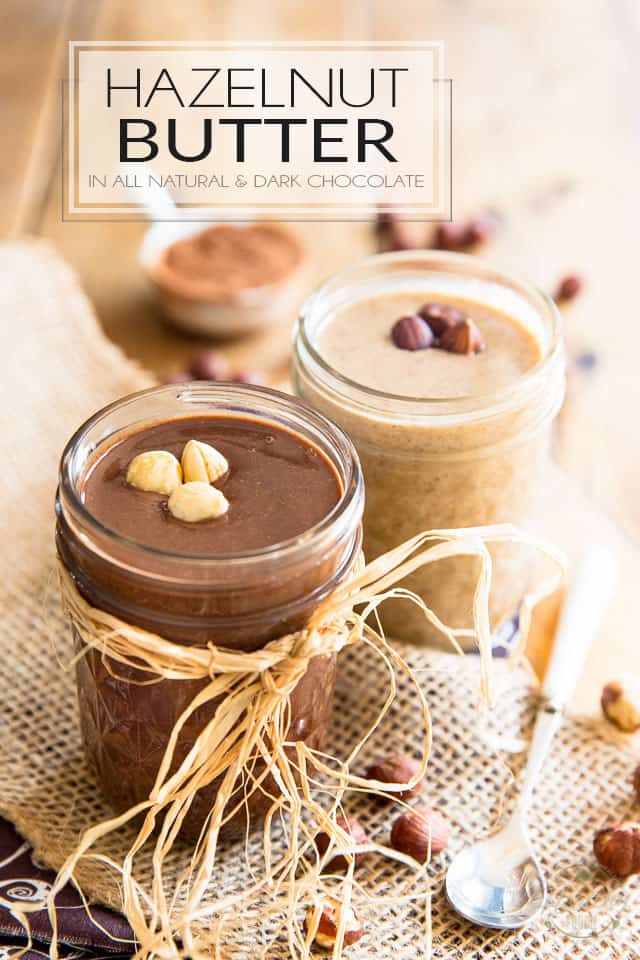
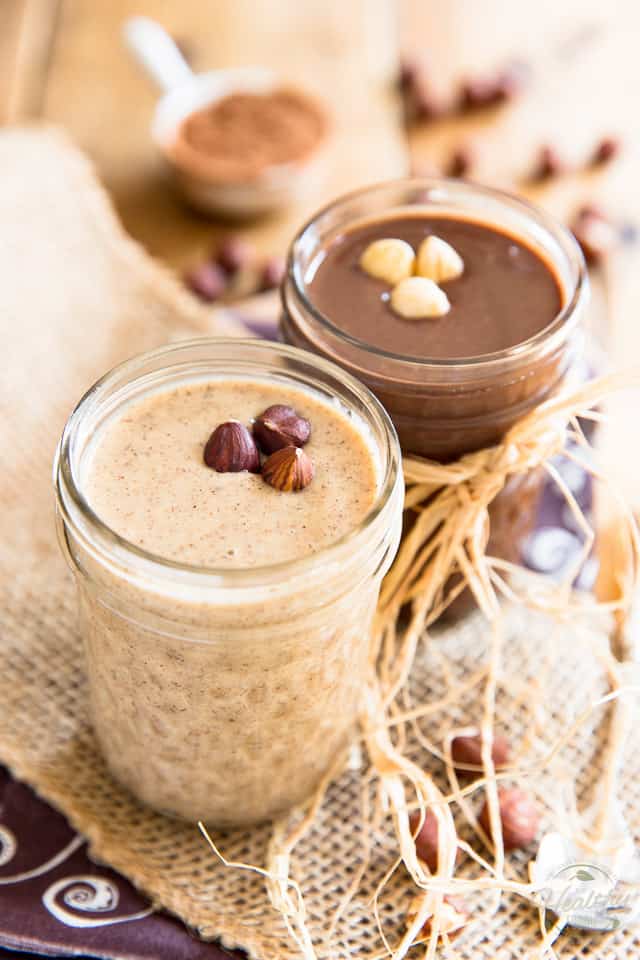
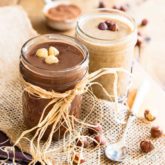
Hazelnut Butter 2 ways: All Natural and Dark Chocolate
Learn how to easily make your own creamy Hazelnut Butter at home and then make it even more delicious by adding a touch of Dark Chocolate to it! Breakfast will never be the same…
The day I realized just how easy it was to make nut butter at home, I started making my own all the time. Especially the fancy ones! Cuz you know, specialty nut butters, they cost SO MUCH to buy at the store. And hazelnut butter, it definitely falls in that category.
But despair not! I’m about to show you how to make your very own hazelnut butter, that’ll taste just as good if not better, for a fraction of the price!
Not only that, but we’ll also be kicking things up a notch… Tell me, can you think of anything that tastes better than toasted hazelnuts? Toasted hazelnuts AND chocolate, of course!
So if like me, you are a Nutella lover, you totally have to go all out and make the dark chocolate version, too. Trust me, you won’t regret it. I mean, that stuff is G.O.O.D., as in absolutely insane good. It’s not Nutella, because to recreate that evil treat, one would probably need to use TONS of nasty fat and sugar, but I am telling you, THIS is just AS good, if not better.
So do yourself a favor and buy a big bag of hazelnuts today!
Oh, and you might want to consider making a double batch, just sayin…
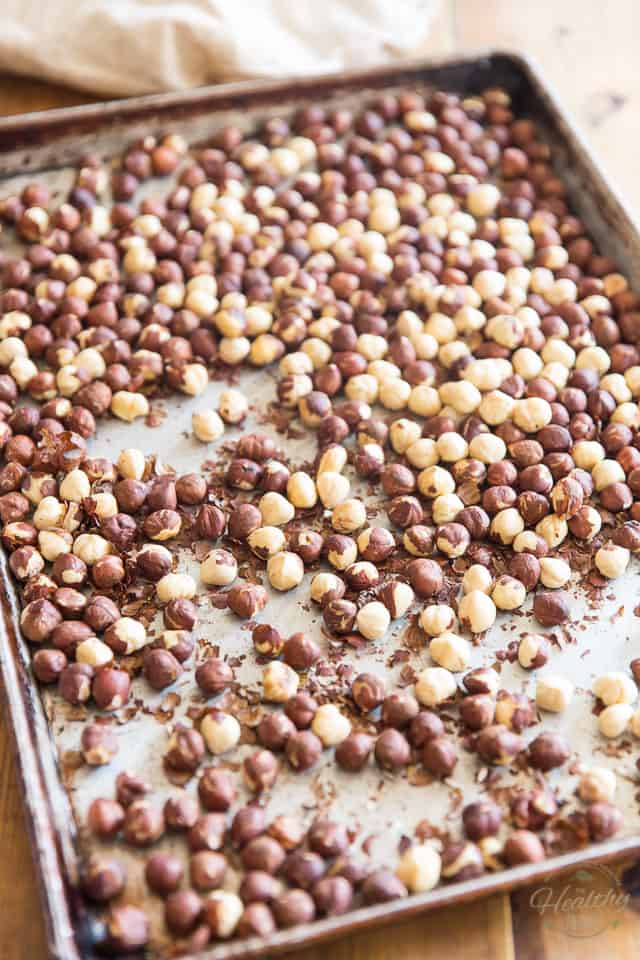
Now, to make your hazelnut butter really nice and creamy, you’ll want to remove the skins from the nuts, because they are kind of dry, tough and fibrous.
The best and easiest way to do that is to place your hazelnuts on a large baking sheet and toast them for 10 to 12 minutes in a 375°F oven.
Then, remove the toasted nuts from the oven and let them cool for a few minutes, until you can safely handle them with your bare hands.
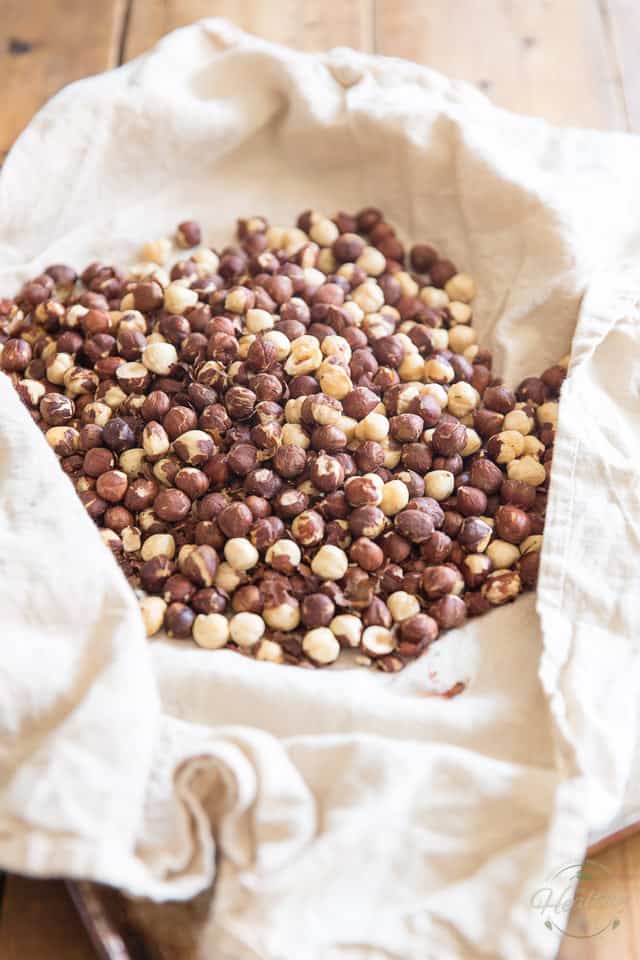
Once your hazelnuts have had a few minutes to cool, transfer them to a clean dish towel…
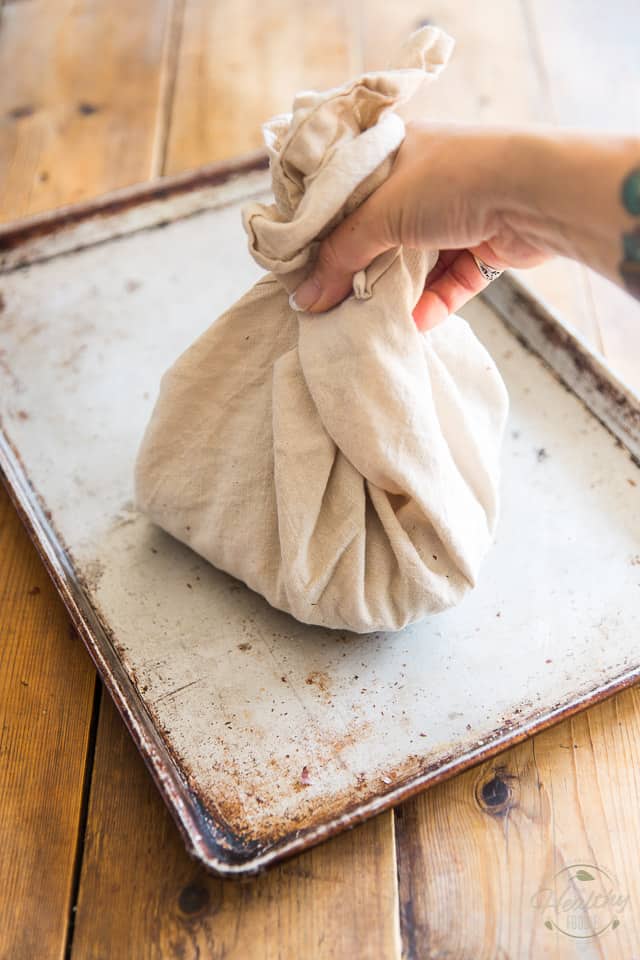
… and then bring all 4 corners of the towel together to form a little bundle.
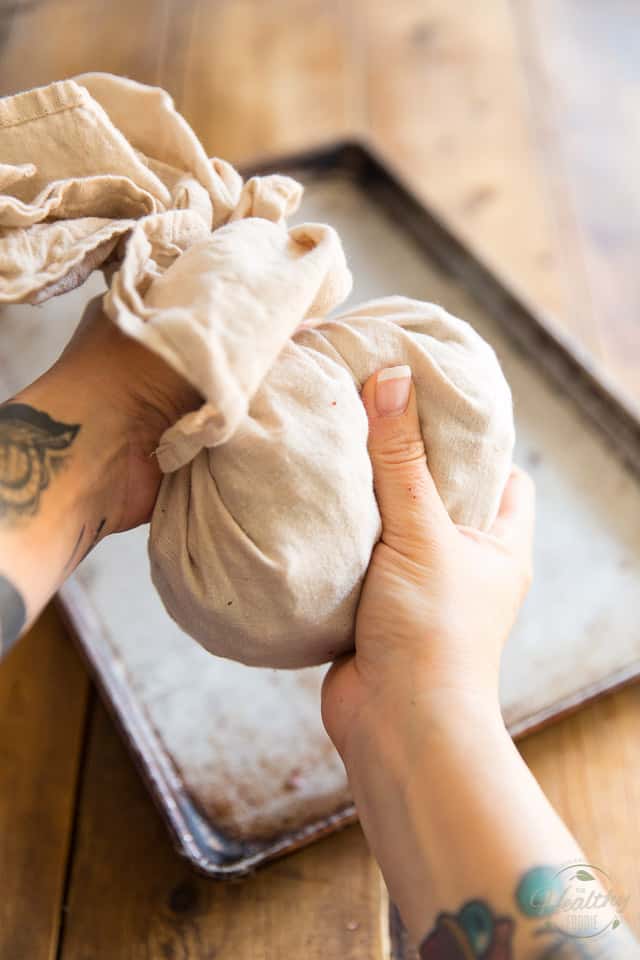
Hold that bundle in one hand and, with the other hand, wiggle the nuts around so that they grind against each other. The friction will cause the skins to detach from the nuts.
Go at it fairly passionately, too… you’ll see that those skins, they are pretty clingy and will refuse to go without a fight!
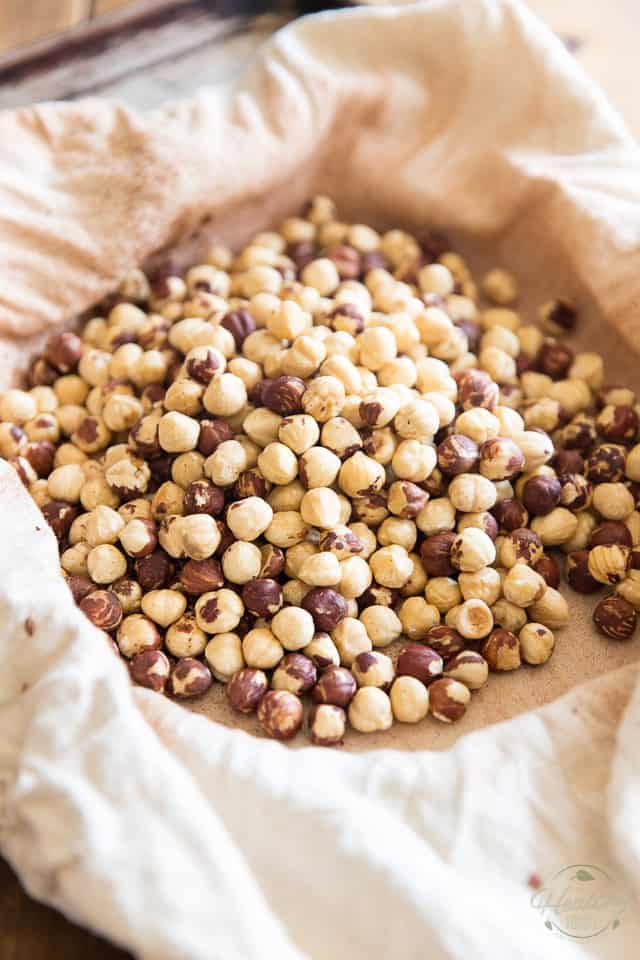
Do that for a good minute or two, and when you open up your little bundle, all your nuts will be totally naked! Alright, a few of them might be more on the prude side and will desperately hang on to any piece of skin that they possibly can.
You can let them have their way… A little bit of skin has never killed anyone! 😉
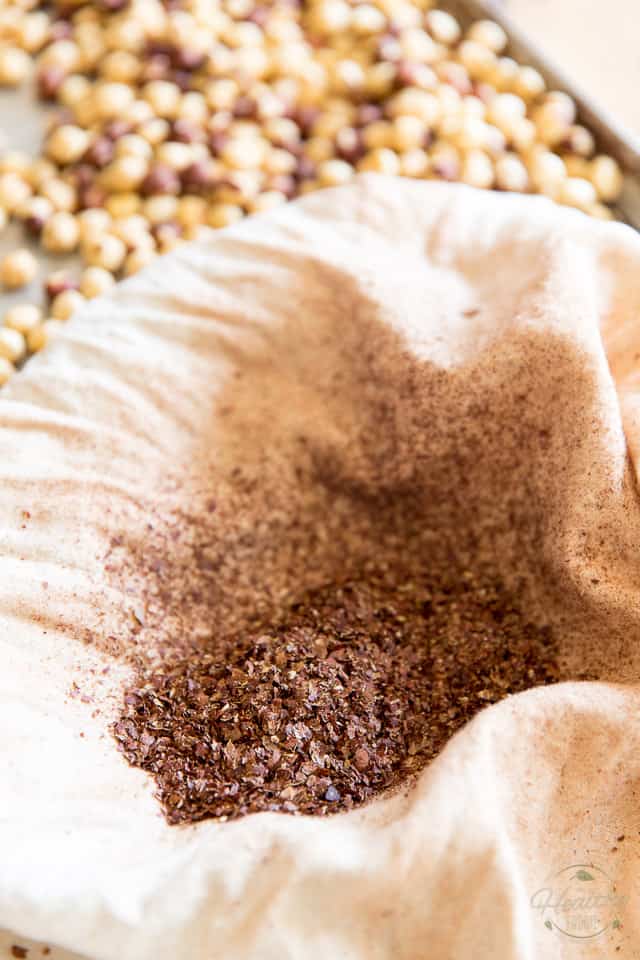
Now all that’s left to do is delicately remove all the hazelnuts, being careful as to leave all the skins behind.
See how much of them got removed? Imagine all that in your nut butter!!! I don’t know about you, but I’d rather not have it in mine…

Once the skins are gone, the hardest part is behind you. All that’s left to do now is transfer the skinless toasted hazelnuts to the bowl of your food processor and process the nuts until they turn into this beautiful, luscious, creamy and velvety hazelnut butter.
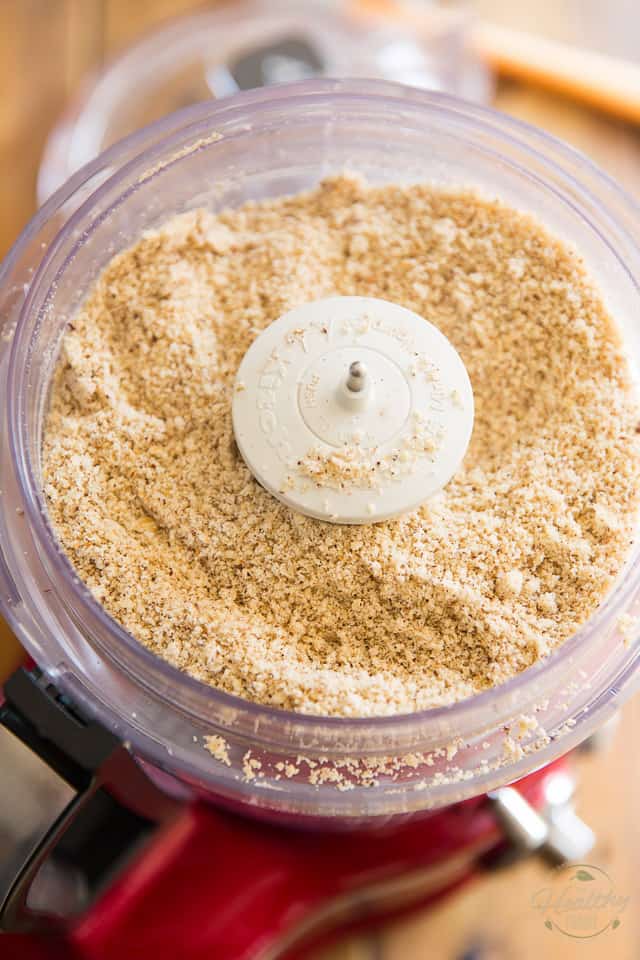
Hazelnuts are fairly easy to work with. They will start releasing their oil and turn into butter rather quickly: the whole process should take roughly about 5 minutes.
After about 1 minute, your nuts will be reduced to a fine powder like the one in the photo. Give that bowl a little scrape and keep going…
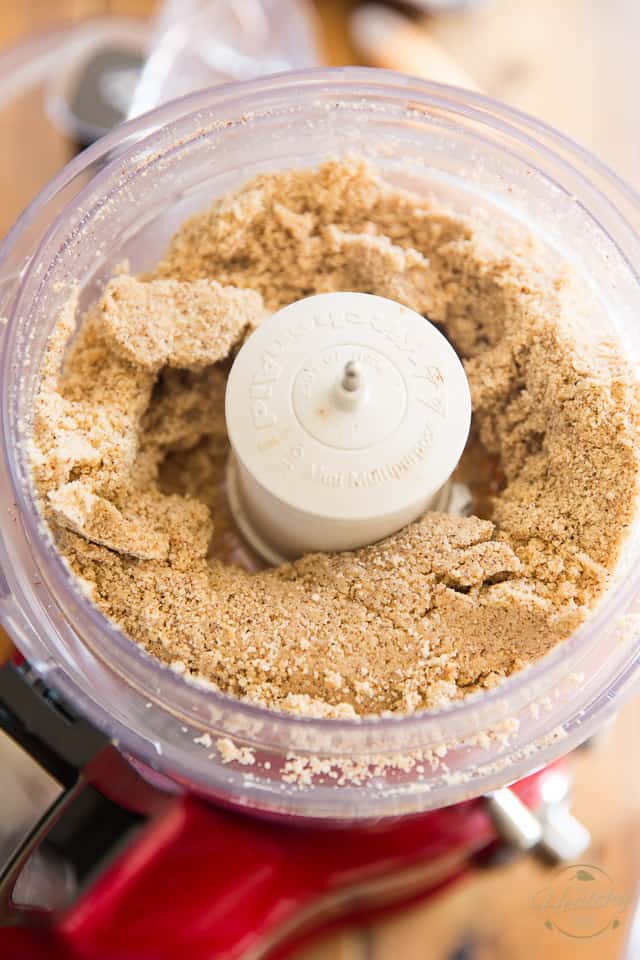
Another minute down the road, the powder is starting to turn to something that resembles wet sand. Not yet quite what we’re after… Scrape, and keep going!
Another minute in. Now that sand is turning into what’s starting to look like thick cement. Ugh! Definitely not what we’re after, but do not despair! Just keep those blades spinning!
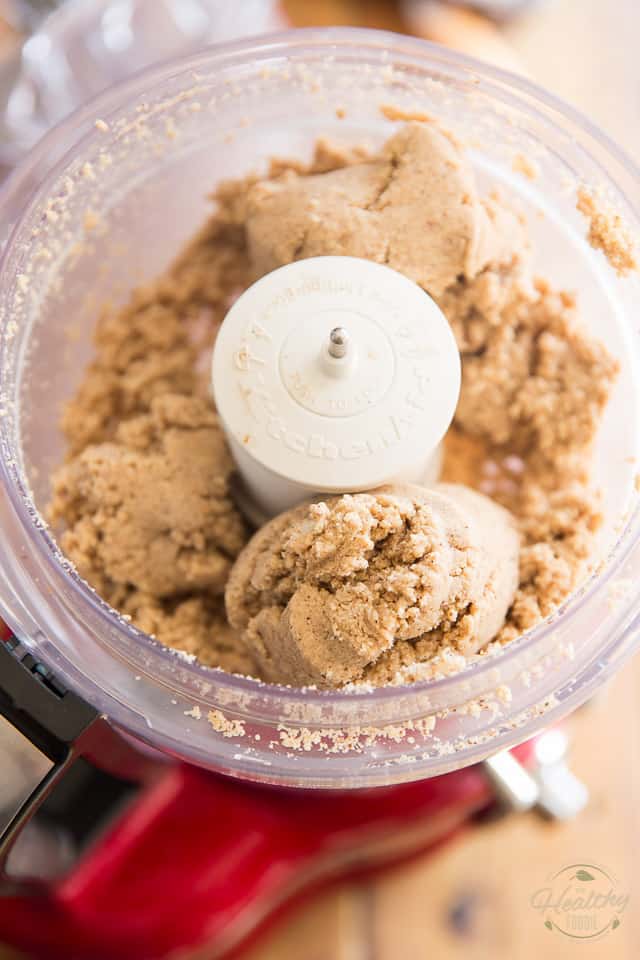
Ah! Finally, it looks like we’re going somewhere. This mixture would almost qualify as official nut butter. But it’s not creamy enough yet. We’re going for smooooooth!
Another minute or two should totally do the trick! Give that bowl one more good scraping ant turn that motor back on!
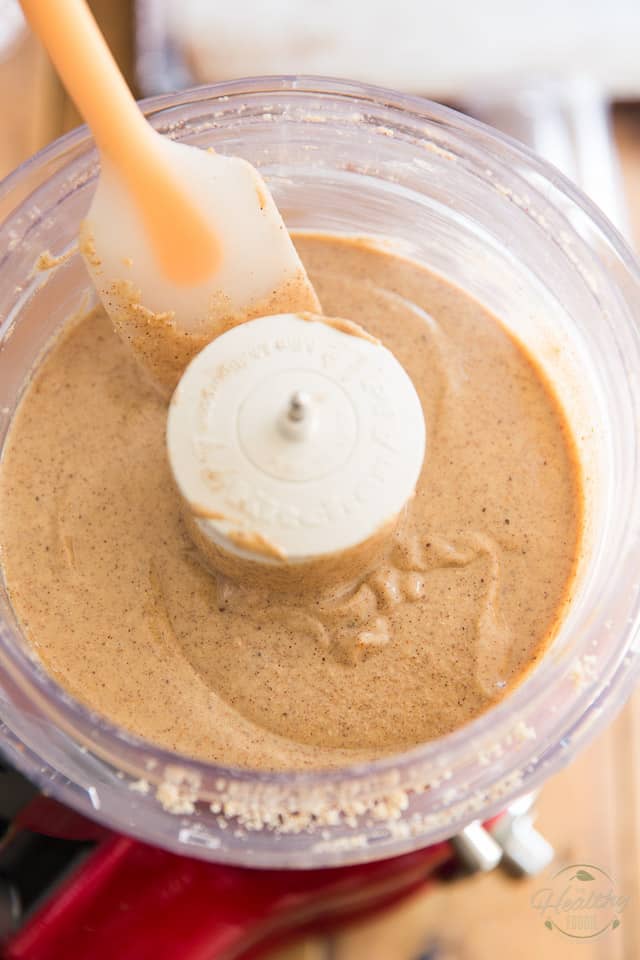
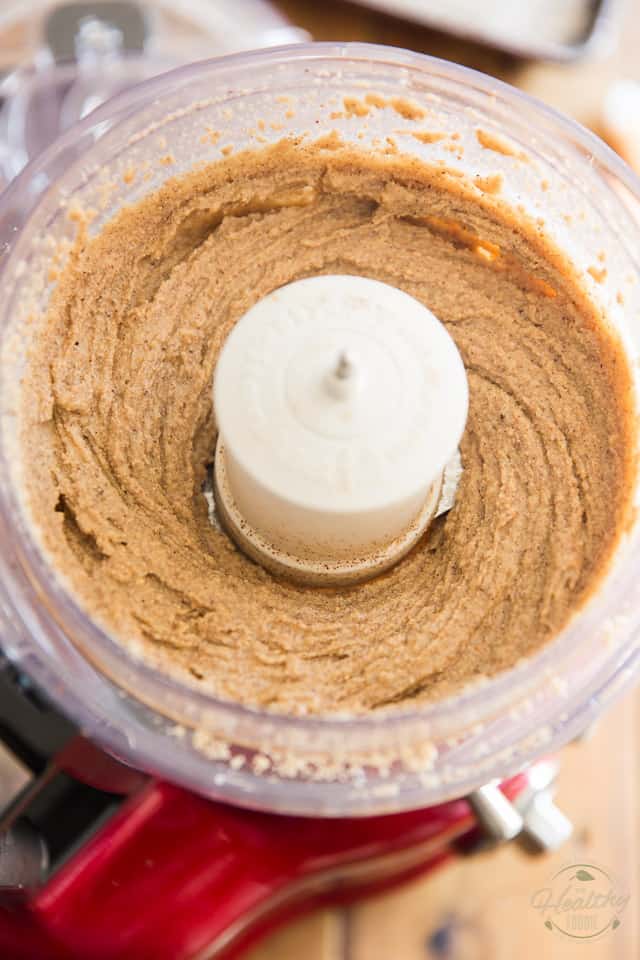
And there we have it! This is totally what we’re after!
This batch makes enough Hazelnut Butter to fill two 8oz Mason jars, so at this point, you have 3 options:
- Make only the all natural hazelnut butter
- Make one jar of all natural and one jar of dark chocolate
- Make only the dark chocolate
If you choose to make only the natural version, then that’s it, you’re done! Simply transfer your nut butter to clean glass jars…
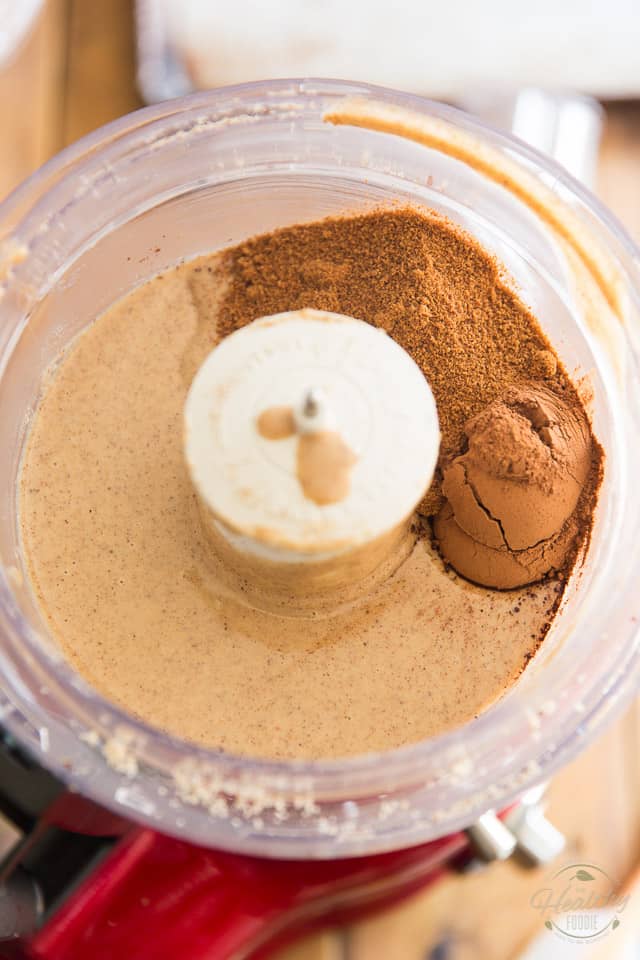
If you want to make one jar of each, then transfer about half of the natural hazelnut butter to a 8oz Mason jar and then, to what’s left in the food processor, add 3 tablespoons of coconut sugar and 2 tablespoons of cocoa powder.
If you want to make only the dark chocolate version, then add double the amount of coconut sugar and cocoa powder to the entire batch of hazelnut butter.

Now resume processing until the cocoa powder and coconut sugar are well incorporated, about 30 seconds.
You might want to stop and scrape the sides once in the process to make sure the mix is well combined.
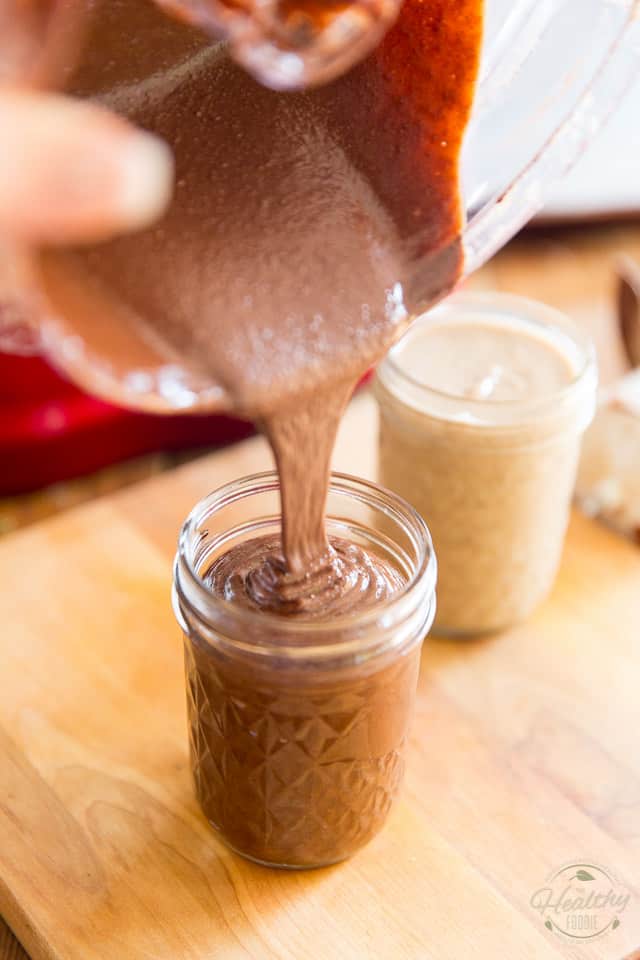
Transfer your now finished Dark Chocolate Hazelnut Butter to an 8oz glass jar, or two if you elected to make only this version.
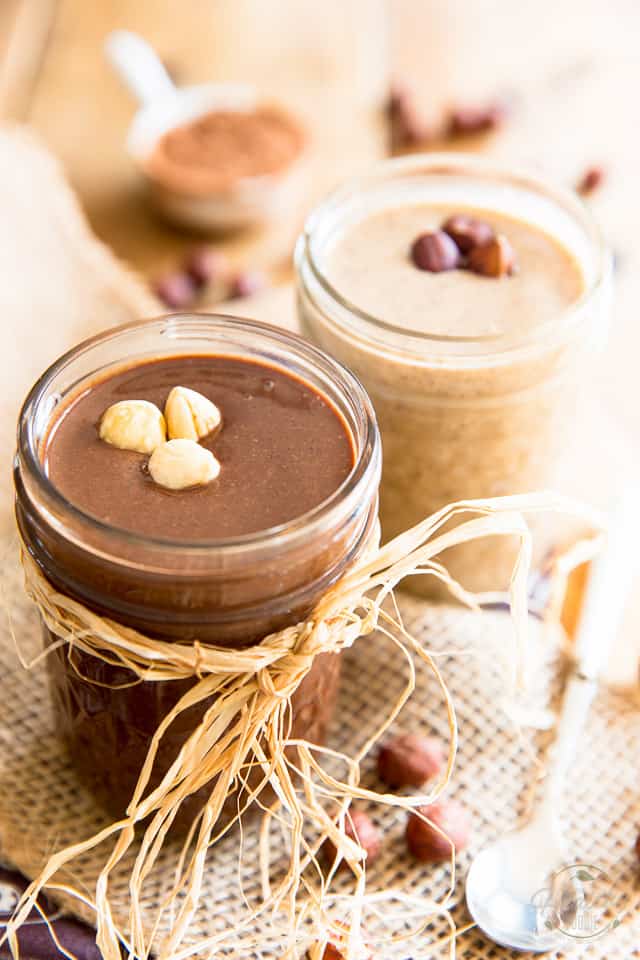
And now for the hardest part: no matter which version you chose to make, you should totally let your jars of hazelnut butter rest until the next day before you even taste them, to allow their flavor to fully develop.
In your dreams, the nut butters will keep for several weeks at room temperature or several months in the refrigerator.
In reality, they won’t last a week…
Natural and Dark Chocolate Hazelnut Butter
Ingredients
- 4 cups raw hazelnuts
- 1/2 tsp salt, I use Himalayan salt
For Dark Chocolate Version*
- 2 tbsp cocoa powder
- 3 tbsp coconut sugar
Instructions
- Preheat your oven to 375°F; spread the hazelnuts onto a large baking sheet and put them in the preheated oven for 10-12 minutes.
- Remove the toasted nuts from the oven and let them cool for a few minutes, until you can safely handle them with your bare hands.
- Transfer the warm nuts to a clean tea towel and bring all 4 corners of the towel together to form a little bundle. Hold that bundle in one hand and, with the other hand, wiggle the nuts around for a few minutes so that they grind against each other. The friction will cause the skins to fall off the nuts.
- Transfer the nuts to the bowl of your food processor, being careful to leave all the skins behind. Add the salt and process on high speed, scraping the bowl from time to time, until the nuts turn into a creamy butter, about 5 minutes total.
- Transfer about half of this nut butter to an 8oz glass jar with a tight fitting lid. Mason jars work beautifully!*
- Add cacao powder and coconut sugar to the remaining hazelnut butter and process until well incorporated, about 30 seconds. You might want to scrape the sides once in the process to make sure the mix is well combined.
- Transfer to another 8oz glass jar with a tight fitting lid.
- Let your nut butters rest until the next day to allow their flavor to fully develop. They will keep for several weeks at room temperature or several months in the refrigerator.
Notes
Nutrition
If you’ve tried this recipe, please take a minute to rate the recipe and let me know how things went for you in the comments below. It’s always such a pleasure to hear from you!
You can also FOLLOW ME on PINTEREST, FACEBOOK, INSTAGRAM and TWITTER for more delicious, healthy recipes!
*Editor’s Note: This post was originally published in September of 2011 and has since been completely revamped and updated with better pictures. A few minor modifications to the original recipe may also have been made.


130 Comments on “Hazelnut Butter 2 ways: All Natural and Dark Chocolate”
Hey there, I’ve been following your blog for A LONG time now and I absolutely love it. I recently attempted making “Nutella” at home using lots of toasted hazelnuts and melted milk chocolate, however, I found that I could never get the hazelnuts processed to be as creamy as you have it here. I used a blender for my first experiment but will be using a small food processor now. Are there any tips or tricks you can provide for making the hazelnuts turn out creamier as a butter?
Real happy to learn that you have been reading me for a while now! Thank you very much for that! 😀
Using a food processor as opposed to a blender if a very good idea. Blenders are better suited to deal with liquid foods. Like I said, removing the skins really helps in achieving a smoother, creamier butter. And I think that processing the nuts while they are still warm also helps. Give that a try, and let me know how it went! 🙂
Looks awesome.
Oh yes you did!!!!!! You’ve compelled me to want to lick the screen AGAIN! Wow what gorgeous butters– brilliant contrasting colors with the plain and chocolate versions 🙂 I have 9 (mostly eaten) homemade butters in the fridge currently…once I finish up one or so of the jars this one is my list!
Nora you are too kind! To have want to lick your screen is such an honor for me. 😀
You better stop that, though, else I will feel obligated to send you a box of screen wipes… 😉
And did you say NINE butters? OMG, I would be in heaven! I think I need to stock up on Mason jars… and pay your site a little visit. 😉
I haven’t come across one of your recipes that I didn’t drool over 🙂 You are a master in the kitchen and behind the camera! Haha, love your comment ab the screen wipes – totally laughed out loud on that one!!
I know, I’m a fanactic – two jars of almond-pumpkin seed, one plain almond, two plain PB (one creamy, one crunchy), one curried PB, one coconut butter, one sunflower seed butter and a jar of cacao artisana bliss…your hazelnut butter is next!
The feeling is quite mutual Nora! I happen to really like your pictures and your recipes, too! Your pics always make me hungry and your recipes always inspire me. I think I could copy half of your blog to my Must Try List. INCLUDING your entire list of nut butters. 😀
How Long do the nut butters or “Nutella’s” last?
Please refer to the recipe card for the answer to this question!
You seem to know all my weaknesses: Hazelnuts and chocolate, a combo that I cannot resist.
What food processor are you using, that makes nut butter in 5 minutes? I once made almond butter, and my poor food processor was grinding away for some 20-30 minutes before it got really creamy.
Anja, my food processor is a Kitchenaid, but one has to keep in mind that hazelnuts have a higher fat content than almonds, so they get to the creamy butter stage much quicker than almonds. It also takes my food processor a good 25-30 minutes to turn almonds into butter. 😉
Hi Sonia, how big is your food processor in terms of capacity? (ml/Litres?)
This is the model that I own: https://amzn.to/2V9YnW1
I don’t think I can ever say no to anything with hazelnut…Can you? This looks heaven!
I make homemade “nutella” all the time, but I’ve never thought of removing the skins. I’ll have to try that, and I’ll also have to try the Vanilla Almond Hazelnut spread because that sounds out of this world good.
Nice nut butters, there! Now why do you have all that weird bolding in your blog post? I keep thinking the bolded text is a link but sadly, it’s not.
SEO. :p
Actually, not at all… it was more of a visual thing!
I love homemade nutbutter and it’s easy to do too. We once had a daring cooks challenge to make nutbutter so that’s when I discovered it wasn’t so hard to do. This looks yum!
whoa…I need to make this! I do love Nutella but it is excessively sweet. I’d love to taste hazelnut butter in a more stripped-down form! Given that I just heard there’s a peanut shortage it would probably be a good idea to try making my own alternative nut butters.
Once you start making your own, Rachel, you will never go back to store bought. They are incredibly easy to make, if you roast the nuts first, it just fills the entire house with the most delicious aroma, plus, there’s nothing like dipping your spoon in fresh made, warm nut butter. It’s just insanely good!
How funny! Every morning I love reading your blog, thank you so much!
Thank you, Cindy! So happy to know that! 😀
I’m trying this this evening, I have a batch of fresh hazelnuts to crack open that needed a tasty recipe, and here it is 🙂
Did you actually crack open the whole bunch of hazelnuts that the recipe calls for? That is A LOT of hazelnuts! My hands would be sooooo sore! 😉
I’ve cracked open a huge basket of hazelnuts, my hands are sore!
But it is going to worth it, once the delicious hazelnut butter is ready:)
OMG, you cracked ’em all by hand? I bet your hands are sore! But it’s gonna make that butter so much better. 😀
done! added some honey and a little milk to make the cream more soft. Very good indeed, the scent of the nuts was terrific!
Is it not amazing? It just fills up the entire house and makes you feel like it’s Christmas or something! Didn’t the addition of milk make the butter really runny? I find it’s already on the soft side, I’m trying to think of ways to make it creamier, smoother, richer. So you used honey instead of the cane sugar? And it worked great? Oh, I get the feeling I will be revisiting this recipe very, very soon!
What have you found to be the shelf life of the hazelnut butter? Also, what’s the best way to store it? I’m sure it won’t last long once opened, but I’m making it as a gift and don’t want to make it too early! 🙂
Actually, that batch is still alive, I still have about a quarter of a cup of the plain hazelnut butter left, and it hasn’t gone rancid or anything. I stored it in a mason jar and kept it in the cupboard. I guess if one wanted to prolong that shelf life even more, they could always keep theirs in the fridge. So I say you can go ahead and make your gift whenever you’re ready! 😉
I just made this and WOW is it delicious. I used honey as sweetener. Only thing is that it’s not as creamy as I’d have liked, though still spreadable. The only hazelnuts I found already had the skins removed. I didn’t roast them because of this, but now wonder if that would’ve made a difference in the creaminess. I’ll try that next batch. Which there WILL be because holy cow this is incredible. I’m going to have to ration it.
Currently enjoying about 2 tbsp with pear slices. SO good!
Glad to hear you like this, Shannon! Honey as a sweetener must be fantastic. I don’t think that roasting the hazelnuts would make much of a difference in the creaminess, if anything, not having the skin on would’ve made it creamier than my version. Of course, this version having a much higher nut content than Nutella’s (which is probably close to none in their case), you can’t expect it to be as creamy as the original… Besides, what makes Nutella really creamy is the emulsion of pure fat and sugar. Not something I’d call a healthy start to your day!
Anyway, real happy you seem to like this one as much as I do… now you got me craving some, big time! I get the feeling that a new batch will get made in this household pretty soon!
Thanks a bunch for your great feedback, Shannon. I truly appreciate that! 😀
How do you think this would work as a substitute for Nutella in baking recipes? I want to make Nutella cheesecake squares tomorrow but don’t really feel like going and buying Nutella. Eh, I guess I’ll just make it and let you know how it works. Oh and these pictures are amazing! It looks sooo gooey. I just got some coconut sugar so I’m going to use that instead of honey because I want mine to be like yours. 🙂
AAAAH! This is so yummy. I’ve made the Smitten Kitchen and David Lebovitz versions of fake Nutella, but this is the best! I have to admit I added another tablespoon of coconut sugar but other than that I followed the directions. Oh and I roasted the hazelnuts for about 15 minutes at a higher temperature because I was in a hurry. And then I used it in Nutella cheesecake squares and it’s great! It’s not as smooth as Nutella would have been, but that’s okay. It still tastes amazing! And even Alex liked the cheesecake, although he was whining about how “dark chocolate” the spread was. I’m so excited! I’m going to make this and the cheesecake again in a few weeks, take pictures and make a post. 🙂
YAYYY! Geez, I didn’t even have time to reply to your previous comment that already, you’ve tested it. You’re too quick for me! 😉 Glad it worked out, though, and real glad you liked my version of home made Nutella. FYI, I’m mentally working on a new and improved version of that, so stay tuned.
And seriously? How can someone ever find chocolate too dark? 😉 I say, the darker, the better! 😀
But how can you possibly improve this? There’s not a lot of sugar, and it’s not powdered sugar which is already a huge improvement over all the over recipes. The cheesecake is already gone. I had a little of this nut butter leftover and that’s gone too. It’s all gone. In two days. 🙁
I don’t like dark chocolate (65% is about as high as I can go) but this was not too dark. He’s just a bit stupid about his sweets. BUT! He’s eating healthy fake Nutella cheesecake and I thank you for that.
Have you tried this with other nuts? I’m going to try with almonds. I have 7 types of nut butter in my fridge right now and I don’t even like nuts (other than peanuts). Haha.
Oooooh, is there going to be a cheesecake post on Texanerin Baking soon? I LOOOOOOVE cheesecake. It would be my ultimate favorite dessert in the whole wide world. And cheesecake with healthy Nutella in it? I’m all for that.
Glad to hear you liked this recipe. I want to improve it by making it lighter and creamier! Closer to the real thing, you know. Not that this one wasn’t good. I clearly remember its voice as it was calling my name from the cupboard, and believe me, it was LOUD!
And what? 7 jars of nut butter and you don’t even like nuts? And I thought I was the nut freak? OMG! Can I come to your house now? 😉
I have to make the cheesecake recipe healthier, take pictures and then it’ll be on there! But now I want to wait for the lighter version of this spread. Hurry up with it so I can make my post! 🙂
If you ever feel like coming to Germany, you and I will eat lots of nut butter and cheesecake. And you’ll be in shock when we go shopping and see only “million percent fat” (haha, sorry, I still think it’s funny!) yogurt. It’s really crazy, though. I keep going to huge organic food stores and not even they have lower fat yogurt. Or they do, but they have very very few options. The rest is 3.5%. And all Greek yogurt is 10%. Booo!
So you’re saying if I ever go to Germany, I have to be ready to gain at least 10 pounds, is that it? 😉 I still can’t get over the fact that your Greek yogurt is 10% fat. Wow that’s a lot! There should be a law against that! 😉
And I’m working on it! (that lighter version of the spread, that is) I tried something today, but that’s not quite “it”. I couldn’t really make it exactly like I wanted to because I have too many perishable nut butters to go through now… so I don’t want to create another one just to create it and end up chucking it (although I am really itching to!) But don’t worry… it’s coming! It’s something I very much want to do… 😀
I can’t wait to see what you do to make it lighter! I’ve tried some versions with milk, which were smoother, but also full of sugar. I’ll be patient. 🙂
I just want to say these are really really nice pictures. I’m trying to take pictures of this now and it’s impossible. It’s not very interesting looking and the glare from the jar… my goodness. So good job to you! 🙂
Hey thanks, Erin! So very kind of you to say! I really appreciate that! You rock!
If you blend the hazelnut butter with the cocoa and other ingredients, will it start to separate? I did something wrong, the oil started to separate and the rest started to become thick like fudge. So I wondered if I blended either too long making the butter or if I blended too long after adding the other ingredients? Thank you.
I’m not sure I undertand your question, Stacy. Do you mean you blended everything together the whole time? As in, you introduced both the cocoa powder and the whole nuts at the same time in your food processor? I’ve never tried it, but I could very well imagine this kind of separation happening if it was the case. When making “flavored” nut butters, you need to turn the nuts into a butter first, and then add the other ingredients and mix just to incorporate, no more.
There has to be a way to save this, though… For startes, I think I’d try throwing it in my mixer and beat the heck out of it. I’d start slow, though, so as to not send oil flying all over the place! 😉
Hope this helps, and real sorry to hear your nut butter misbehaved like that!
Hi Sonia and everyone! I am so unhappy with my hazelnut butter and nutella version I made but healthier. Mine doesn’t even look like yours so I am sure they don’t taste the same. I bought a brand new Cuisinart Food Processor, toasted and removed the skins, put in 7 cup food processor for nearly a half hour, maybe less, testing it every 5 to 10 min.
Anyway, my hazelnut butter was too dry and crumbly. So I added no flavor olive oil (the kind with no flavor)a few times to my 1 pound of hazelnuts, added some agave to sweeten but not too much. But in the end the crumbly-ness remained, maybe a little less crumbly, but now greasy tasting too.
My folks get their peanut butter from a machine at the grocery store that makes it out of peanuts right before your eyes. It come out grainy but creamy. Not sure if that makes sense, it is grainy as there is no added oil (no added sugar, no added salts, nothing at all). But it doesn’t come out crumbly. Maybe it’s the different machine? Perhaps food processors cant do that? Still yours seems to be good and I don’t see it saying anywhere that you added extra oil and that yours was crumbly.
Any advice appreciated, I am about to give up already but would like to find a solution if possible. Thanks!
Wow, Betsy, I have no idea what to tell you… I didn’t add any oil at all to mine. In fact, I never find it necessary to add extra oil to nut butters, as the nuts themselves usually provide enough of that for them to turn into butter. That holds especially true with hazelnuts, which I find tend to be oilier than that other ones, often resulting in a much more “liquidy” butter.
I really can’t see what went wrong with yours. Nuts don’t usually dry out! And even when you do dry them, the oil does not evaporate! Of course, natural nut butter always has a bit of a grainy texture to it, unlike the commercially made “smooth” stuff, because no matter how long you process for, you will never be able to grind the nuts completely down, plus, you don’t add any of the emulsifiers. So yeah, the texture is a bit different, much like the peanut butter you describe. But crumbly? I’ve never had that happen to me.
Maybe someone else has had a similar experience and could give you more insight?
Sorry I can’t be of more help… hope that this experience won’t discourage you from giving it another try!
Thanks Sonia. Yeah mine isn’t really grainy at all actually, but even the day after it’s crumbly, in fact, the added oils only helped in the moment to make less crumbly. Putting it in the fridge may have added to that, but I want it to last a bit. May I ask what machine you use? I bought Cuisinart DLC-2007 Food Processor, 7-Cup Prep 7 this past weekend and used the recommended blade. Wonder if another is better?
Maybe another possibility is that I boiled them too long which maybe led to the crumblies? I did that only because when I boiled them for less time, the skins weren’t coming off. Perhaps next time I will boil for less and do the baking soda thing to help get the skins off. But if that changes the flavor too much, I will be back to removing what I can after toasting them and be satisfied even if some skins stay on.
Boil? As in, in boiling water? And baking soda? What do you mean by the baking soda thing? Not sure I follow you here…
The skins can very well stay on, you know… it only makes for a more “grainy” butter, so you don’t have to be overly zealous in trying to remove them. 😉
As for your food processor, it should be able to handle the job just fine! Mine is in fact very similar to yours!
Hi Sonia,
Now that I think about it, the first batch I put in was the hazelnuts I toasted and then removed the skin as best I could out of the oven, but it was still was cakey and crumbly. Then I combined the 2nd batch which was the ones I boiled. My mom said if I boiled them the skin would come off easier. I overboiled them because the skin was just not coming off. There is a method where you only boil them for 3 min along with baking soda and that is suppose to really remove the skins. But I didn’t add the baking soda till much longer after I began boiling because I wanted to try first without risking changing their flavor. But in any case, both batches before I combined them were cakey, I need to figure that out somehow. Also, I am trying to avoid grainyness as much as possible and I have completely! But at this point I would take grainy over this crumbly mess.
Well, Betsy, there’s your answer right there! By boiling the nuts, you incorporated a whole bunch of water to them, and water and oil just don’t mix, you know. Boiling the nuts actually modifies their structure, so that would be a big no no for making nut butter. It’s probably a good technique if you’re planning on using the hazelnuts whole or chopped in a dessert, say. Still… I’m not sure that I would be too keen on the idea. I’d much rather roast them… it gives them such a nice flavor! 😉 I think you need to try again, without boiling this time! 😀
Let me know how it turns out if you take another go at this!!!
Hi Sonia,
I seemed to have the same crumbling problem even with the ones I didn’t boil, but I will try it again. I tried Brazil nuts, cashews and pistachios. The Brazil nuts were also very crumbly and I realized I actually don’t like their flavor and completely hate the taste and smell when made into butter (actually, crumbs). The pistachios and cashews, however, turned creamy just like your hazelnuts! I don’t get why the hazelnuts and Brazil nuts didn’t work, though I don’t care about the Brazil nuts since I don’t like their flavor, I wonder why some nuts are working for me and others are not. Hazelnuts are my favorite so I would have liked for them to work.
Hi Sonia!
I’m in highschool and I had to make hazelnut butter for a food class project. I tried making it today and at first, I completely burned my hazelnuts by accident. Fortunately, I still had some left so I lightly toasted them to remove the skins.
I find that if I crumble them in a coffee grinder and then add some coconut oil to the mixture and place the batch in a actual food processor, it comes out very creamy. When I tried to make it without adding the coconut oil, it just turned into a fine oily crumble even after a good ten minutes.
That’s very odd… I never had such a thing happen to me before! Did you make the entire batch in a coffee grinder? Guess I’ll have to try and make a batch of nut butter in a less powerful food processor, to see if I can replicate this crumbly mixture. It definitely got me all curious…
I have to say that I really like your class project! If they were all like that, I’d want to be in school for the rest of my life! 😉
I like your class project too. I don’t know if my processor isn’t powerful enough or what. But even when I added oil (no taste olive oil), it only made it creamier for a short time. It ended up crumbly again only now with added oil, yuck. It’s tough to add oil to something that’s already 70% fat. But the worst is that it didn’t work for long, for me anyway. If I was wealthy I’d request Sonia to make a trip to my home to examine my machine and technique lol. I can’t get over your pics, I just want to reach out and take a few spoonfuls. 🙂
LOL! Guess you won’t need me to come over after all, Betsy! Glad you got your mystery resolved! 😉
Now you can start making all sorts of nut butters! 🙂
OMG I did it!!!!!!!!!!!!!!!!!!!! I was ready to get rid of the new food processor yet the problem was ME! User error all the way! Sonia was 100% right. Boiling the nuts to blanch them was a huge mistake and that’s why it ended up crumbly. The only reason I didn’t think that was the reason initially (sorry Sonia for doubting!), is because the 1st batch I made was from the oven only and it was crumbly before I added the boiled nuts. But apparently I just didn’t process the baked ones long enough before adding the boiled. Once the boiled are added, you can process for an hour and it won’t matter, it’s crumb city from there. I only did that boiling method thinking I needed to do a better job of getting the outer layer off. I will never stray by reading other hazelnut butter blogs that messed me up. I am totally loyal to this blog only now 🙂 My only complaint is how many nuts it takes to make so little butter, but still so worth it.
Alright!!! Real happy to hear, Betsy! Finally, you got that hazelnut butter working for you! That’s awesome! And thank you so much for your lovely comment. I’m flushed…
Now as far as it taking a lot of nuts to make the butter, I totally hear you… but you will find that if you buy your nuts in bulk or in large bags, it will be A LOT less expensive and you will get good home made nut butter for a fraction of the price! 🙂
Hi Sonia you are 100% right. I am seeking a hazelnut farm so I may buy direct in bulk rather than the grocery store. Even at the lower cost grocery store in my area hazelnuts are not cheap and you don’t even want to know about the other nuts.
This is a little off topic but still about hazelnut butter….
I decided to put the hazelnut butter in biscotti and in madelines because I love this stuff so much, both recipes turned out great in the past. I should mention that I always use less sugar than the recipe says. When they came out, there were two issues. 1. there was NO hazelnut flavor…at all! It was a total waste of the nut butter and 2. there was no flavor to them period, whereas before when I made them there was flavor despite the lower sugar. So now I wonder if the fact that I used agave rather than regular sugar was the problem? In both cases I used the same amount of sweetner. Or was it that the nut butter just ruined everything? I just can’t believe how something so flavorful & delicious can turn tasteless once cooked. Too bad because I had all these ideas for hazelnut butter in this, hazelnut butter in that. Not that it’s not totally amazing on its own but I wanted to do something more cost effective for purposes of sharing with many and maybe even selling locally.
I explored your blog two days ago & since then I nearly can’t stop studying recipe after recipe. They all sound so delicious & your pictures are so amazing. I left my parents home a couple of month ago & lived very student at the beginning (fast food), but I don’t feel good doing this anymore. I already picked many recipes from your blog, which I want to try out & the Hazelnut Butter will be the first. It looks so perfectly creamy & since it only consist of hazelnut I don’t have to feel bad about eating it. Keep up the good work! xo.
Awww, thank you so much, I truly appreciate your kind comment! Glad you like the recipes and that they inspire you. Kudos to you on ditching the fast food thing. Cooking healthy doesn’t have to be complicated, and doesn’t have to be boring either! Make sure you let me know how the recipes turn out for you! 🙂
OK I don’t know what I am doing wrong again. I was making great butters, I even made them kinda liquidy at one point and I liked that. Then I went to make some again, and it was crumbly no matter how long I had it in the processor. I didn’t do anything different. Also, another day I tried adding milk to the recipe to see if it would taste a little more nutella like (but not like nutella exactly since I use very little sweetner and a whole lot more hazelnuts), but the milk changed the texture of the whole thing, it was awful, and it brought out the oils in the nuts like you won’t believe, very greasy mess. Anyway, it appears to be just me with the crumbling issue, but if anyone out there has an idea what I could be doing wrong, please let me know. Thank you!
P.S. I tried some of your other recipes and they were delicious, thank you! I seem to only have troubles with the nut butters, but it’s what I need most often.
The only thing I can think of Betsy is water. Water and oil do not mix. So you can’t use anything that has water in it, or even let your nuts anywhere near anything that has water in it! 😉 Of course, there’s water in milk, so in that case, milk would be the culprit. It would definitely cause the oil to separate. I’m guessing you can add it slowly to an already “established” nut butter, but until the process is really completed, I am guessing that no amount of water can ever be added to the nuts. I guess I would have to run a few tests on that one.
As for the Nutella thing? I’ve got a little secret for you… I’ve got an AMAZING healthy “Nutella” recipe coming up! It’s so great, it really inspires me to try my hand at making home made, healthy Ferrero Rochers! Stay tuned!
Thanks Sonia.
The sad part is the crumble issue happened outside of the milk adding issue. These were different batches. I guess I thought that adding milk would make it taste even better, though already it’s good. I saw that milk is an ingredient in the Nutella stuff. I guess milk is out then. But the crumbling issue is such a mystery because it’s not always an issue yet I always do the same things. I will make some again today using almonds this time. I have been avoiding making any butter because if it turns crumbly, I will still eat it but it’s not the same and then I am out the money for the nuts which as we all know is very $$$.
Bake the nuts for 75 minutes? That right there is killing the nutrients! I am going to try this recipe though, I just don’t plan on baking the nuts
Oh my! I’m pretty sure that I meant to say 10-15 minutes?!!?!? Thanks for pointing that out, Nicole! I will correct that right away! And not baking the nuts at all will work too. 😉
Hi Sonia,
Well I saw your recipe and dived right in. Unfortunately, being a male, I wanted to do it my way. So I started by processing 2 cups of hazel nuts for 5 min and then once crushed, I added 3 tbsp of Carob powder. I then processed (in my 20 year old BRAUN) for about 45 min and still had only powder. I tried adding a little milk, but still nothing. I kept at it for another 45 min .Eventually I heated the oven to its max and put the powder on tin foil, in for about 5 min, to get rid of the moisture. Then I put it back in the Food processor and 5 min later, voila’ ! I t finally worked. Next time I follow your recipe, but the carob tastes great and no other sweetener is necessary. Thanks for a great site.
Hey Angelo! Your comment about being a male really made me laugh… you see, the thing with nuts is you have to let them do their thing before you even think of adding anything else to them. So get to creamy butter consistency, then you can add whatever you want, although you need to avoid anything that’s got a high water content, for water and oil don’t mix well, and that also holds true in this case.
Thanks for the kind words, real glad to hear you like my site. Feel free to visit anytime you want! 🙂
Hello! Your nut butters look amazing. Tried to do de chocolate version to make it look less healthy to my boyfriend (more of the cookie type eheh)and i followed your instruction from a to z and it turned out great but at the end i added 3 tbs of liquid honey and pulse it for 30 seconds and the texture went to smooth to cookie dough!!! Do you think its the honey? Should i pulse more or it will just make it harder? Thanks in advance 🙂
Hmmmm… hard to say! I think I would try giving it a good spin, let it run for a good minute and see what it says. Maybe add a tablespoon or so of coconut oil to help loosen it up?
Soft cookie dough isn’t bad, though, if you ask me. Must be nice and agreeably spoonable! 😉
Thank you for your insights into nut butters and Hazelnut nut butter specifically! This helped me a lot! I came here because I was trying to salvage some “Million Dollar Fudge” that my son and wife tried to make before Christmas that was done in the wrong order and ended up not fit for gifts. In order to clear out the bottom of the fridge “left overs” I thought I would try to make a Nutella like spread with the disaster.
I made a hazelnut and almond nut butter and it was just fine – nice and creamy. Then I dumped in the “deficit dollar fudge” and the oil separated big time! I like salvaging what ever I cook so next I put in flour and cream to go slightly toward a pudding and to emulsify the oil. Heated up the mixture in a double boiler added a couple of squares of Hageland premium dark chocolate [53% cacao]. Tastes yummy and it is fit to eat. Now to let it cool and see if it will spread with a knife or be eaten with a spoon.
Oh and by the way if you have lots of nuts to crack it is a breeze with a #816 Reeds Rocket nut cracker. 2 cups of hazel nuts and almonds in about 20 minutes with out sore hands and mostly complete nut meats. Works well for pecans and walnuts too.
Thanks for the tip, Jim, I’ll keep that in mind if I ever need to crack a lot of nuts!
Glad you managed to save the Million Dollar Fudge (although that really doesn’t sound healthy at all! 😉 ) but tell me… how does the story end? Was it spreadable after all? Or did you have to eat it all by the spoonful?
We had two pints of very nice smooth spread now only one and a third with two teenage boys around none of it will last long.
You are right, defiantly on the decadent side. Feast days tend to be that way. I like the French way of looking at foodie things. Everything is okay — it is the moderation that counts. Butter spread thinly on one piece of toast is just as tasty and satisfying as a pat of butter on each of three pieces. Take your time and enjoy the taste; don’t rush through the eating.
Thanks for your hints and the hints of the rest of the gang! And my idea of using flour to sop up the oil worked well.
Hi,
I also like and do promote healthy and homemade recipes on my blog. I lardy did chocolate butter with coconut butter and almond butter, with roasted butter and skin, today, I would like to tray hazelnut butter, also with skin, it;s more nutritious. Do you know, if I should roast hazelnuts in order to blend them?
Please, feel free to visit my blog, even thou the recipes are in my native language, the flag translator is right on page…
Hey Ava! You could very well make the nut butter without roasting the hazelnuts first. The taste and texture will be different, but very good nonetheless! 🙂
I came across your blog a couple of days ago and today I made this nut butter. OMG!!! So delicious and so EASY! I had tried making nut butter before, but it just wouldn’t turn creamy and I got so frustrated. So I had gived it up, but the fact that I had been defeated by a handful of almonds has bothered me ever since 😛 Then I saw your recipe, and it came with a twist (toasting them first and putting them in the food processor while still warm), and I decided to take revenge. I couldn’t be happier with the result! I’ve already made this one and the peanut butter, and it was super quick and not at all frustrating. As soon as I’m allowed to eat cocoa again (mild intolerance at the moment), I’m making your nutella!
Thanks for a lovely blog, it’s going to be one of the tabs I never even bother to close 😉
Cheers from Barcelona
Oh, thank you so much for this, Biljana! You’re a real gem!:D
I’m real happy that you were finally able to make some real good homemade nut butter. Now time to start experimenting and have fun with them!
Be careful though… that stuff is highly addictive! 😉
GREAT WEBSITE. YOU ROCK!
GREAT PHOTOGRAPHY. COULD YOU PHOTOGRAPH MY DAUGHTERS GRADUATION?
TALK TO YOU SOON.
CHRISTINE
Thanks for your vote of confidence, Christine, I really appreciate that. Unfortunately, I merely only ever take pictures of food, and, believe it or not, I have no idea what I’m doing most of the time… 😉
HI. I’ve been dying to make this and I’m going to finally try this weekend. I don’t have any cocoa powder on hand but I do have a bag of raw cocoa nibs. Do you think I could just process some of those in with the warm nuts to achieve the “chocolate hazelnut butter”??
Oof… not sure, Steph. I think what I would do is grind the nibs in a coffee grinder and then pass that through a fine mesh sieve. Then I would add it to the nut butter.
You know what? I think I want to give that a try myself, now. Whoever tries it first tells the other about it, how’s that? 😀
I just tried this. The skin-removing trick didn’t work so well for me (maybe I should have let the nuts roast a few minutes longer) but I went ahead anyway. 2 spoons of honey, dash of vanilla, and… oh no! No cocoa powder! Wait, I have a block of 100% cocoa instead. I shaved some off with a knife, and blended it all.
Result is not quite as creamy as I might have wanted, but spreadable, and more to the point, absolutely delicious! I just wish hazelnuts were cheaper.
Hi there! I tried this and it was so delicious. Only problem was getting the skins off; many wouldn’t come off! Is there an easier way? Should I roast longer? The hazelnut butter was creamy, but the chocolate hazelnut was more of a paste. How do I get it as creamy as your pictures?
This recipe looks great … Just curious most of your recipes I have seen are printable why not this one?
This is an older recipe of mine, prior to my site redesign, that’s why. It hasn’t been entered in the new plugin that was added with the redesign. Sorry about that…
Not a problem … I just really liked this one! I saved it to my web browser and when I have time I will type it out … I know I want to try it!
I got you covered, Chris. You can now easily print the recipes with a simple click! 🙂
Thanks so Much!
This is so stinking delicious. I made the one with cocoa powder and it is absolutely to die for drizzled over fruit. I finished off the last of it over the weekend (saddest day ever) but I’m already gearing up to make a double batch tonight.
Thanks so much for sharing!
Glad you liked, Ariel! Now you made me want to whip up a batch too. Although I think I’ll stick with a single batch: the more I have of this stuff, the more I eat, so smaller batches are a better option for me! 😉
Any reason why date paste wouldn’t be worth a try as the sweetener? Just made my first batch (thank to the recipe on this site) and am loooving it on Ezekiel bread.
Date paste would work very well indeed, I think! I’ll have to give it a try! Glad you like, Shon, and thanks for taking the time to let me know! 🙂
OMG, I have got to buy a food processor! Can’t wait to try this.
It’ll be one of your best purchases ever, Beth. I could not live without my food processor, ever!
I just tried making this in a nutrabullet and it was a total fail lol. Next time I will just buy ready to go hazelnut butter and then mix the rest of the ingredients in.
The nutribullet simply isn’t powerful enough to turn the nuts into butter… you need to use full size food processor for this task.
I made these recipes yesterday. My hazelnut butters are a bit crunchy, because I used a shredder, but I was surprised, how creamy it gets without adding any oil or anything.
I tried both versions, but I used carob powder instead of cocoa, and a bit sweetener, but it didn’t cover that unique taste of carob, which my family not quite fond of, so I added raw sugar, and that saved it. May I ask if anyone had trouble with the sugar being crusty in the butter? I tried to warm it up a bit, but the sugar didn’t dissolve fully. Is it because I used a shredder? I have never used food processor, I’m not familiar with it’s way, does that crush the sugar, too?
Anyway, I really like hazelnut, thanks for sharing these recipes, they are so simple, yet so precious:)
Perhaps it’s the kind of sugar that you used, Lil. It may have been on the coarser side and therefore wouldn’t dissolve quite as well as the finer variety. Also too, I’m not familiar with shredders, but perhaps the food processor does help in making the final texture finer.
I just finished making this, and loved just licking the spoon when I was done putting it in the mason jar. It did take much longer than anticipated (more than 20 minutes!), but I waited and slowly noticed the evolution of the nuts. I was tempted to add coconut oil, but in the end I did not need it. I’m looking forward to using the hazelnut butter in the paleo sweet potato brownies, which are already started. It’s been a busy (and messy) day in my kitchen!
HAHA! Looks like just another ordinary day in my kitchen: busy and messy! 😉 Good on you for not adding the oil after all. Hazelnut butter is already fairly runny to start with so it really doesn’t need any additional oil! I really hope that your brownies turn out as good as your nut butter has. Keep me posted! 🙂
hi sonia, what’s the proper way of storing it and how long do you have to keep it.
You can store this in a cool dry place for up to a few months… or keep it in the fridge if you prefer.
Ooohhhh, thank you! Read all through the posts so hopefully I can avoid any pitfalls. Going to try it out this weekend……… Your pics look absolutely awesome, shame I can’t just reach in to the screen and have a dip or two! 🙂
HAHA! Now wouldn’t that be cool!
Thanks for the kind words, Charlotte. Hope the nut butter turns out great! 🙂
Hi Sonia, I just tried your recipe and it turned out amazing yummy !!! Most important my kids LOVE it too !! Actualy I didn’t have whole Hazelnuts but only grinded ones, but it worked perfectly well anyway. I added two additional tbsp sugar for my taste and it’s still much less sweet than the packed nutella. Big big thanks Sonia
Yay! Very happy to hear, Monica! Thanks for taking the time to let me know, too. I greatly appreciate that! 🙂
Your question regarding the nutritional value of hazelnut skins. Yes, you are significantly reducing nutritional value through roasting and skinning your hazelnuts. Hazelnut skins are one of the most concentrated sources of polyphenols, which provide a total anti-oxidant capacity, or TAC, that is 3 times the TAC of whole walnuts, 7-8 times that of dark chocolate, 10 times that of espresso coffee, and 25 times that of blackberries, according to a 2011 study. http://www.ncbi.nlm.nih.gov/pubmed/21819158
Roasting and skinning hazelnuts significantly reduces polyphenol content.
http://www.ncbi.nlm.nih.gov/pubmed/21535710
Polyphenols have been shown to reduce oxidative stress, may inhibit tumor cell replication and can combat toxicity from certain pollutants, such as dioxins, which serve as endocrine disruptors.
So if you want creamy and delicious, roast and skin. If you want healthy, you may have to put up with some grit.
It sounds like this is one of those recipes that just comes out different for everyone; I tried making it and without adding anything it turned out beautifully smooth and actually quite runny! This was a great, easy recipe; thankyou for posting :). Hopefully my spread sets a bit in the fridge but if not it’ll be great in baking!
It should indeed set a little bit in the fridge, Laura. Next time, though, you should totally give this newer recipe a try. It’s a little bit more work, but it’s also a million times better! 🙂
It did set up nicely in the fridge 🙂 thanks for the the link I’ll be sure to try it out in the future :).
Yay! Very happy to hear, Laura. 🙂
I am excited to find this recipe for Dark Chocolate Hazelnut Butter. I cannot wait to try. I was wondering if you have tried to add protein powder. I have a peanut allergy and would like the added protein.
Surprisingly, I’ve never tried it, Liz, so unfortunately I can’t be of any help here…
Made this last night and ended up turning it all into the chocolate hazelnut version, it’s delicious!!! Thanks for the recipe😋
Glad to hear it was to your liking, Nikki. Thank YOU for the great feedback! 🙂
Just a point of fact that in most nuts, Hazelnuts included, the skin is super nutrient dense, particularly in antioxidants, which are compromised by roasting, and obviously by removal.
My mum brought me a bunch of hazelnuts and I was just thinking what to do with them and this is just perfect!! Exactly what I was looking for 🙂
I have already made my own peanutbutter (almost on a weekly basis haha), almond & cashew butter but this will be my first hazelnut butter, cant wait to try!! 🙂
Also I really enjoyed reading, I like your type of writing and humor, thanks for that, will follow your blog from now on 🙂
Haha! Thanks Louisa, that’s very kind of you to say! Hope you enjoy the hazelnut butter. Be careful though… that stuff is highly addictive! 😉
Thank you for providing all of the process and procedures to making amazing hazelnut spreads. Well done! Absolutely fool proof!
Just wondering how many grams is a serving size for the hazelnut coca butter
I’m not sure why this didn’t work for me. I halved the amount as I didn’t want a huge amount of the kids didn’t like it. The mixture was very dark and not runny. I did think I’d got the bits to the right consistency before adding cocoa powder. The coconut sugar I used was brown in colour and grainy. Was this right?
Hi Sonia.. thats a wonderfully easy recipe.. thank u so much 😊. . Just a lil clarification needed about the nutritional info, how much is the sample amount for nutritional information and is it for chocolate version or simple version. I shall be grateful to u.
Regards
Hi thank you for your recipe
the pan you are using to roast the hazlenuts – aluminium or stainless steel?
thank you
have a great day
Lisa Jackson
You can use whatever you have on hand, Lisa.
Tastes great but mine dried up too quickly. I used maple syrup instead of sugar, would that be a reason? Does cocoa powder dry it out over time?
( I separated it into 2 portions -The nut butter stored without the additions is the same as it was)
Yeah! Maple syrup has water in it, and water and oil don’t mix so well, so that’s most definitely your culprit!
Can you substitute the coconut sugar for a different sugar
Absolutely
My husband loves Nutella, but he was wondering if a version without sugar would be any good. So my question is, would a version of this recipe without the coconut sugar be any good, or should I stick with the sugar? He prefers things a lot less sweet.