Layered Choconut Bars
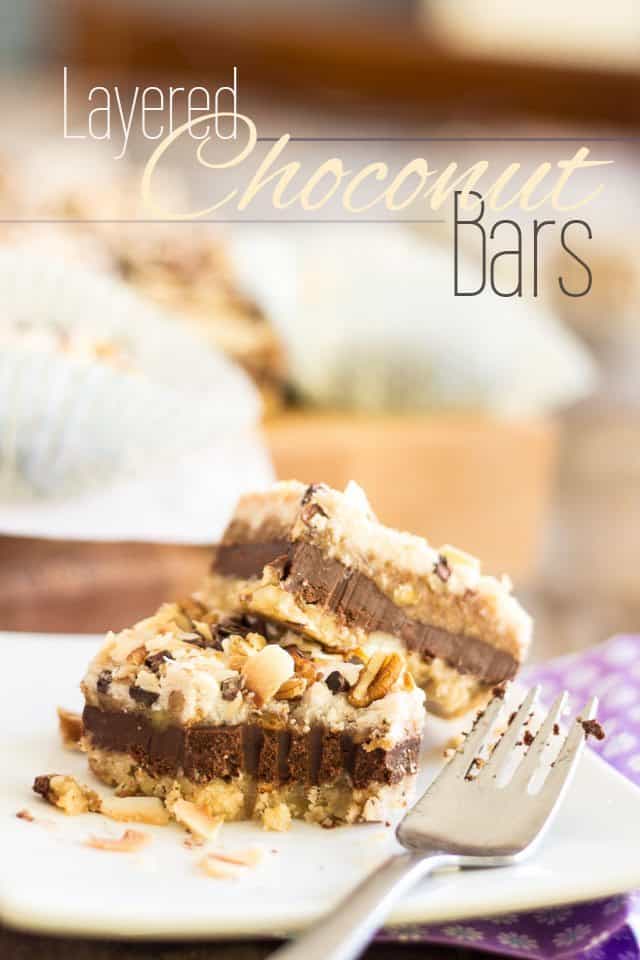
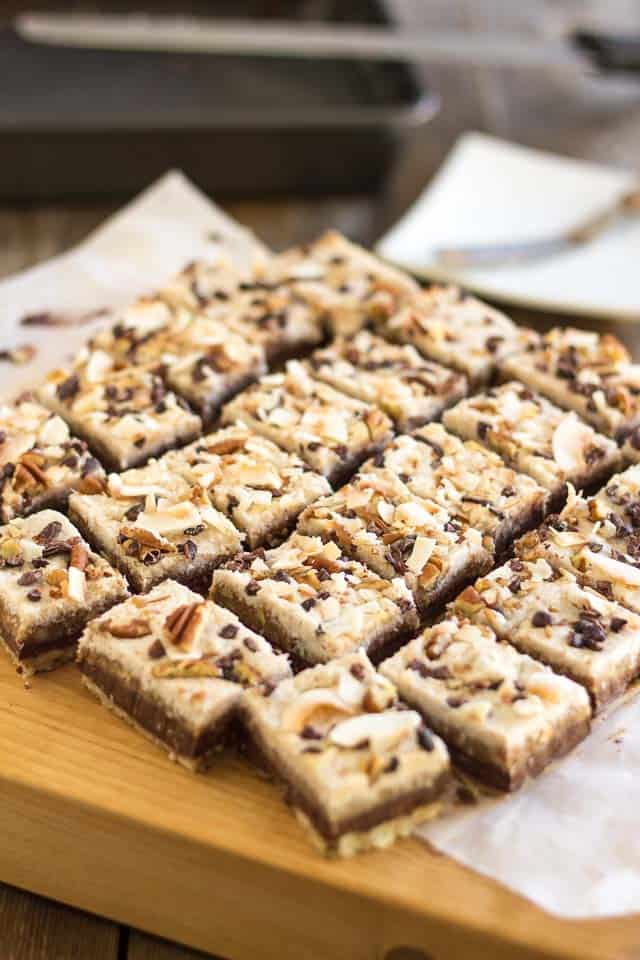
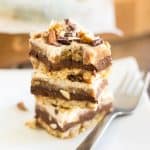
Now, before I even write another word, please allow me to say this: whatever you do, keep this lovely picture in mind and don’t let the recipe’s very lengthy list of ingredients and seemingly endless series of instructions demoralize you and prevent you from giving these Layered Choconut Bars a try.
Hear me out: it really isn’t so bad, I swear. I’ll give it to you, this recipe does indeed call for a lot of ingredients. As in “A LOT” with big fat capital letters! But most of them are pretty standard in a paleo pantry, so that shouldn’t be an issue. And they’re all fairly easy to weigh and measure, too. Promise.
And yes, there are many layers to make, but you don’t even need to rinse or clean the bowl of your food processor between layers. Or clean dishes at all, for that matter.
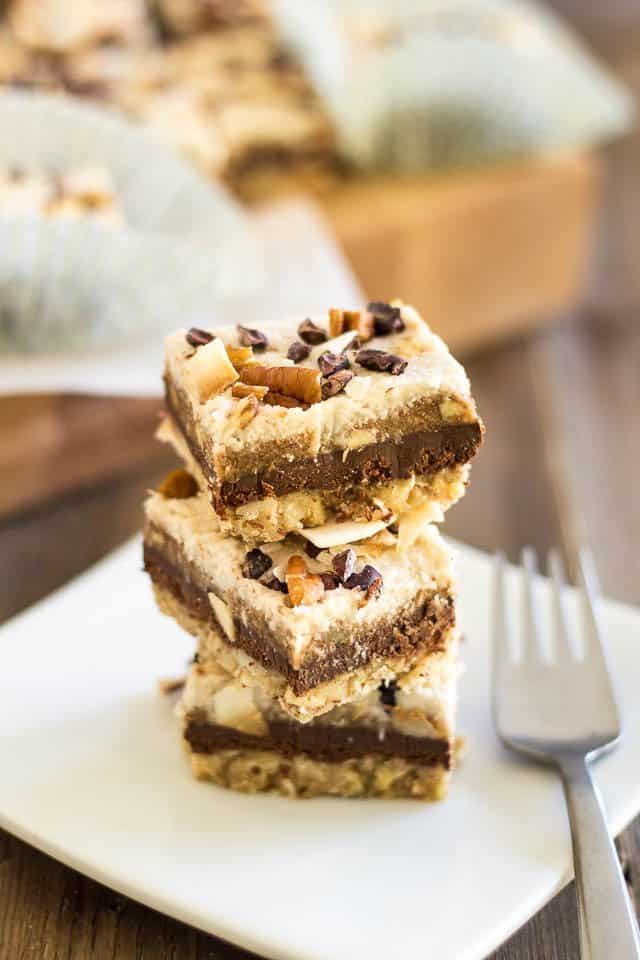
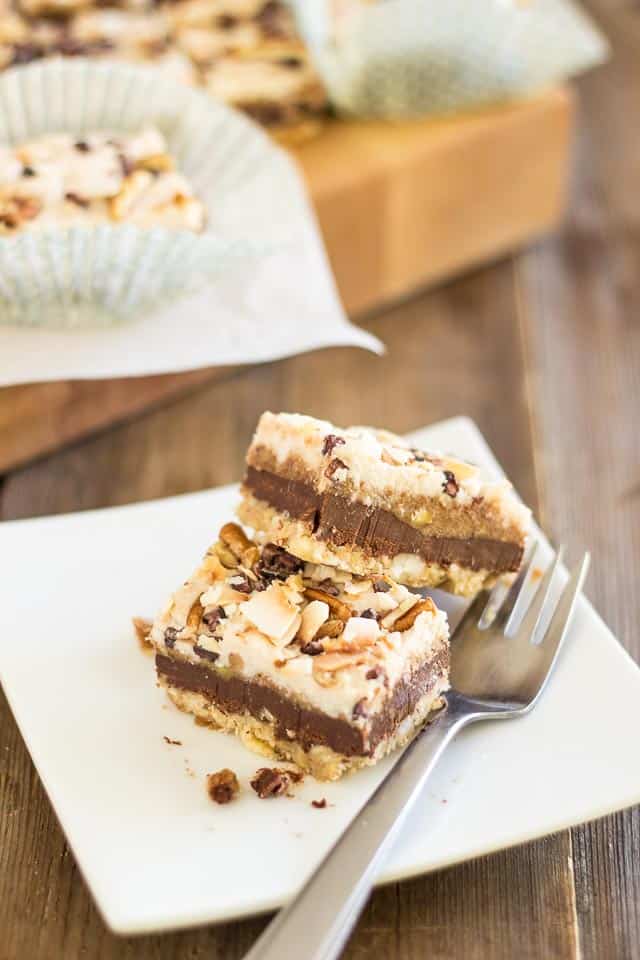
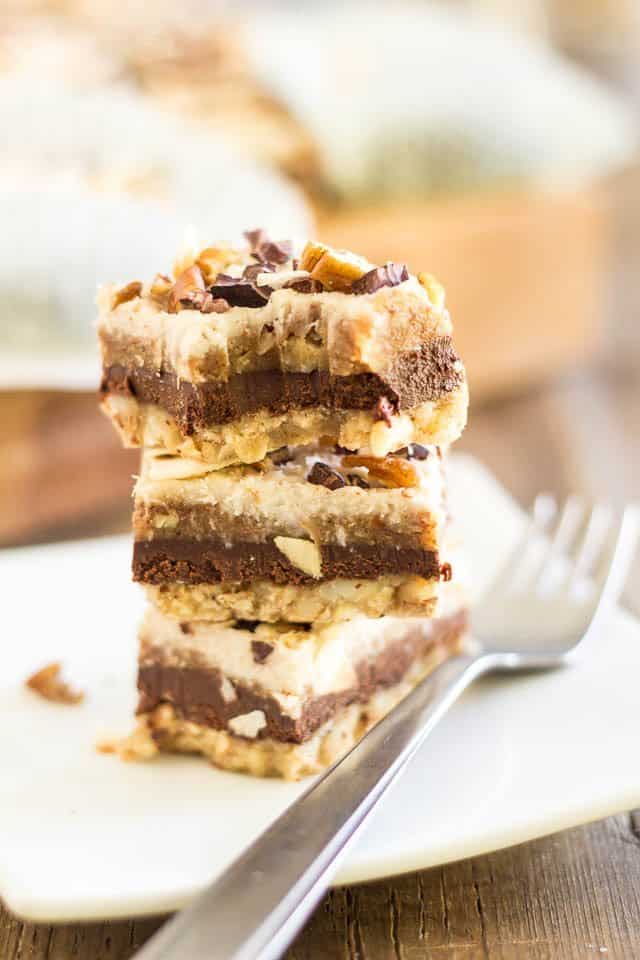
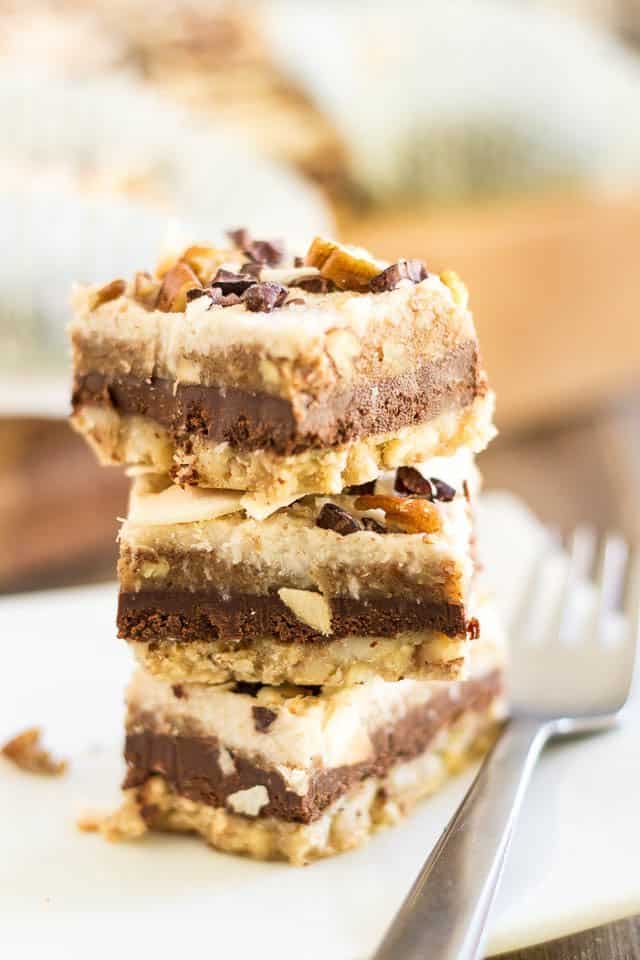
Trust me, those bars are so sweet and creamy, so intensely chocolaty, so fudgy and crunchy, so indecently dreamy that they are worth every single second you’ll be spending in the kitchen making them.
Plus, I’ll take you by the hand and walk you through every single step and even give you pictures and all. You’ll see, it’ll be a fun ride. In fact, it’ll probably take you much more time to read the post and recipe than it will take you to make the actual bars.
With that in mind, and without further ado, what do you say we get started?
#1 – Cookie Dough Layer
Start by greasing and lining a 9” square baking pan with parchment paper. For easy unmolding, make sure to leave a little bit of an overhang on either side of the pan.
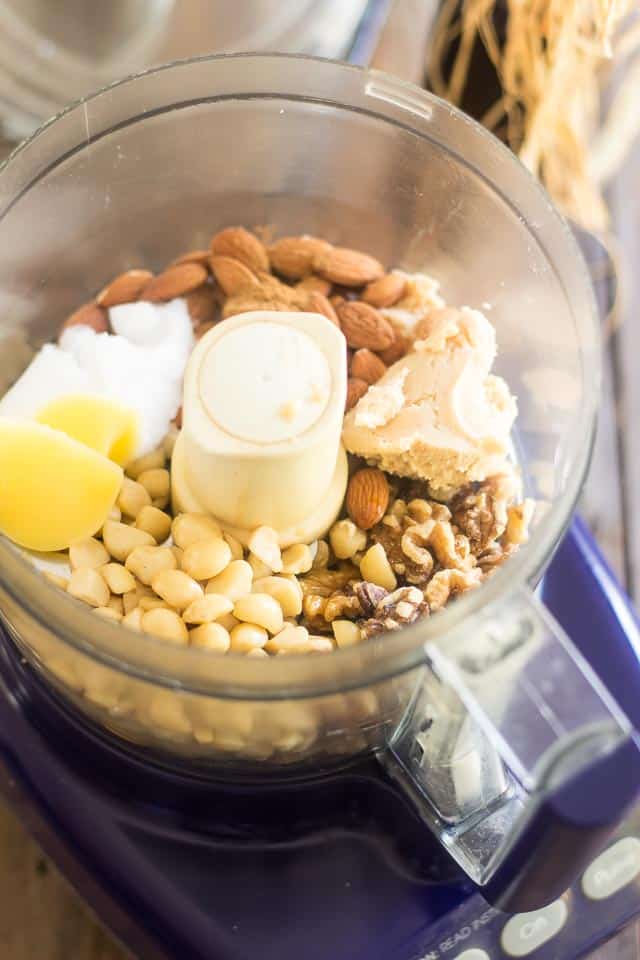
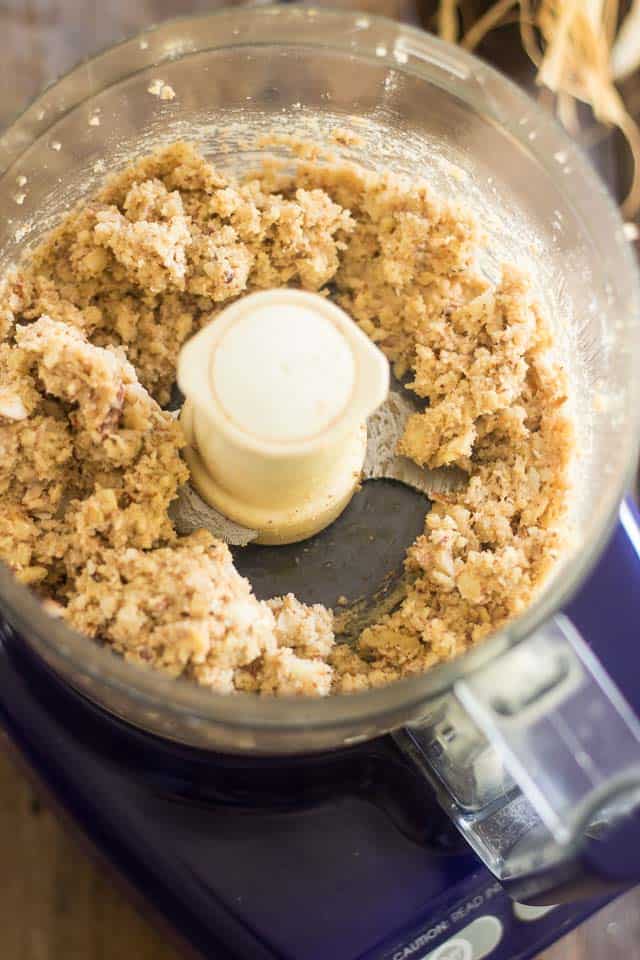
Then, add all the ingredients for the cookie dough layer to the bowl of your food processor.
Process on pulse until the mixture resembles that of very soft and chunky cookie dough.
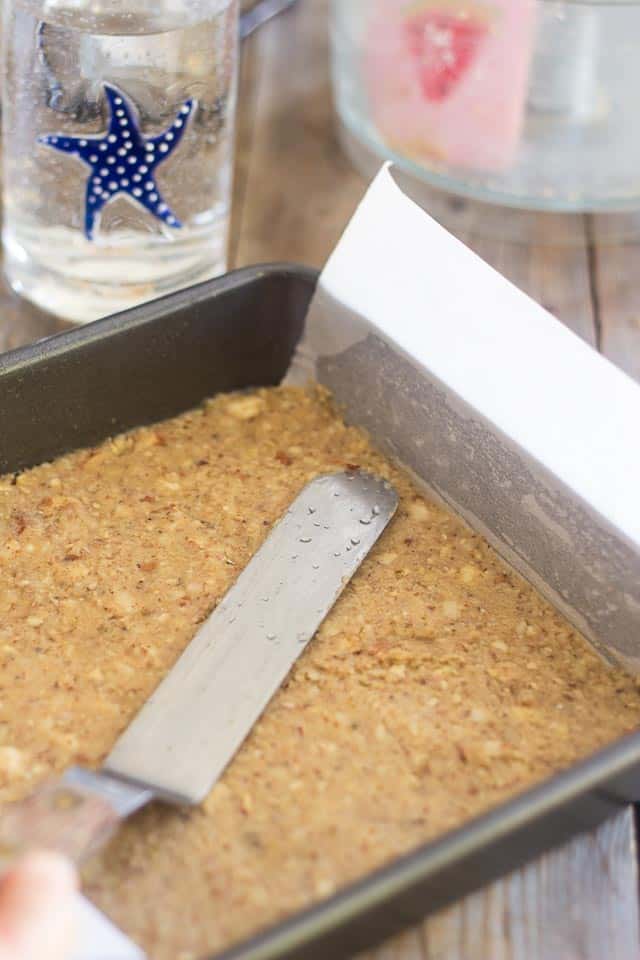
Pour this mixture into your prepared pan and with the help of an offset spatula that’s been dipped in cold water, spread the mixture all the way to the edge of the pan, as evenly as possible.
If you don’t have an offset spatula, you could always use your fingers or a flat bottomed glass, but again, you’ll want to dip them in cold water to prevent the mixture from sticking. ‘Cuz trust me, it’ll stick if you don’t…
Send this to the fridge to set while you work on the other layers.
#2 – Chocolate Layer
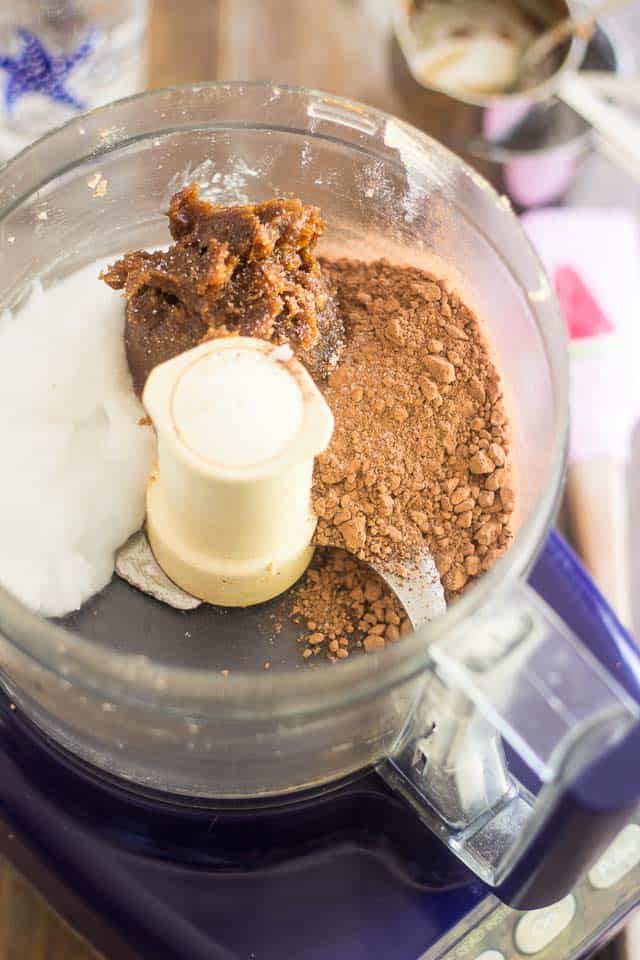
Add all the ingredients for the chocolate layer, except for the warm water, to the bowl of your food processor (hey, don’t even bother rinsing it. No cleaning dishes, remember?) and process until combined, no more.
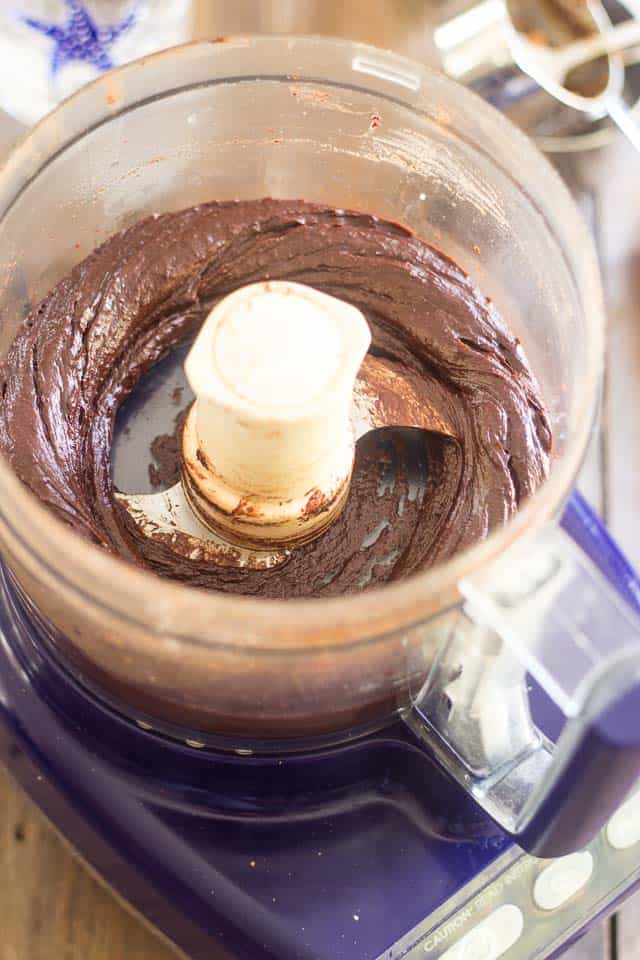
While the motor is still running, add the warm water through the feeding chimney, one tablespoon at a time, until the mixture becomes silky smooth.
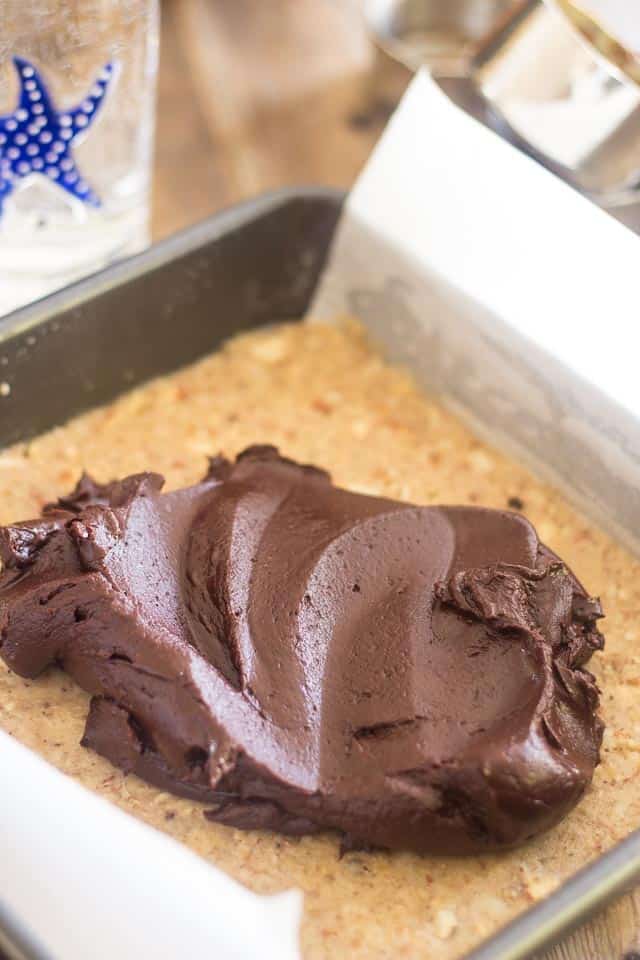
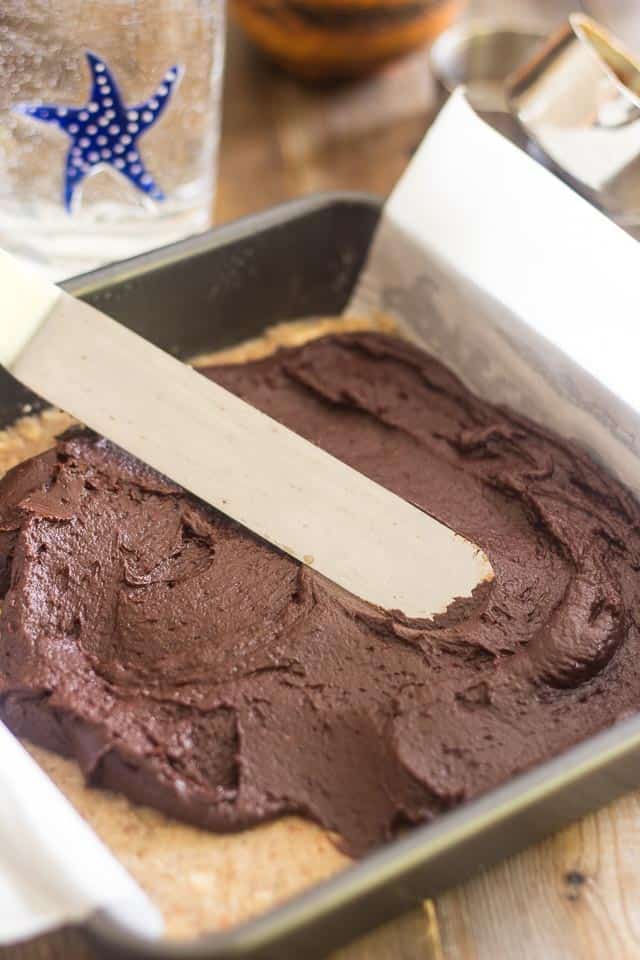
Take the cookie dough layer out of the fridge and pour that chocolate mixture right over it.
Again, with an offset spatula, spread the mixture all the way to the side of the pan, as evenly as possible.
No need to dip your blade in water this time, and again, if you don’t have an offset spatula, you could use one of the rubber variety instead.
Return the pan to the fridge.
#3 – Creamy Nut Layer
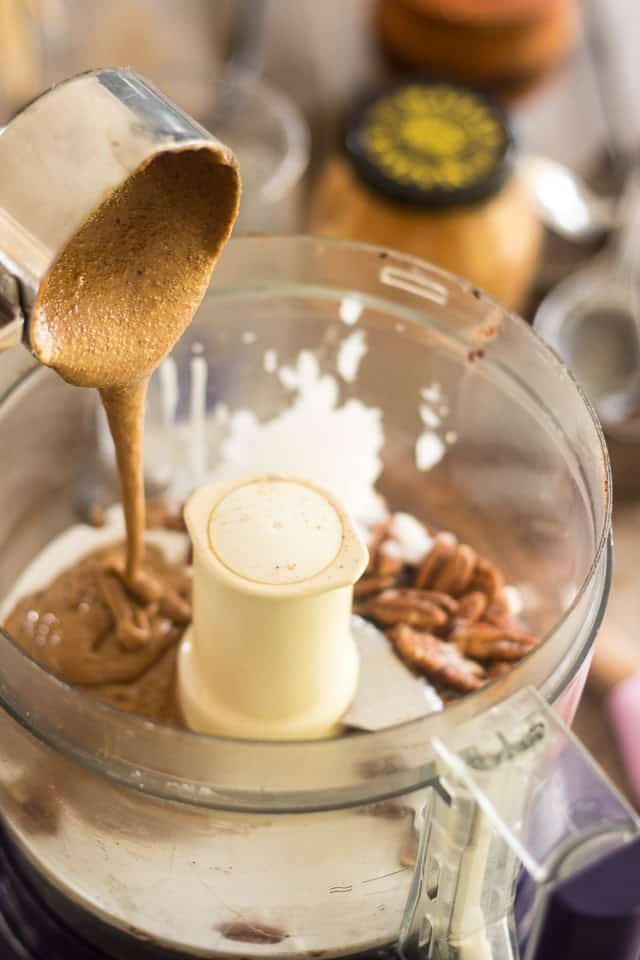
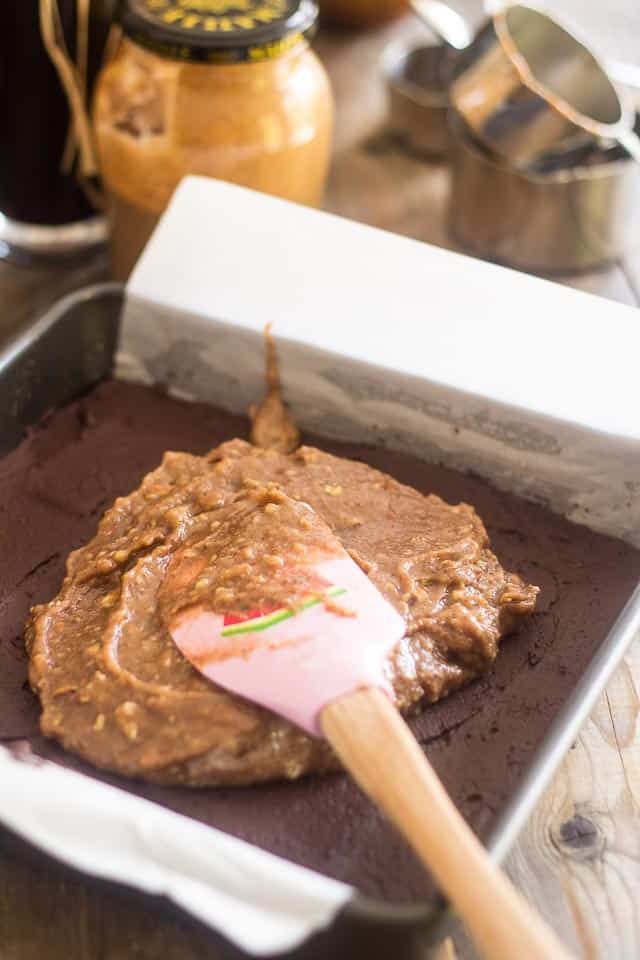
As you did with the other 2 layers, add all the ingredients for the Creamy Nut Layer to your food processor.
Take a few seconds to look at that beautiful, creamy Toasted Almond Butter that’s slowly dripping into that bowl. Admit it, you just want to stick your finger in there and then lick it real clean!
I know that’s what I’m thinking!!!
But we’re about to create something MUCH better… so leave it.
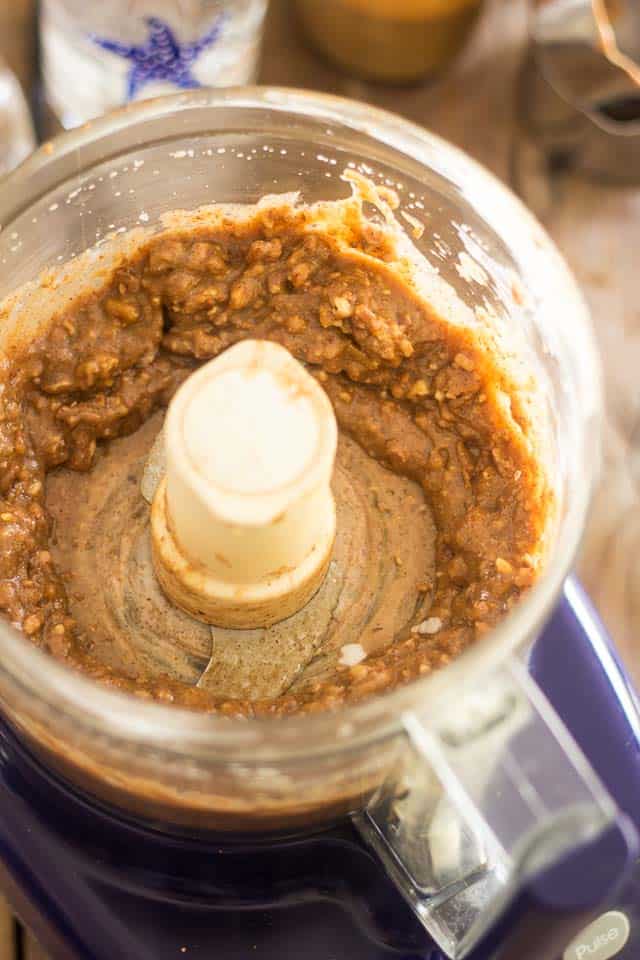
Process these ingredients until well combined and creamy, but make sure that some chunks of nuts remain present.
Pour that over the Chocolate Layer and again, spread evenly all the way to the edge.
Return to the refrigerator once more.
#4 – Coconut Layer
Now, this layer doesn’t really require the use of the food processor; it could very well be mixed in a bowl, with a spoon or spatula, but since the food processor is already out and dirty, we might as well use it. Why use more dishes than we need to?
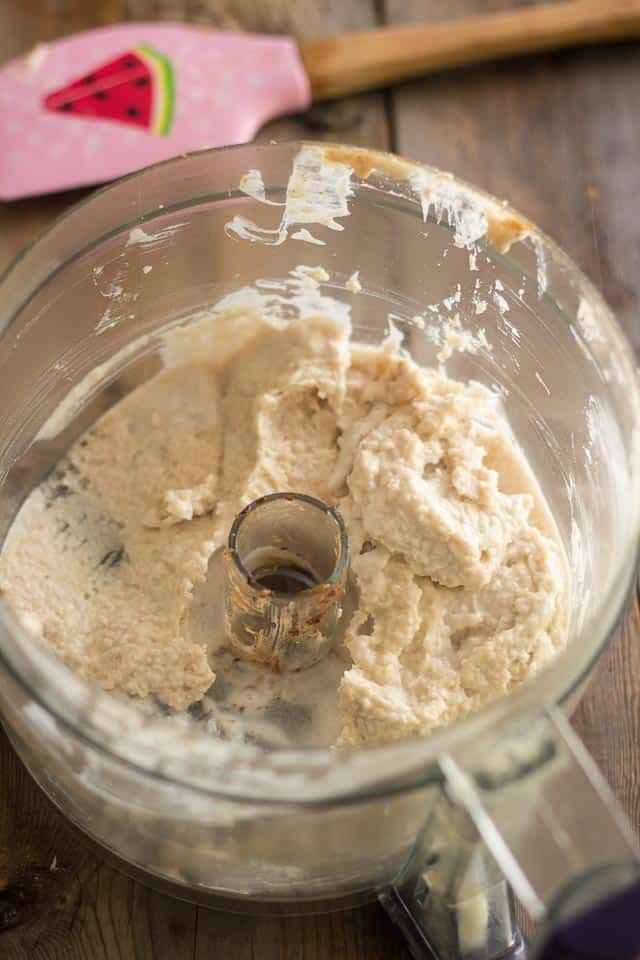
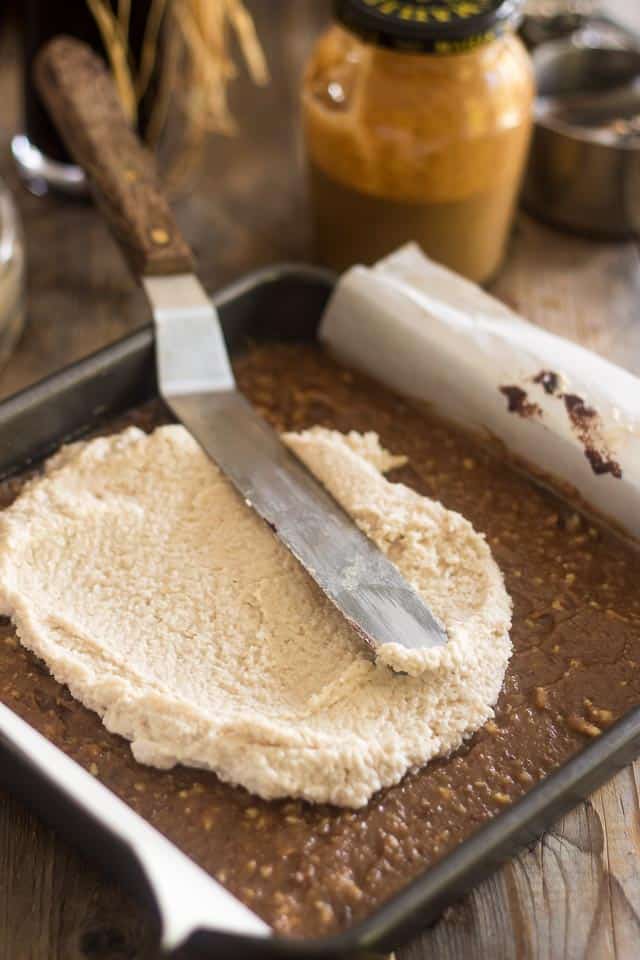
Alright, I bet you know the drill by now…Add the coconut butter, coconut milk and unsweetened shredded coconut to the bowl of your food processor and process until combined.
Pour that mixture right over the previous layer and spread it all the way to the edge
Ah, but this time, we won’t return the pan to the fridge just yet…
We’ll take care of the final layer first!
#5 – Top Layer
Technically, this isn’t really a layer… but hey, we’ll call it a layer still, just because. I want these Layered Choconut Bars to have LOTS of layers…
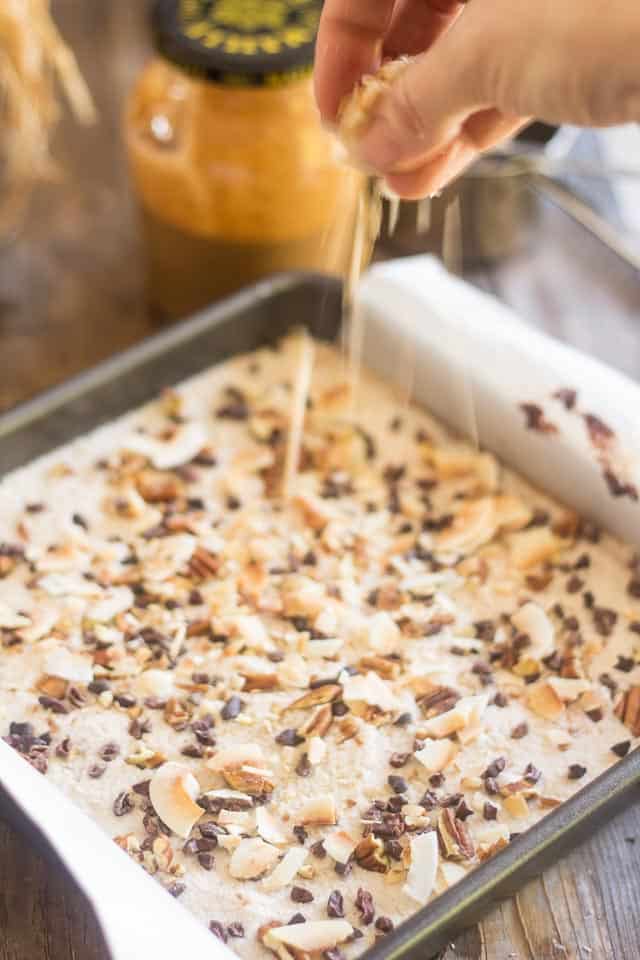
Sprinkle the toasted coconut, cacao nibs and chopped pecans all over the top of the coconut layer and then press them down a little bit with your fingers so they adhere real well.
Now, return your pan to the fridge until your bars are fully set, at least 6 hours, but preferably overnight.
Cut into 24 squares and place the bars in paper cupcake liners if desired; put these in an airtight container and place them in the fridge where they will keep for up to a few weeks.
Ahem… if you can keep them that long!
Phew. Are you still reading? Or are you already busy cooking?
Come on, admit it. It’s not as bad as it looks at first glance. And I swear to God, you’ll forget all about all that hard work as soon as you take that first bite.
This is the kind of treat that’ll send you straight to seventh heaven.
The best part is, there’s absolutely ZERO guilt involved. That, and the fact that no one will ever guess that these contain no refined sugar, no grains, no gluten, no dairy, no artificial sweeteners whatsoever… Nope, they contain nothing but good, wholesome ingredients.
They’re even low-carb and keto friendly.
What are you waiting for? Be someone’s hero today, go whip up a batch!
Layered Choconut Bars
Ingredients
Cookie Dough Layer
- 1/2 cup raw walnuts
- 1/2 cup raw macadamia nuts
- 1/4 cup raw almonds
- 1/4 cup coconut butter
- 2 tbsp coconut oil
- 1 tbsp ghee
- 1/4 tsp Himalayan salt
- 1/4 tsp ground Ceylon cinnamon
- 1 tsp pure vanilla extract (or make your own
Chocolate Layer
- 3/4 cup organic cacao powder
- 3/4 cup coconut oil
- 1/2 cup date paste
- 1/4 tsp pure almond extract
- Pinch of Himalayan salt
- 2-3 tbsp warm water
Creamy Nut Layer
- 1/2 cup all natural roasted almond butter
- 2 tbsp coconut oil
- 1/4 cup full fat coconut milk
- 1/2 cup raw pecans, toasted
Coconut Layer
- 1/4 cup coconut butter
- 1/2 cup full fat coconut milk
- 1/2 cup finely shredded unsweetened coconut
Top Layer
- 2 tbsp cacao nibs
- 2 tbsp raw pecans, chopped
- 2 tbsp organic toasted unswseetened coconut flakes
Instructions
Cookie Dough Layer
- Grease and line a 9” square baking pan with parchment paper. For easy unmolding, make sure to leave a little bit of an overhang on either side of the pan.
- Add all the ingredients for the cookie dough layer to the bowl of your food processor and process on pulse until the mixture resembles very soft and chunky cookie dough.
- Pour this mixture into your prepared pan and with the help of an offset spatula that’s been dipped in cold water, spread the mixture all the way to the sides of the pan, as evenly as possible.
- Place in the fridge to set while you work on the other layers.
Chocolate Layer
- Add all the ingredients for the chocolate layer, except for the warm water, to the bowl of your food processor (don’t even bother rinsing it) and process until combined. With the motor running, add the warm water through the feeding chimney, one tablespoon at a time, until the mixture becomes silky smooth.
- Pour that over the cookie dough layer and again, with an offset spatula, spread all the way to the sides of the pan, as evenly as possible.
- Return the pan to the fridge.
Creamy Nut Layer
- Just like you did with the other 2 layers, add all the ingredients for the creamy nut layer to your food processor and process until creamy but make sure some chunks of nut are still present.
- Pour that over the chocolate layer and again, spread all the way to the edge. Return to the refrigerator.
Coconut Layer
- This coconut layer could very well be mixed in a bowl, but since the food processor is already out and dirty, we might as well use it. I bet you know the drill by now…
- Add all the ingredients to the food processor and process until smooth then pour over the previous layer and spread all the way to the edge.
- Ah, but don’t return the pan to the fridge just yet this time…
Top Layer
- Sprinkle the toasted coconut, cacao nibs and chopped pecans all over the top of the coconut layer, press them down a little bit with your fingers so they adhere real well and return your pan to the fridge until your bars are fully set, at least 6 hours, but preferably overnight.
- Cut into 24 squares and place the bars in paper cupcake liners if desired; keep refrigerated in an airtight container for up to a few weeks.
Notes
Nutrition
If you’ve tried this recipe, please take a minute to rate the recipe and let me know how things went for you in the comments below. It’s always such a pleasure to hear from you!
You can also FOLLOW ME on PINTEREST, FACEBOOK, INSTAGRAM and TWITTER for more delicious, healthy recipes!







13 Comments on “Layered Choconut Bars”
Wow this looks amazing.
I have all the ingredients except the date paste. How many mashed dates do you think is the equivalent to half a cup? Many thanks.
Trish – I didn’t have date paste pre-made either. I guessed and put 10 in the processor first before adding the other chocolate layer ingredients. When I measured it, it was allllllmost 1/2 cup. I noted on the recipe to use 12 dates next time. Hope this helps.
Ok….it took about two seconds for me to decide to make these. They look amazing! I have them in the fridge right now, but my only question is regarding my chocolate layer. It didn’t look quite like yours. Now that I think about it I wonder if I should have let it process a bit more? Because mine was definitely lumpy and more greasy looking…it was as if the water wasn’t absorbing all the way. At the time I thought I was over-processing it so I stopped and figured even though it looked weird it would probably taste good. Any thoughts on what I did wrong there?
I made these because I’m having company over tonight (and can’t be trusted with sweets on my own), so I hope the chocolate turns out ok. I’ll be sure to let you know! Thanks for the recipe!
It’s hard to tell without having been there to witness the entire process and see the actual reactions of the mixture. My guess is perhaps it needed a little bit more water… Hopefully, they turned out great still.
Wow Sonia, these look incredible! So much healthy, rich goodness, who could possibly still want white flour/sugar treats?? 🙂
Wow these chocolate and coconut bars look delicious! Wish I had one to devour right now.. loving how guilt free they are especially.
Wow these coconut chocolate bars look amazingly good, Coconuts are some amazingly good fruits and these chocolate food bars with coconut look amazing
Just shared this on facebook. I have to wait until Christmas to make them though because I cannot be trusted to be alone with them 🙂 The pictures (as usual) are amazing!
Thank you Lisa! Hope you and your friends enjoy the Christmas treats!
These look absolutely amazing! Love all the different flavors mingling. I would add some cocoa butter somewhere. I’ve got a chunk that I love experimenting with. It would give these bars a white chocolate spin!
Wow, these look just fantastic. I am sure that all that work is worth it. So healthy and nourishing and so low in carbs. I definitely have to try it.
Hello, these look amazing! And I love that the ingredient list is simple and not hard to find ingredients. I hope you’re well, haven’t seen you post here for a while, not sure if you’ll look at comments
Have you tried freezing them? I assume it will work but just wanted to double check
Yes, they do freeze very well indeed!