Paleo Opera Cake
When I look at the length of this post and think back on the experience that the making of this Paleo Opera Cake has been, the first thing that comes to mind is NEVER AGAIN!
For this cake demands SERIOUS time and efforts in the kitchen in order to come to life, and I do mean serious. We’re talking several hours of active prep work and even more hours of resting / cooling time. In fact, I don’t think that you could make this cake in one go, even if you wanted to. This is the kind of dessert that will have you spend a lot of time in the kitchen over the course of several days. And it might even have you curse a little bit from time to time, too.
But… just one bite from the finished product will have you forget aaaaaall about that time you spent slaving in the kitchen.
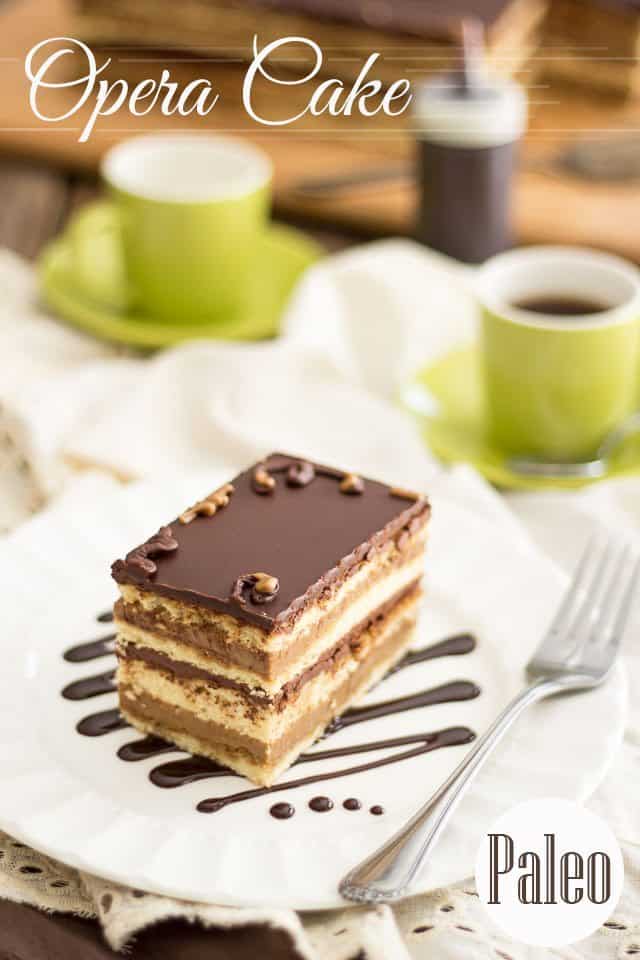
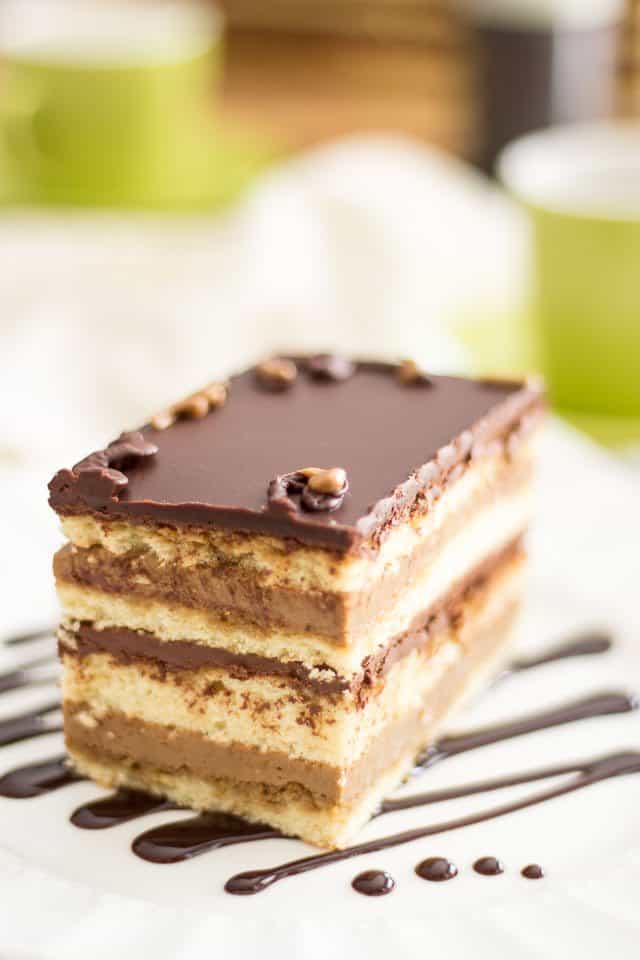
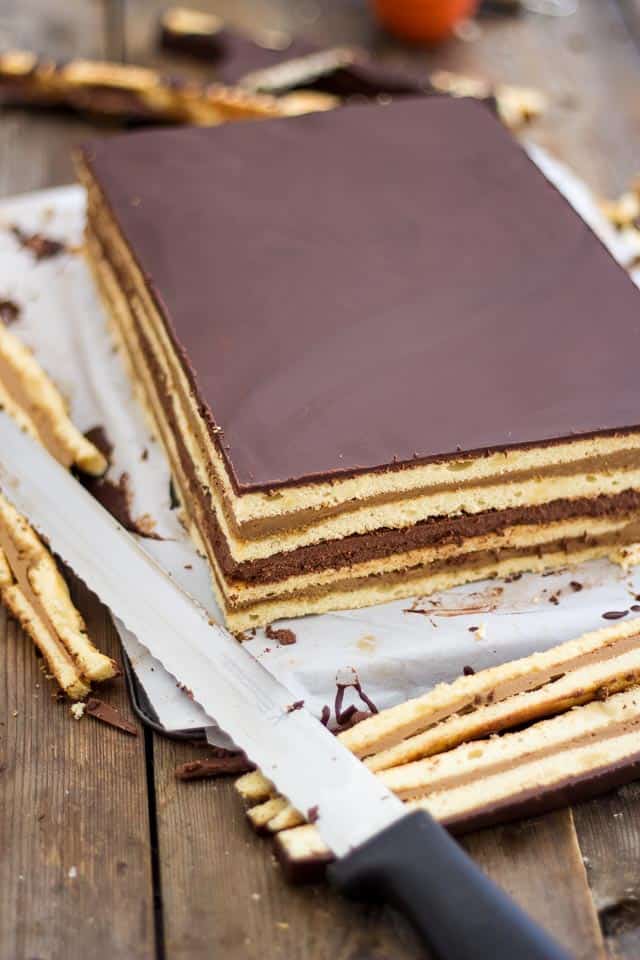
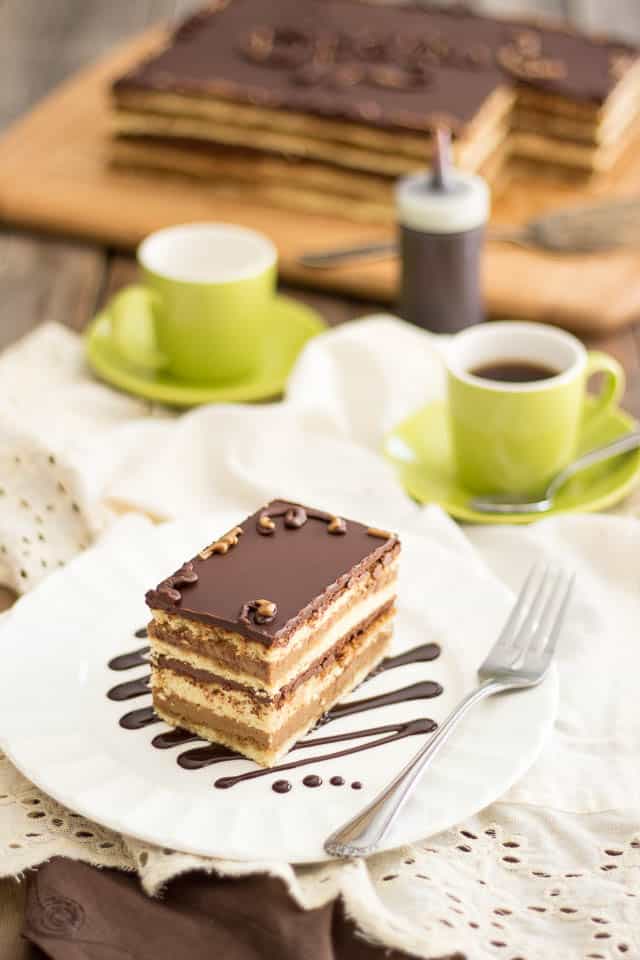
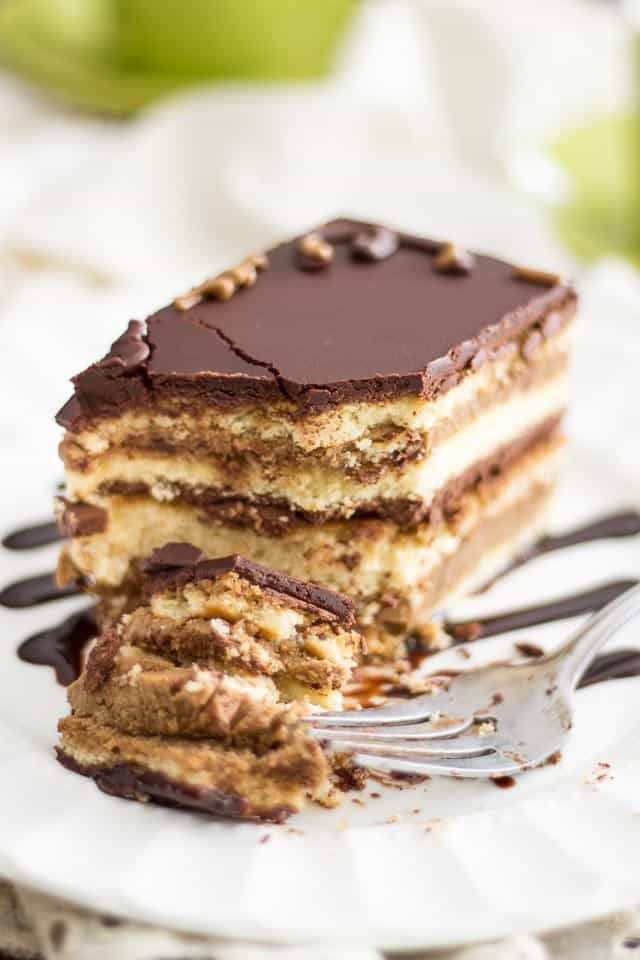
In case you’ve never tasted an Opera before, let me explain: this cake is pure bliss, pure heaven, pure perfection. We’re talking thin sheets of delicate Joconde almond cake drenched in sweet coffee syrup, topped with layers of melt-in-your-mouth coffee buttercream and silky smooth, intensely dark chocolate ganache. A luscious layer of semi-firm, dark chocolate glaze crowns this heavenly treat.
Honestly, Opera has got to be my ultimate favorite cake in the whole wide world, followed very closely by cheesecake. I’d already managed to create the perfect dairy free version of the latter, but I’d been putting off making the Paleo Opera because I knew just how much work it would be. I’m glad I finally worked up the courage to do it, though, ‘cuz honestly, it’s a masterpiece!
Okay, so like I said, this post is already super LOOOONG, and I’ve already talked way too much. I’ll now save my words to show you how to make the cake so you can judge for yourself just how crazy good it truly is.
One last thing, before we start: I couldn’t take pictures of all the steps, there would’ve been way too many, and some steps were also pretty hard to photograph, seeing as how I only have 2 hands, you know… so I tried to include the most relevant (or mouth watering) captures and I’ll explain the steps as best I can with words.
Ready? Let’s do this. For seriously, in the end, this cake might be a lot of work, but it’s so friggin’ totally worth it.
CAKE
Preheat your oven to 450°F.
Grease a 13″ x 18″ rimmed baking sheet with ghee or coconut oil and then line it with a piece of parchment paper that fits snuggly inside it. Make sure that the parchment paper adheres evenly to the entire surface, especially around the edges.
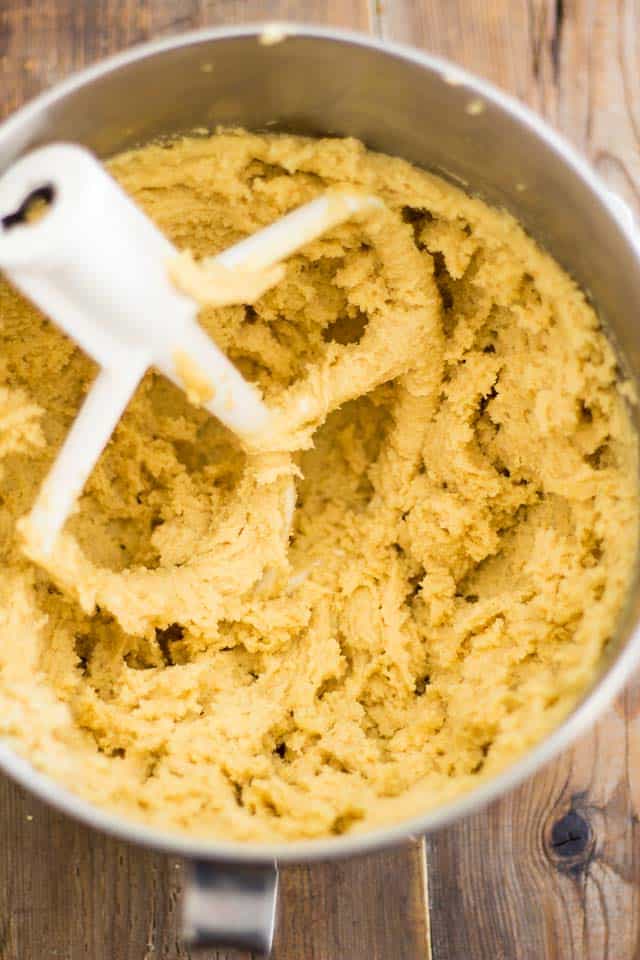
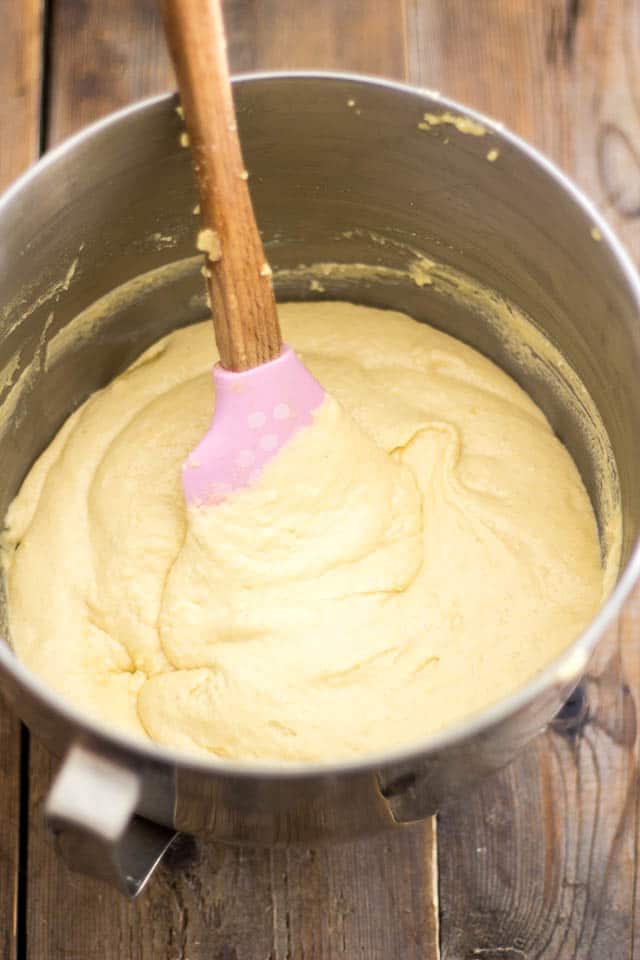
Then, combine the almond flour, tapioca starch, coconut flour, salt, honey and 4 eggs in the bowl of a stand mixer equipped with the paddle attachment. Beat on medium speed until well combined; the batter will be rather thick and sticky at this point, as pictured above.
Add 4 more eggs one at a time, beating until fully incorporated between each addition, and then keep mixing on high speed for about 5 minutes, or until the batter gets slightly emulsified and much lighter in color. (pictured above)
Delicately fold in the melted ghee with a rubber spatula, transfer to a large bowl and set aside.
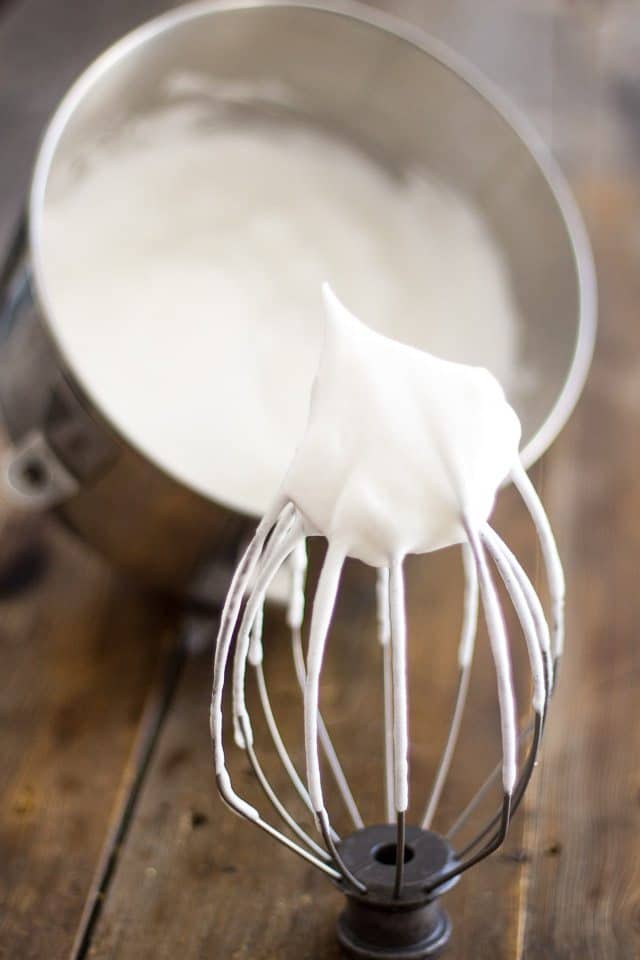
Quickly wash the bowl of your stand mixer and switch to the whisk attachment. Beat the egg whites and cream of tartar on high speed until the meringue becomes light and fluffy and stiff peaks form, about 4 to 5 minutes.
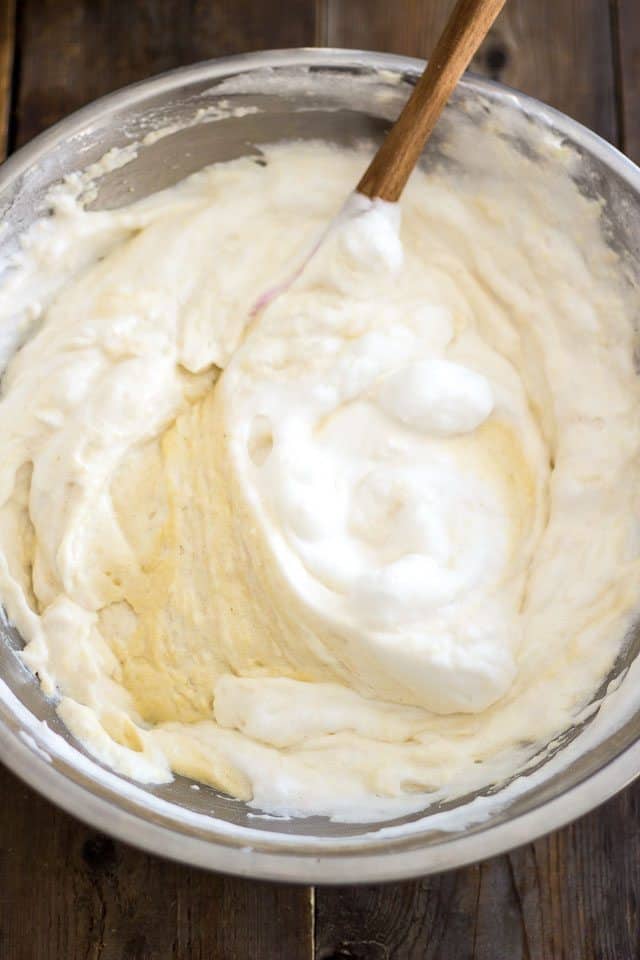
With a rubber spatula, delicately fold this meringue into the flour and egg mixture we previously reserved.
See how light and fluffy that batter is? Make sure you be very delicate with your folding so it remains that way. Keep folding until all the ingredients are well combined, no more.
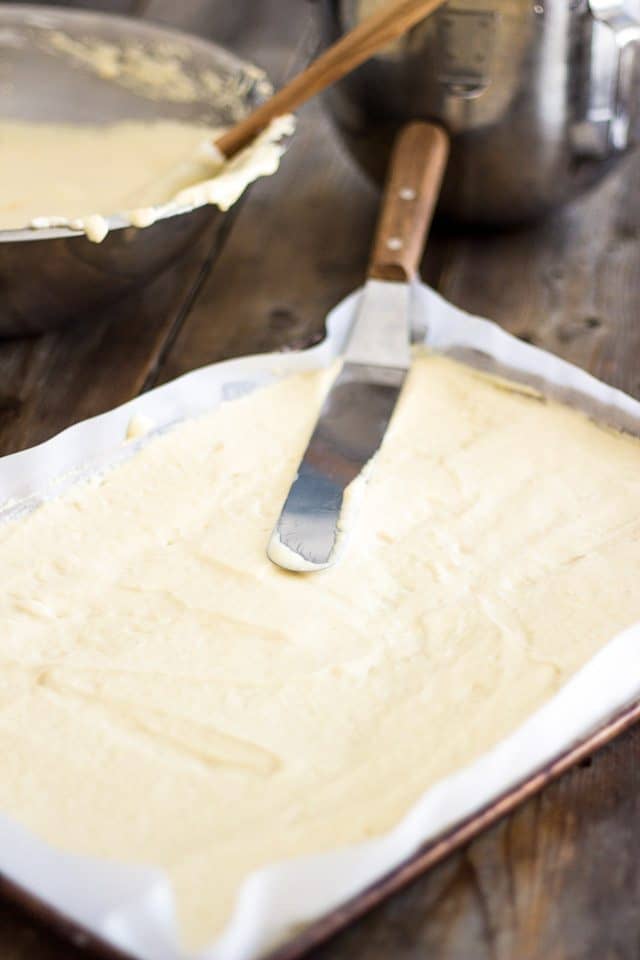
With the help of an offset spatula, spread half of this batter as evenly as possible onto the reserved cookie sheet…
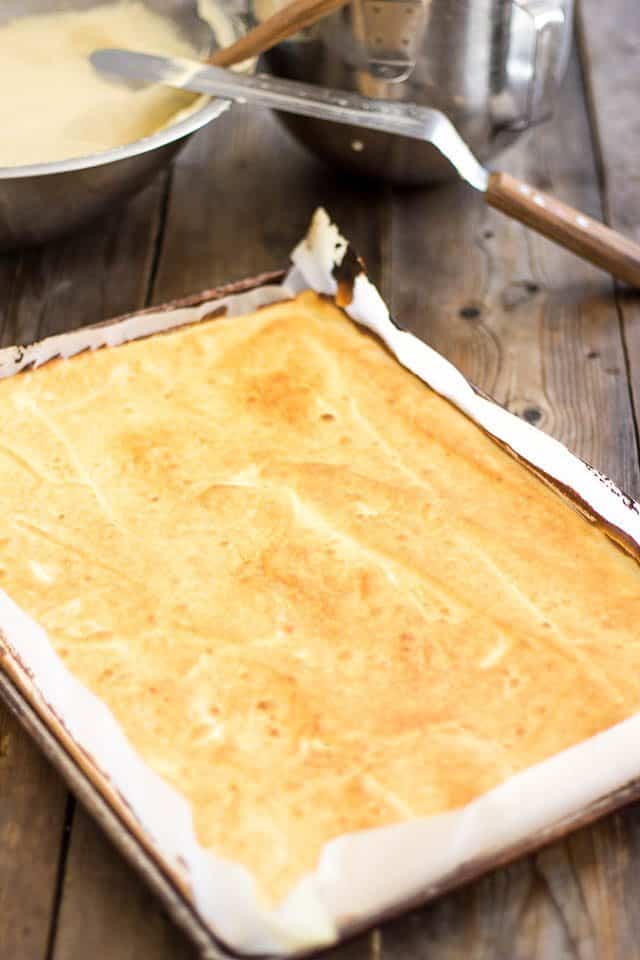
Bake your cake in the oven for 7 to 8 minutes, or until the top turns golden brown.
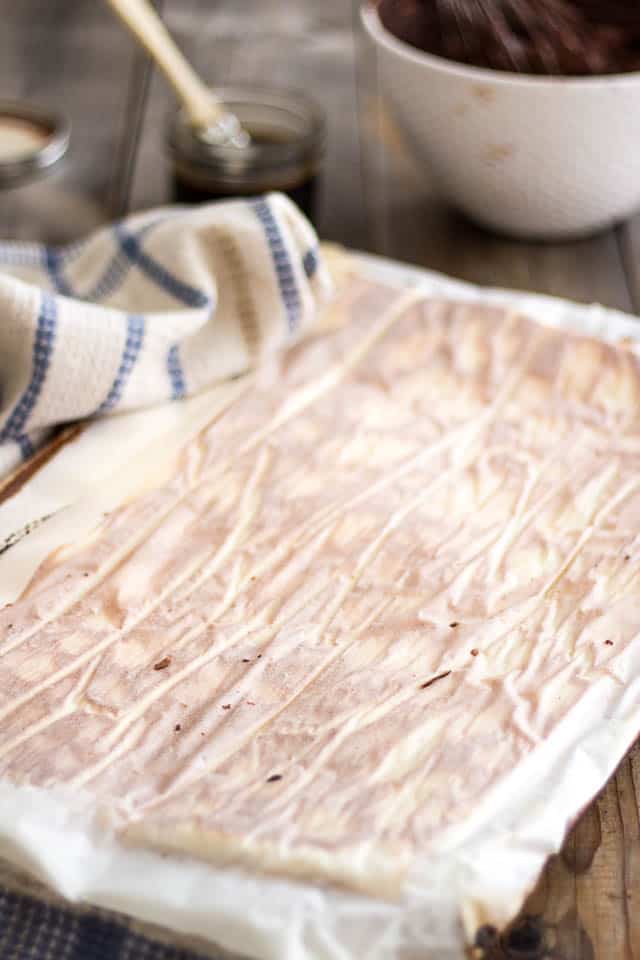
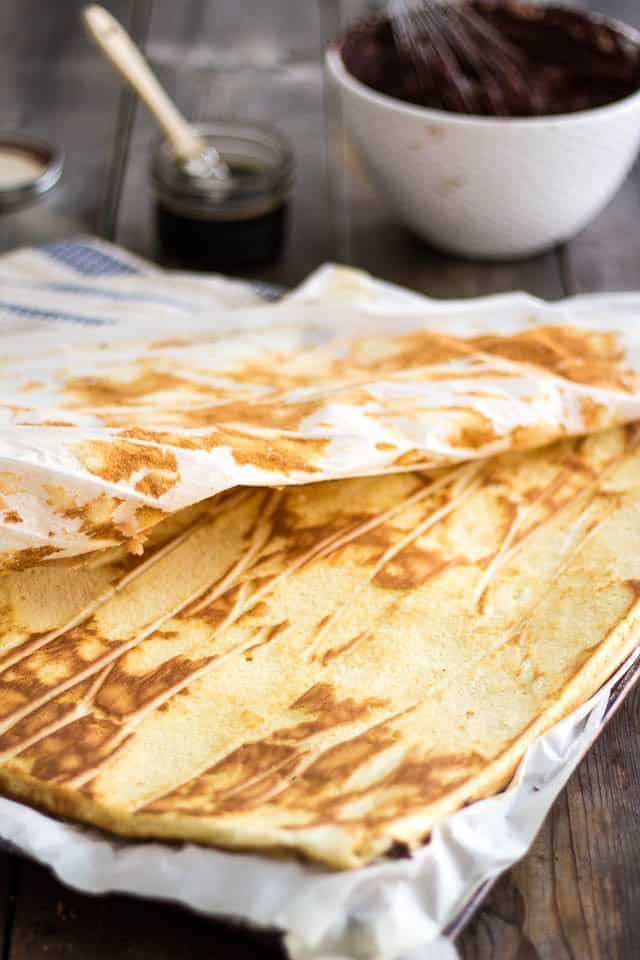
Turn your cake over onto a cooling rack or clean tea towel as soon as it comes out of the oven but do not remove the parchment paper just yet.
Let the baking sheet cool for a minute or two, then line it with parchment paper again and spread the remaining cake batter on it. Bake and flip onto a cooling rack or towel like you did with the first cake.
-You could, if you wanted to, put these in the fridge and continue working on your cake the next day. Just leave the parchment paper on and wrap the cakes in a clean tea towel before to place them in the refrigerator.
GANACHE
Chop the cacao paste very, VERY finely and place it in a medium sized mixing bowl.
Bring the maple syrup, coconut milk, salt and scraped vanilla seeds to a slow simmer over medium heat. (You can also throw the empty pod in there to infuse more flavor; just make sure you don’t forget to remove it when you pour this over your chocolate).
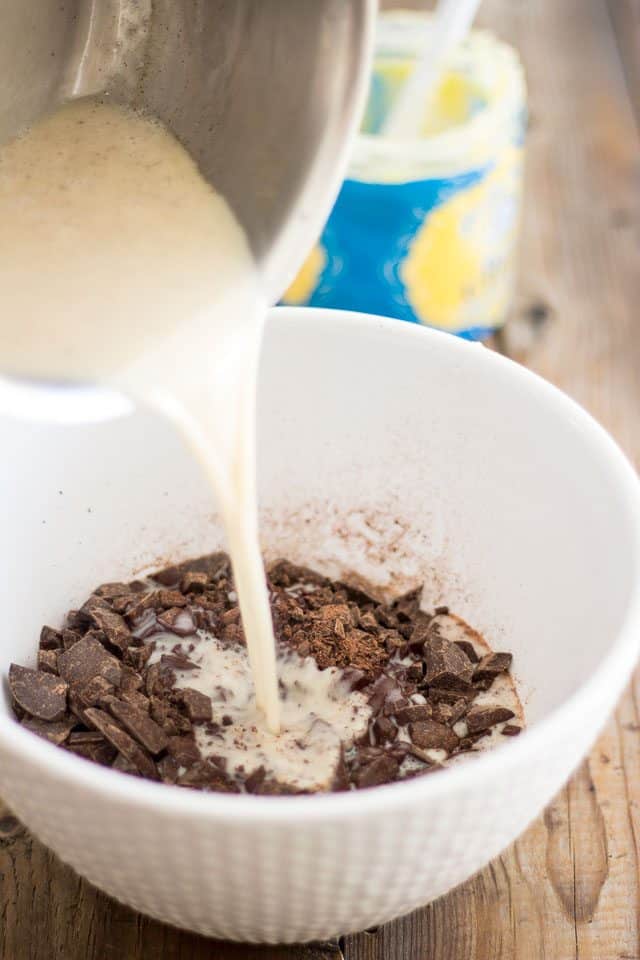
As soon as the creamy mixture starts to simmer, pour it over the chopped chocolate and let it sit for 5 minutes, undisturbed, to allow the chocolate to melt.
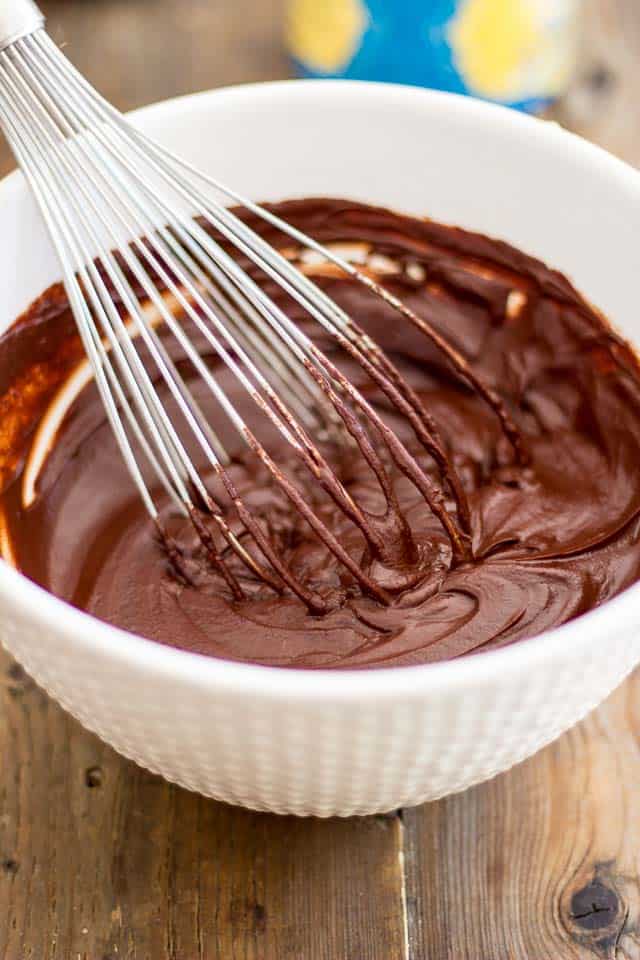
Stir very delicately with a whisk until the chocolate is completely melted and the ganache becomes smooth. Add the melted ghee and stir again very delicately until just combined, no more. Do not over stir, as ganache tends to separate when prepared with coconut milk. If that should happen, just give it a quick stir with a stick blender; it’ll become super smooth and silky again.
Let your ganache rest and thicken until it gets to a consistency similar to that of soft cream cheese. This could take up to a couple of hours, depending on the ambient temperature.
While that ganache is resting, let’s get working on the buttercream.
COFFEE BUTTERCREAM
Add the egg whites to the bowl of your stand mixer equipped with the whisk attachment and beat on medium speed for about 2 to 3 minutes, just to incorporate a little bit of air into them.
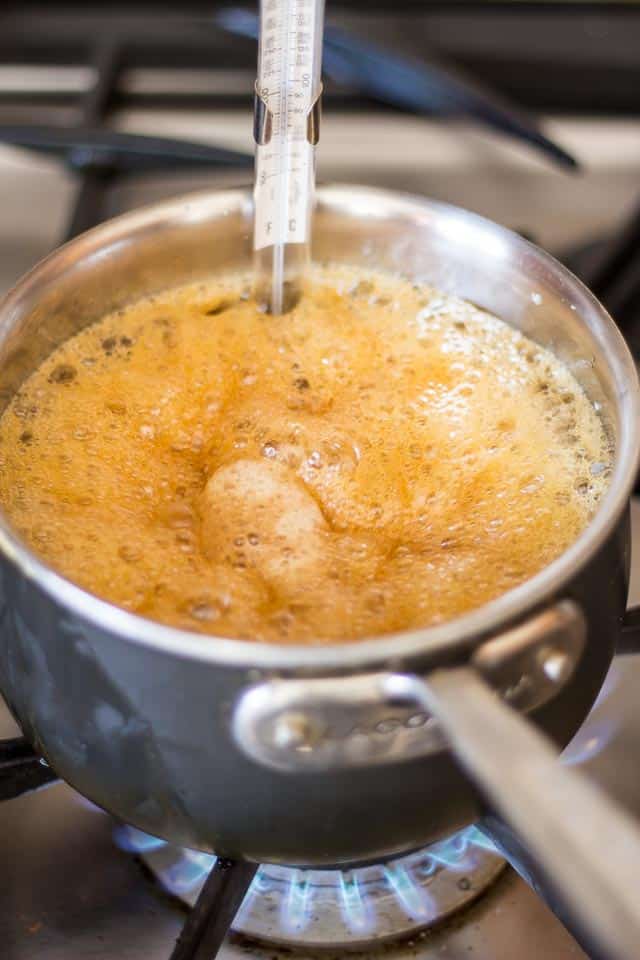
Meanwhile, bring the maple syrup to a boil over high heat and allow it to boil vigorously until it reaches 250°F (120°C) on a candy thermometer, about 5 to 8 minutes.
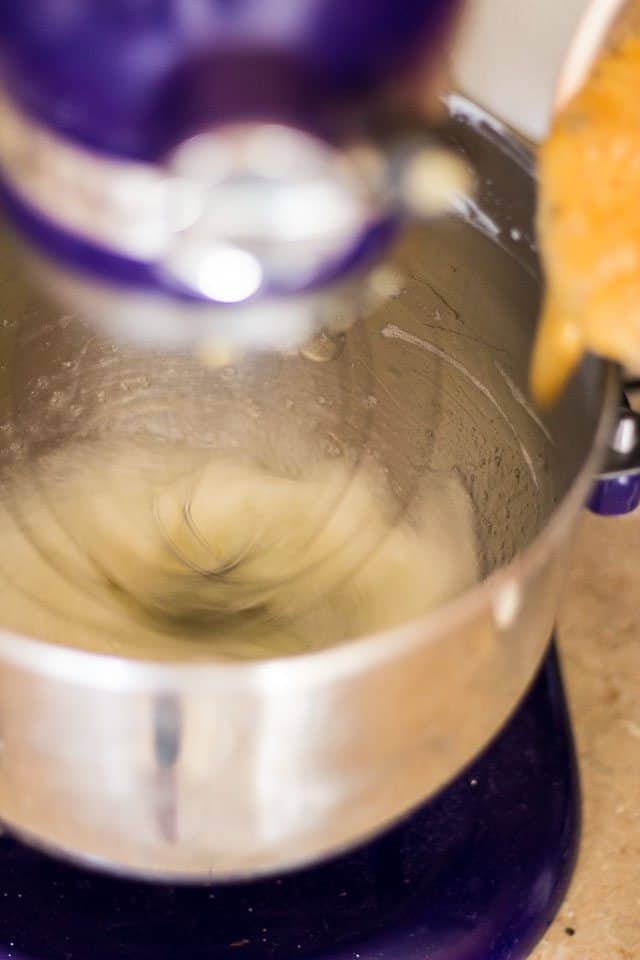
Start the egg whites on high and while the motor is running, pour the hot maple syrup down the side of the bowl in a slow, steady stream, being careful not to hit the beater with that syrup.
Now I tried to capture this process, but I haven’t had much success… as you can (maybe) see, I’ve got the saucepan resting right on the edge of the bowl and am allowing the syrup to go down right between the beater and the bowl. You don’t want the sugar to hit the beater, as it would send hot syrup flying all over the place and create a real big mess; but you don’t want it too close to the bowl either because then, it’ll instantly stick and harden against the coldness of the bowl and won’t get incorporated into the whites. So aim right between. It’s not that complicated, you’ll see.
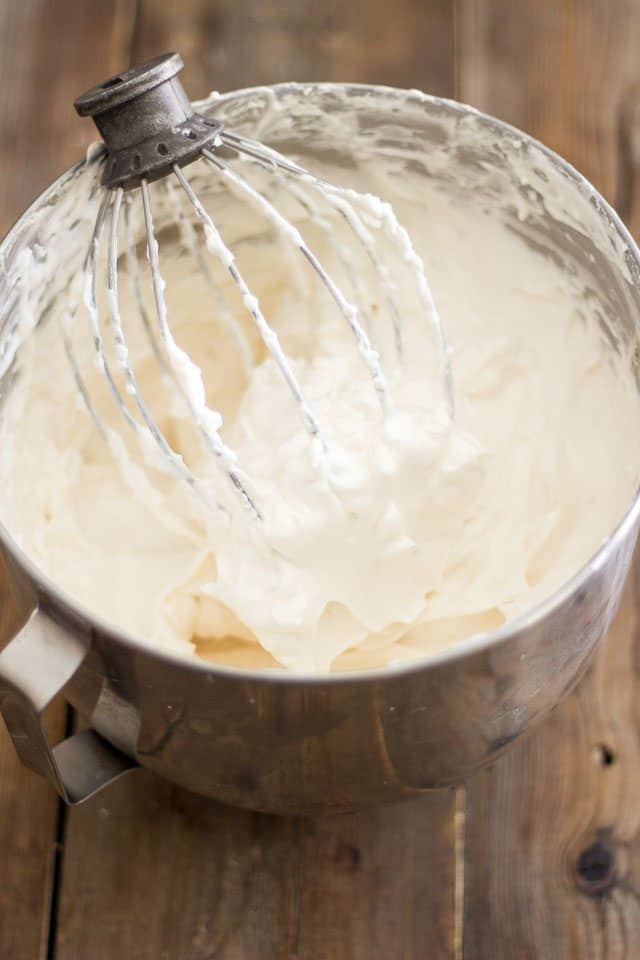
Once all the syrup has been incorporated, continue beating on high for 2 more minutes, then lower the speed to medium-high and continue whisking until the meringue completely cools down, about 10 to 12 minutes.
This is what your meringue should look like when it’s completely fluffed up and cooled down.
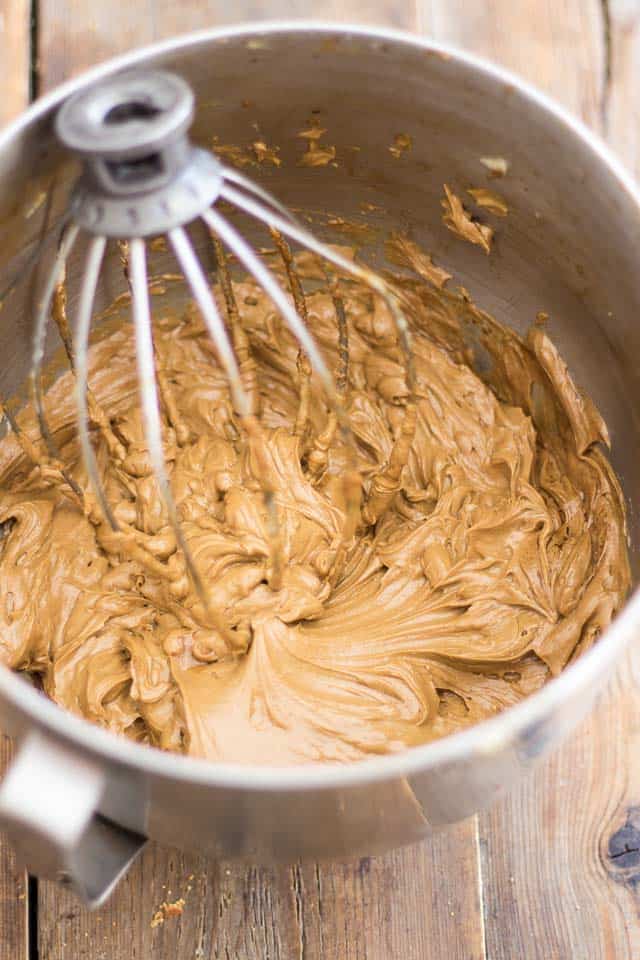
Now lower the speed to medium and, with the motor is still running, add the ghee and lard to the meringue, about a quarter of a cup at a time, allowing it to fully incorporate between each addition. Once all the fat has been added, crank up the speed to high and let the buttercream fluff up and tighten for about 2 minutes. In the meantime, dilute the instant coffee powder in the boiling water.
Lower the speed once again and add the coffee extract you just made to the buttercream, about a teaspoon at a time, then mix on high speed one final time for about 30 seconds.
Your buttercream is now ready to use, but if you find it to be a little bit too soft, you can chill it for 10 to 15 minutes and then give it a good whip to make it pliable again.
Now, if you chilled it for too long, it may become too firm and tend to separate when you try to fluff it up again. If that happened to you, don’t fret. Simply heat your buttercream slightly by placing the bowl VERY BRIEFLY over a double boiler, and then give it a good whisk on medium to high speed. If it’s still not soft enough, return the bowl to the double boiler for a few more seconds and then try whisking it again. Repeat as many times as necessary, but always keep the double boiler sessions very brief. You wouldn’t want that buttercream to melt, ‘cuz then you’d have to chill it again and start over.
And THAT may very well cause you to curse a little bit…
ASSEMBLY
Alright, so we now have cake, ganache and buttercream. We need coffee syrup. That one’s easy (thank goodness!) To make it, bring the maple syrup and water to a boil over medium heat. Stir in the instant coffee powder and let this syrup simmer for a minute; kill the heat and set aside.
And now we have everything we need to start assembling this baby!
Grab one of the cake sheets and remove the parchment paper that covers it. Cut the cake exactly in half crosswise (yes, go get that ruler, don’t you go try and guesstimate this. Measure!) and place one of the halves on a large cake board or inverted cookie sheet.
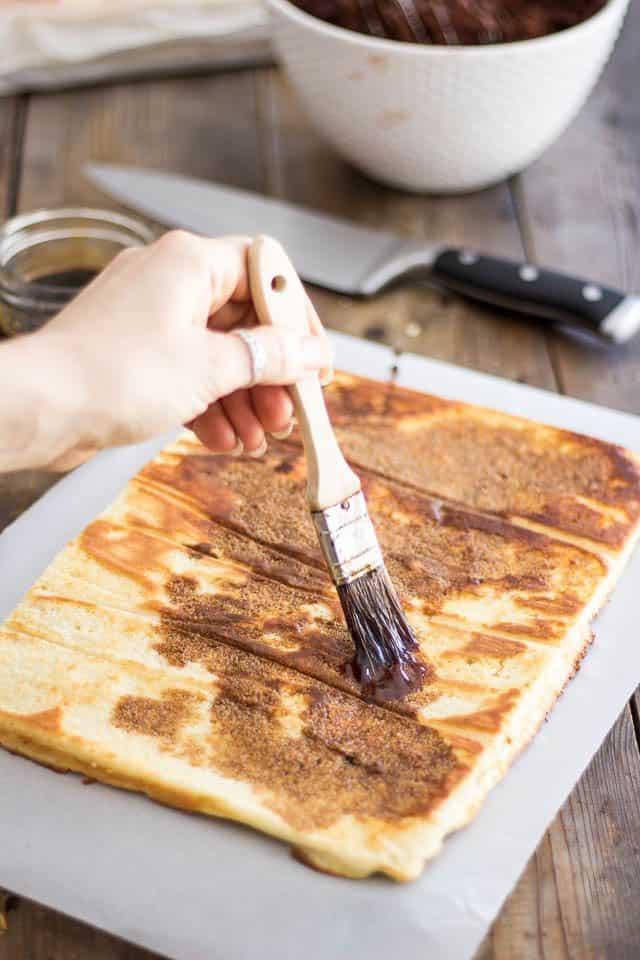
Brush the cake generously with the coffee syrup over its entire surface.
Don’t be afraid to go liberally with the syrup; the cake will soak it all up and will be that much moister as a result. Do make sure you have enough for all 4 cakes, though…
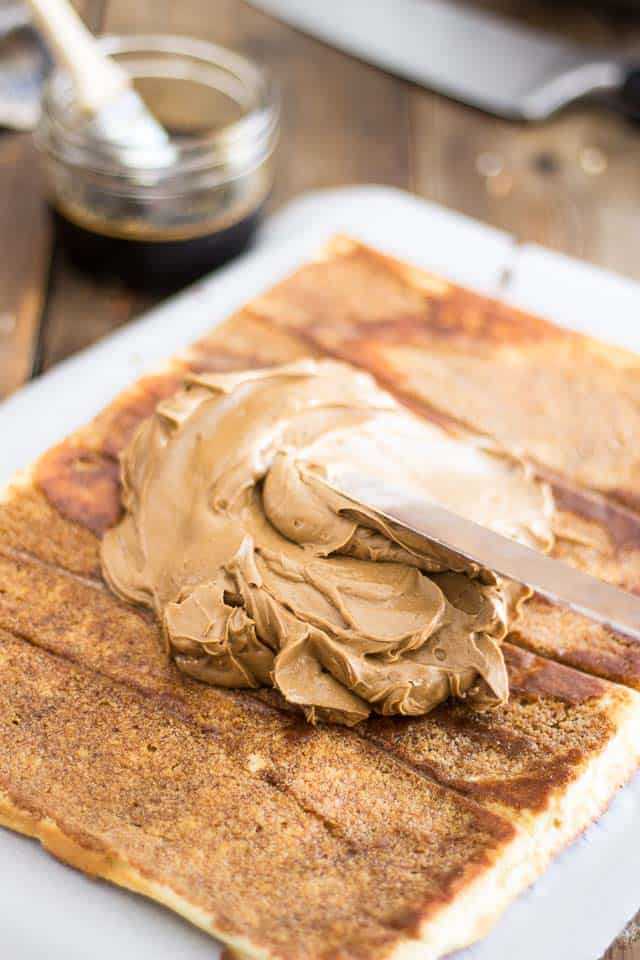
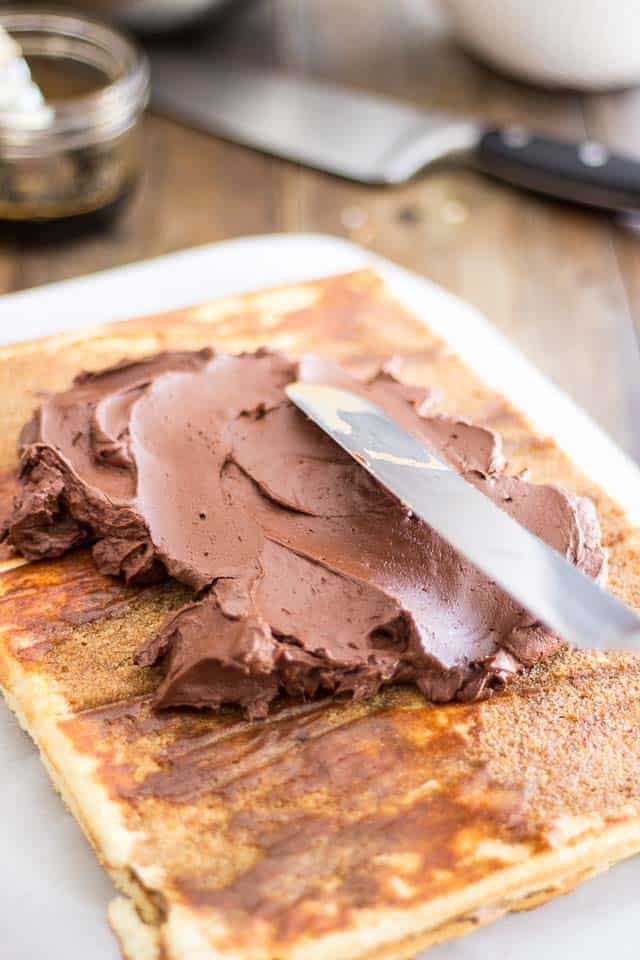
Now mound about half of the coffee buttercream right in the center of the cake…
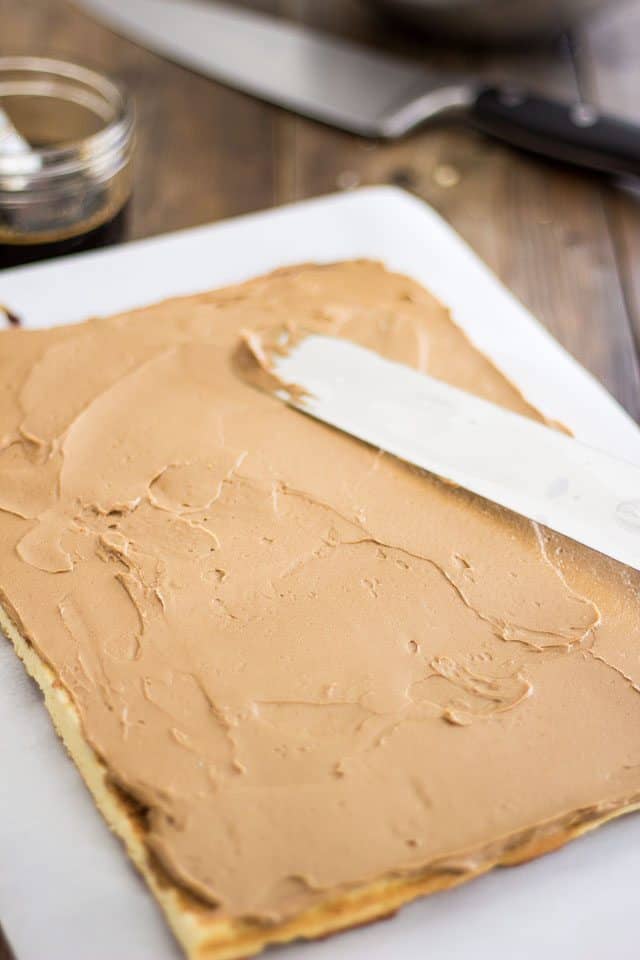
…and spread it thinly and evenly, all the way to the edge.
Yes, that layer will be thin and you may feel like it won’t be enough, but trust me, it will. This cake is seriously rich, you’ll see. A little goes a long way!
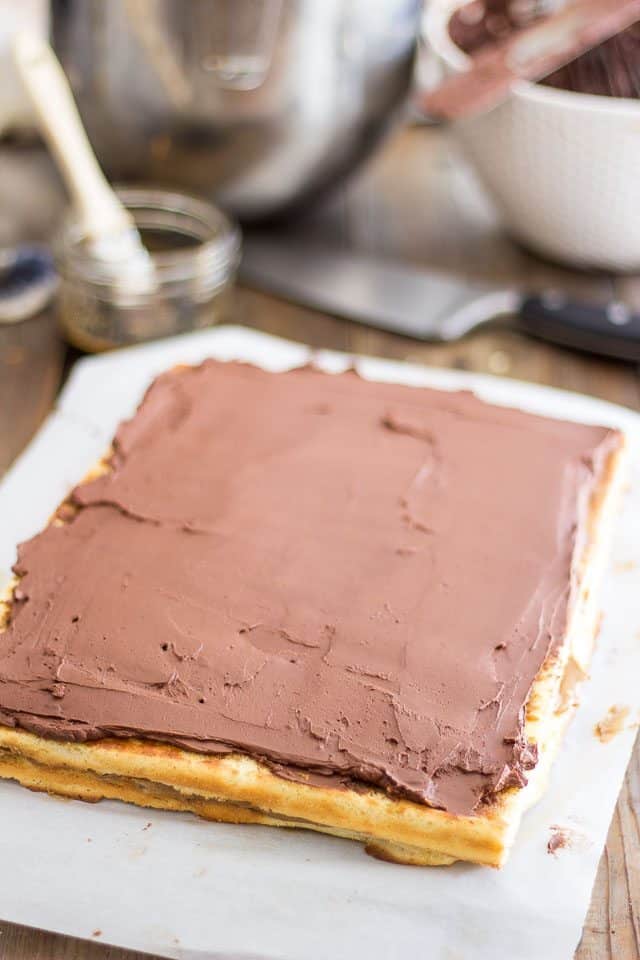
Place the other half of the cake over this first layer and again, brush generously with the coffee syrup. Then, mound about 2/3 of the ganache right in the center of the cake and spread evenly all the way to the edge.
If your ganache has gotten too thick to spread, use the same double boiler technique as the one described for the buttercream to make it soft and pliable again.
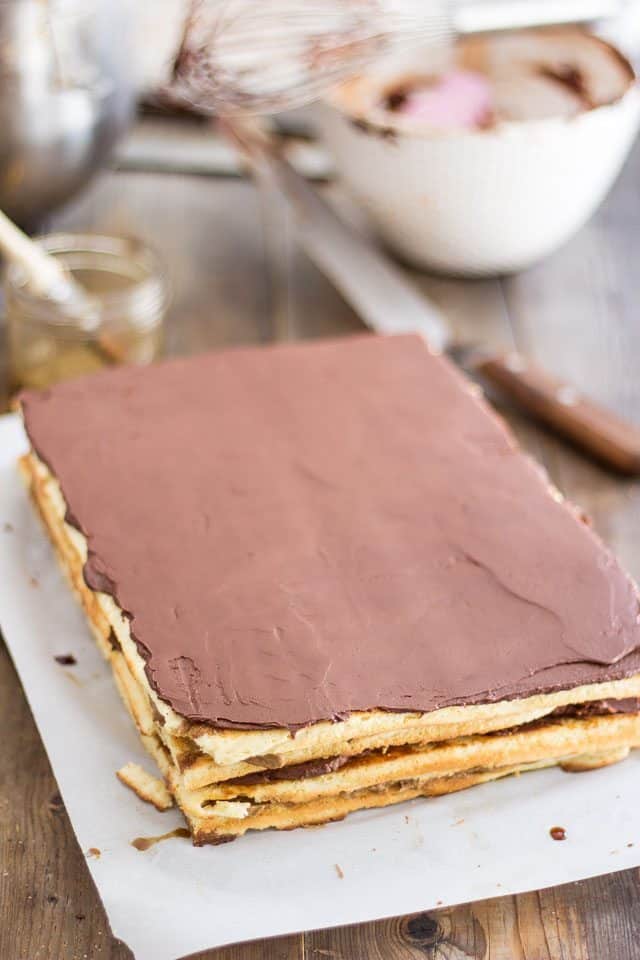
Repeat the process with the other cake sheet; remove the parchment paper, cut in half crosswise, add one of the halves over the 2 layers already in place, brush with coffee syrup, spread the rest of the buttercream and then add the final layer, topped with the rest of the ganache.
Oh, you might want to save a couple of tablespoons of both the buttercream and ganache to decorate the cake later…
Smooth the top of that final layer as best as you possibly can and then send your cake to the fridge to firm up and chill all the way through, at least 2 hours, but preferably 4 to 6 hours.
CHOCOLATE GLAZE
Phew. Told you this cake was a lot of work didn’t I? But we have finally reached what is the final step in the elaboration of this classic masterpiece.
Melt the cacao paste with the macadamia oil in the microwave in 30 second intervals and stir well for an equal amount of time between each session until it’s completely melted. About 3 to 4 sessions should do the trick. Don’t go overboard with this because you don’t want the chocolate to become real hot or worse, burn. In fact, your chocolate should barely feel warm when it’s done melting.
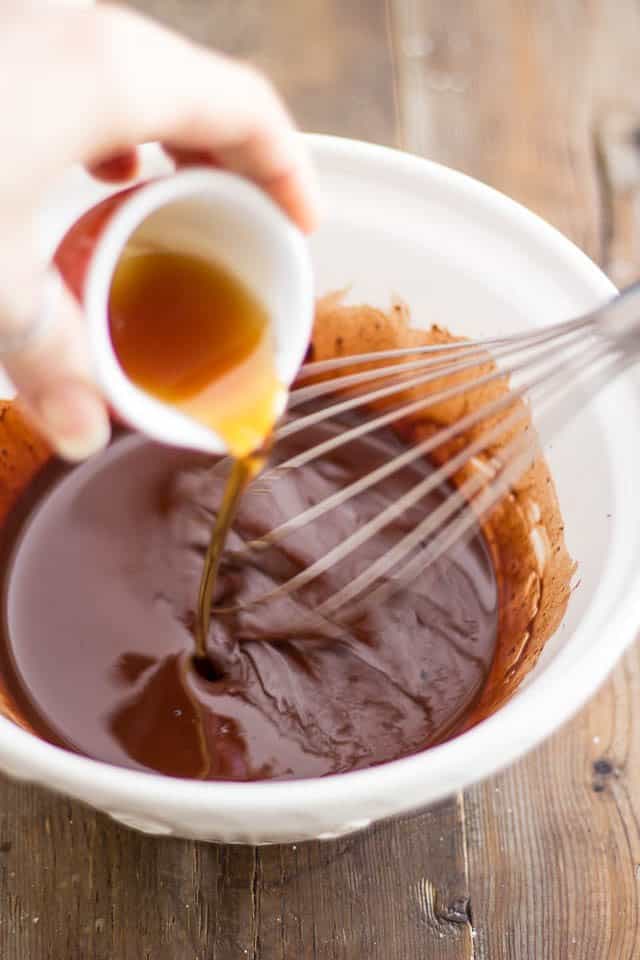
When the chocolate is fully melted, add the maple syrup and pinch of salt and stir delicately until smooth.
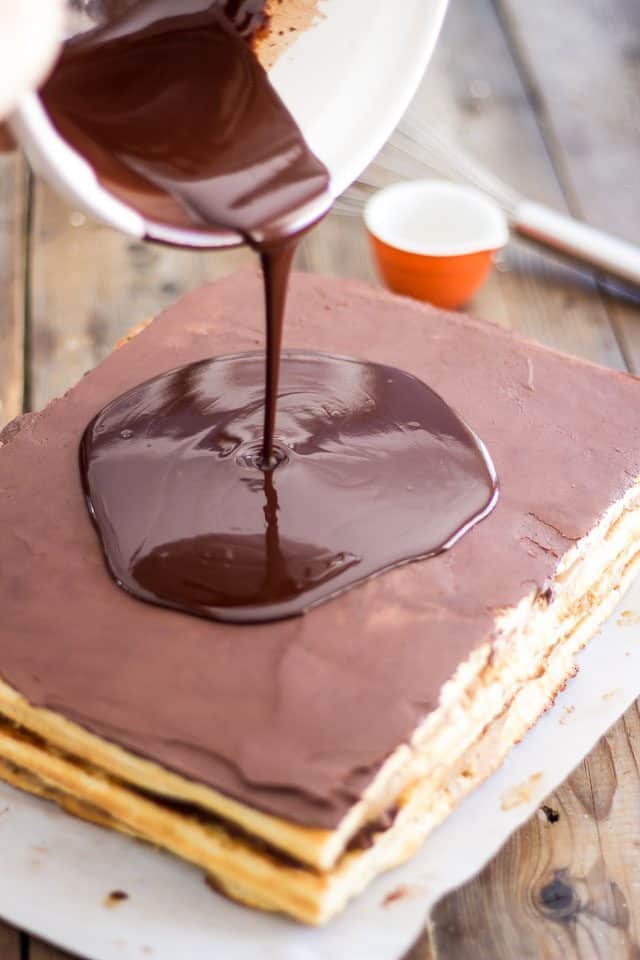
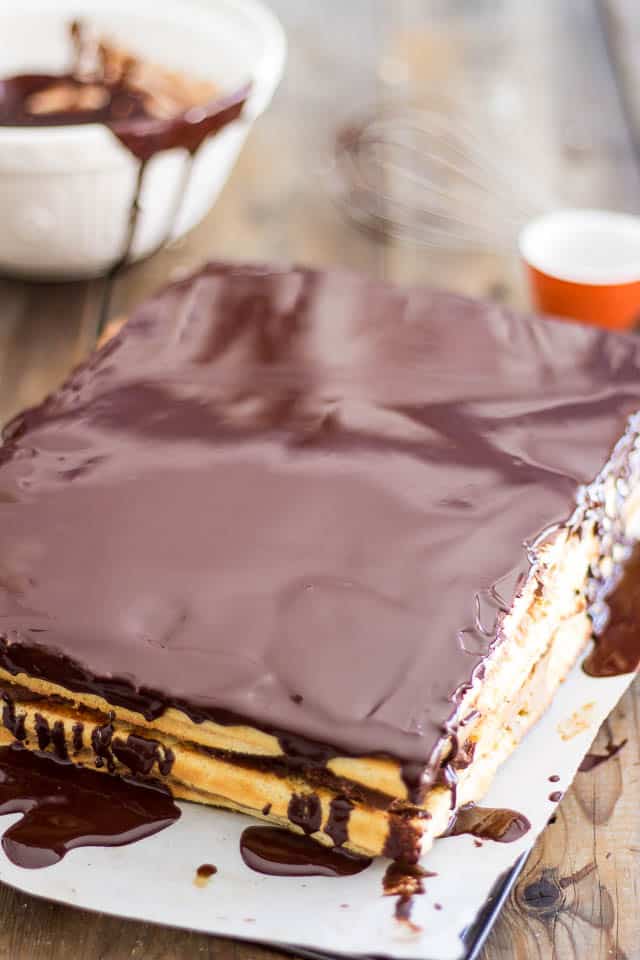
Pour that chocolate glaze slowly right in the center of your cake and then spread it all the way to the edge.
Don’t worry if it goes over a little bit, you’ll be cutting that out later. However, try to make that top as smooth and straight as possible. Every little defect will show once the chocolate sets.
You can gently tap your cake a few times against the table if you want, to help get rid of any potential defects and/or air bubbles.
Send the cake back to the fridge until completely set, ideally about an hour.
Take the cake out of the fridge and carefully trim out the edges with a long serrated knife.
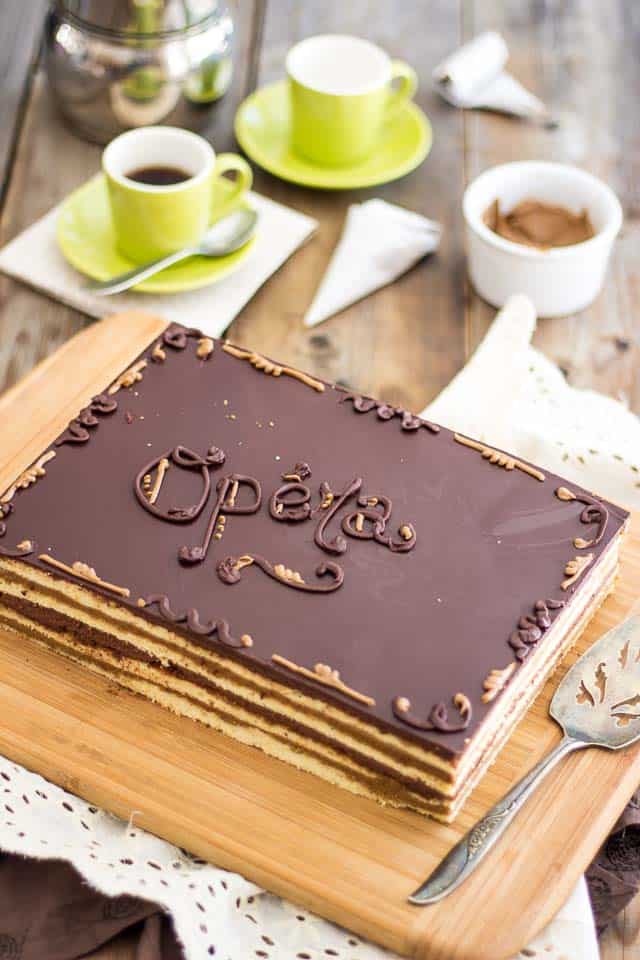
Transfer your cake to a clean cake board and decorate the top with the reserved ganache and buttercream.
Finally, you’re all done. But you know what? You can’t even enjoy your cake just yet… told you this baby would test your patience!
To be truly enjoyed at its best, Opera cake needs to sit at room temperature for at least 3 to 4 hours prior to serving. If you were to serve it cold, the ganache and buttercream would be way too firm and would not turn into this rich, soft and velvety morsel upon contact with your tongue, the way they’re supposed to.
Think of it this way. You wouldn’t dream of serving ice cream at room temperature, now would you? Same goes for Opera cake. You just CAN’T serve it cold.
Trust me. It’s taken you this long to make it, you’ve worked this hard to get this cake on your table… give it just a few more hours.
It’ll be totally worth the wait, I swear.
Paleo Opera Cake
Ingredients
CAKE (2 sheets - 13"x18")
- 3-2/3 cups almond flour, sifted
- 1 cup tapioca starch, sifted
- 1/2 cup coconut flour, sifted
- 1/4 tsp Himalayan salt
- 1/2 cup raw honey
- 4+4 large eggs
- 1/4 cup melted ghee
- 8 egg whites , from large eggs
- 1 tsp cream of tartar
GANACHE
- 9 oz organic raw cacao paste, finely chopped
- 1 cup full fat coconut milk
- 1/2 cup pure maple syrup, Grade B or Canada Medium
- 1 vanilla bean, seeds scraped
- 1 pinch Himalayan salt
- 1/4 cup melted ghee
COFFEE BUTTERCREAM
- 5 egg whites , from large eggs
- 3/4 cup pure maple syrup, Grade B or Canada Medium
- 13 oz ghee, at room temperature
- 3 oz lard
- 1/2 tsp Himalayan salt
- 1-1/2 tsp pure vanilla extract
- 3 tbsp instant coffee powder
- 1 tbsp boiling water
COFFEE SYRUP
- 1/2 cup pure maple syrup, Grade B or Canada Medium
- 3/4 cup water
- 2 tbsp instant coffee powder
CHOCOLATE GLAZE
- 3-1/2 oz organic raw cacao paste, finely chopped
- 1/4 cup macadamia nut oil
- 1/4 cup pure maple syrup, Grade B or Canada Medium
- 1 pinch Himalayan salt
Instructions
CAKE
- Preheat your oven to 450°F
- Grease a 13" x 18" rimmed baking sheet with coconut oil and then line it with a piece of parchment paper that fits snuggly inside it. Make sure that the parchment paper adheres evenly to the entire surface, especially around the edges.
- Combine the almond flour, tapioca starch, coconut flour, salt, honey and 4 eggs in the bowl of a stand mixer equipped with the paddle attachment. Beat on medium speed until well combined; the batter will be rather thick and sticky at this point. Add 4 more eggs one at a time, beating until fully incorporated between each addition, and then keep mixing on high speed for about 5 minutes, or until the batter gets slightly emulsified and much lighter in color.
- Transfer to a large bowl, delicately fold in the melted ghee with a rubber spatula and set aside.
- Quickly wash the bowl of your stand mixer and switch to the whisk attachment. Beat the egg whites and cream of tartar on high speed until the meringue becomes light and fluffy and stiff peaks form, about 4 to 5 minutes.
- With a rubber spatula, delicately fold this meringue into the flour and egg batter previously reserved.
- Using an offset spatula, spread half of this batter as evenly as possible onto the reserved cookie sheet and bake in the oven for 7 to 8 minutes, or until the top turns golden brown.
- Turn this cake over onto a cooling rack or clean tea towel as soon as it comes out of the oven but do not remove the parchment paper just yet.
- Let the baking sheet cool for a minute or two, then line it with parchment paper again then spread the remaining cake batter and bake and flip onto a cooling rack or towel like you did with the first cake.
GANACHE
- Chop the cacao paste very, VERY finely and place it in a medium sized mixing bowl.
- Bring the maple syrup, coconut milk, salt and scraped vanilla seeds to a slow simmer over medium heat. (You can also throw the empty pod in there to infuse more flavor; just make sure you remove it when you pour this over your chocolate)
- As soon as the creamy mixture starts to simmer, pour it over the chopped chocolate and let it sit for 5 minutes to allow the chocolate to melt.
- Stir very delicately until the chocolate is completely melted and the ganache becomes smooth. Add the melted ghee and stir again very delicately until just combined. Do not over stir, as ganache tends to separate when prepared with coconut milk. If that should happen, just give it a quick whizz with a stick blender; it’ll become super smooth and silky again.
- Let your ganache rest and thicken until it has a consistency similar to that of soft cream cheese. This could take up to a couple of hours, depending on the ambient temperature.
- While that ganache is resting, let’s get working on the buttercream.
BUTTERCREAM
- Add the egg whites to the bowl of your stand mixer equipped with the whisk attachment and beat on medium speed for about 2 to 3 minutes, just to incorporate a little bit of air into them.
- Meanwhile, bring the maple syrup to a boil over high heat and allow it to boil vigorously until it reaches 250°F (120C) on a candy thermometer, about 5 to 8 minutes.
- Start the egg whites on high and while the motor is running, pour the hot maple syrup down the side of the bowl in a slow, steady stream, being careful not to hit the beater with that syrup. Once all the syrup has been incorporated, continue beating on high for 2 more minutes, then lower the speed to medium-high and continue whisking until the meringue completely cools down, about 10 to 12 minutes.
- Lower the speed to medium and, with the motor is still running, add the ghee and lard to the meringue, about a quarter of a cup at a time, allowing it to fully incorporate between each addition. Once all the ghee has been added, crank up the speed to high and let the buttercream fluff up and tighten for about 2 minutes. In the meantime, dilute the instant coffee powder in the boiling water.
- Lower the speed once again and add the coffee extract you just made, about a teaspoon at a time, then mix on high speed one final time for about 30 seconds.
- Your buttercream is now ready to use, but if you find it to be a little bit too soft, you can chill it for 10 to 15 minutes and then give it a good whip to make it pliable again.
- If you chill it for too long, it may become too firm and might separate when you try to whip it. If that happened to you, don’t fret. Simply heat your buttercream slightly by placing the bowl VERY BRIEFLY over a double boiler, and then give it a good whisk on medium to high speed. If it’s still not soft enough, return the bowl to the double boiler for a few more seconds and then try whisking it again. Repeat as many times as necessary, but always keep the double boiler sessions very brief. You wouldn’t want that buttercream to completely melt.
COFFEE SYRUP
- Bring the maple syrup and water to a boil over medium heat. Stir in instant coffee powder and let this syrup simmer for a minute then kill the heat and set aside.
ASSEMBLY
- Grab one of the cake sheets and remove the parchment paper. Cut the cake exactly in half crosswise and place one of the halves on a large cake board or inverted cookie sheet. Brush the cake generously with coffee syrup over its entire surface. Don’t be afraid to go liberally with the syrup; the cake will soak it all up and will be that much moister as a result. Make sure you have enough for all 4 cakes, though…
- Now mound about half of the coffee buttercream right in the center of the cake and spread it thinly and evenly, all the way to the edge.
- Place the other half of the cake over this layer and again, brush generously with the coffee syrup. Then, mound about 2/3 of the ganache right in the center of the cake and spread evenly all the way to the edge.
- Repeat the process with the other cake sheet; remove parchment paper, cut in half crosswise, add one of the halves over the 2 layers already in place, brush with syrup, spread the rest of the buttercream and then add the final layer, topped with the rest of the ganache this time (you might want to save a couple of tablespoons of both the buttercream and ganache to decorate the cake).
- Smooth the top as best as you possibly can and send your cake to the fridge to firm up completely, at least 2 hours, but preferably 4 to 6 hours.
CHOCOLATE GLAZE
- Melt the cacao paste with the macadamia oil in the microwave in 30 second intervals and stir well for an equal amount of time between each session until it’s completely melted. About 3 to 4 sessions should do the trick.
- When the chocolate is fully melted, add the maple syrup and pinch of salt and stir delicately until smooth.
- Pour that chocolate glaze slowly right in the center of your cake and then spread it all the way to the edge. Don’t worry if it goes over a little bit, you’ll be cutting that out later. However, try to make that top as smooth and straight as possible. Every little defect will show once the chocolate sets.
- Send the cake back to the fridge until completely set, ideally about an hour.
- Take the cake out of the fridge and carefully trim out the edges with a long serrated knife
- Transfer your cake to a clean board and decorate the top with the reserved ganache and buttercream.
- Let the cake sit at room temperature for 3 to 4 hours prior to serving. If you served it cold, the ganache and buttercream would be very firm and would not melt in your mouth the way they’re supposed to.
Nutrition
If you’ve tried this recipe, please take a minute to rate the recipe and let me know how things went for you in the comments below. It’s always such a pleasure to hear from you!
You can also FOLLOW ME on PINTEREST, FACEBOOK, INSTAGRAM and TWITTER for more delicious, healthy recipes!








25 Comments on “Paleo Opera Cake”
Holy cow.
From the looks of it. . .it is very clear that this one took tons of effort (and patience) to create. But it looks like it was worth it as it is a feast for the eyes. A pure and simple work of art. I hope you took loads of time to admire it before you devoured it.
Haha! It’s hard to stop and take the time to admire this cake when it’s right there in front of you… good thing I took pictures! (which was even harder, seeing as how I couldn’t even touch it!)
Wow! you need to change your profile pic to you dressed as Wonder Woman. This looks delicious and amazing beyond words! Honestly, I don’t think I crave cake enough to try this, however … 😉 all those flavours just burst from the screen! Thank you for the patience and creativity to make this.
Hahaha! Too funny, Leslie! Thank YOU for your kind words! 🙂
Looks amazing! Can’t wait to try it out for the next big occasion. Right now I’m completing a whole 30 thanks to your post about it but trust me, when the time is right this cake is in my future .
Glad to hear I’ve inspired you to give the Whole30 a try! How are you liking it so far?
Wonderful job in photos and explaining…it looks beautiful…will try, one day! At least now, I don’t feel quite so intimidated. Thank you!
Thank you, Donna, that is very kind of you to say! Hope you enjoy the cake if you ever decide to give it a go!
Hello Sonia,
Hope you’re doing well!
Really appreciate your recipes!
I want to know the bestest alternatives for Eggs,Honey,Maple and Melted Ghee in the Recipe.
Thank you
WOW! You so came through on your announcement. This looks Ah- mazing and maybe I will go to the trouble of making it for a very special occasion.
Good work though!
Thank you Beth! I hope you do work up the courage to give this baby a try, someday! Would love to hear your thoughts!
Thanks Sonia, when I make it I will be sure to let you know! I am preparing to move to North Carolina from Ohio so it will definitely not be before then and probably not til the holidays.
Wow, that’s a big change! You definitely have more important things to think about than cake, that’s for sure. Good luck with the move, Beth!
Wow! You are amazing! This is quite a feat you performed! I’ve been missing Opera Cake ever since I changed my diet. You have made my day! I can’t wait to try this for a special occasion! Thank you for your hard work and time in creating this beauty!
The pleasure is all mine, Aria. After all, I got to enjoy the cake after I was done taking all the pictures… 😉 I’d been craving Opera Cake for so long now, it was about time I tackled the challenge!
If you ever do give it a try, make sure to let me know how you liked it!
Opera is hands-down my favorite cake in the entire world. Love that bitterness from the coffee buttercream and chocolate ganache. Your recipe is so detailed and well illustrated, thanks so much!
I love your blog and would like to talk to you about becoming a Chicory recipe partner. Are you interested?
I’ll definitely have to look it up. Thanks a bunch for the offer! 🙂
Hi Sonia, should you run into any questions, feel free to shoot me an email at chi@chicory.co . I’d love to chat!
Hi Sonia
This looks awesome and I can’t wait to make it!
However, I’m wondering if we could replace the ghee with oil? I’m allergic to dairy products so I think ghee (clarified butter) is out of the question for me. Thanks!
Sorry Cheryl, that really wouldn’t work. However, you shouldn’t have a problem with ghee even though you are allergic to dairy, since ghee has been stripped of all the milk protein that’s normally found in butter. Most people who are lactose intolerant will tolerate ghee.
Does anyone happen to have the macros handy? It’s an awful lot of ingredients to calculate- so just wondering if anyone already has!
Hi Sonia, I made this cake and it was truly amazing! I want others to know that it wasn’t all that difficult to make . . . she literally spells it out for you and includes the length of time it should take to get to the right consistency – THANK YOU Sonia, for including the minutes. That really helps beginner like me.
Unfortunately, I ran into a few hiccups, so I hope its okay to post my experiences:
I couldn’t get ahold of cocoa “paste”, I swapped the paste 1:1 for unsweetened chocolate morsels (chocolate chips). The ingredients were cocoa mass, cocoa butter, 100% cocoa. This worked like a charm.
Something went wrong with my “cake layer”, for some reason it didn’t absorb the coffee syrup, so I poked holes in the layer to let the syrup in. Meh, didn’t work as well as I’d hoped, I was in a hurry. I’m wodering if I over baked the layers? Not sure. If I had more time, I would have let the layers soak directly in the syrup in the pan. (And ever so carefully move it to assemble). My layer WAS soft, but it should have been softer with the syrup flavor infused.
The only other problem I had was the coffee buttercream. The ghee that’s available where I am, is in a jar – half liquid, half solid, and lumpy solid. It wasn’t a smooth fat consistency. I couldn’t get it smooth and it took longer to thicken to a spreadable consistency. I’ll bet it would have been okay if I had used just the lard for this layer.
Regardless, the taste was still amazing. All the other layers worked out beautifully, everyone loved it. Your instructions were perfectly detailed. The hiccups were all on me . . . Still giving it 5 stars! My husband helped me make this . . . It REALLY wasn’t hard at all, just a bit time consuming – but totally worth it!! Thank you 🙂
Thank you so much Amber for your kind words and for taking the time to share your experience in so much details! I’m happy you ended up loving the cake despite the hiccups, and finding it well worth all the efforts. Opera is definitely one of my favorite cakes in the whole world, and probably my favorite “non-cheese” cake. About those hiccups you encountered, cacao paste is in fact practically the same as unsweetened chocolate, but I’m not a fan of using the term unsweetened chocolate, because then it makes it sort of ok to use the baking kind, and there are usually all kinds of undesirable added products in this stuff… I’m happy to hear that the chips did the trick for you.
As for the cake layer not absorbing the syrup, that’s weird. Did you brush the syrup on the side from which you had removed the parchment paper? That side should be totally “porous” and super absorbent… And I wouldn’t suggest using only lard, as lard isn’t really palatable. Maybe try using 1/3 lard,2/3 ghee, whip them up real good and refrigerate if needed, then whip again until you get a good consistency.
If you ever have the patience to make it again, please let me know how it went. Fingers crossed that it goes without any hiccups this time! 🙂
Made the recipe today, doing different steps at different times when I had a few minutes. Worked out great! The ganache and buttercream were too warm when I spread the layers, so things were uneven (definitely need to chill both to make even layers!), and I found the sponge wasn’t as fluffy as I would have liked. These are all technique issues, though—the recipe worked great as written! A real showstopper.