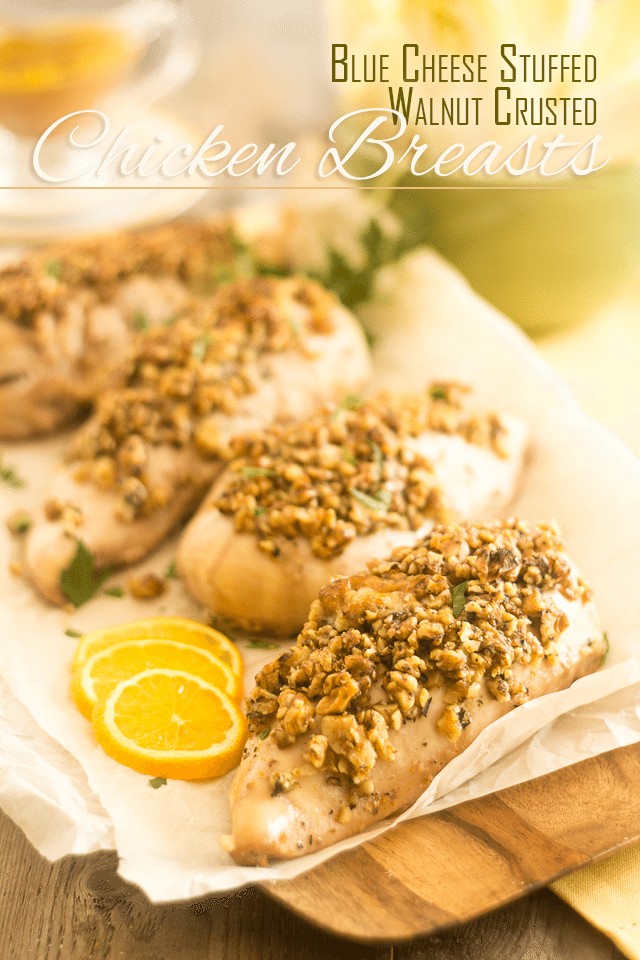
Blue Cheese Stuffed, Walnut Crusted Chicken Breasts
Yes, you read that right. The title does mention Blue Cheese… which can only mean one thing: cheese is on the menu today.
I know, I know, it’s not your optimal health food choice, and it’s not exactly paleo but what can I say? Cheese is one thing that I still do indulge in from time to time and I’d been having such a major craving for Blue Cheese, I just had to give in.
The sad thing is, though, good quality cheese is really hard to come across in my part of the world. There are all sorts of crazy laws in Canada about pasteurization and selling raw milk is not allowed, which makes raw cheese particularly hard to find.
Not impossible, but hard. And well, of course, it’ll cost you an arm and a leg.
Still, I managed to get my hands on this insanely pungent Organic Goat Gorgonzola made by a local artisan, as well as a super creamy and fresh Organic Ricotta, although that one had been made from cow’s milk.
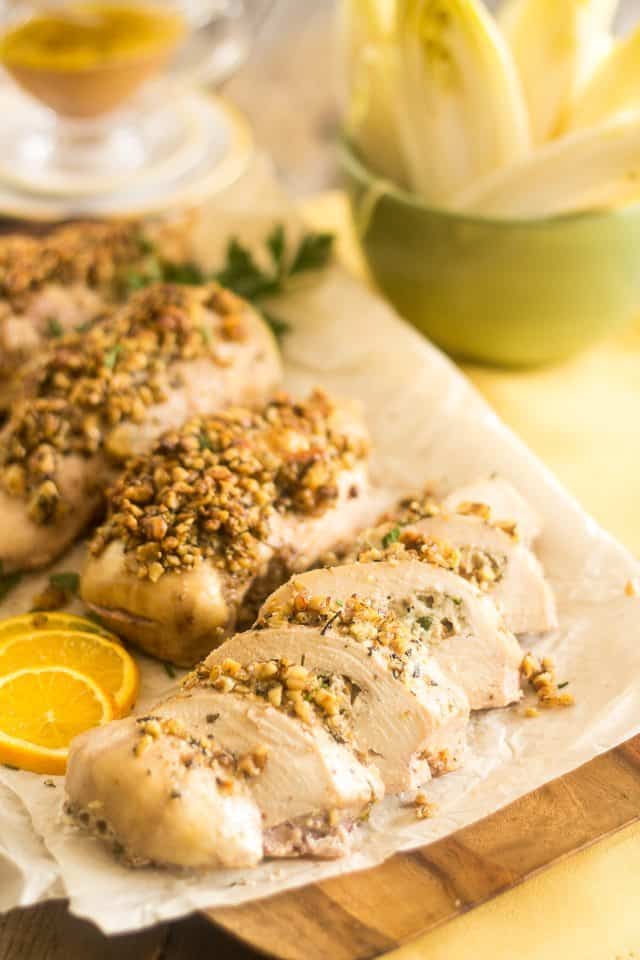
My efforts were greatly rewarded with one of the best tasting chicken dishes I’d ever had.
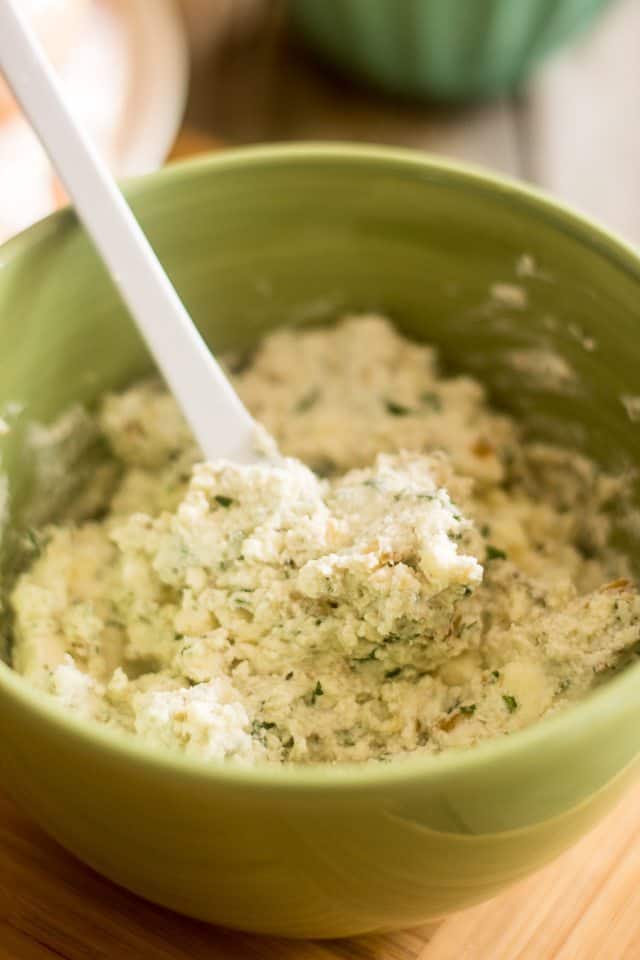
To make the cheese stuffing, simply throw all the ingredients in a bowl and mix delicately with a spoon until well combined.
Make sure that your walnuts are chopped very finely here, as if you keep the pieces too big they might get stuck later when you pipe that mixture into the chicken breasts. Also, do be gentle when mixing: you wouldn’t want to end up destroying all your beautiful chunks of blue cheese.
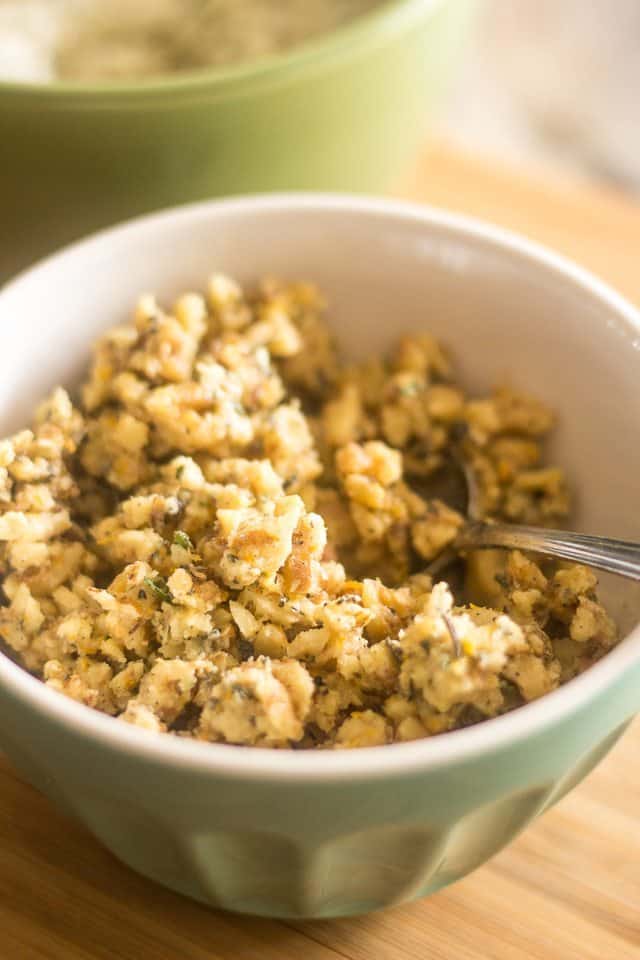
Then, to make the walnut crust, mix walnuts, ghee and other aromatics in a separate bowl.
Now put those 2 bowls aside and as far away from you as possible, else you might be tempted to taste test a little too often. You know how sometimes, flavors develop in a matter of minutes, or even seconds… and you have to check just to see if, you know, perhaps the flavor has improved some in the last minute?
Yeah… put those away!
Okay, so now that you have put a safe distance between you and those bowls, it’s time to create little pockets for the filling in our chicken breasts.
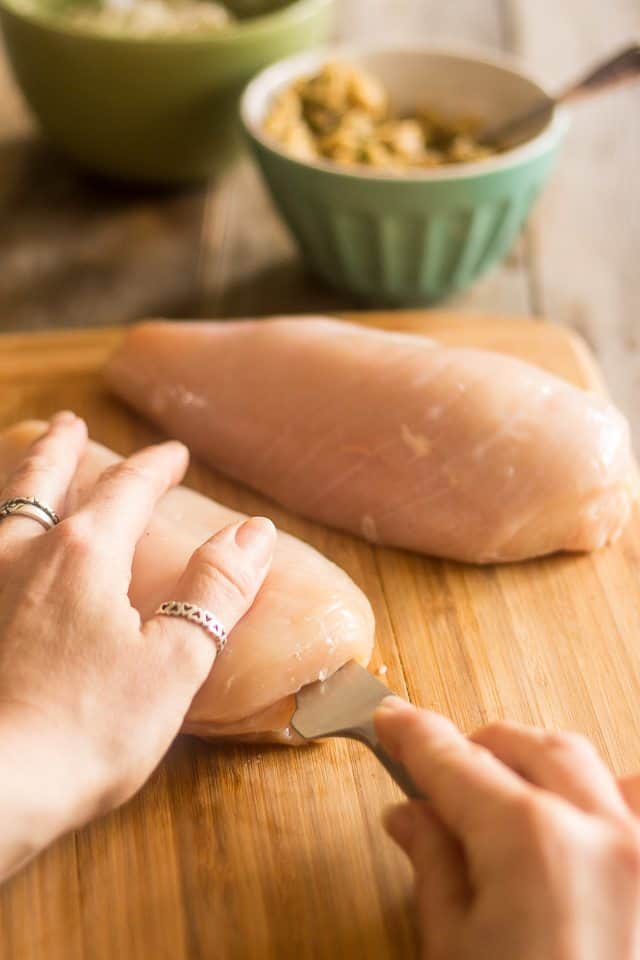
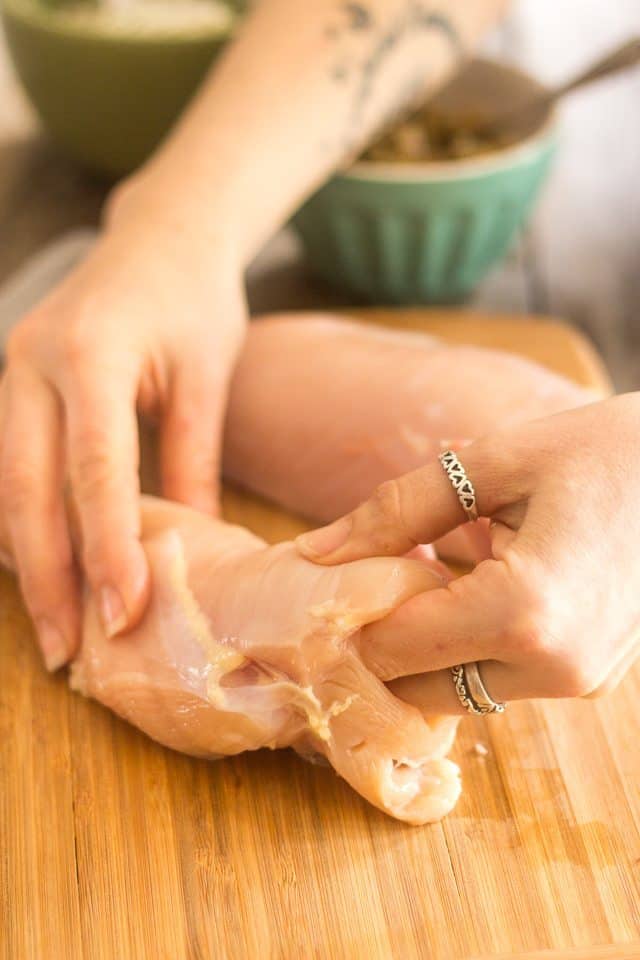
With a sharp boning or petty knife, (or any long, narrow and pointy knife) make an incision in each of the chicken breasts. Start at the thickest end and slowly work your way to the other end, while being careful not to let the blade go all the way through.
The goal here is to create a nice pocket for that cheese filling to go in and we wouldn’t want that filling to escape through all kinds of holes, now would we?
Then you’ll want to insert one or two fingers in that pocket you just created to sort of stretch it a little bit and make sure that the passage is unobstructed all the way to the end.
Hey, hold the silly jokes here, alright? 😉
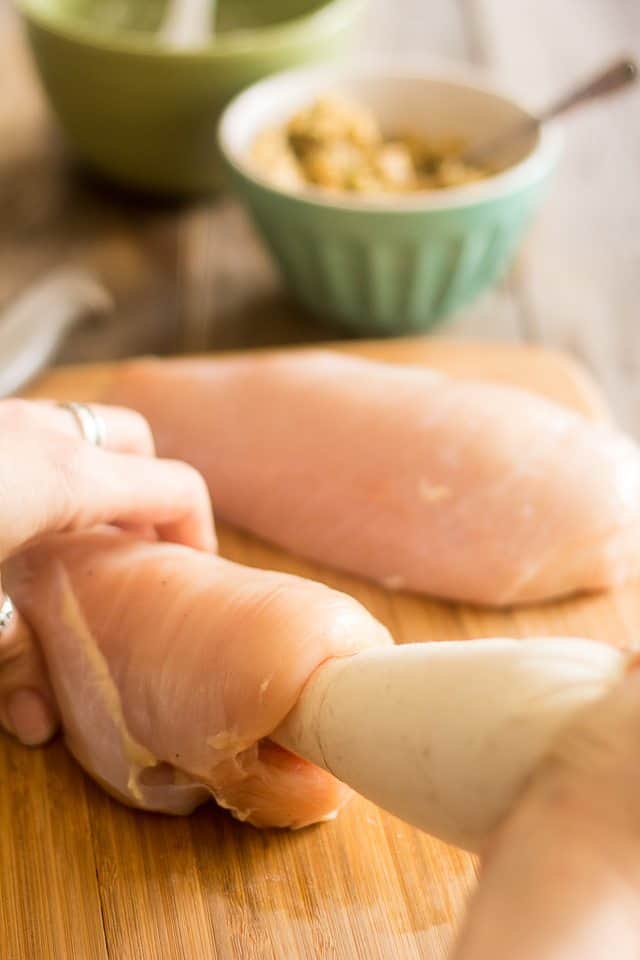
Fill a pastry bag equipped with a large round tip with the cheese mixture and pipe it right into the cavities.
After you’re done, if you feel you need to, pinch the openings closed with your fingers and, with your other hand, give the chicken breasts a gentle squeeze to evenly distribute the filling within that pocket.
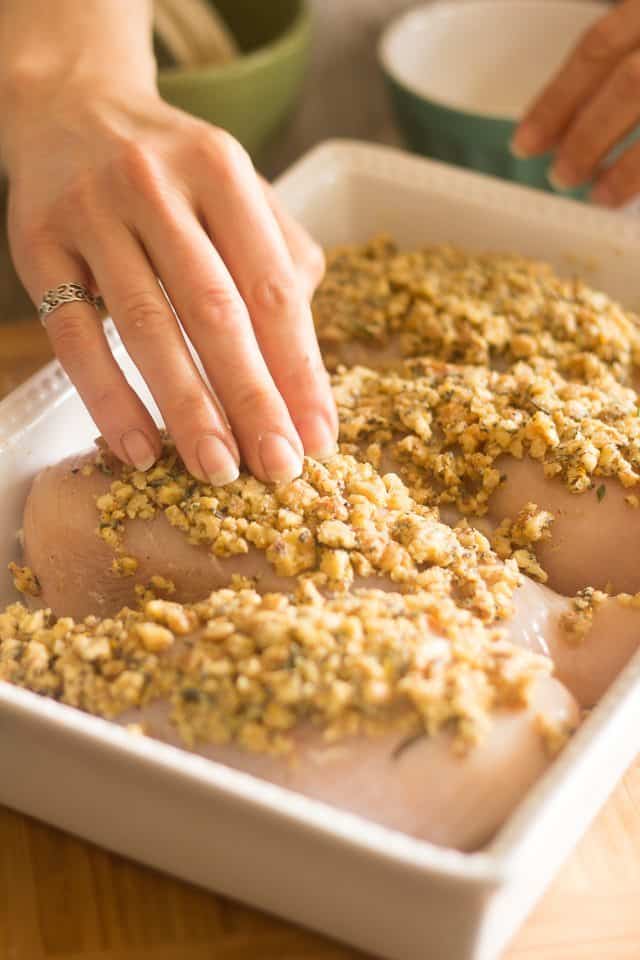
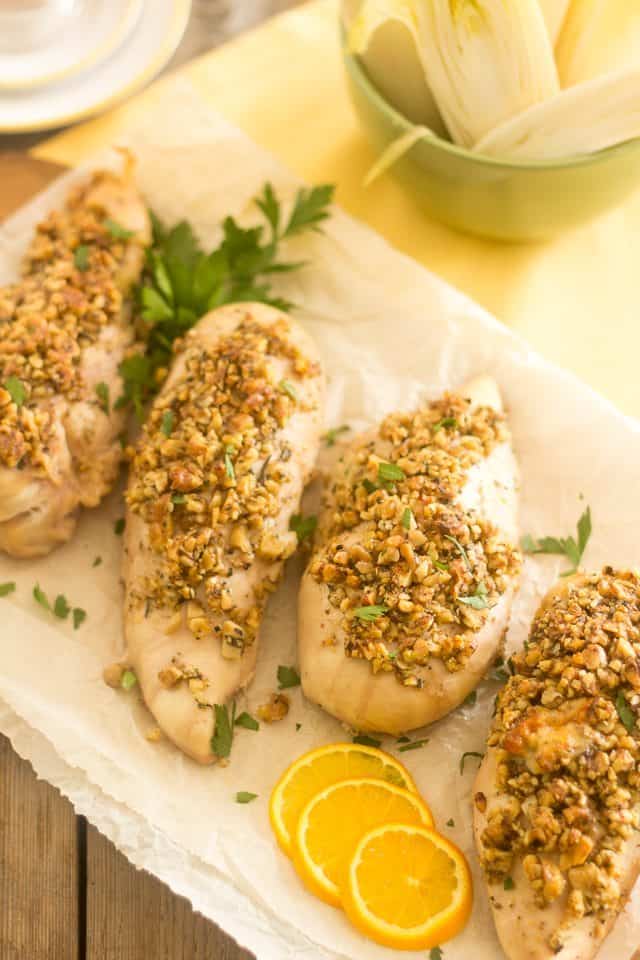
Place the stuffed chicken breasts into a baking dish and pat them real dry, then press the walnut crust firmly over each of them.
If you find that the crust tends to stick to your fingers a little too much, dip your fingertips in water. It’ll really help!
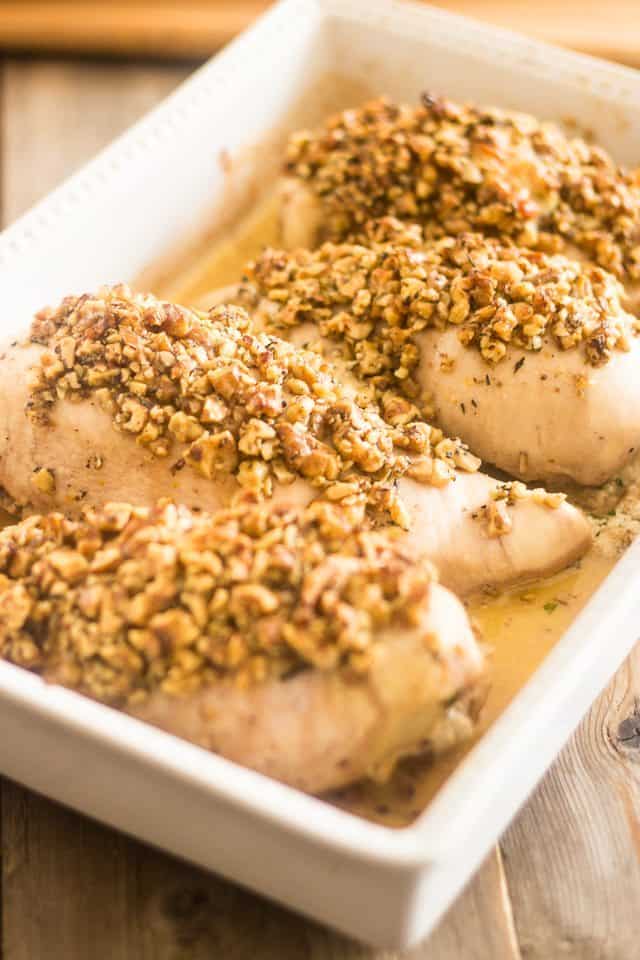
Now cover this with aluminum foil and bake for 30 minutes; you will then want to remove the foil and resume cooking for an additional 25 minutes, basting from time to time.
If, after your chicken is done cooking, you feel the crust could use a little more coloring, simply set the oven to broil for 2-3 minutes.
Remember: with nuts color always equals flavor! You don’t want to overdo it, but you do want those walnuts to be a beautiful shade of golden.
Remove your chicken from the oven and tent it loosely with foil then let it rest for at least 10 minutes.
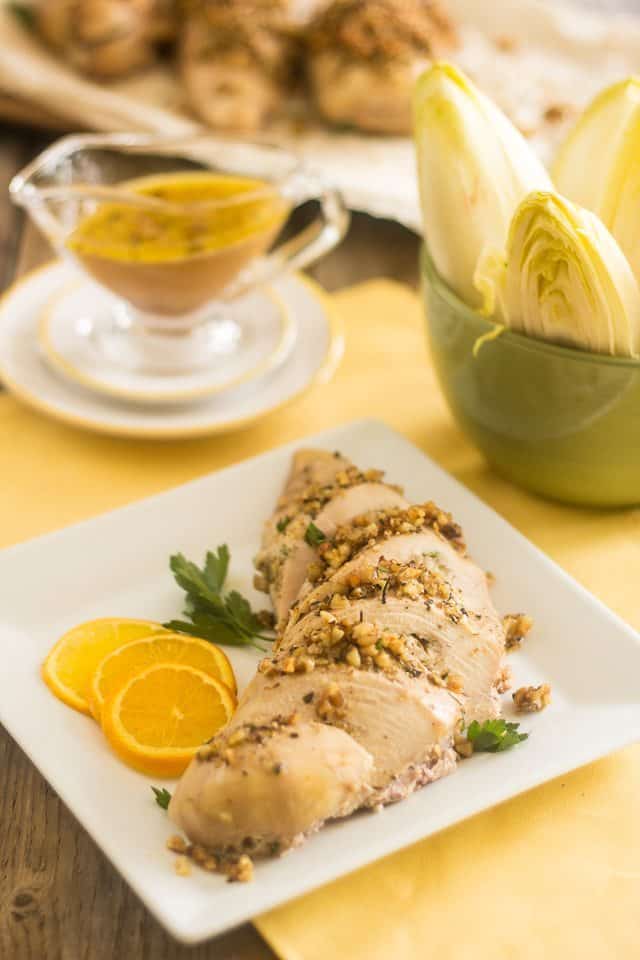
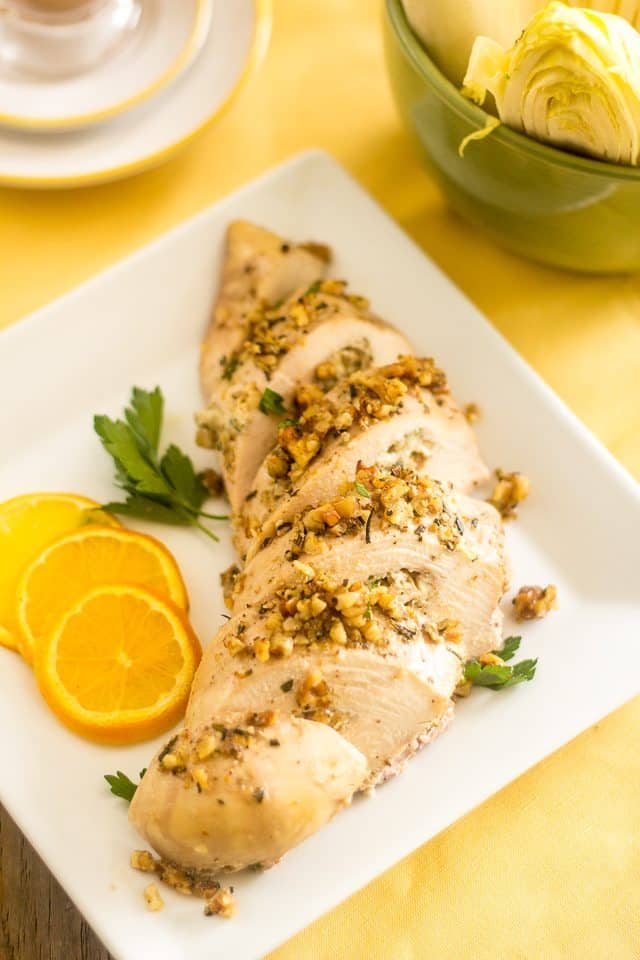
Slice on a diagonal and serve.
Ah, of course, if you’re not a fan of blue cheese, feel free to replace it with something else. I’m thinking cooked spinach would be really delicious. Just make sure you squeeze them real good to get all the water out.
Roasted bell peppers would also be absolutely glorious, or sun-dried tomatoes why not?
Olives, artichoke hearts or even avocados could also do the trick. Oh gawwwwd, I’m getting all sorts of inspiration now.
Me thinks I need to revisit this dish soon… sans cheese, this time!
Blue Cheese Stuffed, Walnut Crusted Chicken Breasts
Ingredients
- 2 cups water
- 1 tbsp Himalayan salt
- 4 large skinless, boneless chicken breasts (about 375g|13oz each)
Cheese Filling
- 200 g 7oz fresh ricotta cheese
- 100 g 3½oz gorgonzola cheese, crumbled
- 1/4 cup walnuts, finely chopped
- 1 tablespoon fresh parsley, finely chopped
- 2 cloves garlic, chopped
- 1/2 teaspoon freshly cracked black pepper
- 1/4 teaspoon Himalayan salt
Walnut Crust
- the zest of 1 orange
- 1 tbsp fresh rosemary, finely chopped
- 1 cup walnuts, coarsely chopped
- 1/2 teaspoon Himalayan salt
- 1/2 teaspoon freshly cracked black pepper
- 2 tbsp ghee
Instructions
- *The previous night, place your chicken breasts to brine in a solution made of 1 tablespoon of salt for 2 cups of water. While this step is not absolutely mandatory, it creates a much juicier and tastier chicken and requires very little effort on your part. Trust me, it's totally worth it.
- Preheat oven to 350F
- In a bowl, add all the ingredients for the cheese filling and mix delicately with a spoon until well combined.
- In a separate bowl, add the ingredients for the walnut crust and again, mix until well combined. Set aside.
- With a sharp boning or petty knife, make an incision in each of the chicken breasts. Start at the thickest end and slowly work your way to the other end, while being careful not to let the blade go all the way through. You want to create a nice pocket for your cheese filling.
- Insert one or two fingers in that pocket to stretch it a little bit and make sure that the passage is unobstructed all the way to the end.
- Place the cheese filling in a pastry bag equipped with a large round tip and pipe it into the cavities. If you need to, pinch the openings between your fingers and give the breasts a gentle squeeze to evenly distribute the filling within the pocket.
- Place the stuffed chicken breasts into a baking dish and pat them real dry, then press the walnut crust firmly over each of them.
- Cover with aluminum foil and bake for 30 minutes; remove the foil and resume cooking for additional 25 minutes, basting from time to time.
- If you feel the crust could use a little more coloring after the chicken is done cooking, set the oven to broil for 2-3 minutes.
- Remove from oven, tent loosely with foil and let rest for at least 10 minutes, then slice on a diagonal and serve.
If you’ve tried this recipe, please take a minute to rate the recipe and let me know how things went for you in the comments below. It’s always such a pleasure to hear from you!
You can also FOLLOW ME on PINTEREST, FACEBOOK, INSTAGRAM and TWITTER for more delicious, healthy recipes!




5 Comments on “Blue Cheese Stuffed, Walnut Crusted Chicken Breasts”
YES YES YES! This was fabulous! Company worthy! The orange zest really added to the complexity of the dish. I reduced this dish for 2 people. I did not have a pastry bag so I just basically butterflied my breasts and stuffed them that way holding with some toothpicks. I was worried about the cooking time (too much) but it actually turned out super moist. I have also never done a brine before but that has all changed now!
Like every other dish I have tried of yours, this one is in regular rotation. I always have an abundance of left over Blue Cheese from my husbands homemade stuffed olives and this is the perfect way to use it up!
AWESOME! Thank you so much Laurie, your feedback just totally made my day! Real happy to hear that you liked the chicken and I truly hope that your parents enjoy it just as much! 🙂
Keep me posted! 😀
Ohh and..I absolutely cannot wait to serve this to my parents. I will be having them over next week so they can enjoy this perfect dish. Thanks again!!
I tried this recipe today and it was excellent! I was wondering if you could make the chicken breasts with the stuffing ahead of time and either freeze them or put them in the fridge. This recipe has ingredients I don’t keep on hand, so I’d love to be able to make up a larger batch and then save some for later. If you freeze then, would you cook it frozen or put them in the fridge the night before to thaw?
I never tried freezing them, Kimberly, but I really don’t see a reason why it wouldn’t work. I would definitely thaw them before cooking, though… unless you forgot to take them out and had no choice but to cook ’em frozen. I suppose that would work too, only you’d have to cook them for a bit longer.
And real glad to hear that the recipe was to your liking. Thanks a bunch for letting me know. 😀