Crispy Homemade Falafel with Garlic Tahini Sauce
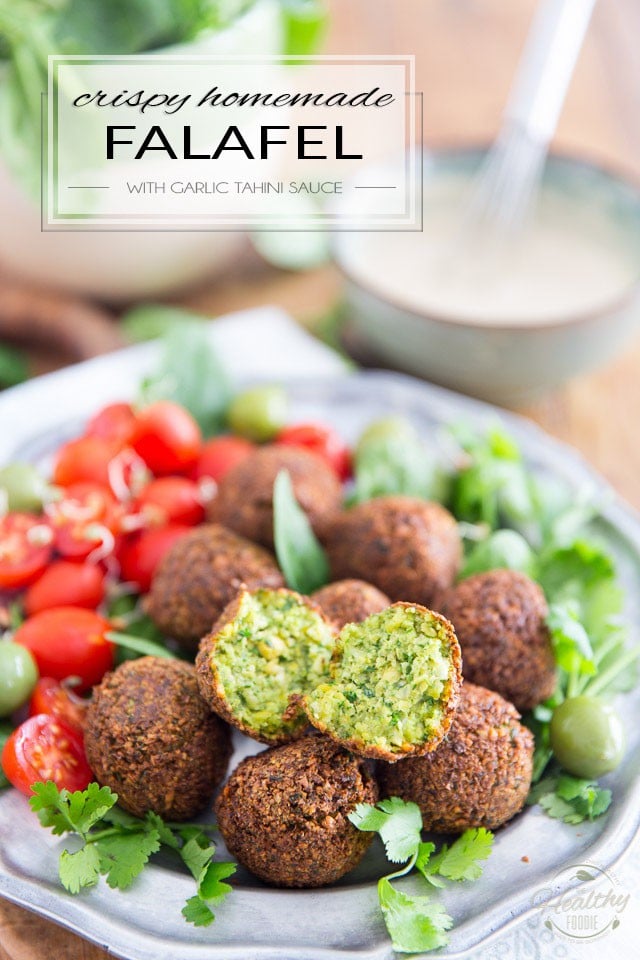
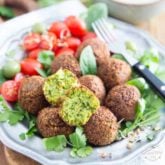
Homemade Falafel is SO much better! Learn how to make this deliciously crispy, light and fluffy chickpea fritter the right way, from scratch, with good wholesome and nutritious ingredients! It’s much easier than you think!
For the longest time, I believed that falafel was extremely long and complicated to make. Pfft! I just didn’t know better… I guess it’s only because it’s not something I’m really used to making, for they were never really a part of my diet growing up. But eventually, once I got the hang of it, I came to realize that they are in fact extremely easy to make: just throw everything in the food processor and blitz away!
The only thing is that they do require a bit of planning, because the key to making good falafel is that you must absolutely, imperatively make them with dried, soaked but uncooked chickpeas. This is a case where you cannot cheat and get away with using the canned beans. Why? Because since the canned chickpeas have already been cooked, the starch molecules within them have pretty much been washed away in the cooking liquid, leaving the actual beans with very little binding power. If you try to grind them, form them into balls, and deep-fry them, they will invariably completely fall apart in the oil. Sure, there are ways to work around that, like adding flour or other binding agents to the mixture, but then the texture of the fritters will suffer big time! You end up with dense, pasty, almost doughy balls…
Trust me, starting with dry chickpeas and giving them ample time to soak is the only way to go!
If you’re concerned about the raw chickpeas not having time to cook all the way through, don’t worry: the key is to get the raw beabs to absorb ALL the liquid that they can actually absorb. 24 hours will totally do the trick! Then, when you grind them into fine particles, form them into balls and throw them into a bath of hot oil, the combination of the intense heat and internal moisture will have the beans cook all the way through in no time at all!
Also, because the soaked and ground uncooked chickpeas still have plenty of starch in them, they will bind together quite well without requiring the help of an exterior binding agent. But since the mixture is somewhat delicate and crumbly, you will have to let your ground mixture rest for a little while, to give the starch a chance to seep out and do its job properly.
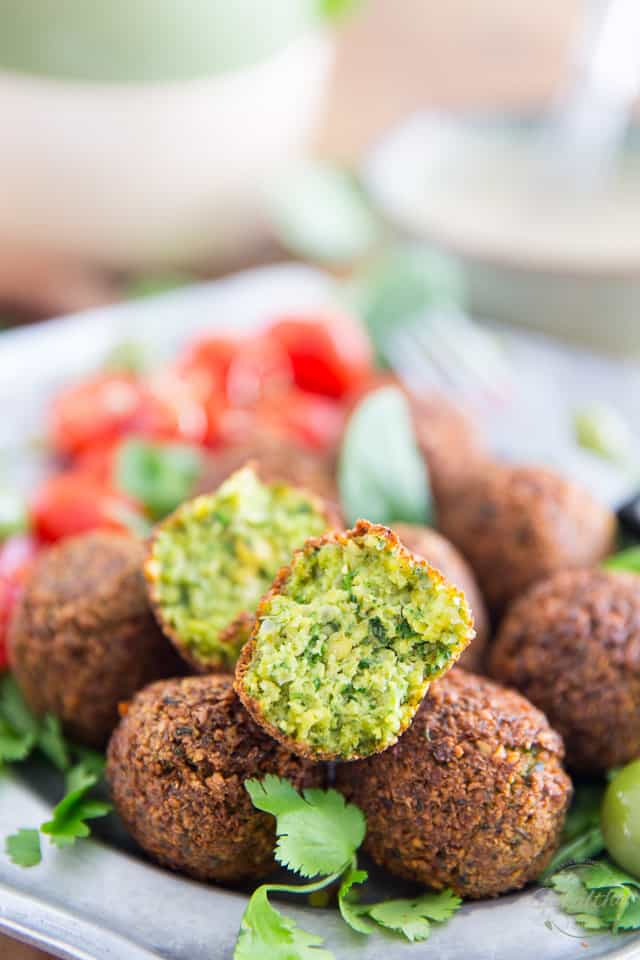
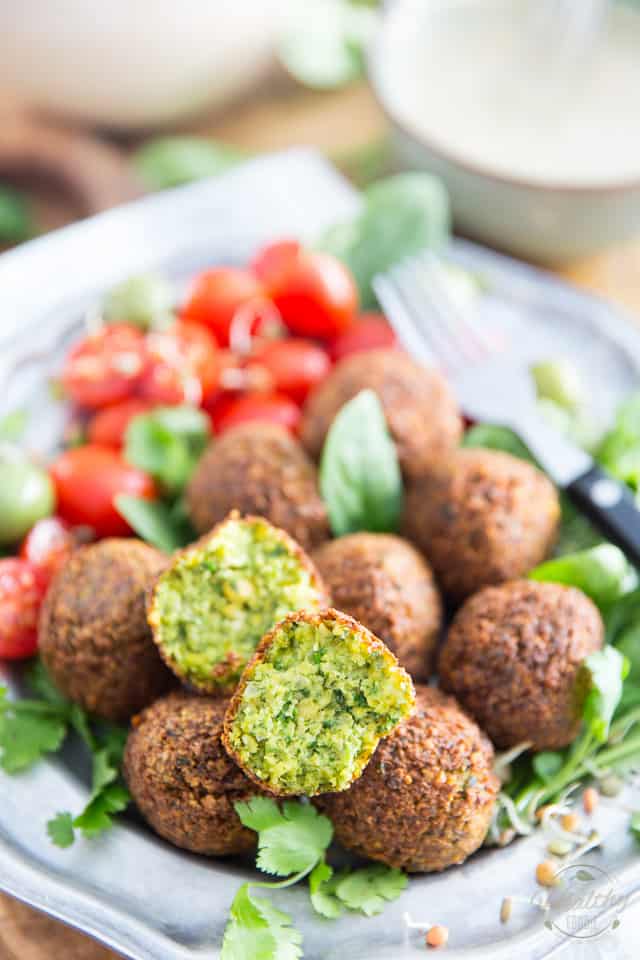
Trust me… this is all worth it. Your patience will be rewarded with the perfect falafel, complete with a super crispy, golden exterior and fluffy, light and crazy tasty interior!
To make the best falafel, you must first soak your chickpeas in cold water for a full 24 hours. To do that, place them in a large bowl and submerge them in water, making sure that they are covered by at least 3 inches. While soaking, the beans will absorb most of that water and will up to triple in volume!
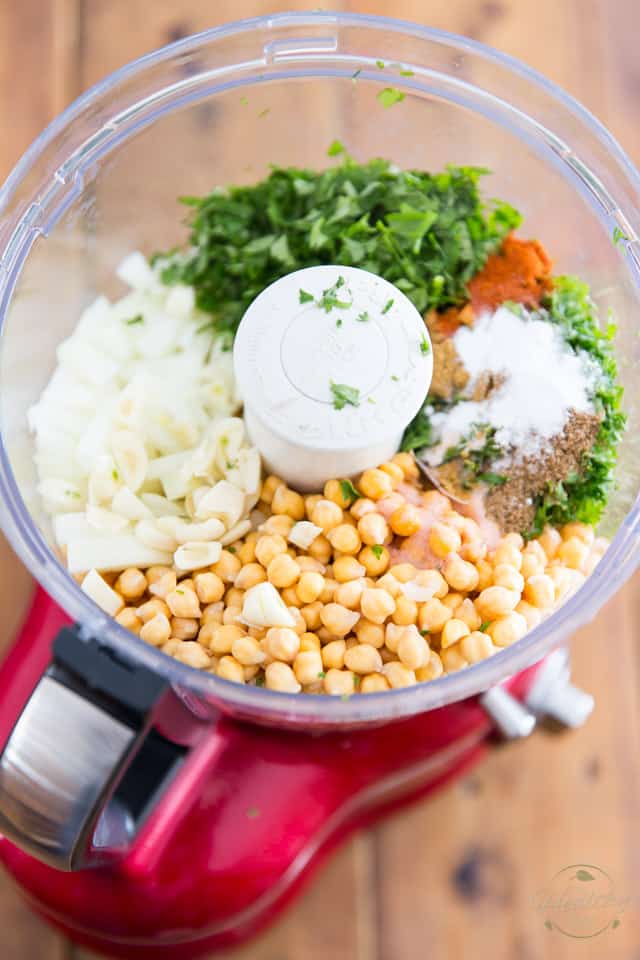
Once the beans are done soaking, drain then well and place them into the bowl of your food processor along with the following:
- 1 medium onion, roughly chopped
- 3/4 cup finely chopped fresh parsley
- 3/4 cup finely chopped fresh cilantro
- 1 tbsp lemon juice
- 1 tsp salt
- 1 tsp ground coriander
- 1 tsp cumin
- 1/2 tsp cayenne pepper
- 1/2 tsp baking powder
While not mandatory, the baking powder is said to create a fluffier, lighter fritter! I’m a fan, so in it goes…
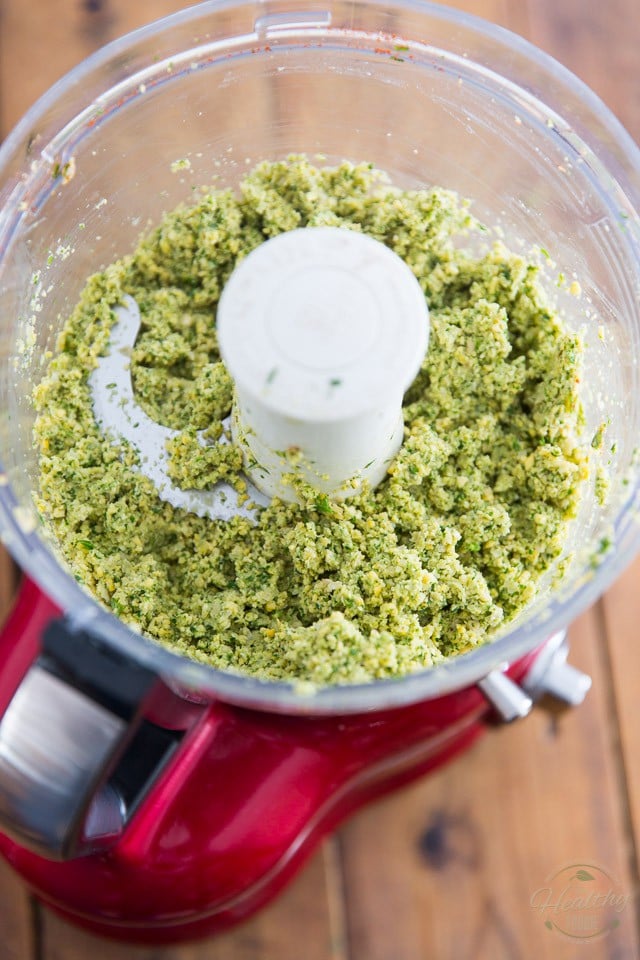
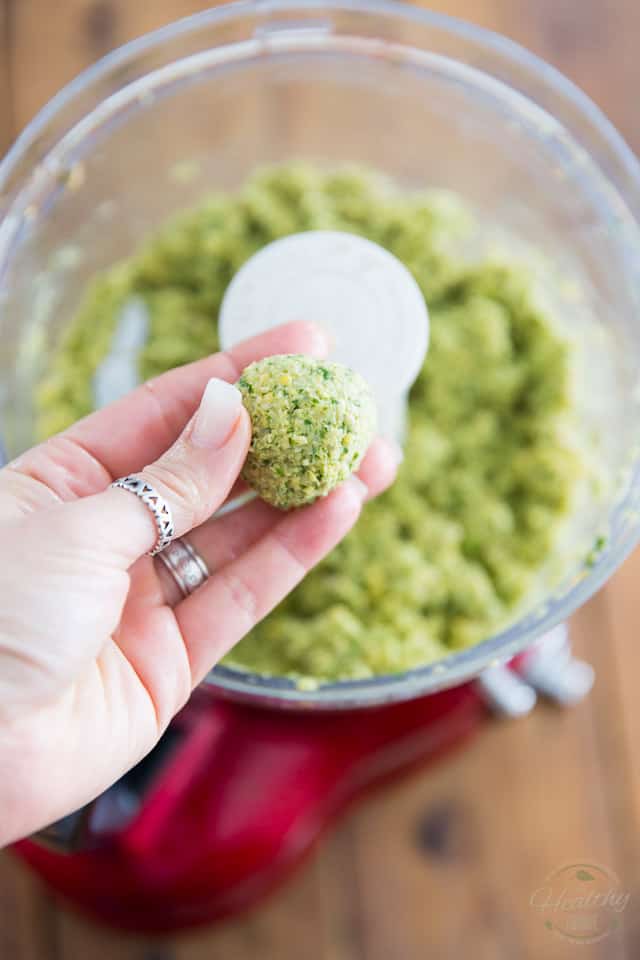
Start the motor and process the ingredients, alternating between pulsing and blending, stopping to scrape the sides of the bowl as needed, until the chickpea mixture is like a coarse paste, but still slightly grainy in texture: small particles of chickpeas should still be visible.
To test the consistency of your batter, try to gently roll a small amount in your hand to form a ball: the mixture should hold together nicely and not fall apart.
If your falafel mixture was too loose to stay in a ball, try letting it rest for about 15 minutes and then try again…
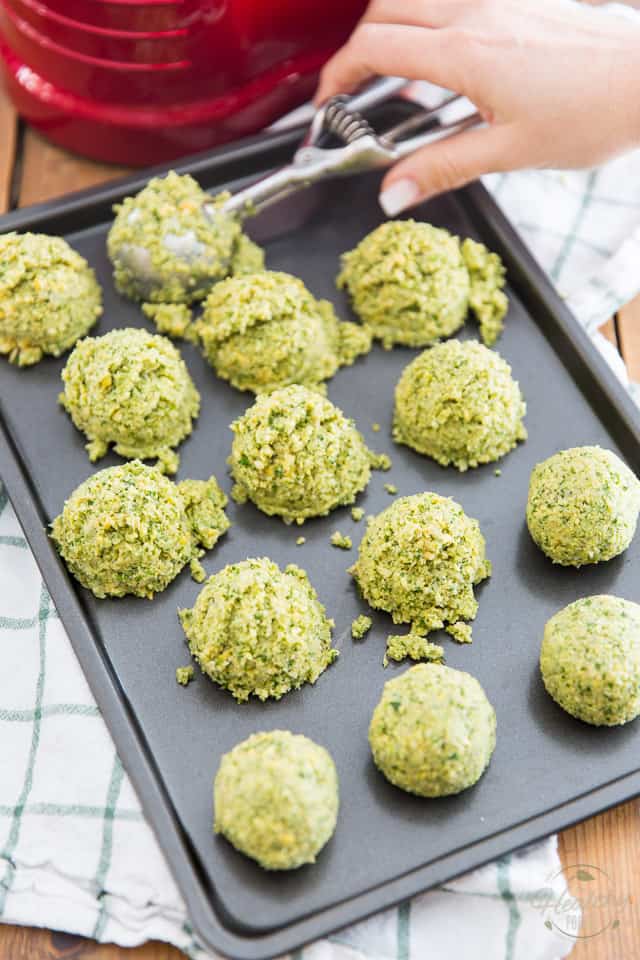
Now roll the mixture into uniform size balls, rolling and shaping each ball delicately in your hand. To make this task easier, I like to use a spring-loaded ice cream scoop to scoop the mixture; this not only helps with pre-shaping the balls, but it also insures that they are all uniform in size and all cook at the same time.
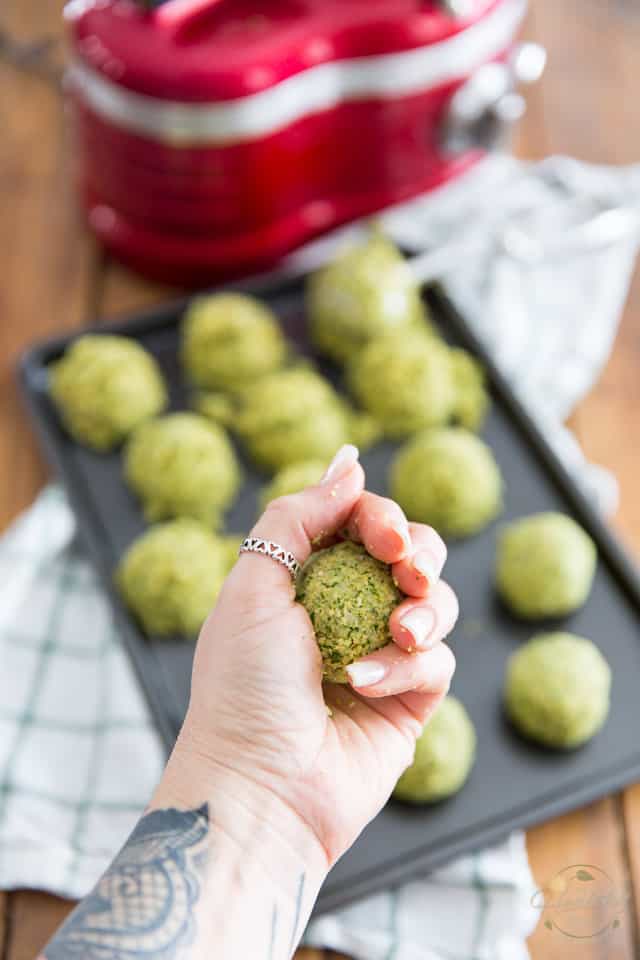
You’ll quickly come to realize that falafel batter is very delicate, so it needs to be handled super gently. You don’t want to be rolling the mixture between the palms of your hands like you would meatballs, for instance. Rather, you want to just softly press the mixture down with one hand, rolling it gently under your fingers, without applying much pressure at all.
You’ll quickly get the hang of it, you’ll see!
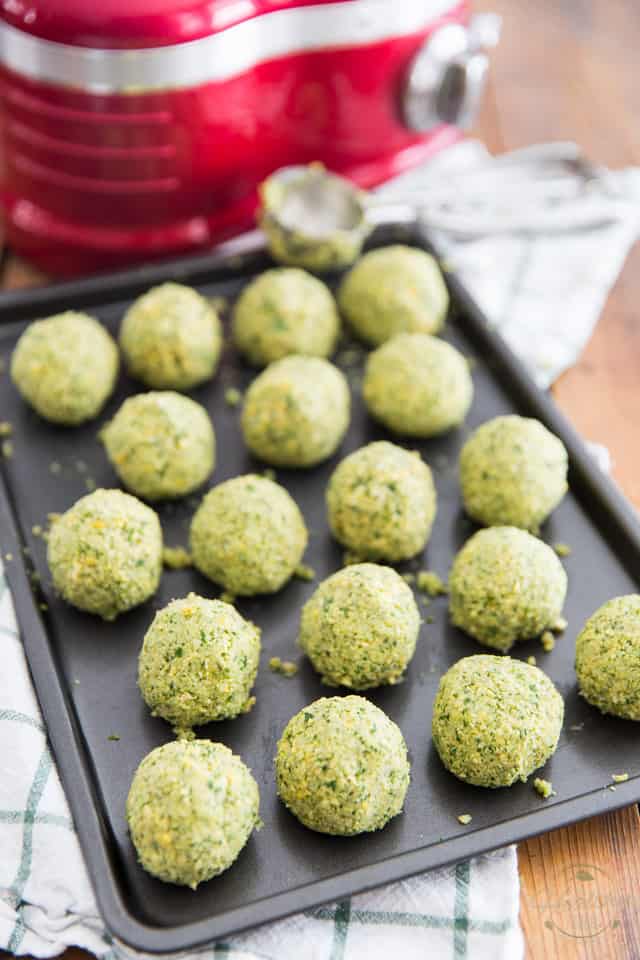
Place the uncooked falafel on a baking sheet and refrigerate for about 30 minutes, or until ready to eat.
In the meantime, why not get busy making the garlic tahini sauce, if you’re planning on using it… And if you weren’t, I think you should change your mind; this stuff is seriously good!!!
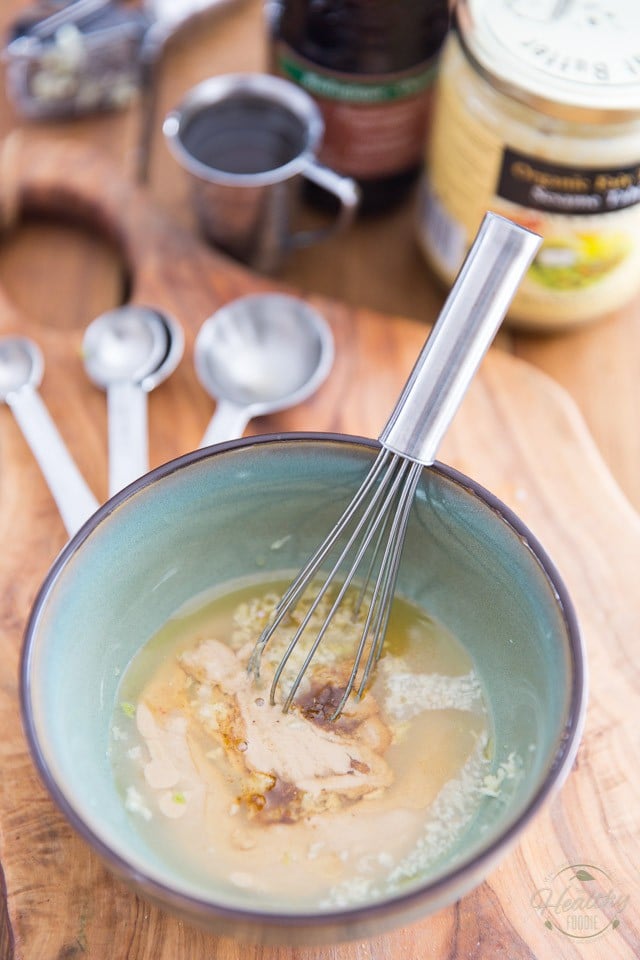
Plus, making that garlic tahini sauce couldn’t be easier… Simply combine some tahini paste, minced garlic, lemon juice, toasted sesame oil, salt and ground cumin in a small mixing bowl.
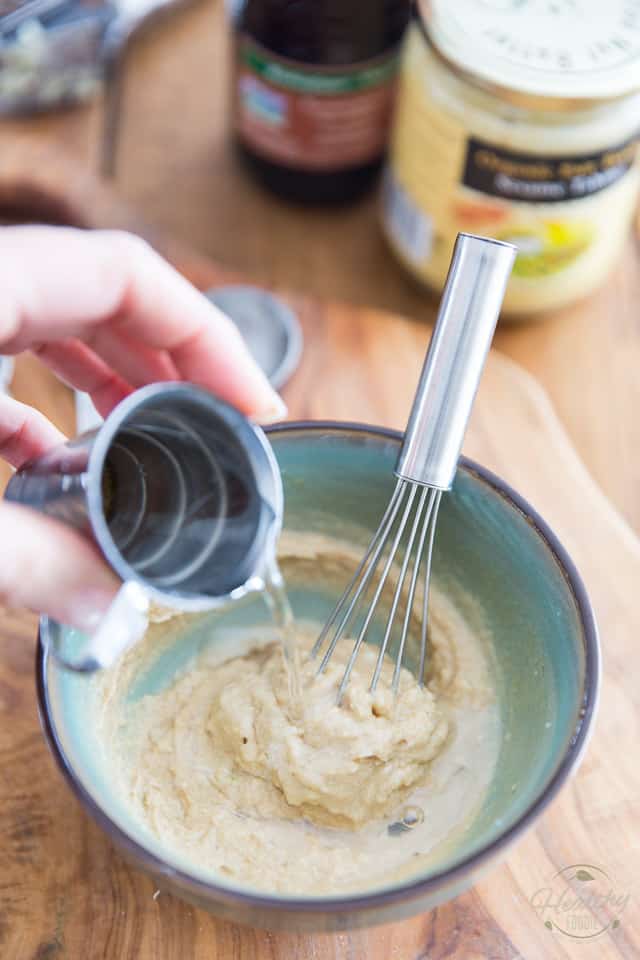
Whisk well until the mixture is fully combined. Add the water, a few tablespoons at a time, whisking to fully incorporate after each addition…
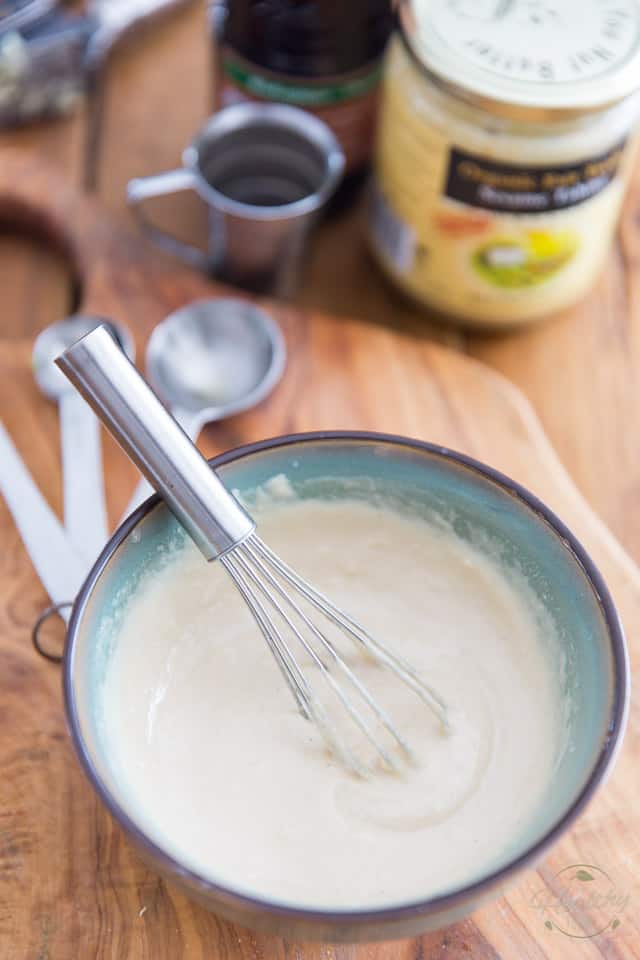
Continue adding water until the desired consistency is reached, then adjust seasoning as needed. That’s it, your tahini sauce is ready to serve!
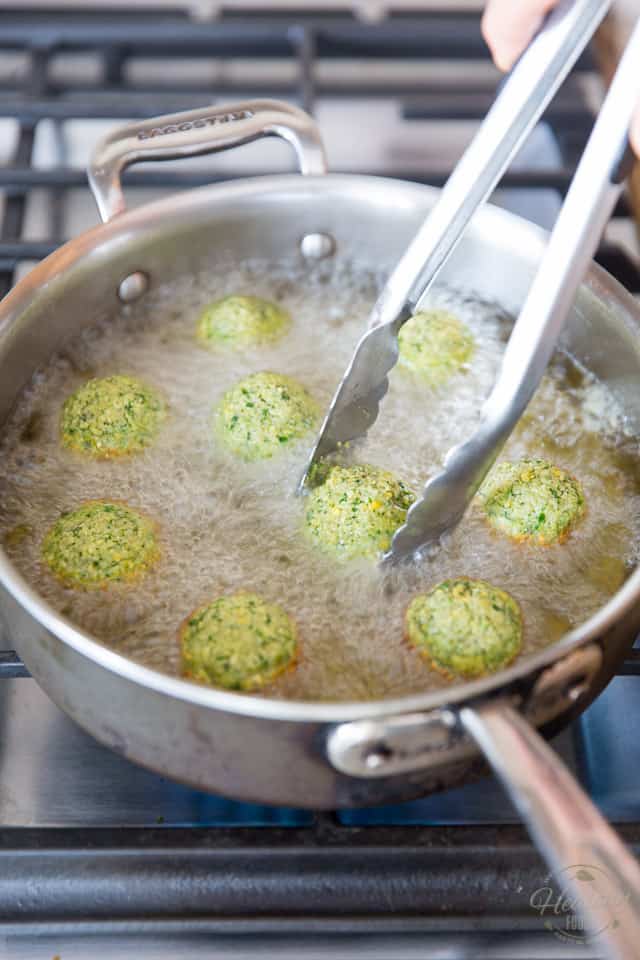
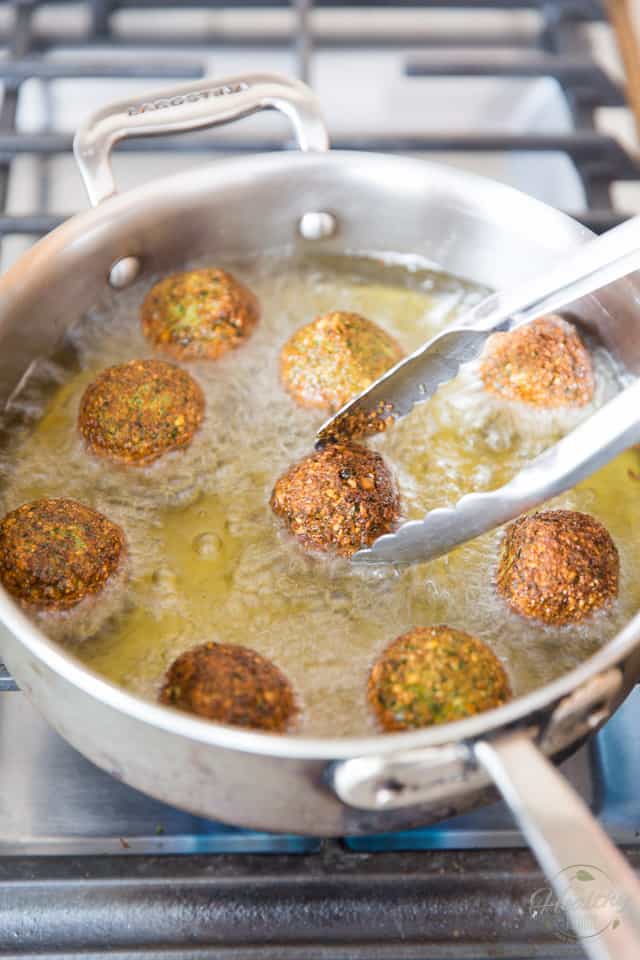
When you are ready to cook your falafel, pour enough oil in a large, high-sided skillet to a depth of about 1-1/4 inches and heat over medium-high heat until the temperature reaches 375°F.
Once hot, carefully lower the balls into the oil with kitchen tongs, one at a time and without overcrowding the pan; you will most probably have to cook your falafel in several batches.
Fry the chickpea fritters for about 2 minutes, or until beautiful and golden brown, then flip the falafel to fry the other side, until they’re brown all over.
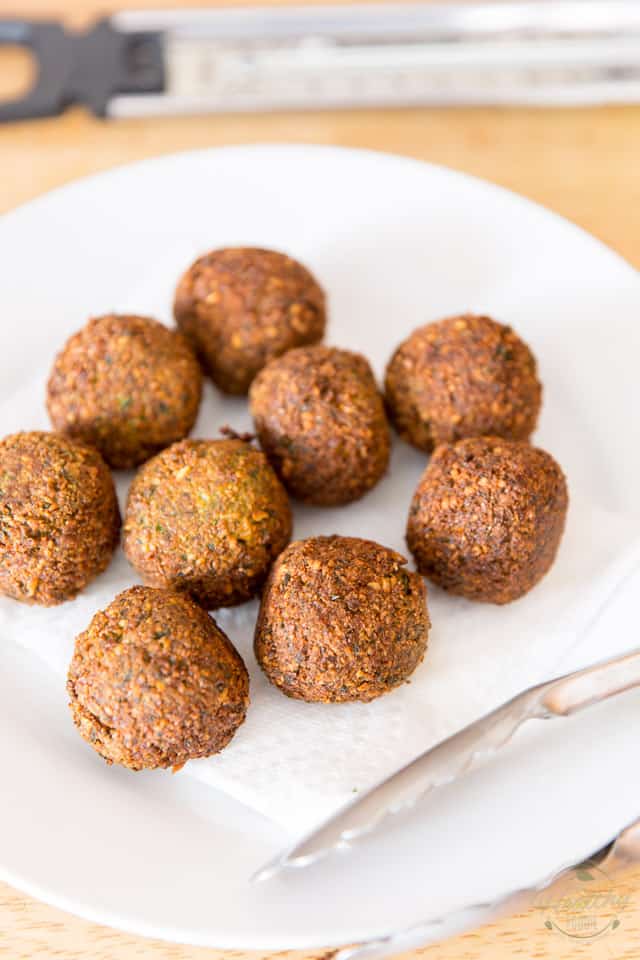
Remove the cooked falafel from the oil and place them on a plate lined with a piece of paper towel to absorb excess oil. Sprinkle the fritters with a little bit of salt while they’re still hot.
Now you can either fry the remaining falafel immediately, or keep the uncooked balls in the fridge for up to a few days and fry them at your convenience. ‘Cuz you know, while reheated falafel is still good, nothing beats fresh out of the fryer!!
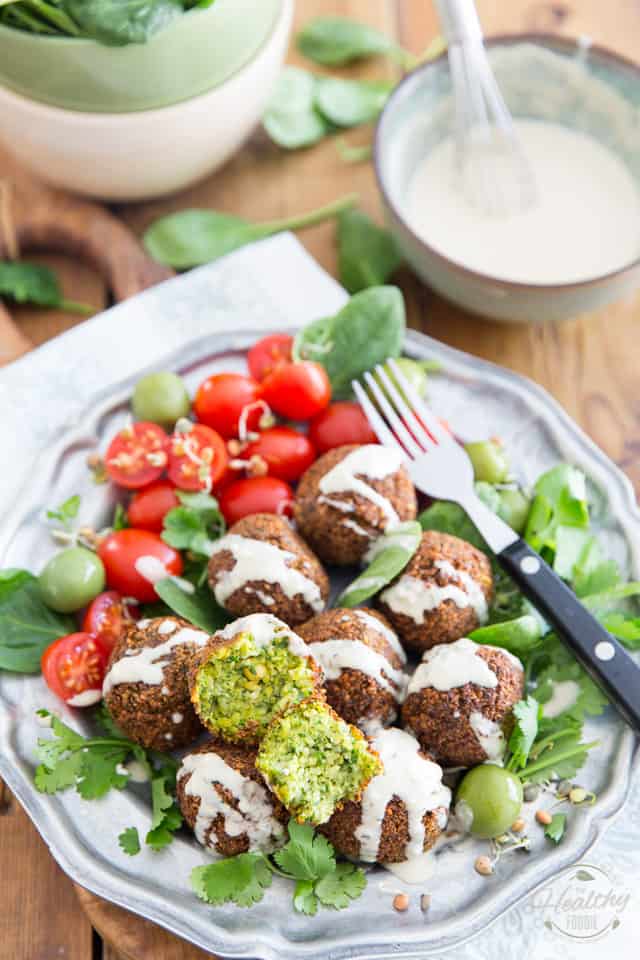
Serve your beautiful, crispy, fluffy falafel without delay, drizzled with a little bit of that yummy tahini sauce, if you took my advice and made it.
Crispy Homemade Falafel with Garlic Tahini Sauce
Ingredients
For the falafel
- 1½ cup dried chickpeas, NOT CANNED*
- 4 cloves of garlic
- 1 medium onion, roughly chopped
- 3/4 cup finely chopped fresh parsley
- 3/4 cup finely chopped fresh cilantro
- 1 tbsp lemon juice
- 1 tsp salt
- 1 tsp ground coriander
- 1 tsp ground cumin
- 1/2 tsp cayenne pepper
- 1/2 tsp baking powder
- Oil to fry the falafel, in sufficient amount, (I used light tasting olive oil)
For the garlic tahini sauce
- 1/4 cup tahini
- 2 cloves garlic, minced
- 2 tbsp lemon juice
- 1 tbsp toasted sesame oil
- 1/4 tsp salt
- 1/8 tsp ground cumin
- 4-6 tbsp water, as needed
Instructions
To make the falafel
- Put the chickpeas in a large bowl and fill with enough cold water to cover them by at least 3 inches. Let soak for 24 hours, then drain.
- Place the chickpeas along with the rest of the ingredients (except for oil) into the bowl of your food processor and process, alternating between pulsing and blending, stopping to scrape the sides of the bowl as needed, until the chickpea mixture is like a coarse paste, but still slightly grainy in texture: small particles of chickpeas should still be visible. The mixture should hold together nicely and not fall apart when you try rolling a small amount in your hand to form a ball. If your falafel mixture is too loose to stay in a ball, try letting it rest for about 15 minutes and then try again.
- Roll the mixture into uniform size balls, rolling and shaping them delicately in your hand. To make the task easier, use a spring-loaded ice cream scoop to scoop the mixture. This will not only help with pre-shaping the balls, but will also insure that they are all uniform in size and cook at the same time.
- Place the uncooked falafel on a baking sheet and refrigerate for about 30 minutes, or until ready to cook.
- In the meantime, make the garlic tahini sauce, if using.
- To cook, pour enough oil in a large, high-sided skillet to a depth of about 1-1/4 inches and heat over medium-high heat until the temperature reaches 375°F.
- Once hot, carefully lower the balls into the oil with kitchen tongs, one at a time and without overcrowding the pan; you will have to cook your falafel in several batches. Fry for about 2 minutes, or until beautiful and golden brown, then flip the falafel to fry the other side, until they're brown all over.
- Remove the cooked falafel from the oil and place them on a plate lined with a piece of paper towel to absorb excess oil. Sprinkle with a little bit of salt while still hot.
- Fry the remaining falafel immediately, or keep them in the fridge for up to a few days and fry at your convenience.
- Serve your falafel without delay, drizzled with tahini sauce if desired.
To make the garlic tahini sauce
- Combine the tahini paste, garlic, lemon juice, toasted sesame oil, salt and ground cumin in a small mixing bowl. Whisk well until the mixture is fully combined.
- Add the water, a few tablespoons at a time, whisking to fully incorporate after each addition, until the desired consistency is reached.
Notes
Nutrition
If you’ve tried this recipe, please take a minute to rate the recipe and let me know how things went for you in the comments below. It’s always such a pleasure to hear from you!
You can also FOLLOW ME on PINTEREST, FACEBOOK, INSTAGRAM and TWITTER for more delicious, healthy recipes!








7 Comments on “Crispy Homemade Falafel with Garlic Tahini Sauce”
Hi Sonia, I would like to try and air fry these. How does it change the calorie count?
Thank you,
Ana
Not sure Ana… I don’t think it would affect it all that much, to be honest.
Ça l’air tellement, mais te llement bon!!!! Je veux l’essayer!
Ta maman qui est tellement fière de toi et tellement heureuse pour toi!!
Hi Sonia, these look gorgeous.
I’d like to use a deep fryer, do you think that would work ok?
Regards
Stacy
Absolutely! You won’t even need to flip the balls halfway through cooking! 🙂
Hi Sonia, my daughter recently decided to go vegetarian; I am doing it with here as I’ve been a vegetarian in the past. She and my entire family really enjoyed the boxed falafel we made the other night but I would like to try this – however; I would like to bake them if possible rather than fry in oil
do you know if this would work and temp/time?
Thanks
Sorry I’ve never tried baking falafel, Rebekah, so I’m afraid I can’t really help you here.