
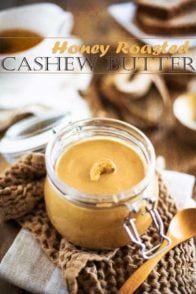
Honey Roasted Cashew Butter

This morning I woke up (way too early, might I add) to some strange, unidentified and very annoying little noise, like some kind of faint crackling.
At first, I thought it was the neighbor rummaging through a bunch of gravel or taking his recycling bin to the curb…
But then it hit me! Remember my unwanted guest? It was HIM! He’d found the baited trap that I’d set for him right next to my bed, behind the night stand, because that’s where I’d last spotted signs of “activity”…
Hey, don’t judge… I had to get rid of him somehow!
As much as I didn’t want to poison him, I was even less comfortable with the idea of setting up the glue traps that I’d initially purchased. I found that technique to be way too inhumane. With these traps, rodents basically find themselves glued to a rectangular piece of plastic as they run over it and then they’re pretty much left there to die, until you find them. I figured at least, if he ate the bait, that would dispose of him in a more “humane” way. Plus, it was just this ONE tiny little trap, so my hopes of him ever finding it were quasi nonexistent.
As someone had suggested, I’d also plugged in a bunch of Ultrasonic Rodent Repellents and I was really counting on those to drive him out of my house; but apparently, that little guy has Ultrasonic Resistant Ears. Or well, had, should I say…
Sadly, the little fury beast is no more. After he woke me up this morning, I tried to catch him, broom in hand, with the help of my son, daughter-in-law and dogs, but he managed to trick all of us and found refuge in a nearby storage room. I realized that he was gonna die because he’d eaten the poison, and there was only one way he could get out of there… so I decided to use the dreaded glue traps after all.
I promised myself, however, that I would not let him suffer and that I would kill him quickly and painlessly as soon as I’d find him, and that I would check on him often, to make sure he wouldn’t stay stuck for too long. It was only a matter of hours before he found himself caught. Suddenly, when I saw him there, breathing rapidly and struggling to free himself, the beast that had scared me so for the past week just turned into the cutest, most fragile little thing. He was looking at me with his round, shiny little eyes, as if he was begging me to help him.
It broke my heart…
As hard as it was, I kept my promise: I grabbed the trap with the mouse glued to it, took it outside, flipped it upside down so he would find himself under the plastic thing and then I dropped a heavy flat rock on it, one that I had carefully selected, one that I knew wouldn’t completely crush his tiny body, but that would assuredly have him die on impact. And all the while, I kept telling him just how sorry I was. I must have apologized over a hundred times.
It wasn’t his fault… he’d only chosen to take shelter under the wrong roof.
I truly hope that it was only him in the house and that the Electronic Ultrasonic Repellent will dissuade others to ever even consider my roof as potential refuge.
I never, ever want to have to go through such an experience, ever again.
But anyway, I’m pretty sure that it wasn’t the desire to read all about my tribulations with my mouse that brought you here; it was probably more the perspective of learning how to make the delicious Honey Roasted Cashew Butter that’s in all the pictures…
Well fear not, I’m about to do just that!
Now I hope that you don’t resent me for not having shared that many nut butter recipes on here lately. It hasn’t been due to lack of inspiration though, trust me.
The thing is, I’ve been making LOADS of them, but I’ve been saving all the recipes so I could add them to my new cookbook! I was so excited at the idea of dedicating an entire chapter to the art of making delicious nut butters at home. All in all, I came up with 21 different recipes, and you can find all of them in Paleo Home Cooking.
If you know me, you know that when it comes to inventing awesome flavor combinations, my imagination knows no boundaries! Heck, I think I could easily write an entire cookbook on nut butters alone…
But hey, I’m not too far from that objective, you know… like I just said, in Paleo Home Cooking, you can find 21 different delicious nut butter recipes, from the very basics and essentials, like All Natural Toasted Almond Butter, to the craziest, fanciest flavor combinations, like Chai Nut Clusters and Date Swirl. I even thought of those who don’t have much of a sweet tooth, with concoctions like Crunchy Smoked Almond and BBQ “Peanut” Spread (that one tastes just like BBQ peanuts, I swear!)
If like me, you really are into nut butters, then you should totally check my book out, I’m sure that you won’t be disappointed.
But in the meantime, let’s get busy making this delicious Honey Roasted Cashew Butter, what say you?
I was inspired to create this particular flavor when, a few weeks ago, I got a major craving for Honey Roasted Peanuts. The kind of craving that won’t ever leave you alone and will even wake you up at night, you know… And then I started craving peanut butter on top of that… yeah, as in true peanut butter. It didn’t take long for my brains to go “You, down there! (they were probably addressing my stomach…) Imagine how good it would be if we got her (I guess they were referring to me) to turn Honey Roasted Peanuts into deliciously creamy and sweet Honey Roasted Peanut Butter”
The problem is I overheard their conversation, and the idea excited me to no end! So I made a deal with my brains and told them that I would indeed give it a try, BUT under one condition: cashews would have to sub for the peanuts. And then they’d have to leave me alone. For good.
They agreed and the rest is history… and you’re about to benefit from it!
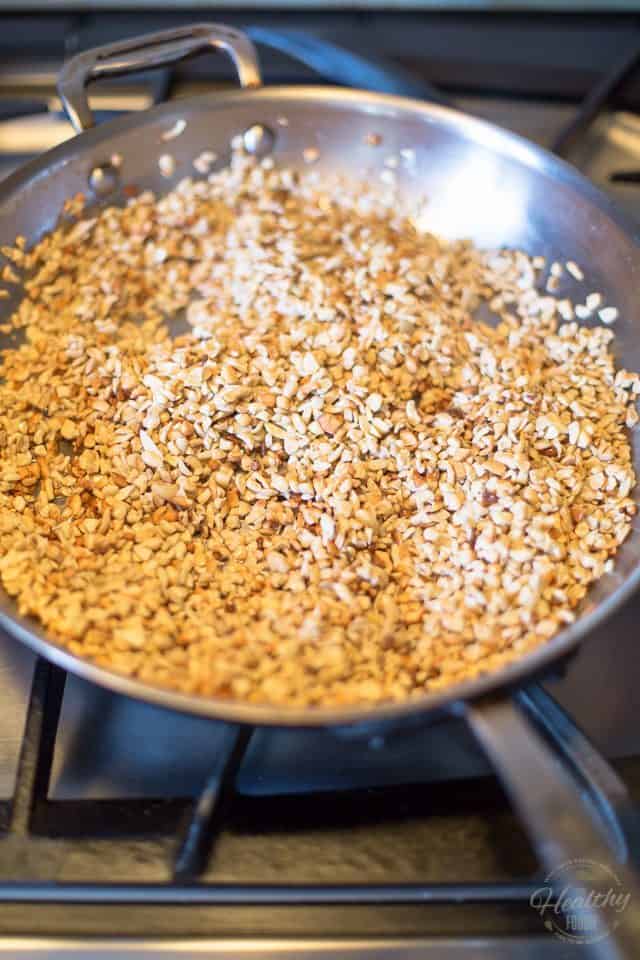
To start with, place a large skillet set over medium heat and then melt 2 tablespoons of ghee; add the cashew pieces and roast them, stirring almost constantly until they turn golden and become highly fragrant, about 5 minutes total.
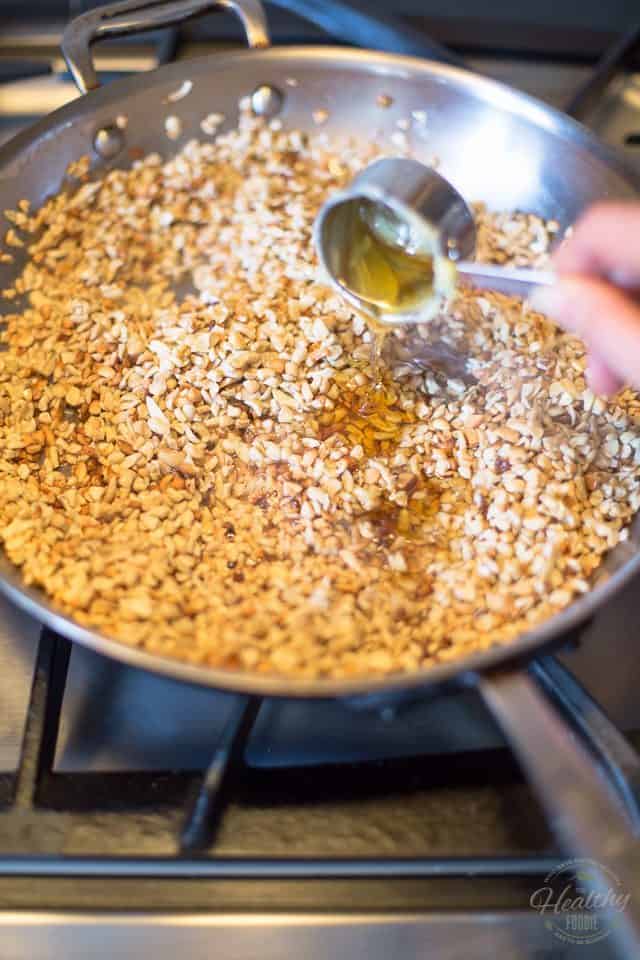
Add the melted honey…
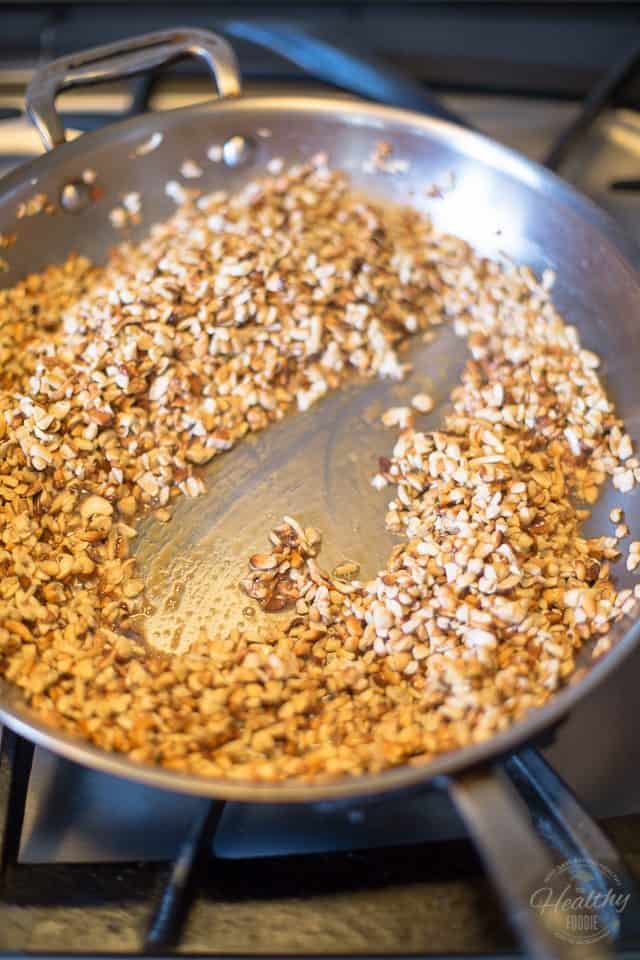
… and continue cooking, stirring constantly, until the nuts get really sticky and there is no more honey at the bottom of the pan, about 30 seconds.
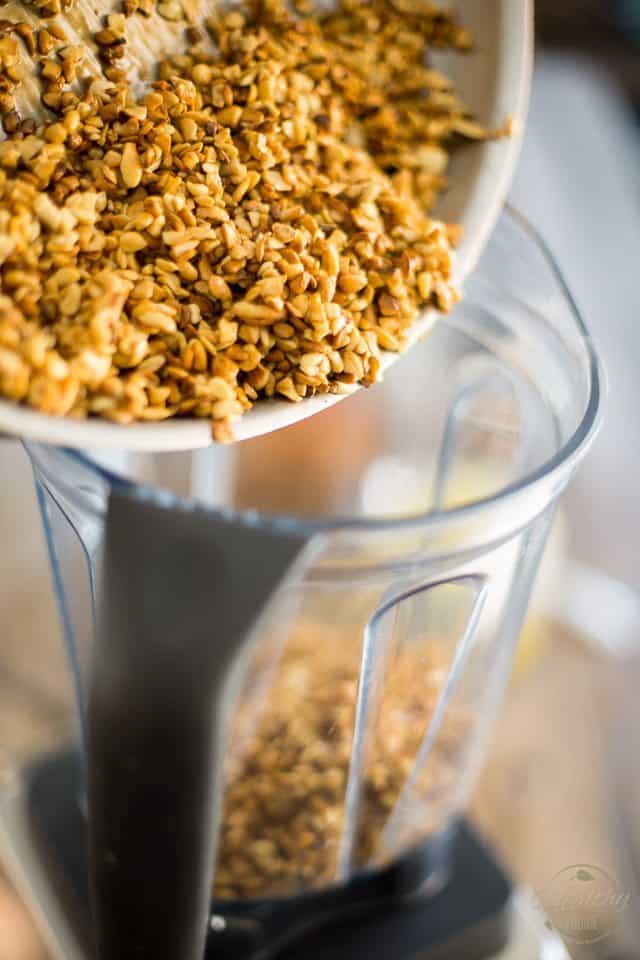
Turn off the heat and let the nuts cool for 10 to 15 minutes or until they can safely be placed in the bowl of your High-Speed Blender or Food Processor.
Note that I chose to make this particular nut butter in my Vitamix, because my brains demanded that it be extremely silky and smooth. However, you could very well do it in a regular food processor, providing that it’s powerful enough. The steps would be pretty much identical, only it might take a little bit longer, and the final product won’t be quite as smooth.
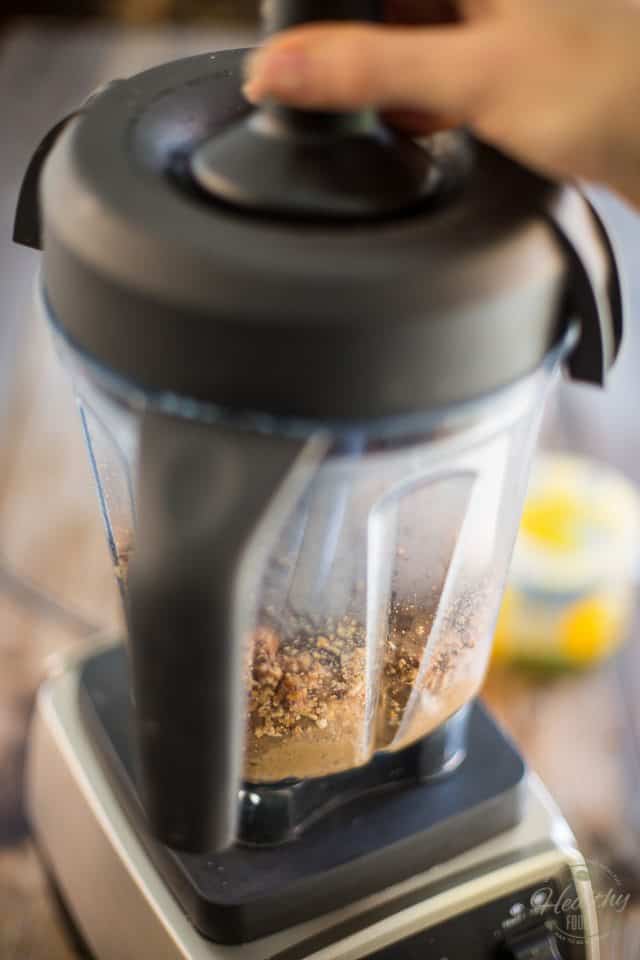
Now that the nuts have been transferred to the container, process them on medium speed for about 30 seconds to a minute, while pushing down with the tamper to force them into the blades, then slowly increase the speed all the way up to the highest setting.
If you’re using a regular food processor, you’re gonna have to stop to scrape the sides quite a few times, since you won’t get to use one of those nifty tamper tools.
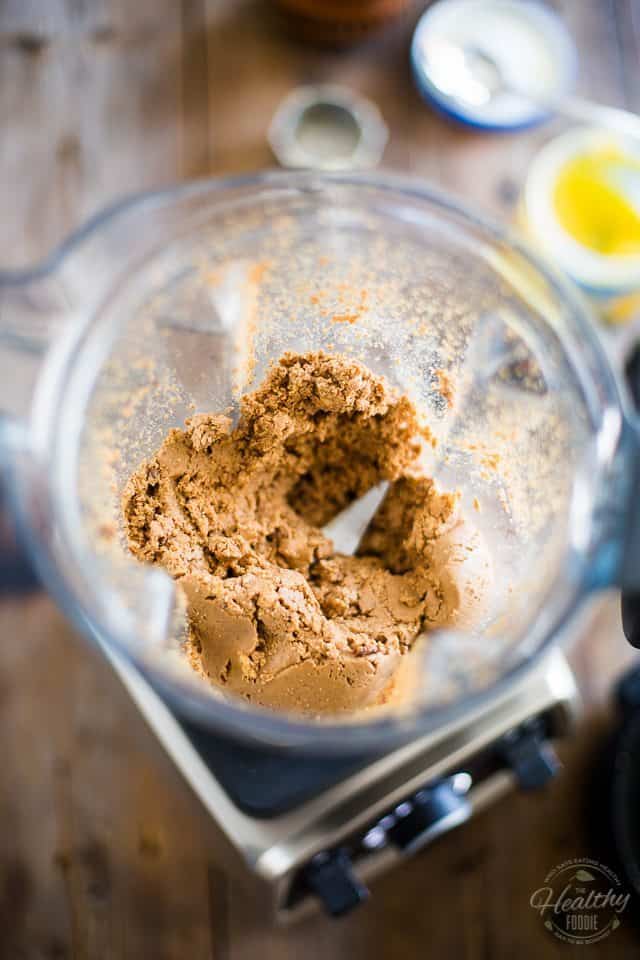
Keep processing until the mixture resembles a block of wet, sticky sand, about 1 or 2 minutes total.
Of course, if using a regular processor, it will take fairly longer to get to that same result.
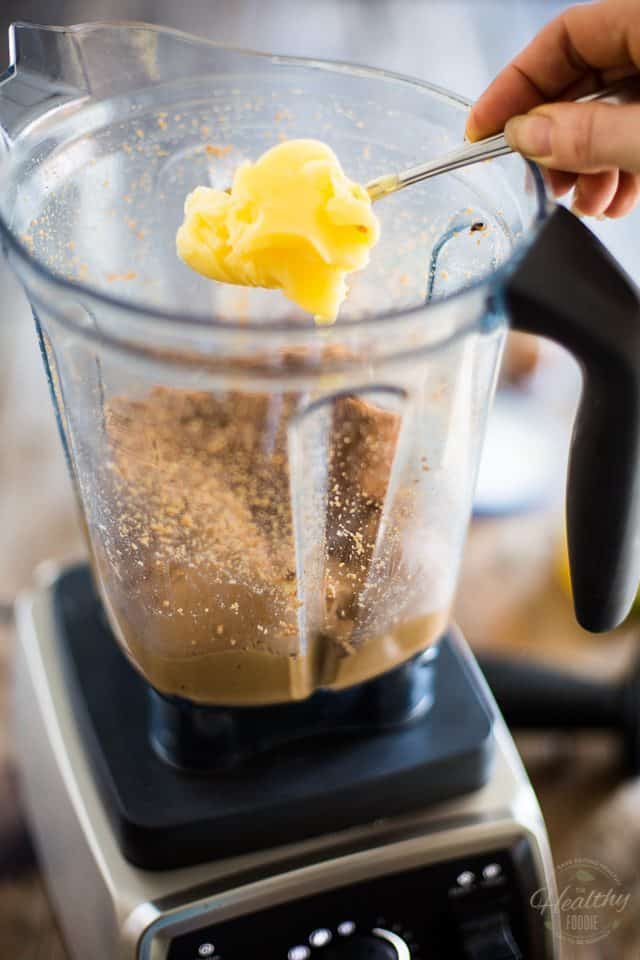
Now remove the lid and scrape the sides with a rubber spatula, then add the half cup of ghee and resume processing, starting on medium and moving up to high, until the nut butter becomes fairly loose and spins freely around the container.
Again, use the tamper as needed to push the ingredients into the blades and stop to scrape the sides a few times if necessary.
It should take no more than 5 minutes to get the nut butter to completely loosen up.
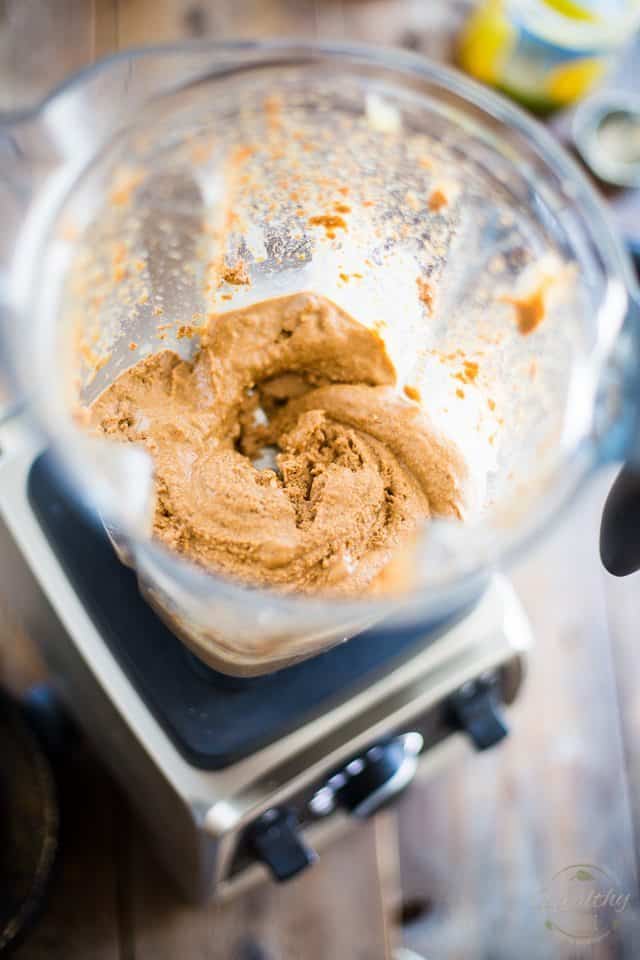
This is what the nut butter will look like after adding the ghee and processing for about a minute. As you can see, it’s still fairly thick and gritty.
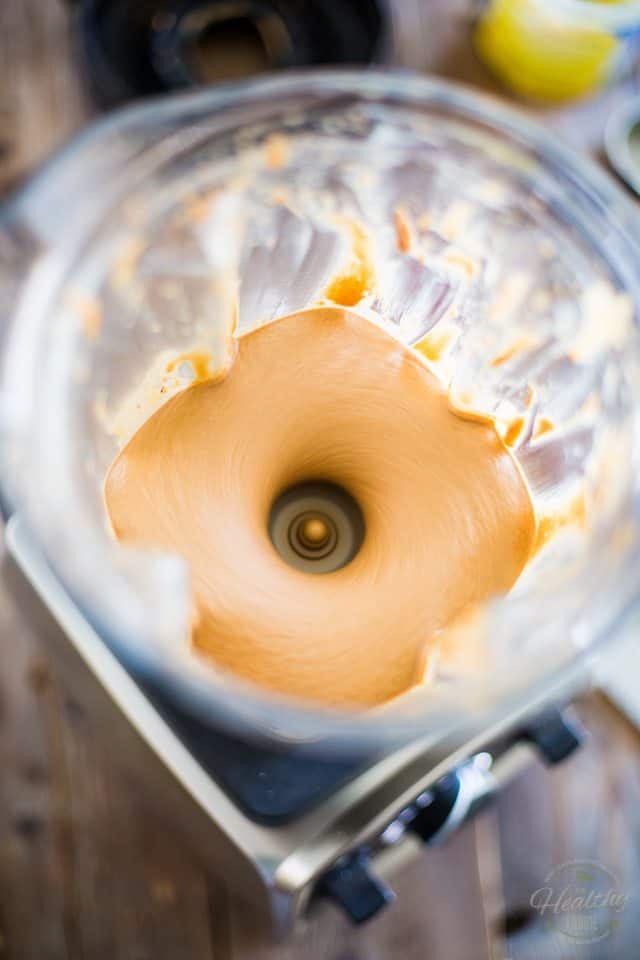
Eventually, though, the ghee will melt all the way, the nuts will start releasing their oil and the nut butter will become almost fluid. As you can see, it is running smoothly and freely in the container. You can tell that it’s really smooth at this point.
I think it’s safe to assume that we’re ready for the next step.
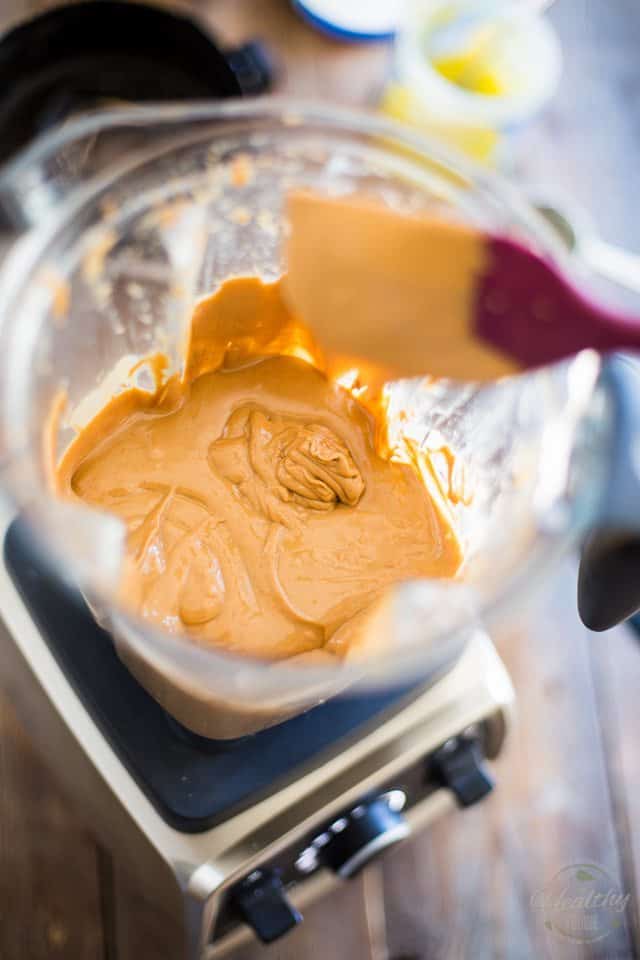
Remove the lid once more and scrape the sides one final time.
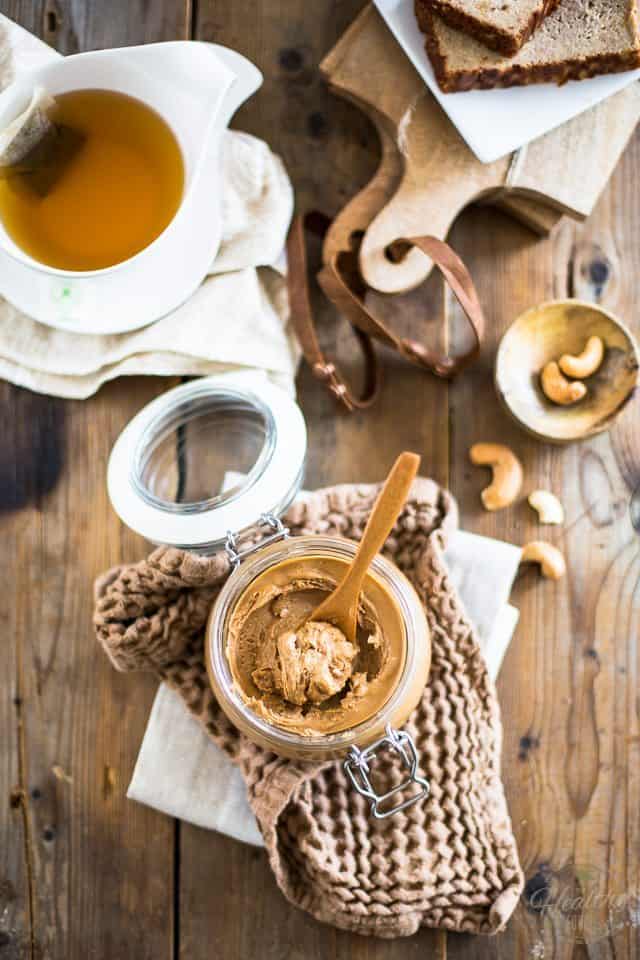
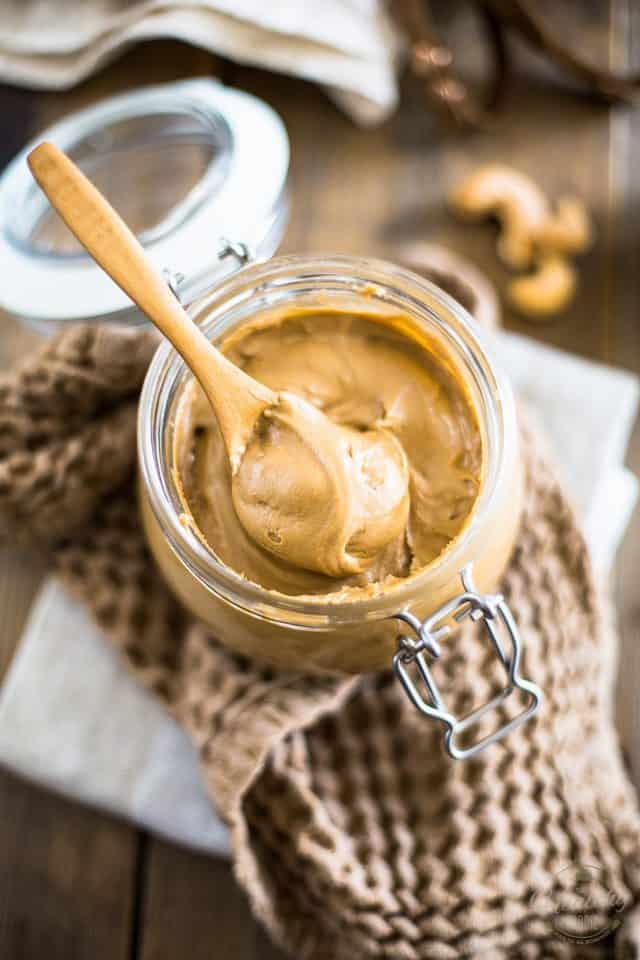
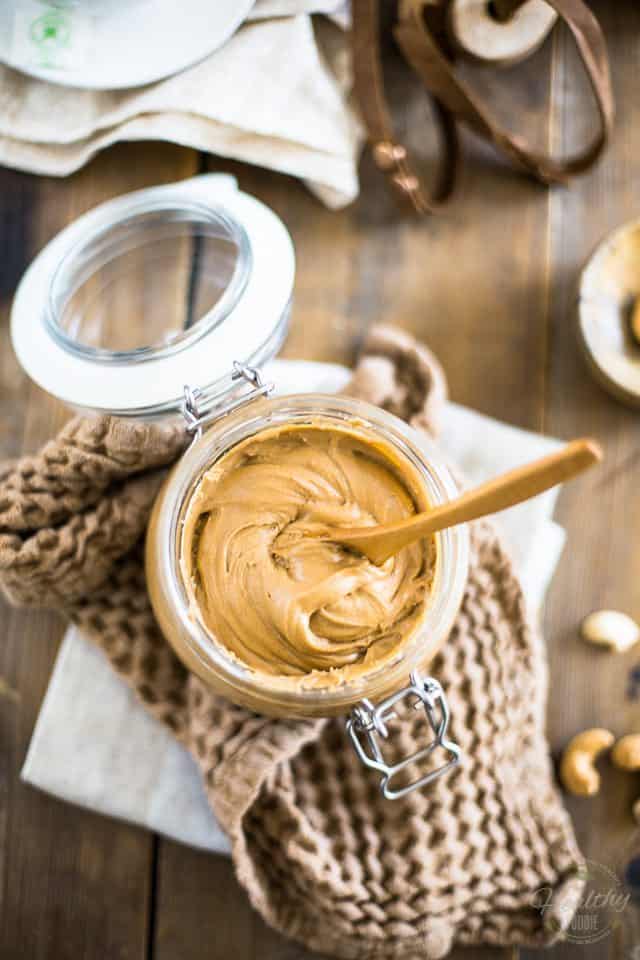
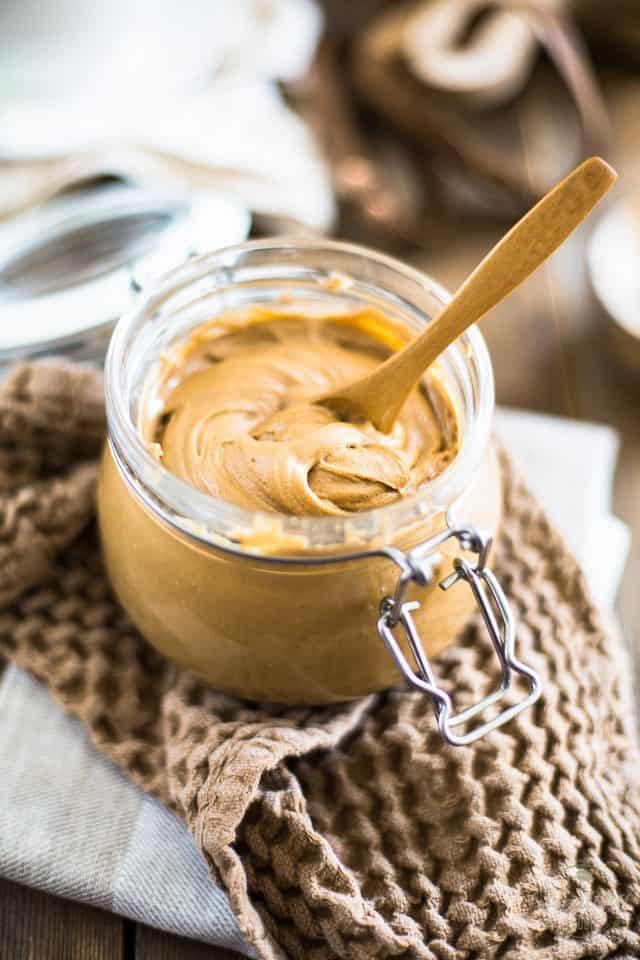
I wish you could smell this, it’s simply out of this world. And can you see how silky smooth this is? OMG, be still my heart!
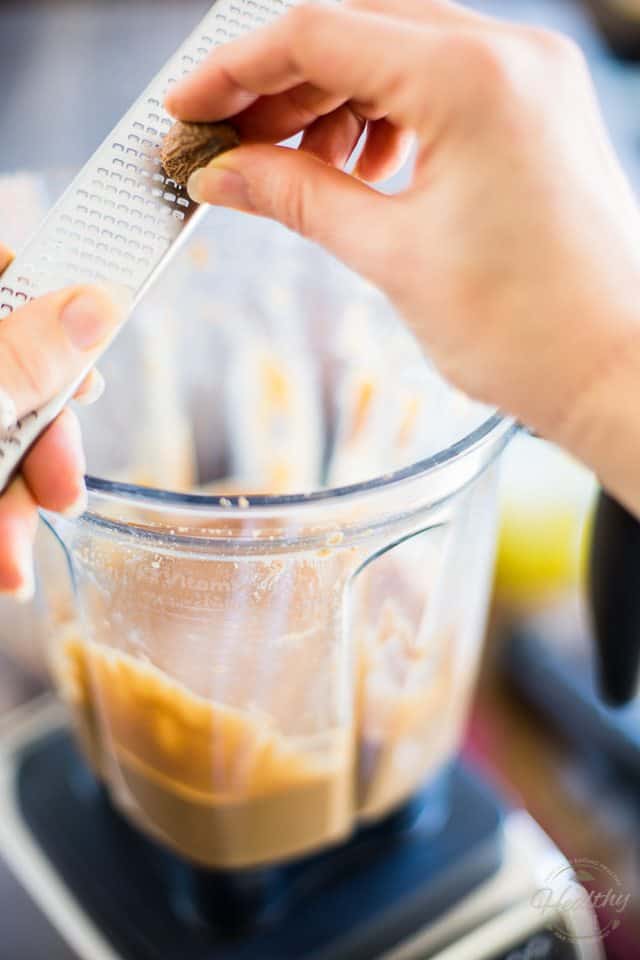
Now add the salt, ground cinnamon and freshly grated nutmeg and then give the nut butter a final spin on medium speed, just to incorporate the newly added ingredients, about 30 seconds.
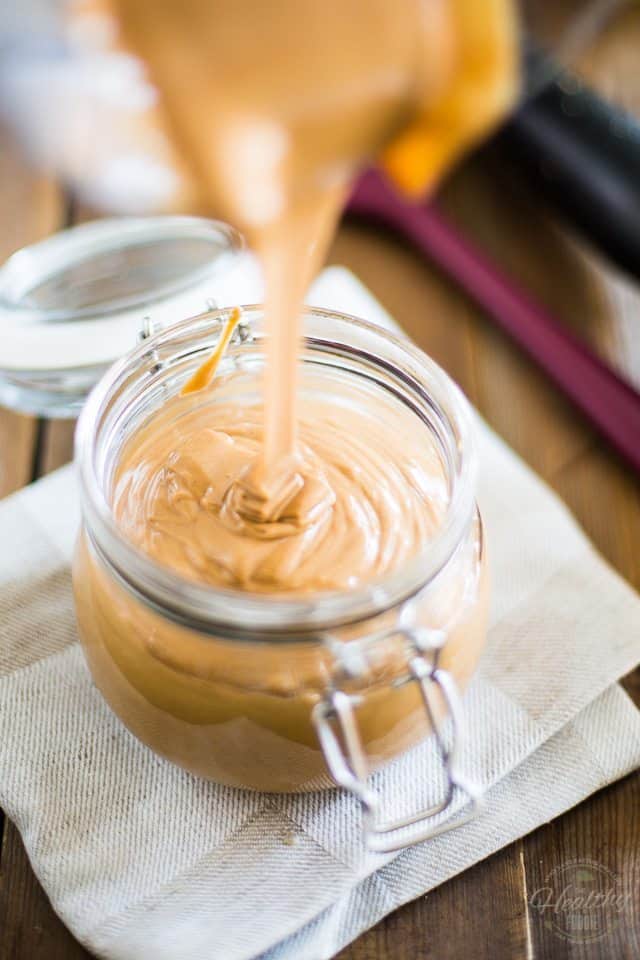
Transfer your nut butter to a clean glass jar and then place it in the pantry to set until the next day. In that short amount of time (which may feel like an eternity, I know…) it will become much firmer, and much better, too. In fact, I find nut butters always taste so much better after they’ve had a chance to “age” for a few days, or even a few weeks!
One thing’s for sure, they are not at their best when they are fresh out of the food processor… so resist the urge to eat the entire jar right now.
Trust me. Put the jar away!
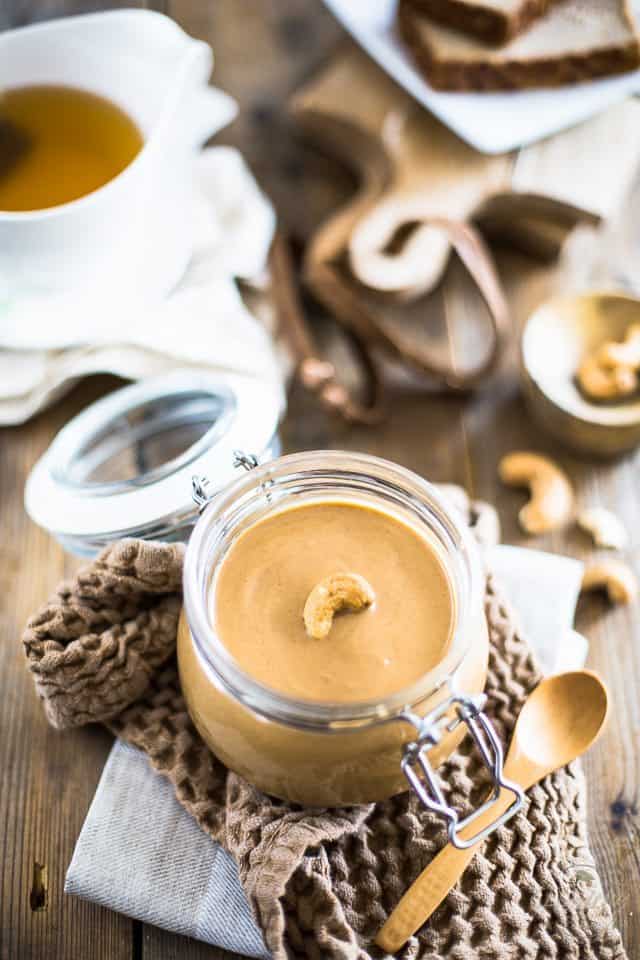
The next day, you can take it out and garnish it with a beautiful whole roasted cashew, if you want to get fancy. I don’t recommend that you do that right after pouring the nut butter in the jar, because the nut will probably only end up sinking… Waste of a delicious nut, if you ask me. Or maybe not. It could make for cool little hidden surprise!
Alright, at this point, you can dig in, but I strongly suggest that you grab a comfortable seat before you do that. This heavenly concoction will no doubt swipe you right off your feet.
And in case you’re wondering… yes, my brains did keep their end of the deal. They said that this was even better than what they’d been dreaming of. This Honey Roasted Cashew Butter is absolutely EVERYTHING they’d hoped it to be, and then some: It’s creamy, it’s sticky, it’s silky smooth, it’s sweet and salty, and it tastes just as if it had been specifically designed for the gods.
WIN!

Honey Roasted Cashew Butter
Ingredients
- 3 cups raw cashew pieces
- 2 tbsp + 1/2 cup ghee
- 1/4 cup raw honey, melted
- 1/2 tsp Himalayan salt
- 1/4 tsp ground cinnamon
- 1/8 tsp freshly grated nutmeg
Instructions
- In a large skillet set over medium heat, melt 2 tablespoons of ghee and then add the cashew pieces; roast, stirring almost constantly until the cashews turn golden and become highly fragrant, about 5 minutes total.
- Add the honey and continue cooking, stirring constantly, until the nuts get really sticky and there is no more honey at the bottom of the pan, about 30 seconds.
- Turn off the heat and let the nuts cool for 10 to 15 minutes or until they can safely be placed in the bowl of your High-Speed Blender or food processor.
- Process the nuts on medium speed for about 30 seconds to a minute, while pushing down with the tamper to force them into the blades, then slowly increase the speed all the way up to the highest setting. Keep processing until the mixture resembles a block of wet, sticky sand, about 1 or 2 minutes total.
- Remove the lid and scrape the sides with a rubber spatula, then add the 1/2 cup of ghee and resume processing, starting on medium and moving up to high, until the nut butter becomes fairly loose and spins freely around the container. Again, use the tamper as needed to push the ingredients into the blades and stop to scrape the sides a few times if necessary. It should take no more than 5 minutes to get the nut butter to completely loosen up.
- When the nut butter has reached the desired consistency, remove the lid, add the salt, ground cinnamon and freshly grated nutmeg, scrape the sides one final time if necessary and then give the nut butter a final spin on medium speed, just to incorporate the newly added ingredients, about 30 seconds.
- Transfer your nut butter to a clean glass jar and store it in the pantry, where it will keep for up to several weeks, if it ever lasts that long, that is!
Nutrition
If you’ve tried this recipe, please take a minute to rate the recipe and let me know how things went for you in the comments below. It’s always such a pleasure to hear from you!
You can also FOLLOW ME on PINTEREST, FACEBOOK, INSTAGRAM and TWITTER for more delicious, healthy recipes!


13 Comments on “Honey Roasted Cashew Butter”
I need to make this recipe for my own good, Its making me drool just by looking at the pictures!
If you think you’re drooling now, just wait until you have the actual thing in front of you! It’s out of this world, I swear! 🙂
Just came across this post and have to say that you have converted me to trying to make my own nut butter! Yours looks absolutely incredible, so smooth and glossy and OMG I think I just need it in my life. And your mouse story made me laugh- we had a similar experience a few years back and everyone was freaking out haha! X
Hahaha! Did you also start chasing the thing with a broom? I felt like I was an actor in some sort of a silly cartoon, running after a mouse, trying to stop it my my broom. I never knew these things could be so quick!!! 😀
That said, I’m really happy to have converted you! I hope you have much fun making your own nut butter. You’ll see, it’s a really rewarding experience. 🙂
Oh my God! This cashew butter looks so amazingly creamy and smooth! Love the addition of the nutmeg and cinnamon, I wish I could smell it from here! 😉
xoxo
Hi, I’ve just made your Honey Roast Cashew Butter…..omg it’s good. Mine is a little chunkier than yours so might whip it through the processor again. But either way sensational. Made your ghee yesterday. Your instructions are really easy to follow. Thanks Bron
Did you also make yours in a Vitamix, Bron? If not, that might explain why it’s a little bit chunkier… You could give it another pass, and if necessary, add a little bit more melted ghee to help loosen it up a bit. One or two tablespoons should do the trick.
At any rate, real happy to hear that the nut butter is to your liking and that you also successfully made ghee! Also, thanks for your kind words, they are greatly appreciated! 🙂
I don’t have the words to describe how delicious this Nutbutter is. (And not just because I’m from Germany) Those hints of cinnamon and nutmeg are amazing!
I already made your Coconutbutter and of course the Ghee for use in this recipe. Great and easy to follow recipes both.
I just wanted to say though, that my Vitamix, a 2013 model, overheated mixing the honey-roasted nuts. I think it might be due to the higher and narrower container. I thought I should tell you for any future reference. I only made one half and then the other, adding the ghee a little early than you did. The result was tremendous, so I will just be a little bit more careful next time.
Thank you for all the inspiration.
Jannick
Wow, thank you so much for your kind words, Jannick, I’m really happy to hear that you enjoyed the nut butter this much!
I’m really surprised about your old Vitamix overheating though… these things are unkillable! But you’re right, the different shape container might be the culprit. Good call on adding the ghee early. You could even melt it before adding it to the butter, which would get things going even faster and easier.
How can I make it vegan?…..what can work instead of the ghee…and honey?
Thanks and blessings
Make a vegan version please
Haha! I haven’t tried it, but I’m pretty sure that if you were to use pure maple syrup in lieu of the honey and sub coconut oil for the ghee, it would work just as well and yield very interesting results!!!
Ok, ok, ok. This stuff is UNREAL! Seriously, I am one of those people who grabs a jar of Jif creamy peanut butter and will eat spoonfuls at a time. This stuff is the only thing that could help relieve that craving for peanut butter. The taste, the texture – both so good! I used coconut oil and had a difficult time with getting the consistency to look like yours, so I used 1/4 cup instead of 1/2 cup and turned out perfectly! Thank you!