Look Ma! I Made Sausage!
Remember how, when I ordered my side of pork, I requested that they include a package of casing with my order as I wanted to try my hand at making my own sausage at home. Well, I’m happy to report that I did, and that I was successful, too!
I LOVE sausage, you see, but since I can never be too certain of what goes into that which is available at my local grocery store, I’ve pretty much crossed it off my list of approved foods.
That’s why I was especially excited at the thought of enjoying this deliciousness again. I can’t even remember when was the last time I’d had sausage.
Since I already own a KitchenAid stand mixer, I figured I would give their meat grinder and sausage stuffer attachments a try. I thought the investment was rather minimal and very well worth a shot.
I was so excited when the items came in the mail, just like a kid on Christmas day! I couldn’t wait for the week-end to finally get here!
The very next Saturday, I hooked everything up and got busy testing it. Well, I must say that it does work surprisingly well!
I don’t know that I would do pounds and pounds of sausage using this gadget, but the 2 little batches that I did, for a total of 4 pounds, were a whole lot of fun to make.
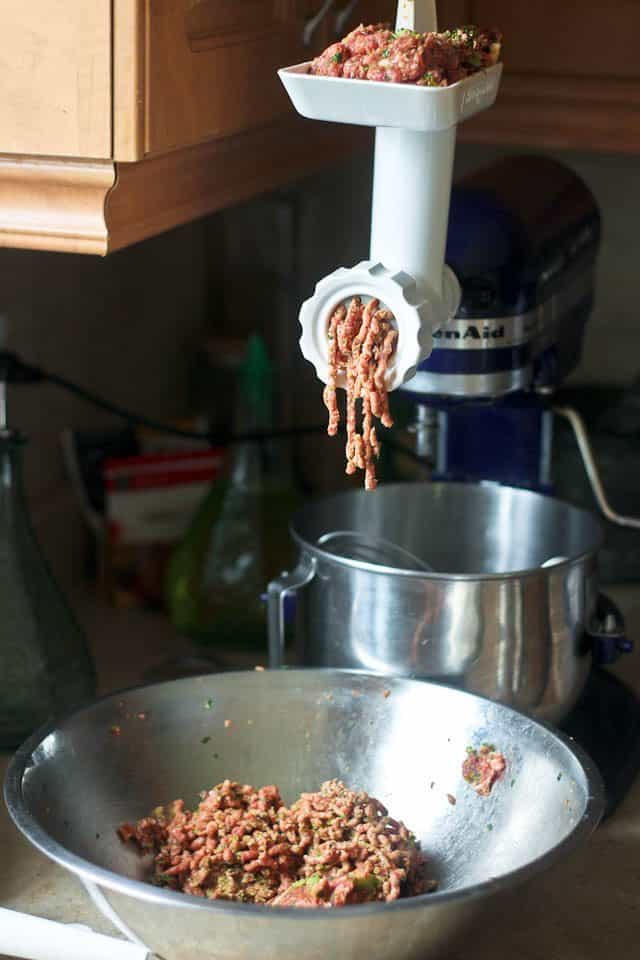
First, I fed the very cold meat mixture through the meat grinder. I was already enjoying myself, big time!
Oh, just one word of advice, here. If you don’t want to end up having to clean the mixer’s bowl, as well as all the accessories that are in it (if you store yours in the bowl, too), take a second to remove them before you start making the sausage. Otherwise, chances are bits and pieces of meat will jump out of the grinder and straight into that bowl, as if they had just entered some sort of a diving contest or something.
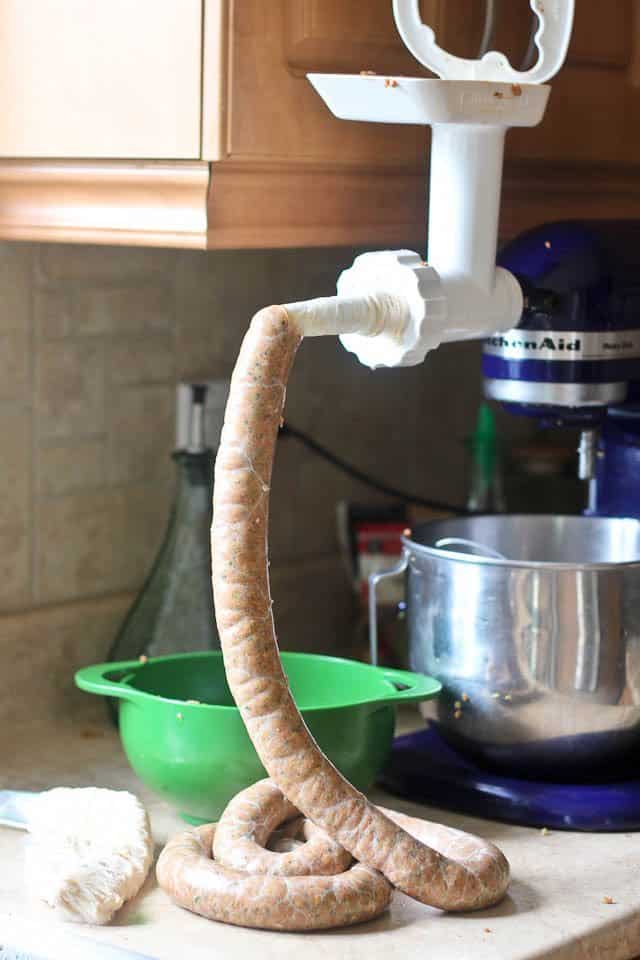
As the meat exits the stuffing tube, it sort of pushes the casing all by itself, so you don’t have much to do, really. Just hold it loosely in your left hand while you push the meat down the meat grinder with the other one.
Simply help shape the sausage a little bit with your fingers and push back any air bubbles that may form.
And don’t be too over concerned with the possibility that you might rip the casing. It’s a lot more solid than it appears!
Once all the meat has been extruded, divide your sausage by twisting it into links…
And Ta Da!
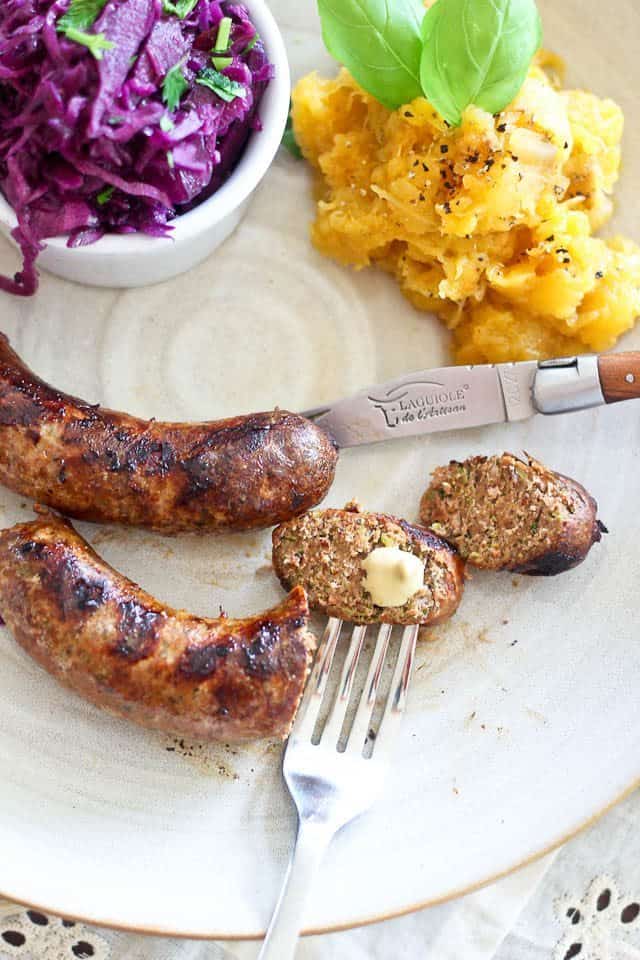
There you have it: delicious home made sausage! And it looks just like the real thing, too!
Only it doesn’t contain any fillers, sugar, gluten or other unwanted nasties. Oh, I so couldn’t wait to taste them.
Time to fire up the barbie!
Of course, as as soon as I put my sausage on the grill and closed the lid, this happened…
The rain had made my sausage prisoner!!! How dared it do that to me? My precious sausage! It was trapped! The only way I could get to it was by getting seriously, and I do mean seriously wet. Just one measly little flip and I needed towels to wipe myself dry.
But luckily, it didn’t last too long.
By the time my sausage was done, the rain had stopped…
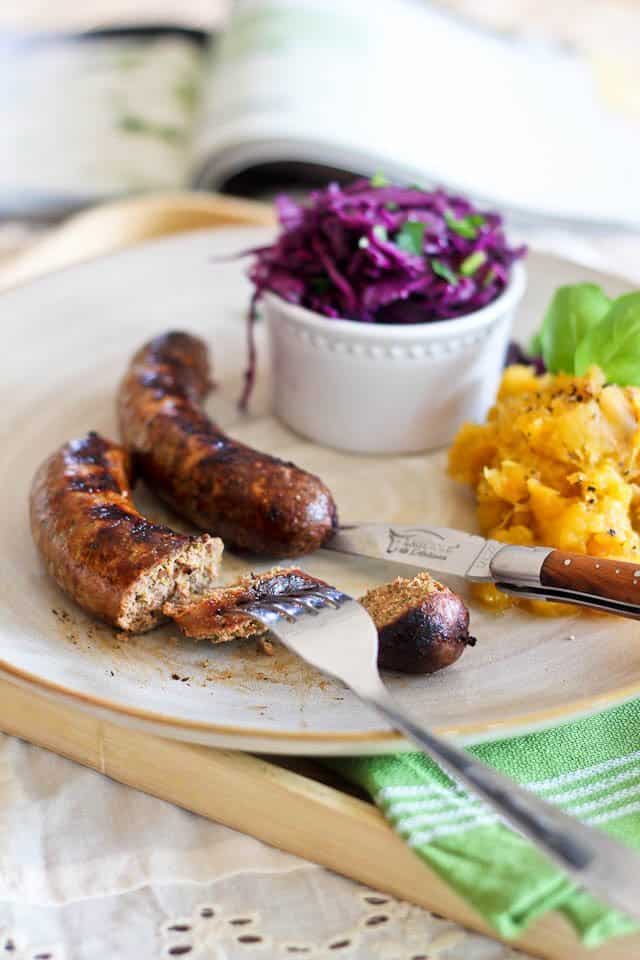
The sun was out again, and the light filled the entire room with a deep feeling of a coziness and serenity…
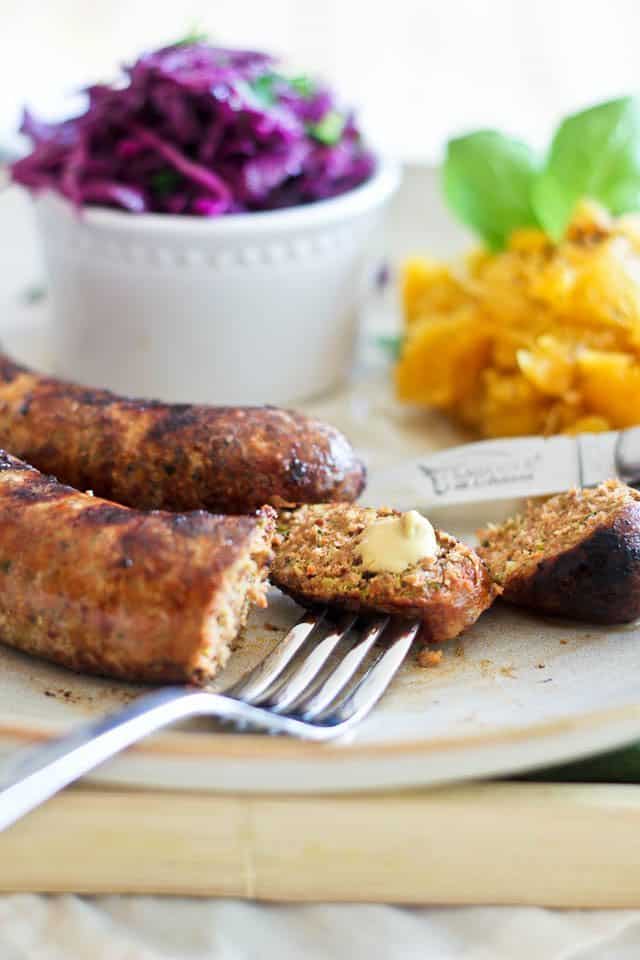
I was very happy to sit myself down and enjoy my very first bite of home made sausage.
It turned out absolutely delicious, if you ask me!
Just the way I like it: with a touch of Dijon mustard!
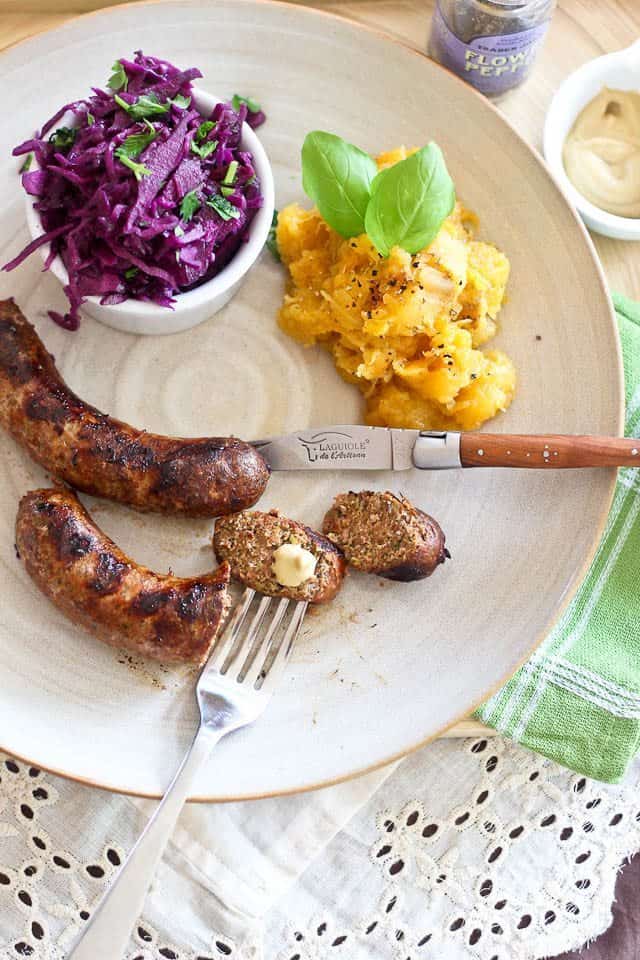
BACON BROCCOLI SAUSAGE
Ingredients
- 1 lb pastured ground pork
- 1 lb grass-fed ground beef
- 8 slices pastured, sugar free bacon, cooked and crumbled
- the fat from your cooked bacon, make sure it’s had time to cool
- 2 cups raw broccoli, chopped
- 2 cloves garlic, chopped
- 2 tbsp fresh parsley, chopped
- 1 tsp Himalayan or unrefined sea salt
- 1 tsp freshly cracked black pepper
- 1 tsp smoked paprika
- 2 tbsp Dijon mustard
- 1 tsp garlic powder
- 1 tsp onion powder
Instructions
- Before you start, make sure that your meat is super cold, as in almost frozen. It would be a good idea to place it in the freezer (or in the fridge, set over a bowl of ice) for a half hour to an hour prior to starting, just to give it that little bit of extra chill.
- In a large mixing bowl, add your meat along with the rest of the ingredients, except for the cooked bacon, and mix until just incorporated, no more. If your meat is slightly frozen, simply cut it into cubes and mix it with the rest of the ingredients, the meat grinder will still be able to handle it don’t worry.
- Work the meat into the meat grinder (if you’re using a KitchenAid stand mixer equipped with meat grinder attachment, set speed to 4); when the meat is completely ground, add the crumbled bacon and place the finished mixture in the fridge while you work on the sausage stuffer.
- Slide the hog casing onto the sausage stuffing tube and leave about 5 to 6 inches hanging at the end. You will need approximately 6 inches of casing per link.
- Hold the casing loosely at the end of the stuffing tube with one hand and let the sausage feed into the casing as you push the meat down the feeding tunnel with your other hand.
- The meat will take care of pulling the casing off of the tube. All you need to help shape it a little bit and push back any air bubbles that may form.
- Once all the meat has been pushed through, take your sausage off of the stuffing tube and tie a knot at both ends, as close to the meat as possible.
- Twist this giant sausage into links, twisting in opposite directions between links to keep them from coming undone as you twist the next one.
- Place the finished sausage in the fridge, uncovered, to let it dry out a bit, then cut it into individual sausage.
Nutrition
If you’ve tried this recipe, please take a minute to rate the recipe and let me know how things went for you in the comments below. It’s always such a pleasure to hear from you!
You can also FOLLOW ME on PINTEREST, FACEBOOK, INSTAGRAM and TWITTER for more delicious, healthy recipes!
I also made a batch of chicken sausages, but didn’t take pictures of these ones. They looked so similar to the first batch, I figured it was no use…
They turned out really really good, however. I say if you are looking for a low fat or non red meat alternative, they are a definite contender!
Chicken, Green Olive and Artichoke Sausage
Ingredients
- 715 g boneless, skinless chicken breast, cut into 1” cubes
- 1 cup raw broccoli, chopped very finely
- ¾ tsp Himalayan or unrefined sea salt
- 1 tsp freshly cracked black pepper
- 1 tsp smoked paprika
- 2 tbsp dried mustard
- 2 tsp garlic powder
- 1 tsp onion powder
- 1/2 can artichoke hearts
- 1/2 cup green olives
- 1 tbsp fresh parsley
Instructions
- Before you start, make sure that your chicken is super cold, as in almost frozen. It would be a good idea to place it in the freezer (or in the fridge, set over a bowl of ice) for a half hour to an hour prior to starting, just to give it that little bit of extra chill.
- In a large mixing bowl, add your pieces of chicken along with the rest of the ingredients, except for the sliced olives and parsley, and mix until just incorporated. If your meat is slightly frozen and won’t mix easily, just cut it into cubes and mix it with the rest of the ingredients, the meat grinder will still be able to handle it that way.
- Work the meat mixture into the meat grinder (if you’re using a KitchenAid stand mixer equipped with meat grinder attachment, set speed to 4); when the meat is completely ground, mix in the sliced olives and parsley and place the finished mixture in the fridge while you work on the sausage stuffer.
- From this point on, you can follow the instructions from the Bacon Broccoli Sausage recipe above, starting at step #4
Nutrition
If you’ve tried this recipe, please take a minute to rate the recipe and let me know how things went for you in the comments below. It’s always such a pleasure to hear from you!
You can also FOLLOW ME on PINTEREST, FACEBOOK, INSTAGRAM and TWITTER for more delicious, healthy recipes!
S








15 Comments on “Look Ma! I Made Sausage!”
This almost brought a tear to my eye – seriously! Awesome post, great photos, and that flavor combination must have been EPIC! Pinning, and making this ASAP! You rocked it!!!!
WOW. I am flushed. Thank you so much, Mellissa. I’m so happy that we share very similar diets now. It seems like I enjoy your recipes just as much as you do mine. I absolutely love that we inspire one another! 😀
These look great! 🙂 On other sites, I’ve read about letting sausages “cure.” Is this an optional step? Could you cure these sausages? Thanks! 🙂
I think cured sausage is more like salami, Laura. I’m no expert on the matter, but I do believe that you need special “starters” to make this kind of sausage… Sorry I can’t really help you with this one, but I have to thank you for the inspiration, though: I sure would love to try my hand at making my own salami now! I shall research that! 🙂
wow does this look good! how did you decide to use half beef/half pork? I was thinking of trying to make sausage with a ground up pork shoulder. I adore all sorts of sausage, and don’t have a good local source. Our butcher makes his own but puts MSG in. I used to have a neighbor who made all sorts of sausage – once he made some mexican chorizo, which I still dream about.
Thanks Trish! I dunno, I just happen to really like mixing pork and beef together. I do that a lot, even when making things like meatballs, meat pies or even simple patties. Sometimes, I find pork to be too fatty to be used on its own, although this holds a lot less true with the pastured stuff. I can’t believe how lean it is in comparison to the meat I used to buy at the grocery store.
Now you’re making me want to start researching how to make chorizo at home… I sure wouldn’t mind eating some of that while knowing exactly what went into it! 🙂
And I think that ground pork shoulder would be AWESOME to make sausage with. Let me know how it turned out if you end up making it! 🙂
I love sausages and yours look amazing too!
I loved everything about this post. Your words captivated me until the very end (And is it bad that I chuckled at the rain’s attempt to sabotage your grilling? I’m sorrryyy). Your photos are beyond gorgeous and this entire sausage making ordeal of yours makes me want a grinder ASAP. Thanks for sharing. I’ll be bookmarking this recipe to try whenever the gods send me a KitchenAid mixer with all those lovely attachments as a gift for being awesome.
HAHA! No Tia, it’s not bad at all. Actually, my daughter laughed at the exact same thing, apparently, so I guess it really is funny. I can tell you I was not laughing when it happened, though. Thank goodness no one was there to take a picture of me when I came in from flippin’ my “prisoners”.
Thank you so much for your super kind words, I truly hope that this KitchenAid mixer finds its way to your kitchen so you can make your own sausage and tell me all about it! 🙂
I’ve had sauasge-making on my foodie bucket list for a long time. You have inspired me to try it! And I LOVE LOVE LOVE the ingredient combos you made.
SO happy to hear, Maria! DO IT! It’s so much fun, I swear you won’t regret it! And please, please, tell me all about your experience. 😀
WOW I am so amazed that you made your own sausage that is great.I also love the tutorials nice and clear .Beautiful layout.I have never made sausage in a casing only the patties .You now inspired me .Please checkout my blog:
http://simplybittenkitchen.net/.
Thanks
Thanks a bunch, Nicole! Patties are great, but the casings make it that much more “special”. It’s that little extra step that makes all the difference in the world. Hope you have a blast like I did if you end up making your own too! 🙂
This made my day. My mother-in-law recently gave me a sausage maker and I took it graciously and said, “Oh this is great!” but I had no plans of ever using it. I recently made some bratwurst with it and now I have my next sausage venture here. Thanks so much they look amazing.
Haha! Glad to have made your day. Now you just made mine!
Hope you like this flavor combo, Mike! Sausage making IS fun, isn’t it? And bratwurst? I HAVE to look that up. Sounds really good! 🙂
Thanks for your kind words!