Homemade Kombucha – Make your own for a fraction of the price!
I remember when my kids were little, my mom used to make Homemade Kombucha all the time and give it to them to drink. She would call it “Magic Potion” and I think that because she called it that, they sort of liked it.
I, myself, couldn’t stand what I referred to as “Mushroom Juice”. I tried to like it because it was supposedly good for me, but it never worked. I despised the stuff so much, I had to block my nose to drink it.
I guess you can very well imagine that I never quite understood the craze around Kombucha and why people were willing to dish out 3, 4 and even 5 bucks for a single bottle of the stuff!
Still, one day I decided I had to give it another chance. Hey, maybe I’d changed enough in all those years that I would now appreciate it? After all, it had been well over 15 years since I’d last had some.
So I actually stopped by the store on my way back home one night and bought myself a bottle. Of course, I had to absolutely love it. Because I needed another addiction, you know. Another expensive addiction, at that!
It didn’t take long before I decided I needed to try my hand at making my own. Hey, if my mom had been able to do it for so long, surely it wouldn’t be a problem for me. I was only hoping that the home made stuff would taste nothing like what I remembered and more like the stuff I’d been getting from the store!
So I started reading on the subject and found many great articles, namely on Cultures for Health, as well as in Fermented: A Four Season Approach to Paleo Probiotic Foods by Jill Ciciarelli (if you are the tiny least interested in food fermentation, I strongly recommend you get this book, by the way), but it wasn’t until Josh, the amazing young man behind Slim Palate, posted about his Kombucha making experience that I finally decided to take the plunge. His instructions were so very clear and concise, and he made it look so easy, he convinced me to finally give it a go.
But before I could get started, I needed to get my hands on a few mandatory supplies:
#1 – A large container for the Kombucha to ferment in
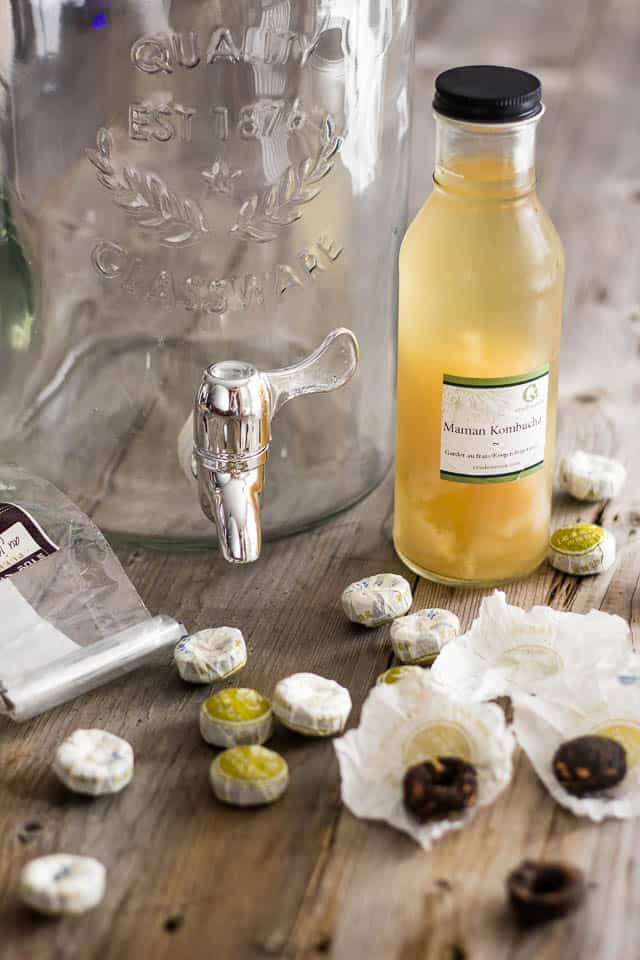
I decided to use a 1½ gallon Beverage Dispenser which I found at my local Target. This kind of container makes tasting your Kombucha so easy! A little too easy, perhaps…
#2 – Several glass bottles to keep my Kombucha in after it’s done fermenting
I purchased several of these beautiful flip top glass bottles at my local IKEA, but I’m sure you could find these pretty much anywhere. You can also reuse any glass bottle that has a screw-on cap, although the flip tops are preferable if you’re opting to do a second ferment. Also, if someone in your entourage happens to be drinking Grolsch beer (like my son does), have them keep the bottles for you!
#3 – Some suitable tea
I chose to go with one of my ultimate favorites, a black Pu Erh, but you can use any tea you like, so long as it’s true Camellia Sinensis, NOT herbal tea, and doesn’t contain any kind of artificial flavoring.
#4 – Most important of all… I needed to find me a SCOBY and some starter tea
Now this is probably the trickiest part. While I know that you can start your very own SCOBY from scratch (well, more from store bought unflavored kombucha) I found it was harder for me to get my hands on some of that unflavored tea than it was to find an all grown up and ready to use mama SCOBY. Plus, when you purchase a SCOBY, it usually comes packed in enough starter tea to get your batch going. There are several online sources where you can buy them and a lot of natural health food stores also keep them in stock.
Get all your stuff ready before you start.
I used a 1½ gallon glass beverage container, an organic black Pu Erh tea that I really like and got me a SCOBY as well as some starter unflavored Kombucha tea at my local health food store
Ready? Let’s go!
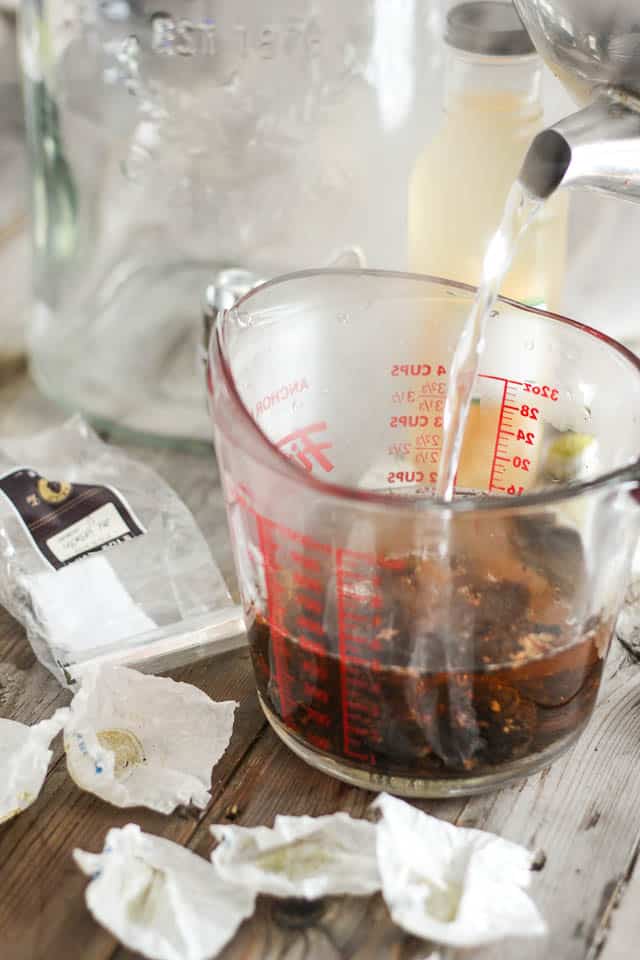
Pour 2 cups of simmering water over the tea. You can use tea bags, discs, bricks or even loose tea, so long as it’s the real thing. No herbal teas, no flavoring.
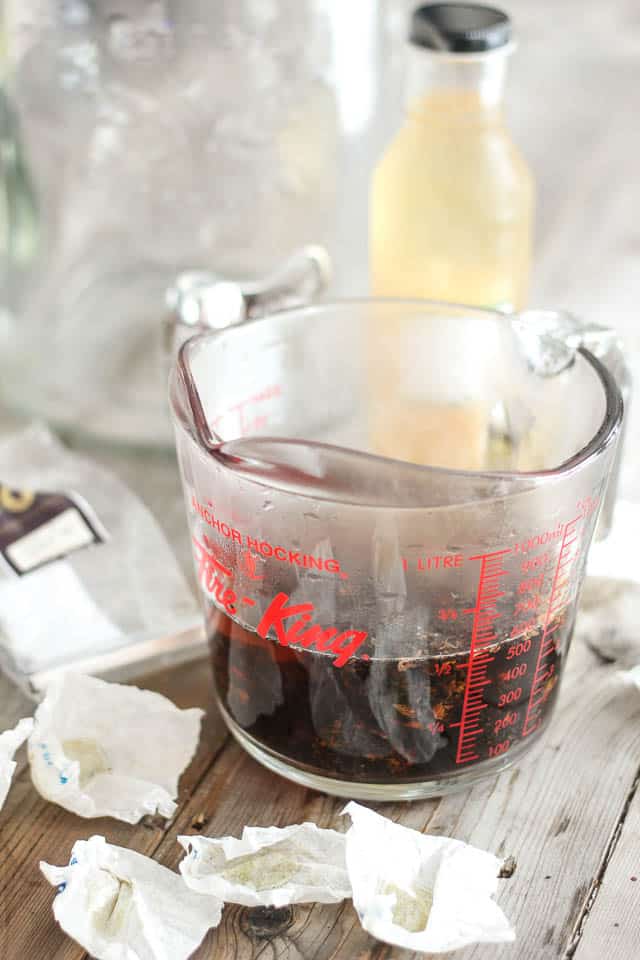
Let that tea steep for 5-6 minutes, then remove the bags or strain the leaves.
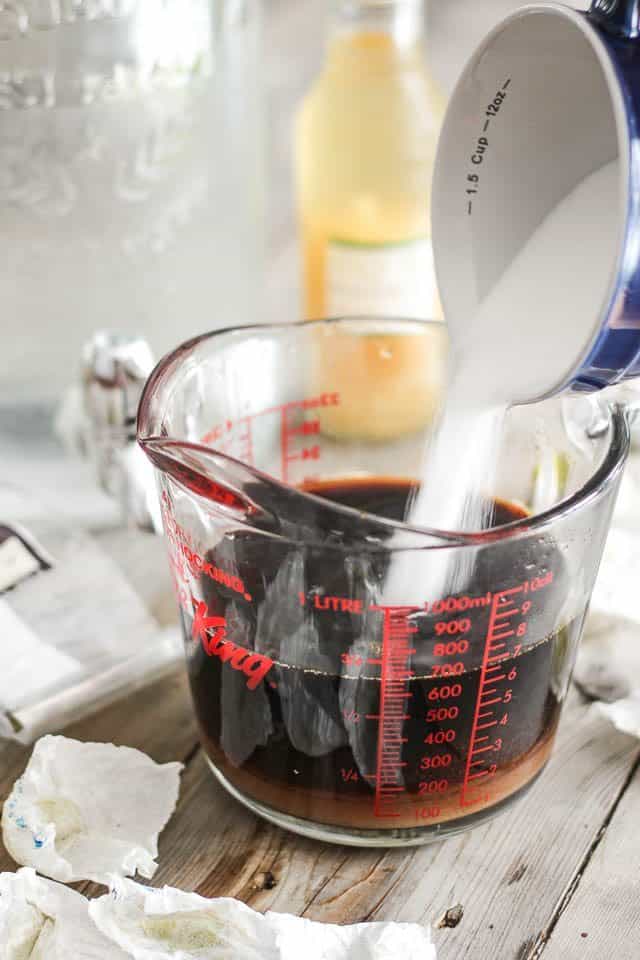
Add the sugar to the hot tea. Yeah, I know: it’s sugar. WHITE SUGAR!
But don’t worry, your SCOBY will be eating most of it and very little will be left in the final product.
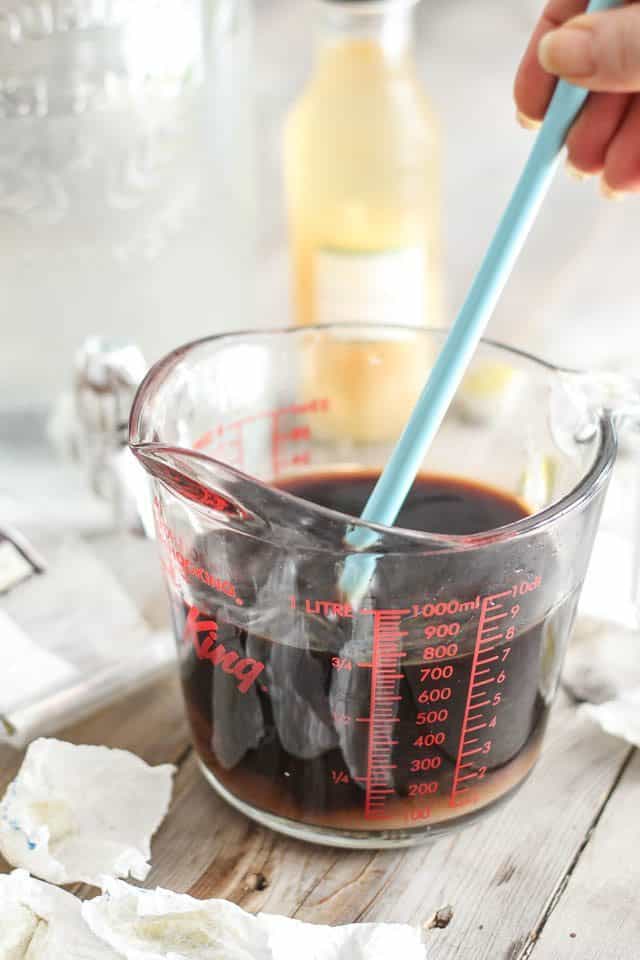
Stir until the sugar is completely dissolved and allow to cool to room temperature.
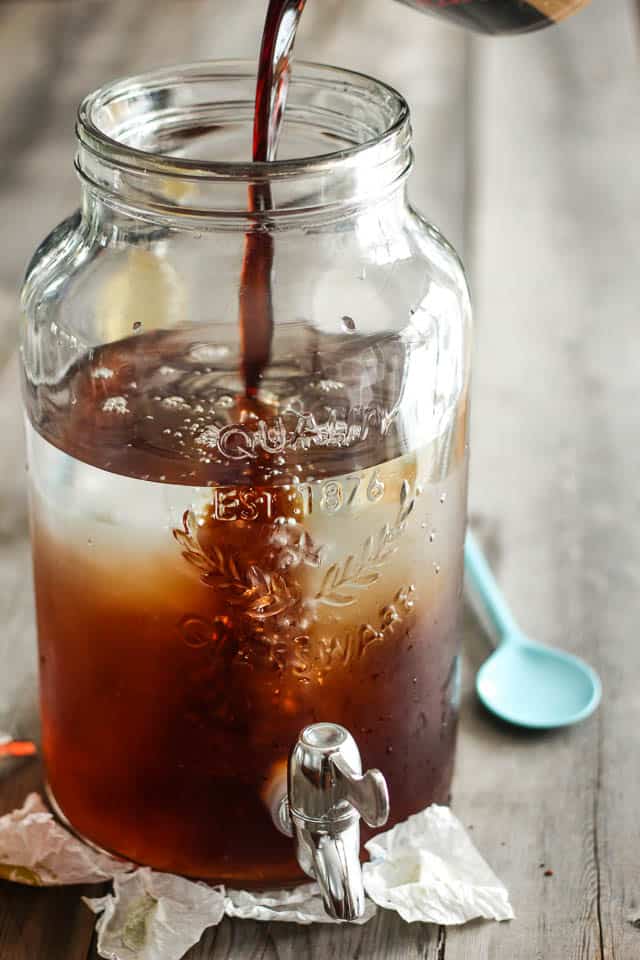
Fill the glass container with cold water and pour the sugared tea right in. Make sure you leave enough room for the starter tea and SCOBY to go in!
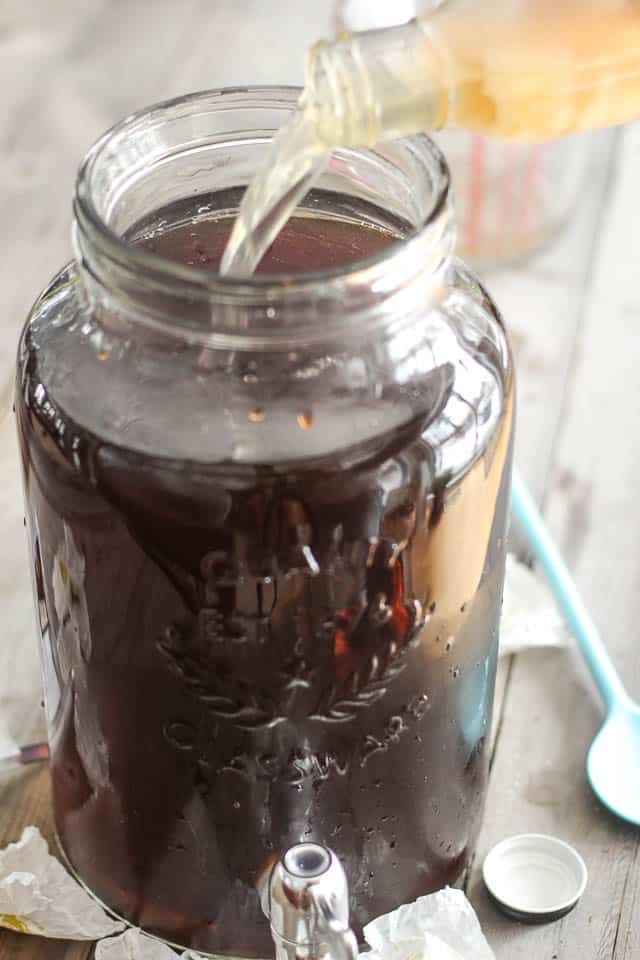
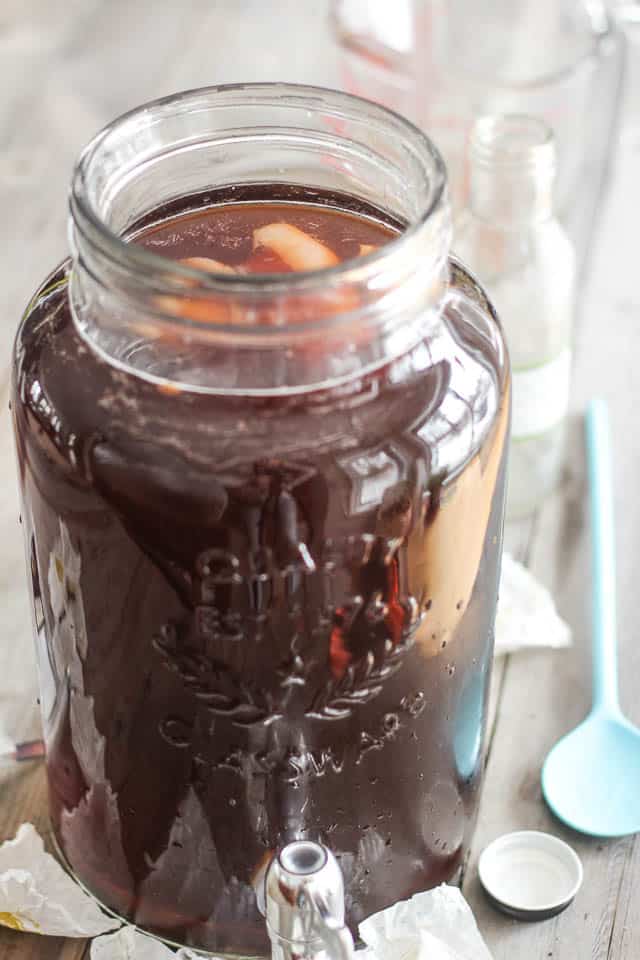
Add the starter tea and SCOBY to the beverage dispenser or glass jar.
Just make sure both the liquid in the jar and the starter tea are at the same temperature. Adding the SCOBY to hot or even warm liquid would likely kill it.
See how that SCOBY is happily it’s floating in there?
We’re pretty much done for now. That wasn’t so hard, was it?
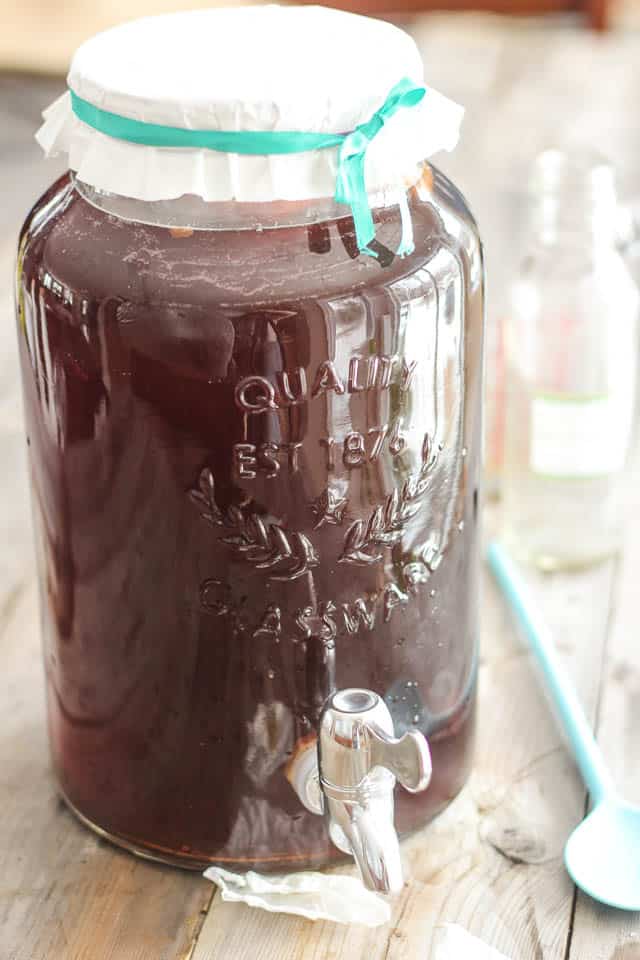
Cover your jar with 2 or 3 large coffee filters and secure them with rubber bands. You could also use a clean tea towel if you don’t have any coffee filters on hand.
Make sure that you use something that lets air through but that is woven tightly enough to keep bugs and dust out of your brew!
Now for the hard part. You need to leave your kombucha alone for the next 2 to 3 weeks.
Total fermenting time can vary greatly depending on many factors, such as ambient temperature, light, ingredients used, as well as your own personal preference, so start tasting after about 10 days.
Set your brew in a warm, well ventilated and well lit area, but away from direct sunlight. You don’t want to hide your kombucha in a cupboard or closet, completely away from light as your SCOBY does need light in order to feed. The kitchen counter works perfectly well for me.
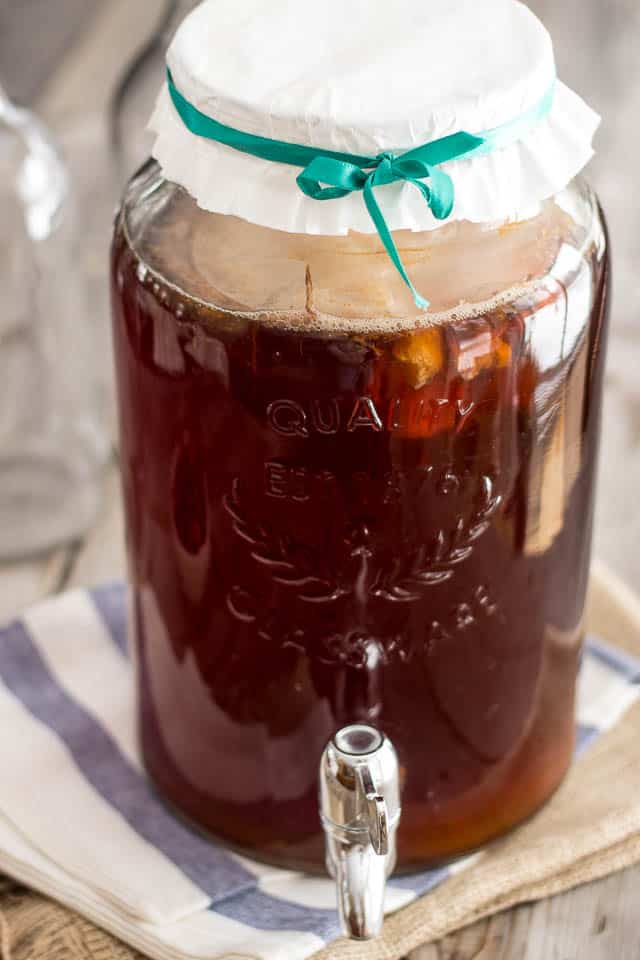
After a couple of weeks, your kombucha will be ready to drink.
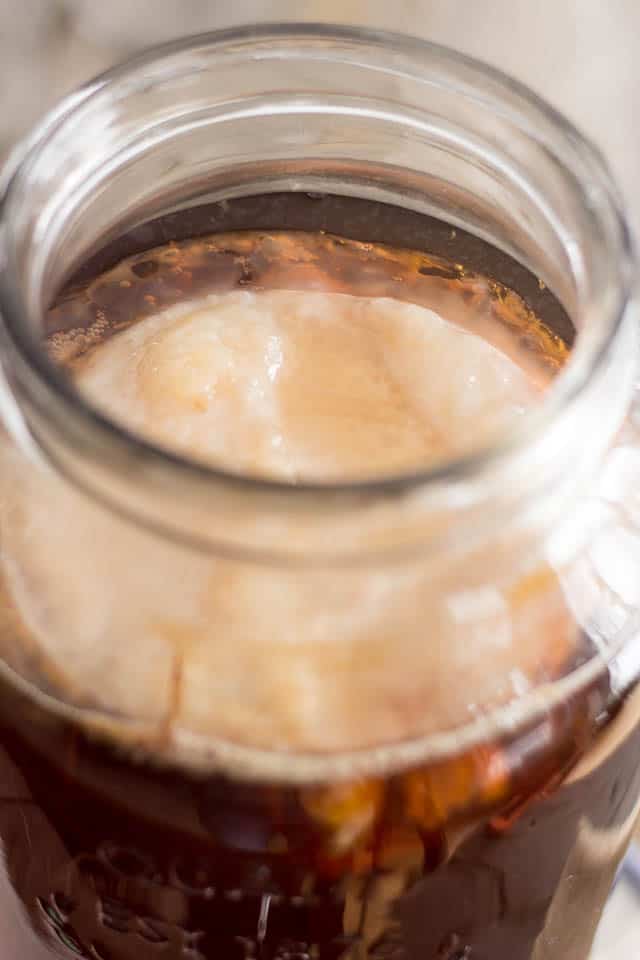
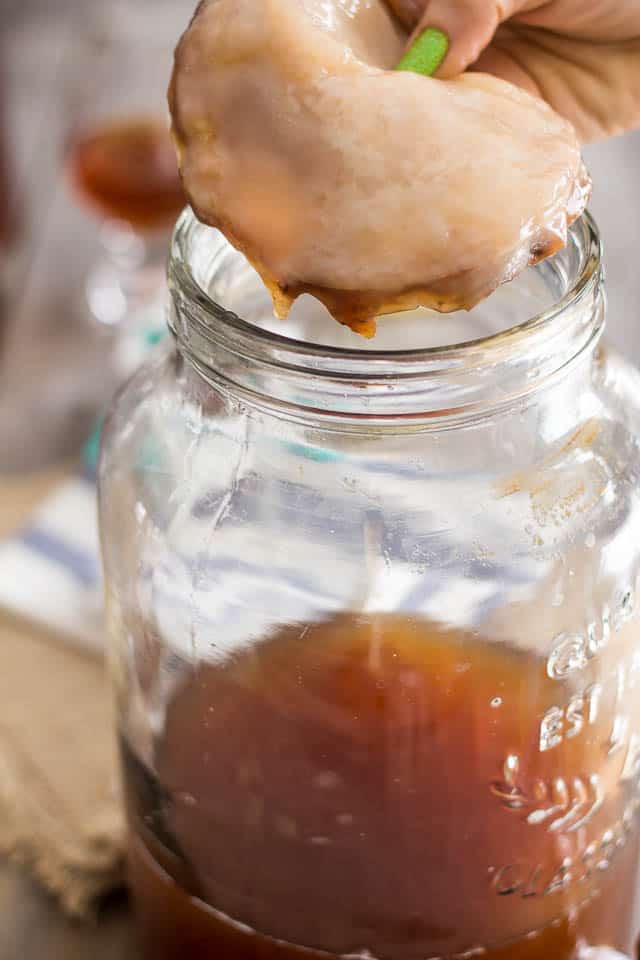
Notice the beautiful SCOBY that grew on top of the other one. Fascinating!
Now you can use that SCOBY to start another batch right away.
Just start the process again right from the beginning.
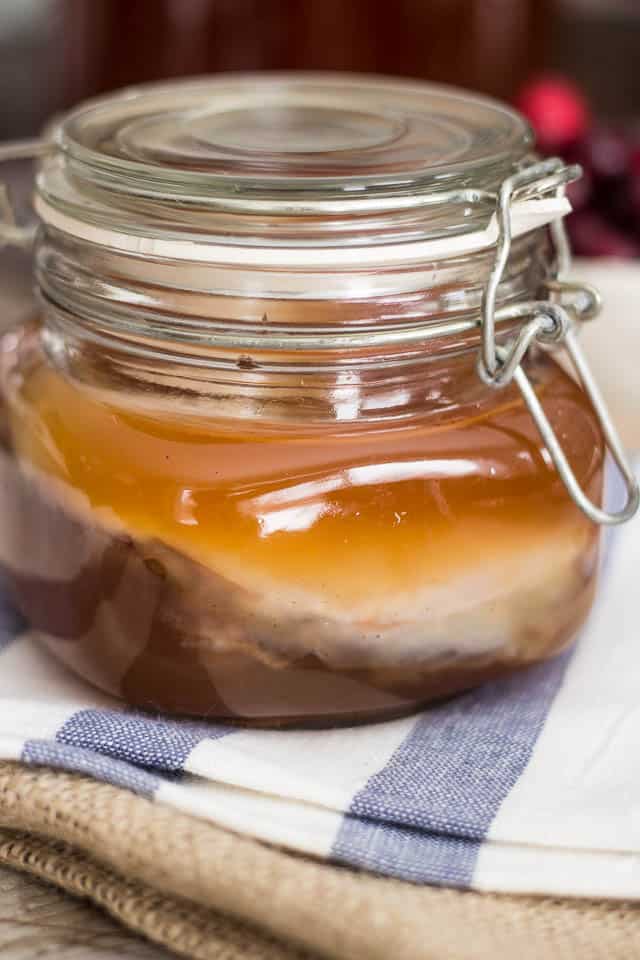
If you’re pressed for time and can’t really get another batch going immediately, you can always store your SCOBY in the refrigerator for a little while. Just place it in a clean glass jar along with 1 or 2 cups of unflavored tea. This also is a great way to keep an extra SCOBY on hand, in case something unfortunate happened and you needed to throw out an entire batch, SCOBY and all…
Plus, these things they multiply with every batch, you know, so chances are you’re gonna want to share with your friends and family! Keep your mushrooms in a jar like that until you find a new home for them.
And there you have it, you can now enjoy your delicious home made fermented tea.
Just transfer it to glass bottles or jars and store it in the refrigerator.
It is very important that you keep the finished kombucha in the refrigerator, otherwise it would continue to ferment even though the SCOBY has been removed.
If you want to add a little bit of flavor, as well as a tad more fizz to your already delicious brew, this is the time to do it.
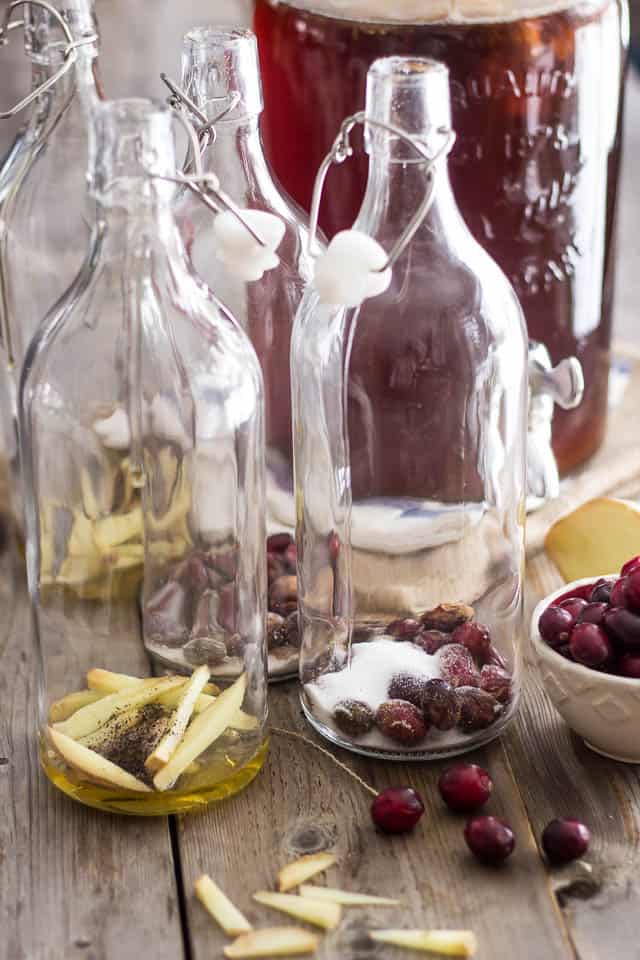
Simply add a few pieces of fruit or a little bit of natural fruit juice, a little bit more sugar and a few herbs and spices right into a flip top bottle, fill with your unflavored kombucha and leave the bottles on the counter for another 4-5 days, or up to a week, to ferment for a second time.
Don’t be afraid to experiment, here. The sky is pretty much the limit!
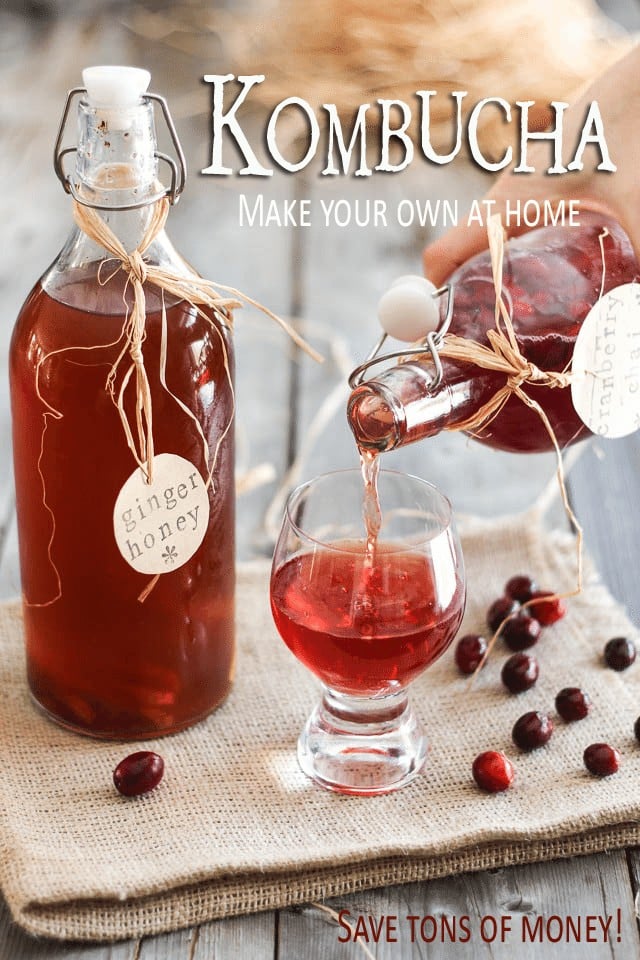
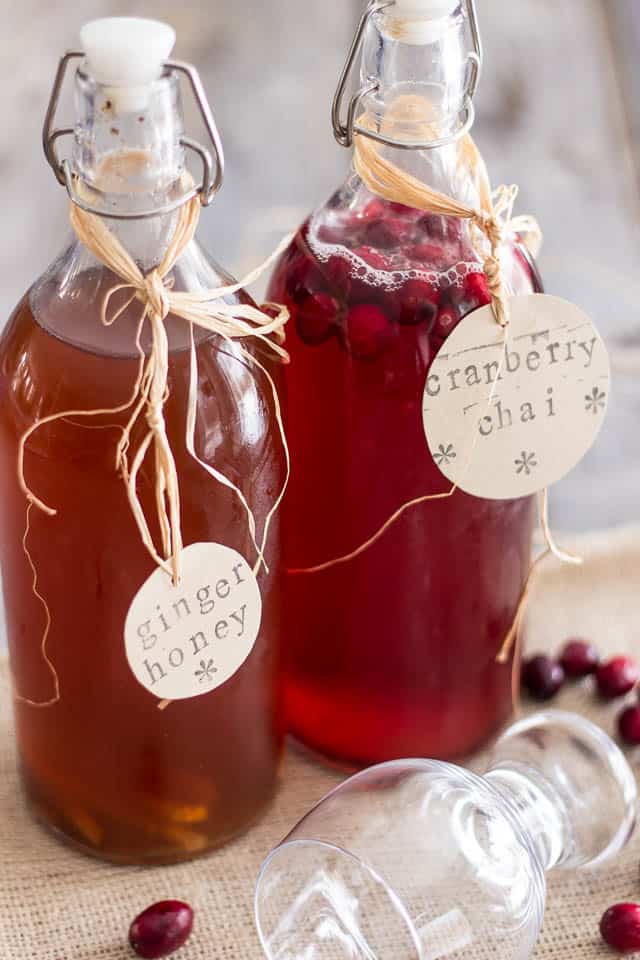
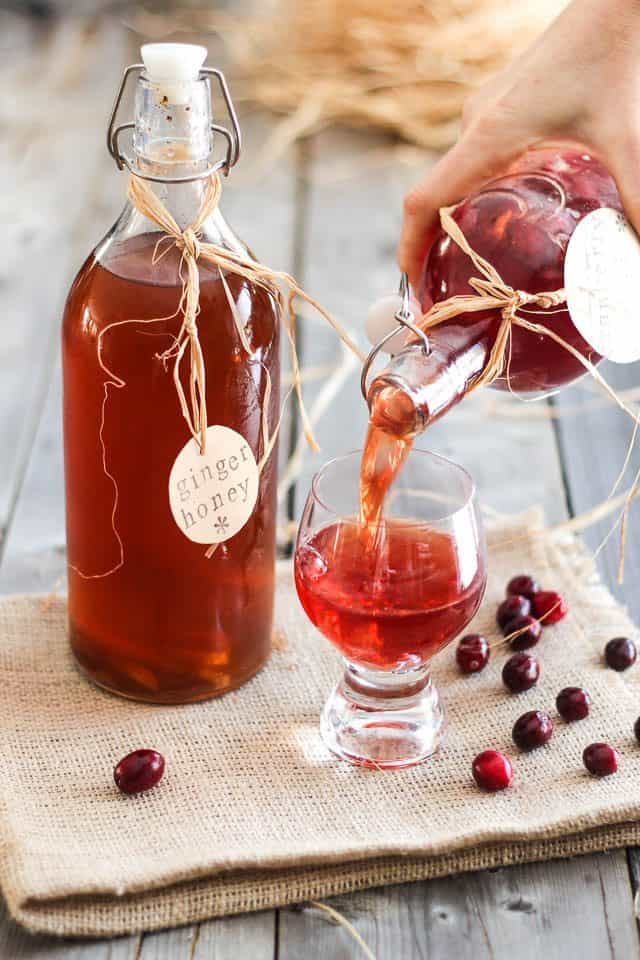
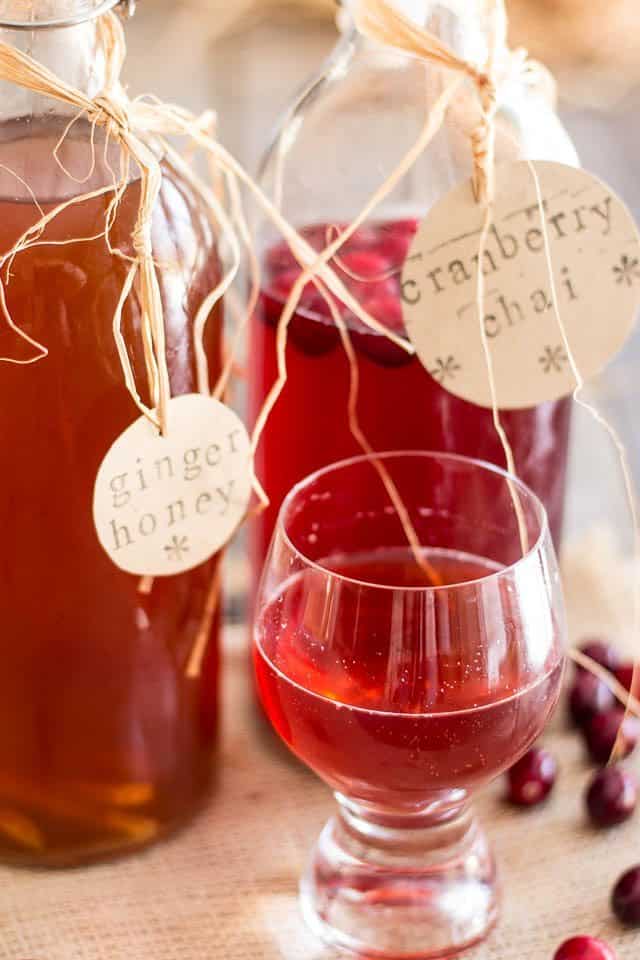
I personally added a dozen popped fresh cranberries, about a tablespoon of sugar and a half teaspoon of chai spice to a 1 liter bottle. In another 1 liter bottle, I added a few pieces of fresh ginger, a tablespoon of unpasteurized honey and a quarter of a teaspoon of vanilla powder.
Both turned out amazing!
After the second fermentation is done, transfer the bottles to the refrigerator and allow the tea to chill completely before attempting to open the bottle. Failure to do that may result in a Kombucha volcano erupting in your kitchen!
Even after refrigerating, always be extra careful when opening the bottles.
It’s not a bad idea to cover them with a clean dish towel just in case…
Time to pour yourself a glass and pat yourself in the back for a job well done, and for saving all that money!
Just look at that beautiful color. And can you see the fizz?
Oh yeah! It fizzes!
And it tastes amazing…
Kombucha – Make your own at home for a fraction of the price!
Ingredients
- 12 bags, pellets or teaspoons pure, unflavored tea of your choice
- 5½ liters 22 cups cold water (preferably filtered or bottled)
- 1½ cups sugar, regular white works best
- 1½ - 2 cups cups unflavored starter Kombucha tea
- 1 SCOBY
Instructions
- Bring 2 cups of water to a simmer. Remove from heat and add the tea. Let steep for about 5-6 minutes then remove the teabags or strain the leaves. Add sugar and stir until completely dissolved; Let cool to room temperature.
- Add about 20 cups of cold water to a 1½ gallon glass jar. Pour the cool sweet tea right in then add your SCOBY and starter tea.
- Cover the jar with coffee filters and secure them with rubber bands. You could also use a clean tea towel if you don't have any coffee filters on hand. Make sure that you use something that lets air through but that is woven tightly enough to keep bugs and dust out of your brew bucket.
- Place your jar in a warm, well ventilated and well lit area, but away from direct sunlight. You don't want to hide your kombucha in a cupboard or closet, completely away from light as your SCOBY does need light in order to feed. The kitchen counter works perfectly well for me.
- Now for the hard part... leave that brew alone for the next 2 to 3 weeks, testing it for taste from time to time, but leaving it undisturbed for the most part. You don't want to be moving that jar around. Total fermenting times can vary greatly depending on many factors, such as ambient temperature, light, ingredients used, as well as your own personal preference. The longer you allow your "buch" to ferment, the more acidic it will become. The less time you give it, the sweeter it will remain. Start taste testing after 10 days or so. That's where the beverage dispenser comes in handy, all you need to do is open up the valve and let a little bit out. If you don't have a beverage dispenser, you can use a straw. Ideally, you want to plunge it as far as you can, block the hole with your thumb and take it out, which will remove a little bit of liquid.
- When your kombucha is to your liking, you can transfer it to glass bottles or jars and store it in the refrigerator. It is very important that you keep the finished kombucha in the refrigerator; otherwise it would continue to ferment even though the SCOBY has been removed.
- If you wanted to add a little bit of flavor, as well as a tad more fizz to your already delicious brew, this is the time to do it.
- Simply add a few pieces of fruit or a little bit of natural fruit juice, a little bit more sugar or maple syrup or honey and a few herbs and spices right into a flip top bottle, fill with your unflavored kombucha (leave about 1½ inch of head space) and leave the bottles on the counter for another 4-5 days, or up to a week, to ferment for a second time.
- After the second fermentation is done, transfer the bottles to the refrigerator and allow the tea to chill completely before attempting to open the bottle. Failure to do that may result in a Kombucha volcano erupting in your kitchen! Even after refrigerating, always be extra careful when opening the bottles. It’s not a bad idea to cover them with a clean dish towel just in case…
- Once you got that bottle opened, just pour yourself a glass, sit back and ENJOY! Oh, and start thinking about your next flavor combination. Don’t be afraid to experiment with that. The sky is pretty much the limit!
If you’ve tried this recipe, please take a minute to rate the recipe and let me know how things went for you in the comments below. It’s always such a pleasure to hear from you!
You can also FOLLOW ME on PINTEREST, FACEBOOK, INSTAGRAM and TWITTER for more delicious, healthy recipes!







33 Comments on “Homemade Kombucha – Make your own for a fraction of the price!”
Great post Sonia, especially since I am so thirsty right now. Really outta try with a store-bought mama scoby, I think Crudessence delivers them, right ?
Yes, I believe they do through their website (link in my post somewhere) but you can also buy it in some of the health stores that carry their kombucha. I got mine at La Moisson right off the 15 (exit 23). I’m lucky enough for it to be on my way home from work, so it makes it easy for me to stop and grab a few things, even too easy to stop for a quick kombucha fix, but now I’ve got my own, so I don’t need to do that anymore! 😉
Wait wait wait, hold on a minutes…Kombucha is a drink?! I always thought it was just silly people messing up the word “Kabocha” (the most delicious squash to ever walk (or maybe it rolls?) the face of planet earth!) Can you maybe explain to me what kombucha is? I have heard a lot about it and I feel like this should be knowledge that I have in my brain. Thanks girl!
OK, this made me smile. Not laugh, I promise! SMILE! 😉
In short, Taylor, kombucha is nothing but fermented tea. Just like any fermented food, it has amazing health benefits and is especially helpful in detoxifying your body, aiding with digestion and keeping your gut healthy. There are many, many websites that deal with this subject. A quick search in Google for Kombucha Health Benefits will yield tons of results and will have you occupied for weeks to come!
And I say you should seriously try and get your hand on a bottle. Then get back to this post, cuz you’ll want to be making your own! 🙂
You know me loves ‘buch (yeah, hipsters refer to it as just ‘buch not kombucha 😉 ) it’s the best fizzy drink ever and so good for you.
I like mine plain but that honey+ginger one seems to good to pass up.
You know what? I’m gonna try it today (I have a batch that should be ready just about now!)
Thanks for the inspiration hon.
PS the pictures are GORGEOUS!
Awwww, thank you so much sweetheart, that is so very kind of you to say! 😀
As for the inspiration, I don’t know who is inspiring who… My next flavor combo? SWEET ROSE-MARY GOJI. Oh gee, I wonder where that comes from? 😉
LOVED this post. I’ve been wanting to make my own Kombucha forever, but had no idea where to track down a SCOBY.
Omg just what I’ve been looking for!! Thank you so much!! I can’t wait to try these & make up my own creations!
Nameste
Glad to hear! If you come up with some particularly tasty ones, please DO share!!!! 🙂
This post is exactly what I needed to start brewing my own. I’ve read a lot on how to do it, but your photos are SUPER helpful to me (yeah, I’m a visual learner). Now I’m confident I can make my own continuous brew system, thanks!
That’s just AWESOME, Jackie! So happy to hear. I too, happen to be a visual learner, that’s why I like to include lots of Step by Step pictures in my posts whenever I can. Glad to hear you find them helpful! Good luck with your Kombucha brewing, and mostly, enjoy!!! 🙂
The Kombucha tea i have made in the past consisted of a special muchroom, brown sugar, purified water, wooden or plastic utensils,stainless steel cooking pot. the flavor was a vinager taste, color was a golden brown. It sat for 2 weeks , poured into glass bottles. I not only drank it and it helped with weight loss, any joint problems i had, cleansed out my body of toxins. I also used the mushroom for sores on my body. cuts, abrasions. which healed in 2 days, compared to 1 to 2 weeks from the doctors prescription.
I quit making it as there was alot of work and time involed into it.
Now i drink Sunrider tea– which does the same for me, plus extra’s. If anybody is interested or wants to know more about sunrider- email me @ ellenroux@ymail.com or pull it up on the internet. Thankyou!
Is posible to replace the white sugar,for sugar cane?
a friend give me a scoby, and she is been brewing it for 20 years only in sugar cane,
and i would like to start a new batch with tea, and sugar cane, do you think that is possible or maybe i kill the scoby?
Oh, and i start drinking the cane sugar batch, for 2 days and i feel a litlle tummy achee, this can be normal at the beginning?
Thanks
Well, Tatiana, if you friend has done it for 20 years and you are getting your SCOBY from her, I really wouldn’t see why it wouldn’t work for you! I say it’s definitely worth giving it a try!
Hi There!
I just obtained my first Kombcha scoby and am brewing my first batch! So exited! I noticed that your swing top bottle don’t have the rubber rings on them. Does this help to avoid exploding bottles by allowing some of the gasses to release during the second fermentation?
Thanks again for all your awesome recipes!
Connie
Oh, but my bottles do have the little rubber thingie, Connie, only it’s the same color as the cap, so you can’t really see it…
Well done! Thank you, and I love the pics.
Hi Sonia, I’ve only brewed a few batches of kombucha and am always looking for the “definitive” recipe. So far, yours is the one I rely upon! Great, clear descriptions and illustrative photos. Thanks so much for the post! I second your comment about opening the second fermentation with a cheesecloth on hand — I made a strawberry batch that foamed like a 3rd grader’s homemade volcano science project (may have added too much sugar). The only thing I would add is for people to experiment with teas. I’m currently brewing a batch with 5 bags Lipton (horrors!) black tea, 2 bags Oolong, and 2 bags of a fusion green/white tea. Can’t wait to see what I get — it’s all about the experimentation, especially when you’ve got great instructions like yours to start with. Thanks again.
HAHAHAH! Homemade Volcano science project. Oh yeah! I’ve so had that happen to me, too! I can totally relate.
And I agree about experimenting with different kinds of tea, so long as one sticks to pure, preferably organic tea. I’ve been using green, black, white, oolong and pu-erh and each yielded very good results. Never thought of mixing them, though… I’ll make sure to do that with my next batch, which incidentally, I should be making today! Thanks for the tip, and for the kind words, too! 🙂
Hi Sonia, I can’t believe I found your fantastic recipe. 3 weeks ago I purchased a jar with 3 scobys and couldn’t find the recipe for the Kombucha anymore…. just great!
It’s just after reading about how healthy Kombucha is that I decided to buy it. Here in Switzerland nobody knows about this great beneficial drink.
I’m so thrilled to have found your post with these amazing pics and your very detailed instructions. Thank you thank you. I’ll write again afterwards to let you know what has become of my scobys. It’s the first time I’m doing Kombucha …ahem… I mean TRYING to.
HA! But making Kombucha is fairly easy, Monica. I’m sure you’ll get the hang of it in no time! Please, do write about your experience, I look forward to hearing all about it! 🙂
I just noticed that my scobys don’t float on the top but rest at the bottom of the jar…. I hope they are still alive…? Dear Sonia what do you think, have I “killed” them? (maybe the tea wasn’t completely cold when I let them slide into the jar) Thanks for your help
Did you just start a fresh batch, Monica? Oftentimes, when I just slide the SCOBY in, it’ll sink right to the bottom and then slowly make its way back to the top. Usually, within a day or two it’s back floating at top of the jar…
Dear Sonia
One of the 3 Scobys finally floated on the top. I sifted and tasted the liquid …… and expected some kind of YIKES …. but ooohh amazing…. it wasn’t that bad, just a little acid. Well I continued with your recipe and added some organic cranberry juice, fresh fruits and spices, Now I’m waiting impatiently these few days for the second fermentation. The colour looks quite similar to the one on your beautiful pics. Could you please tell me how long the remaining Scobys can live in the fridge ? I put all 3 of them separately in a jar with some of the liquid. I don’t have time right now to redo a batch and I’m afraid that they may die. Thank you so much for your concern and your constructive comments, I appreciate them very much.
I’ve had SCOBYs live in the fridge for well over a few months, but to be honest, when I need to take a break from brewing, what I do is leave my batch on the counter as I would with any normal batch and every 6 weeks or so, I remove a little bit of the kombucha and top with more sweet tea, so to feed my SCOBY. I would say I add maybe a cup of tea sweetened with a quarter of a cup of sugar. That will keep my SCOBY alive and kicking (and GROWING!) for months. Of course, when you want to start again, you’ll have to discard that batch as it will have turned to vinegar (mind you, you COULD use it as vinegar if you wanted to) and start from scratch (use about a cup of your “vinegar” as a starter).
Hope this helps, and if you have any questions, please don’t hesitate to ask!
how do you get your bottle open after clamping it down? we can’t seem to open it. we have the glass bottles like yours. just got them this week and used them for the first time yesterday but can’t get them open.
I’m not sure I understand, Paul. To open the bottle, you just need to pull on the latch. You push it down to close the bottle, pull it up to open it. It’s as simple as that. Or am I missing something?
I found it almost impossible to open these until I turned the bottle around, so the horizontal half circle is in front, then I push on the vertical sides and the lid opens right up. no more sore fingers.
I started my first batch with whatever was on the bottom of the Synergy Raw Organic Kombucha bottle, which were very tiny, in a glass gallon jar. All those teeny bits and pieces quickly moved to the top, some filmy-looking stuff covered the opening as in your picture, and then she began growing like crazy. Within a week, I had a reasonable, though very thin, scoby, and by 3 weeks, she was growing a baby.
Then I moved her to a 2 1/2 gallon crock and she was dwarfed, but not for long. She extended her magic out toward the sides and has been very happy ever since. And she has no problem living in the dark, where she is only disturbed by her weekly feeding of tea and sugar. I’m fond of the continuous brew method, and sterilizing the crock and removal of babies in 3-month intervals.
I use 1 T of loose green tea and 1/2 C sugar for every quart of water.
When doing my second fermentation do I close bottles or leave open on counter,
Just doing today Am excited to try this new recipe
You need to close the bottles, Yvonne.
Have you ever used mangos?
Sorry Paul, I haven’t…