Salmon Gravlax
Salmon Gravlax is one of those things that I always thought was super complicated to make and better left to the pros of this world… a bit like Smoked Salmon, you know!
Pfft! Little did I know! Nothing could be further from the truth. In fact, gravlax is probably one of the easiest things I’ve ever made. It’s just like marinating meat with a dry rub, except this time, once the marinating is done, you are, well… pretty much done too!
I know, you’re probably gonna think that I included a heck of a lot of pictures in my post for a project that is *supposedly* extremely easy to tackle. Well, you’re right. But I wanted you to have a real good visual, one that would practically allow you to make the recipe by looking at the pictures alone, without even reading the instructions.
Okay, maybe you’ll still need to read them the first time, but I promise that you’ll be a pro at this in no time!
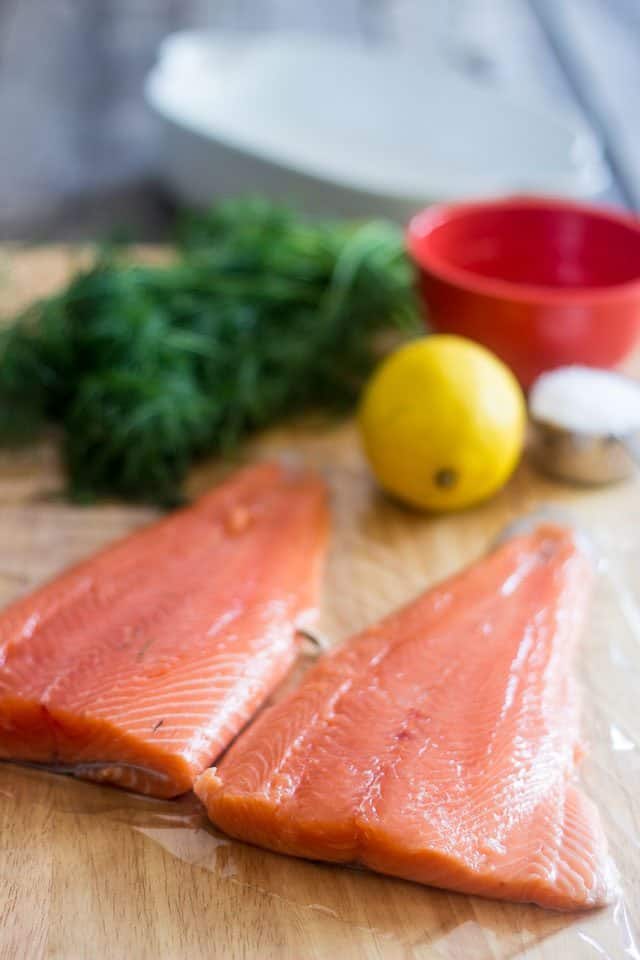
So go and get yourself two beautiful, fresh (wild and sustainably caught, of course!) salmon fillets. Oh, and get the thickest ones you possibly can get your hands on!
Go on, I’ll wait…
Rinse the salmon fillets, pat them real dry and place them skin side down on a cutting board.
Since you will be wrapping your salmon in plastic film later, you might as well place a fairly large piece underneath your fillets right away… That way you won’t have to look for it when you’ve got your hands are all dirty and as a bonus, it’ll keep that board clean for ya. Can you say win-win?
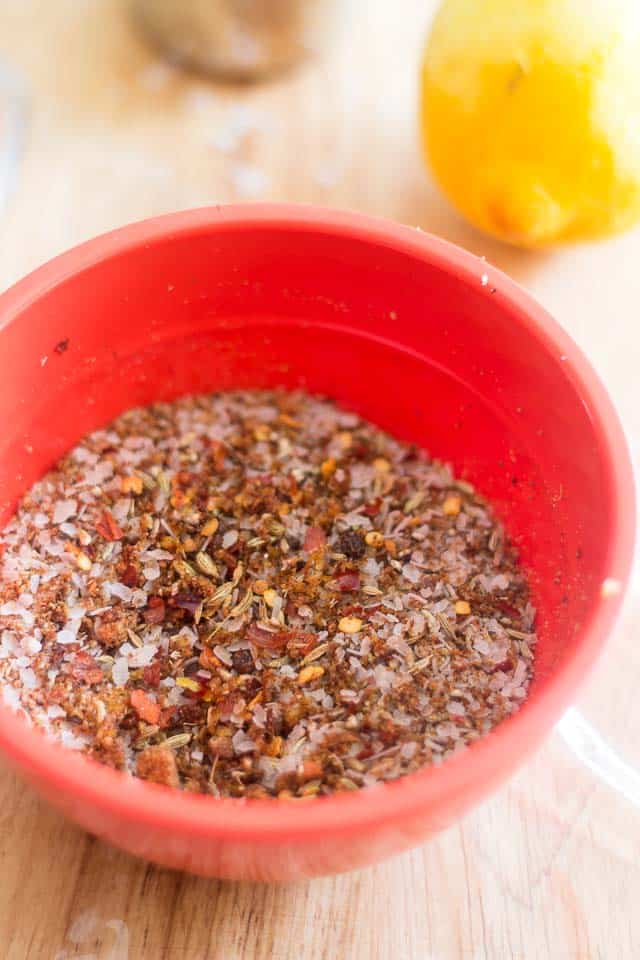
Now grab a small bowl and mix some pickling salt, coconut sugar, black pepper, fennel seeds, chili pepper flakes and lemon zest.
Feel free to change that up a bit of you’d like… there are absolutely no rules against that!
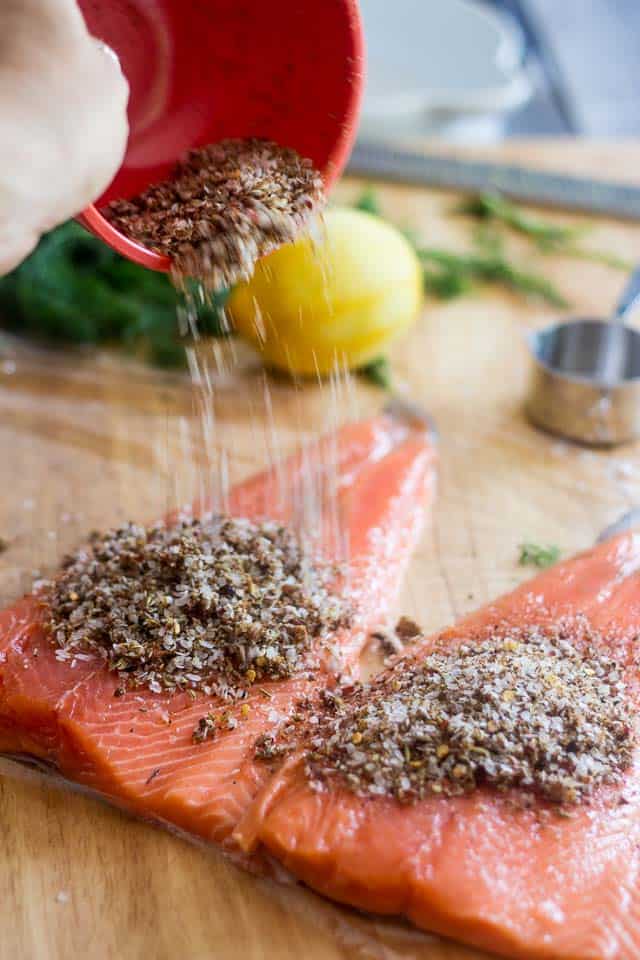
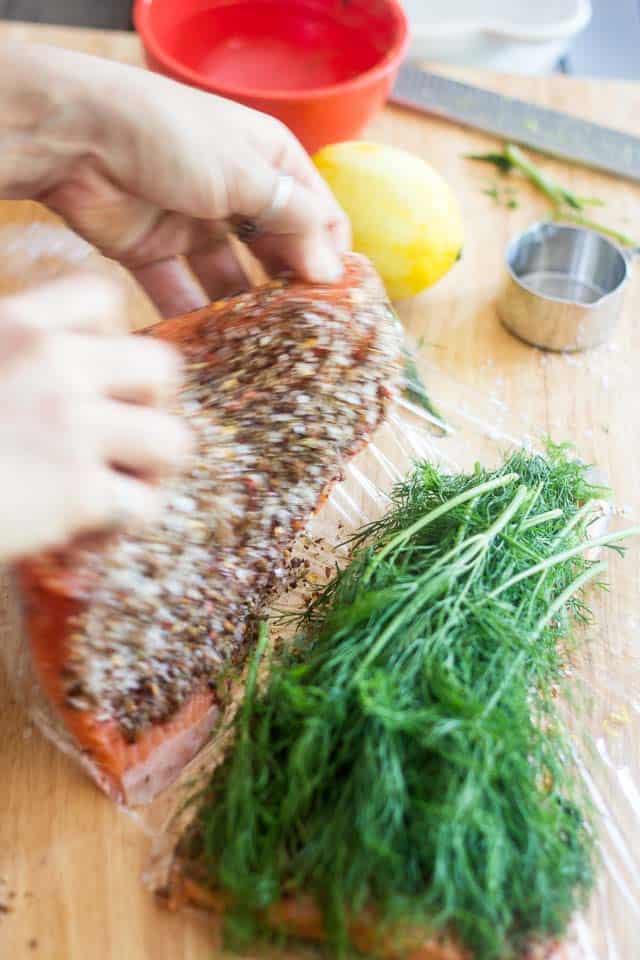
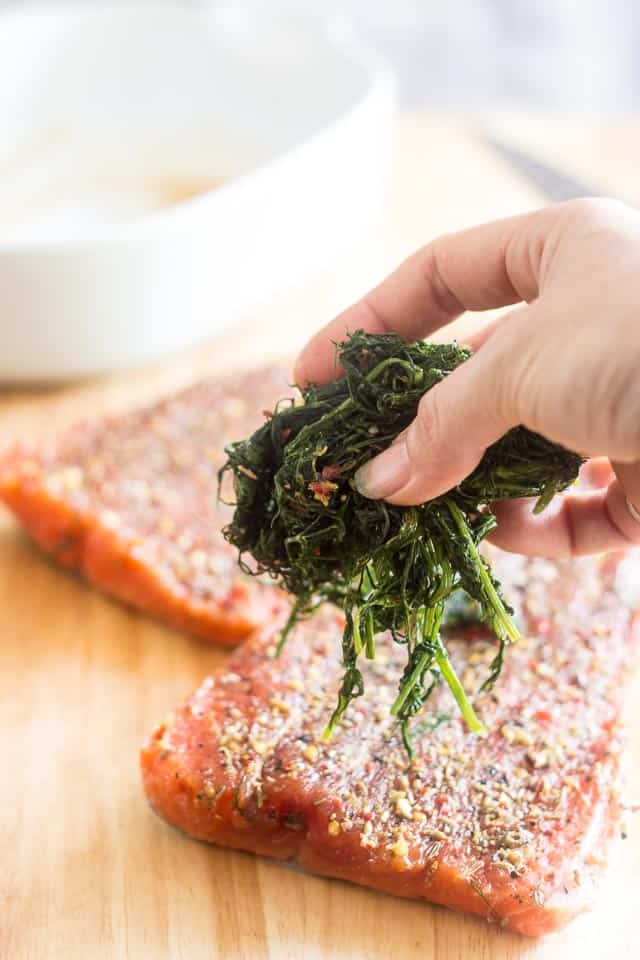
Divide that salt equally between the salmon fillets and spread it delicately with your fingers all the way to the edge so that both fillets get completely covered.
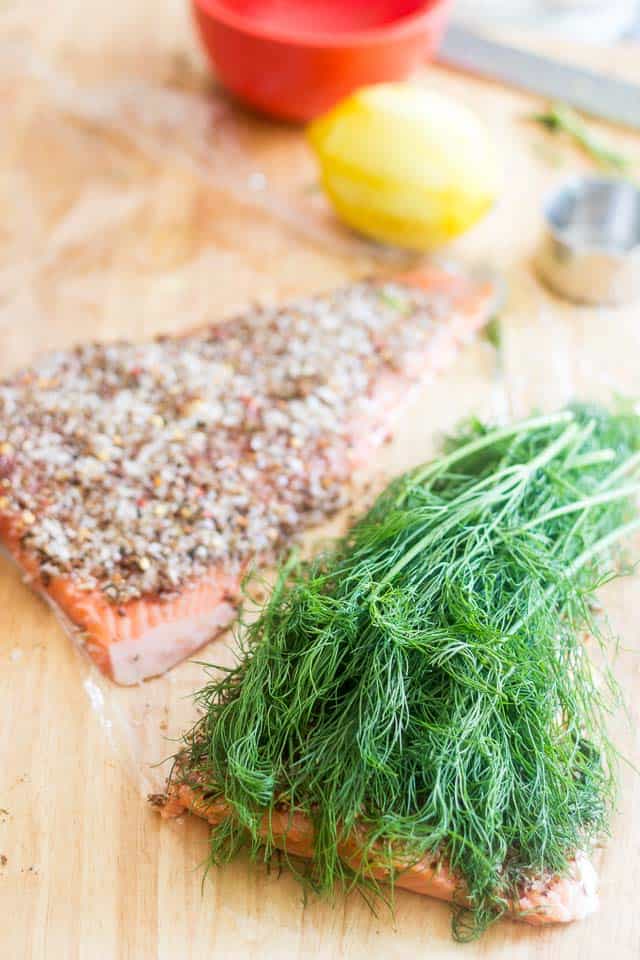
Place the whole bunch of fresh dill on top of one of the salmon fillets. No need to even get fancy about it: just dump the whole thing over the fillet, just like that!
Okay, you might want to trim off the ends a little bit, but that’s about it…
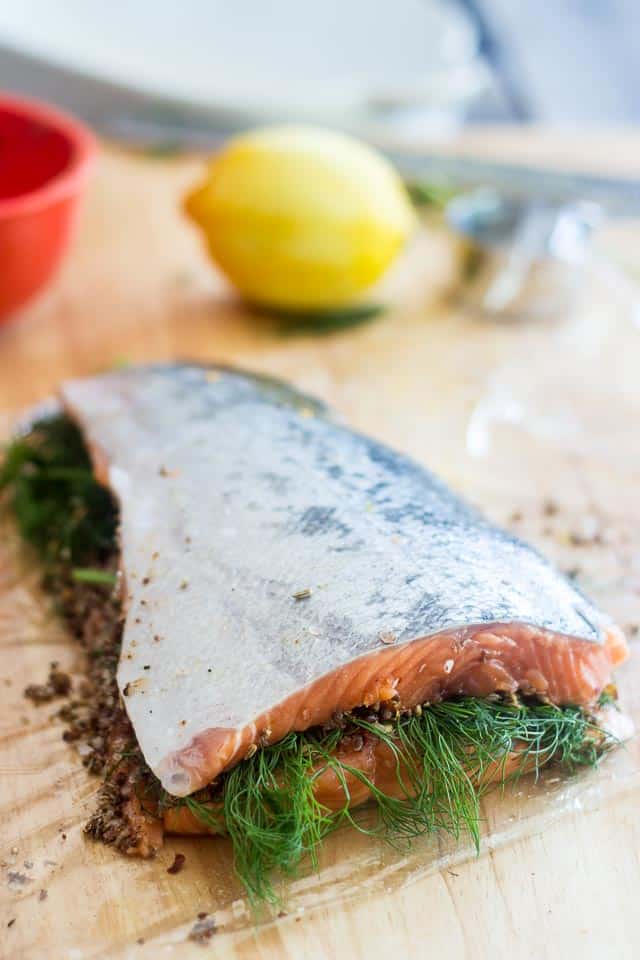
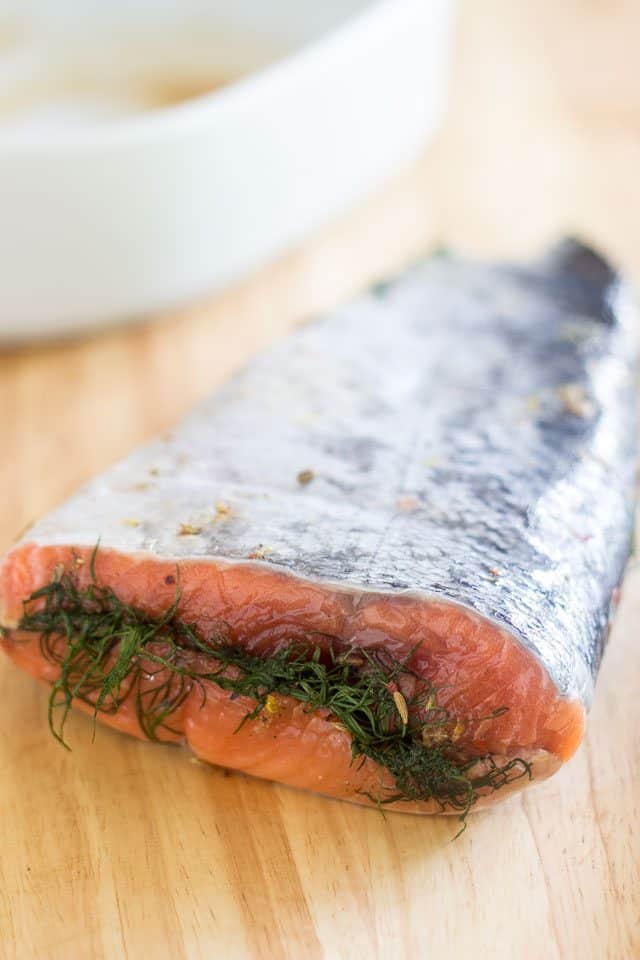
Now grab the fennel-less fillet and quickly flip it over the other one to form some kind of a giant raw fish sandwich…
Just make sure that your fillets end up being flesh to flesh and tail to tail, like such.
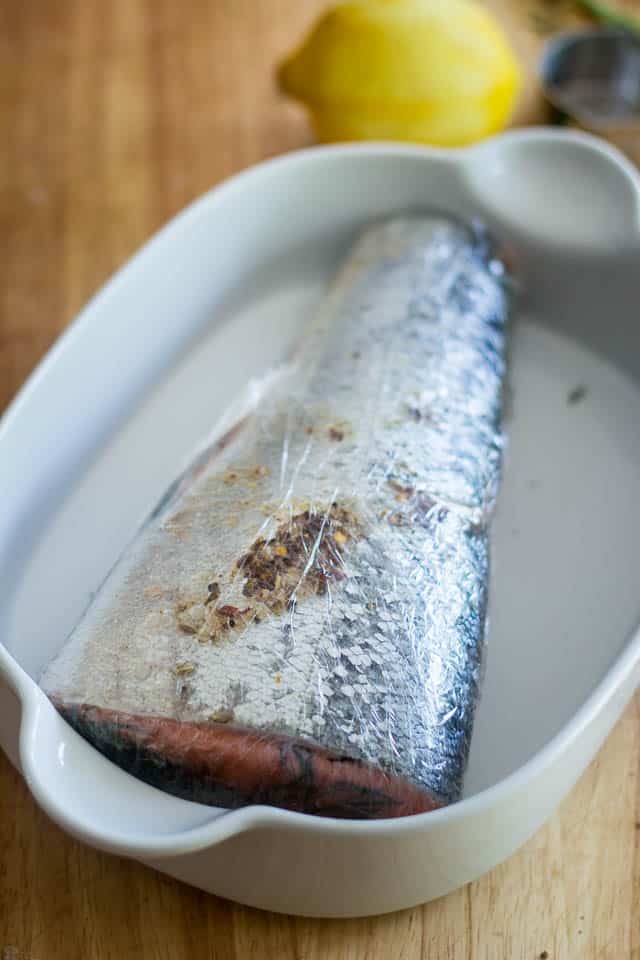
Now use that giant piece of plastic film to wrap the fillets as tightly you possibly can. You then want to place the salmon in a ceramic dish that’s just large enough to accommodate it.
This is very important as your fish will be releasing a lot of juices over the next few days and you definitely want something to collect them. Trust me, you don’t want that to end up at the bottom of your refrigerator…
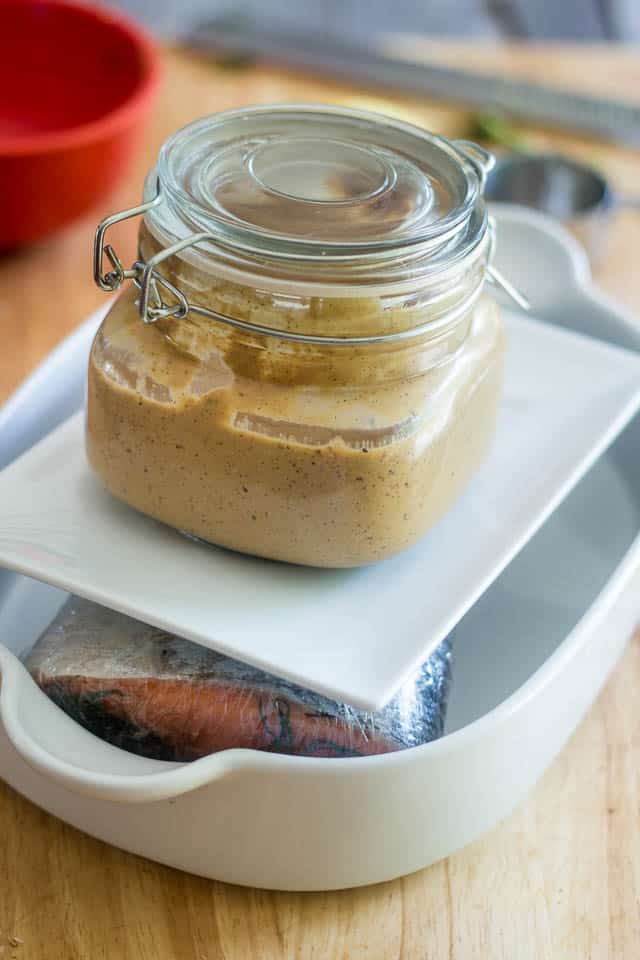
Now we need to weigh this puppy down to help that water come out of it. The best way to do that is to cover it with a plate and then place a weight on top of that plate; something that weighs approximately a pound.
A jar of delicious Roasted Cashew Butter will certainly do the trick, don’t you think? So long as there’s plenty left in that jar, that is…
Place this entire rig in the fridge and let it rest for 48 to 72 hours, flipping the salmon over once or twice a day.
The longer you will leave the salmon in the fridge, the more moisture will get drawn out, so the dryer and saltier your gravlax will be. So that decision is entirely up to you…
I chose to leave mine in for a total of 72 hours.
When you are ready to serve your gravlax, remove the dill and discard it. Trust me, it’s done its job… you’re not gonna want to eat that!
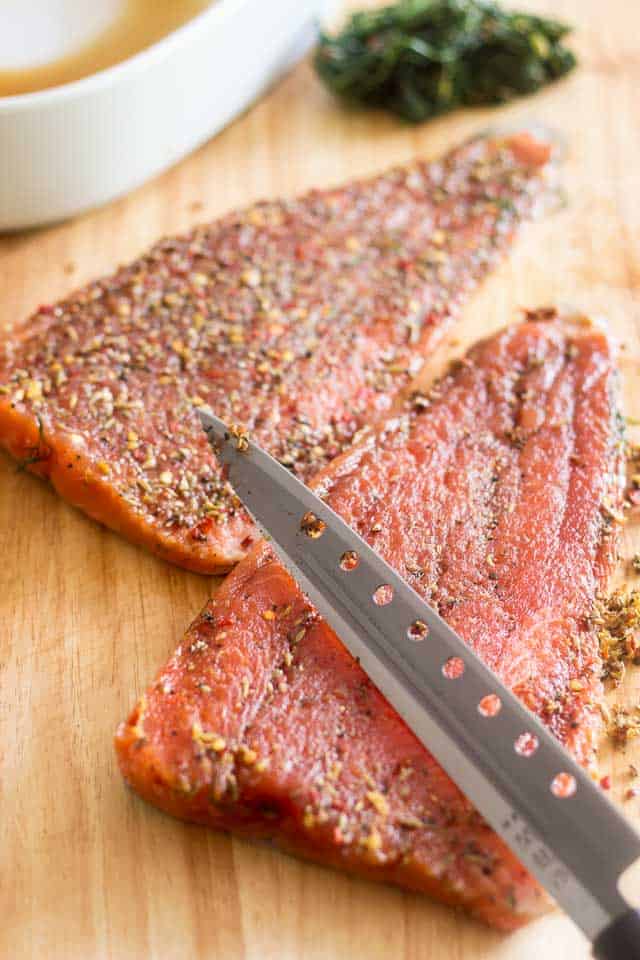
Next, very delicately scrape off all of the salt mixture with the back of a blade.
Some people rinse their gravlax under cold running water and then pat it dry with paper towels, but I prefer the scraping method. I find it helps preserve the dish’s “dry” texture as well as its delicate flavors.
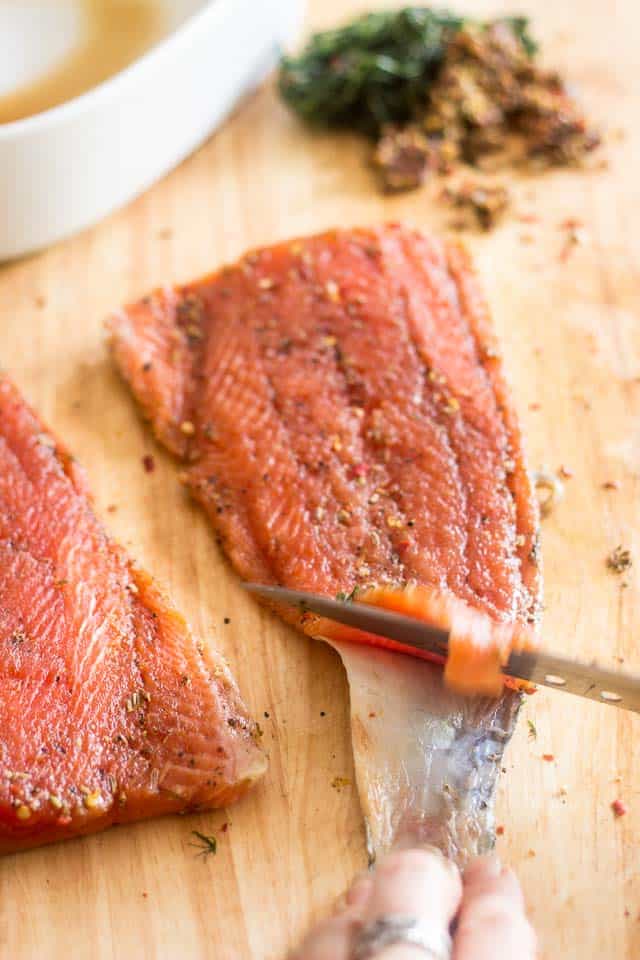
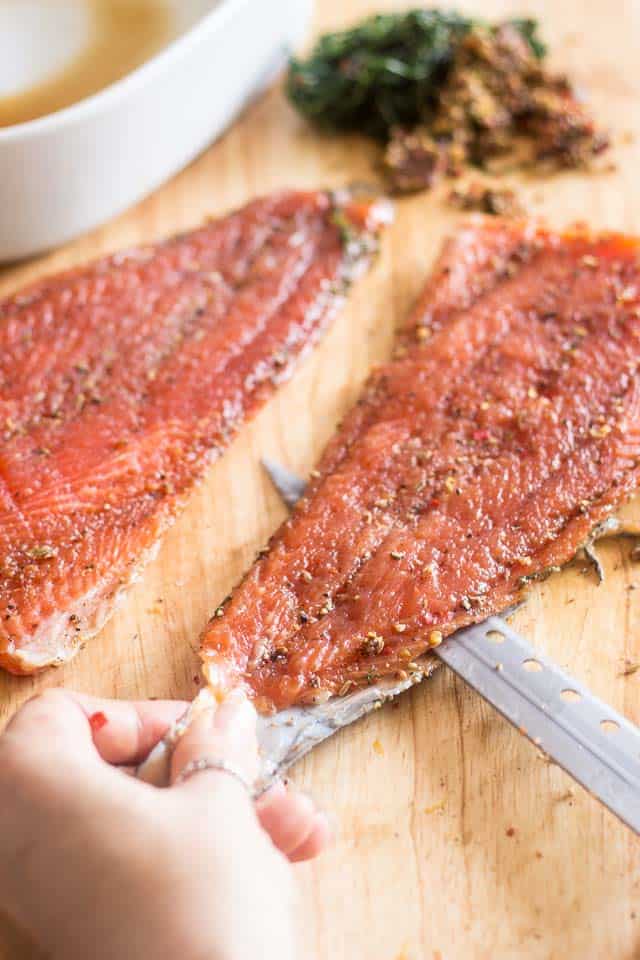
Once all the salt is gone, we need to get rid of the skin. Don’t let that scare you, it’s actually very easy to do. Just grab on tightly to the pointy tail end of the fillet with your fingertips and insert a thin, sharp blade between the skin and the flesh.
Then, hold on to that skin real tight and slide that blade at a bit of an angle, keeping it as close to the skin as you possibly can. Go slowly, you don’t have to do this in one go. You can always lift that flesh from time to time, to assess your blade’s position, and then resume the process.
I find a sashimi knife really works wonders for this. If you don’t have one yet, I say you should totally invest in one. They only cost a handful of dollars and will last you years!
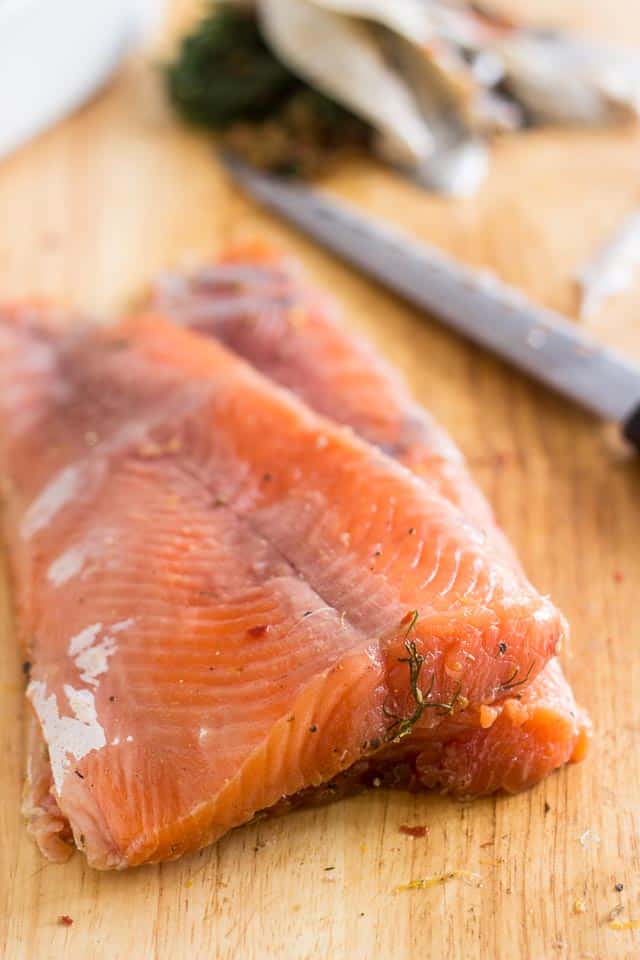
Before you know it, both your salmon fillets will be relieved of their skin and ready for slicing…
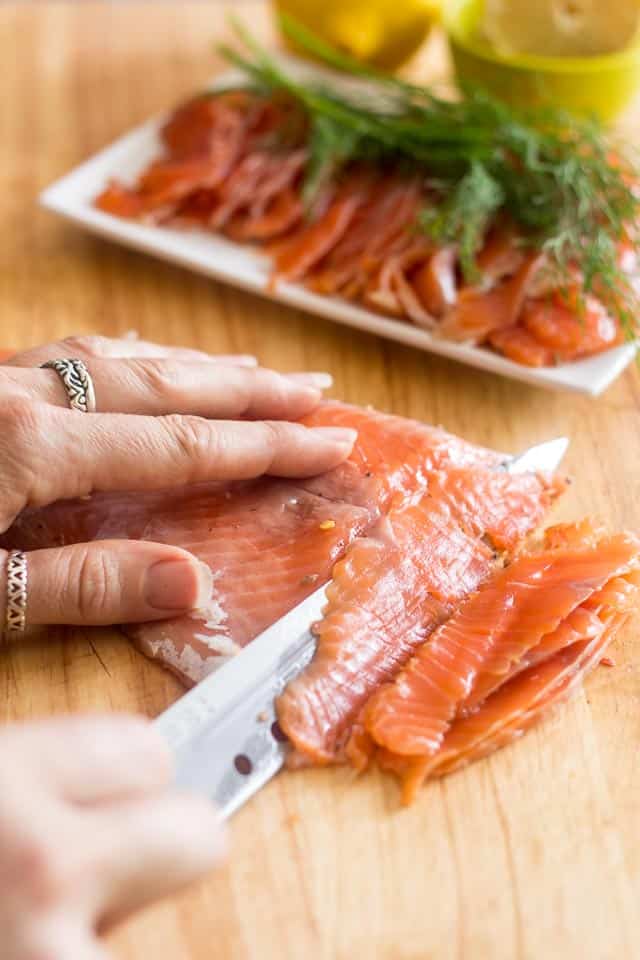
This slicing you’re gonna want to do on a bias, and as thinly as you possibly can. A bit like if you were slicking smoked salmon…
And there you have it. In under 3 days and with very minimal efforts, your salmon turned into delicious gravlax, as if by magic.
That really wasn’t complicated, was it? And it’s so crazy delicious, too! In fact, I think I now prefer gravlax to smoked salmon, and I can guarantee that I will be making it on a regular basis. It’s SO MUCH cheaper and such a cinch to make… why be without it?
You can serve gravlax as is, with a little dipping sauce or drizzled with lemon juice and extra-virgin olive oil. I bet it would be fantastic on top of a Rosemary and Sesame Paleo Cracker, along with a little dollop of crème fraîche, if you can get your hands on it, and a generous sprinkle of cracked black pepper.
Oh, and IF you do end up with leftovers, they will keep in the refrigerator for a few days, just wrap them nice and tight in plastic wrap.
Chances are, you’ll probably want to enjoy it the very next morning at breakfast, alongside a couple of pan-fried eggs!
I know that’s what I did!
Salmon Gravlax
Ingredients
- 2 x 375g thick salmon fillets, skin on
- 1 large bunch fresh dill
- 1/4 cup pickling salt
- 2 tablespoons coconut sugar
- 1 teaspoon cracked black peppercorns
- 1 teaspoon fennel seeds
- 1/2 teaspoon chili pepper flakes
- the zest of 1 lemon
Instructions
- Rinse the salmon fillets, pat them real dry and place them skin side down on a cutting board.
- In a small bowl, mix the pickling salt, coconut sugar, black pepper, fennel seeds, chili pepper flakes and lemon zest.
- Divide that salt equally between the salmon fillets and spread it delicately with your fingers all the way to the edge so both fillets get completely covered in salt.
- Place the whole bunch of fresh dill on one of the salmon fillets and quickly flip the other one right over to form a sandwich - flesh to flesh, tail to tail.
- Wrap the fillets as tightly as you can in plastic wrap, then place the salmon in a ceramic dish that's just large enough to accomodate it. Cover it with a plate and place a weight on top of it, something that weighs about a pound.
- Place this entire rig in the fridge and let it rest for 48 to 72 hours, flipping the salmon over once or twice a day. The longer you leave the salmon in the fridge, the more moisture will get drawn out, so the dryer and saltier your gravlax will be.
- When you are ready to serve your gravlax, remove the dill and delicately scrape off all the salt mixture with the back of a blade.
- With the help of a sharp knife (sashimi knives work wonders for this), carefully remove the skin and slice the fillets on a bias, as thinly as you possibly can.
- Keep the leftovers in the refrigerator wrapped tightly in plastic film; consume within a few days.
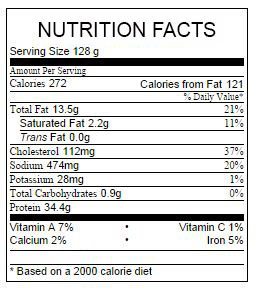
Nutrition
If you’ve tried this recipe, please take a minute to rate the recipe and let me know how things went for you in the comments below. It’s always such a pleasure to hear from you!
You can also FOLLOW ME on PINTEREST, FACEBOOK, INSTAGRAM and TWITTER for more delicious, healthy recipes!















25 Comments on “Salmon Gravlax”
What a great tutorial! I think I saw a recipe for salmon gravlax in Bon Appetit or Food and Wine long ago. At the time I dog-eared the page and really wanted to make it but never got around to it. You’ve inspired me!
Aw, thanks Nicola! Unfortunately, you can’t dog-ear this page, but I hope you really DO give the recipe a go this time. Trust me, you will be thanking yourself for it! (and well, maybe thanking me a little, too…) 😉
I used to have gralvax all the time in Sweden! Thanks for reminding me how delicious it is.. I have never made it myself before so I must try the recipe!
You absolutely must, Thalia! You won’t believe how easy it is!
Salmon is on sale at Earthfare right now so I will be heading there today. Can’t wait to make this. It will be WONDERFUL on my Caesar salad.
Can you use a fresh herb other than dill? Or does it need to be dill?
Dill is a classic and goes very good with the taste of the salmon, but I suppose you could use another kind of fresh herb is you wanted to. Not sure I would go the sage or rosemary route, but milder tasting herbs such as tarragon, fennel or even basil might be interesting options.
Do u need to dump the collecting juices everyday
It would be ideal, indeed!
Thank you so much for this tutorial. I can’t wait to make it. My son-in-law is a real foodie, He’s going to be so impressed when I bring this over for an appetizer in the near future!!!
Haha! Hope he likes it, Judi! 🙂
Hi Sonia, Thank you for this wonderful post and excellent walk through, it was super helpful. I made your recipe yesterday and we are looking forward to enjoying the treat!
You are very welcome, Terese. Hope you’re enjoying the fish! 🙂
We are blown away by how good the fish is, and definitely not as complicated as imagined. We had it on rye bread with a dill and mustard mayo and a dash of sour cream and fresh tomatoes from the garden. Holy smokes, so delicious. Thank you so much – I’ll never be buying from a store again. (Now I’m going to try my hand at Kimchi next!)
Hi Sonia,
Is it possible to reduce the amount of pickling salt in this recipe or is it essential for the process?
The other questions is, can I use a different type of salt?
Thank you,
Tania
The amount of salt it necessary for the process, Tania… as for the type that you use, I suppose any kind would do, but I find coarse salt works better, as well as salt that contains no anti-caking agents…
Hope this helps!
As a Swede who’s made gravlax more times than I can count I think there are a few things that aren’t at all necessary:
It doesn’t need to be pickling salt.
No need to wrap it up in plastic wrap, having it sitting in it’s own liquid, in any kind of container, and covered up is absolutely fine.
Nor is there a need to pour the liquid out each day. You should however turn it once a day to ensure it fures evenly. 🙂
Thanks for all the tips, Annica!
I do not eat sugar and was wondering if I could omit the sugar in this recipe? Thank you for your help. Sandra
Sonia, thank you so much! This is a godsend! I was in the process of making gravlax and was very unsure! Your photos and instructions have helped so much.
Q: Are we supposed to drain the liquid out of the pan from time to time as it sits in the fridge? Or leave it sitting in its liquid for the full 72 hours? Oh! I just saw Annica’s comment. Very helpful. Thanks, Annica!
I find not so much moisture gets drawn out that it requires the need to drain the juices. I do, however, feel strongly about wrapping the fish in plastic film. I find it helps seal in the flavor and assists the salt in doing its job. Plus, it makes it that much easier to flip the fish!
Hope your gravlax turns out great! 🙂
Thanks for this recipe! Is the sugar absolutely necessary? Also, I bought some salmon today but had the skin taken off at the store. Can I make it without the skin on?
Thanks!
The sugar does play an important role in this recipe, Jackie, so I wouldn’t leave it out. However, feel free to use a different kind, if that’s easier for you. As for having the skin removed prior to curing, I’m really not sure about that. I’ve always seen gravlax done with skin on. I suppose you could give it a try, as I doubt it would totally ruin the process… Let me know how it turned out if you do end up trying it!
Thank you! Actually, I saw another recipe that said it can be made either with or without the skin. I’ll let you know! 🙂
This is THE BEST gravlax recipe I’ve ever tried! It hits all the markers for me: It is easy; it doesn’t require much sugar (and even that is coconut sugar, which seems more like a food to me than white sugar); it is a terrific hit with my whole family. Thank you for sharing your wisdom. (The photos are great, too, as it’s easier for me to learn nuance with good pictures.)