
Secret Ingredient Strawberry Cheesecake [Non-Dairy & Paleo]
I know a lot of you have been eagerly awaiting this recipe and I don’t blame you… Honestly, I don’t think I’ve ever been so excited about any of my previous creations.
Well, okay, maybe I have and I just don’t remember. Yeah! Now that I think of it, I probably have. Like when I made these decadent Sweet Potato Brownies, or maybe that Chocolate Truffle Cake…
But this time, it’s different.
I mean, seriously guys, this cake is completely insane. It’s just like CHEESECAKE except it’s got no cheese in it. NO CHEESE!!! How crazy is that!? Totally crazy, I say. Demented, even!
But just you wait until you find out what exactly IS in it! It’ll blow your mind. Seriously.
Honestly, I was the first one surprised when it actually turned out. It was, after all, my first attempt at creating a non-dairy cheesecake, and for a first attempt, I sure went all out. I brought forth the heavy artillery…
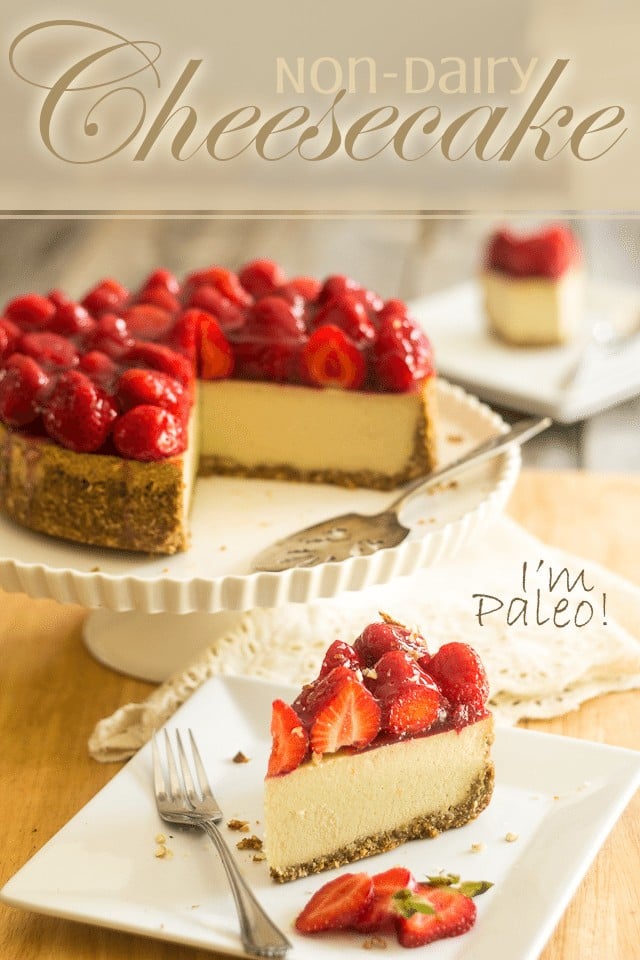
If you know me, you know just how much I love cheesecake. Now, having decided to practically give up on dairy, it was only a matter of time before I tried my hand at making a non-dairy version of my favorite dessert in the whole wide world. In fact, I was only waiting for strawberries to be in season, for I really had my heart set on topping that baby with gorgeous bright red, plump and juicy strawberries.
To be honest, though, I totally expected this cake to be a complete disaster. A flop. A monumental waste of time and valuable ingredients. I was prepared to be extremely disappointed and perhaps even shed a tear or two.
Still. It was too big, too bold an idea for it to remain untested.
I almost wish that I could keep the secret ingredient a complete mystery and have you try the cake without knowing, but then how are you going to make the cake if you don’t know? What if the recipe read: …and now, add the secret ingredient! Right… that wouldn’t fly all that high.
So I guess that at some point, I’m gonna have to let you know…
At some point…
But not now…
First, we gotta make the crust. That part isn’t a mystery at all. In fact, I pretty much used the same recipe that I’d used for my Crème Brûlée Cheesecake, except this time, I didn’t blind-bake the crust.
To make it, simply add all the required ingredients to your food processor and process on pulse until the mixture has the texture of coarse sand.
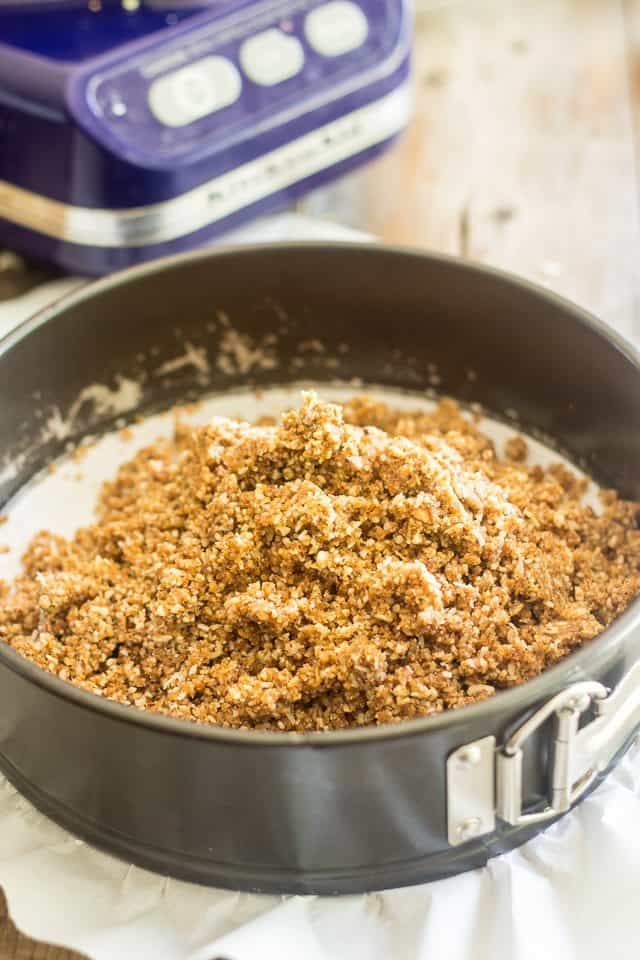
You then want to transfer that mixture to a springform pan that you will have previously lined with parchment paper and press it firmly against the bottom and side of the pan.
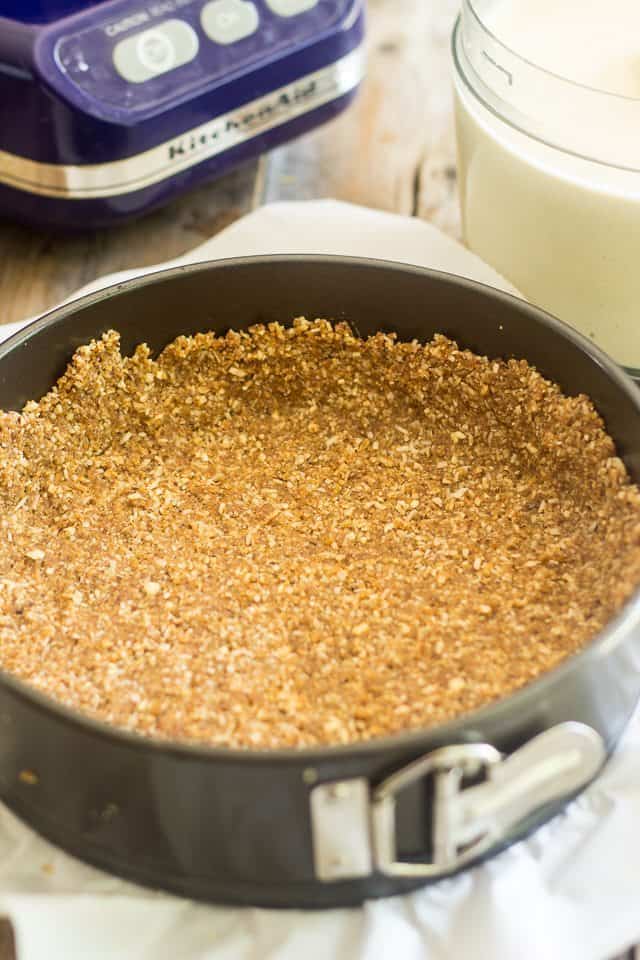
Bring that crust up to about halfway up the side of the pan, like such. No need to be super fancy and take your ruler out, here. The crust looks much prettier when it’s unequal, I find. When you’re done with that, set the pan aside and start working on the filling.
Yikes! Looks like I’m gonna have to tell you what that secret ingredient is fairly soon…
I’m a bit scared, to be honest. I hope you guys won’t run off when you finally find out what it is!
Alright, so you haven’t forgotten to soak your cashews overnight, have you? I hope not!
And no, cashews aren’t the secret ingredient. In fact, they’re a pretty standard cheese replacement in a lot of non-dairy recipes. But I didn’t want to use all cashews, I felt it would require WAY too much nuts for my liking… I had to add something else!
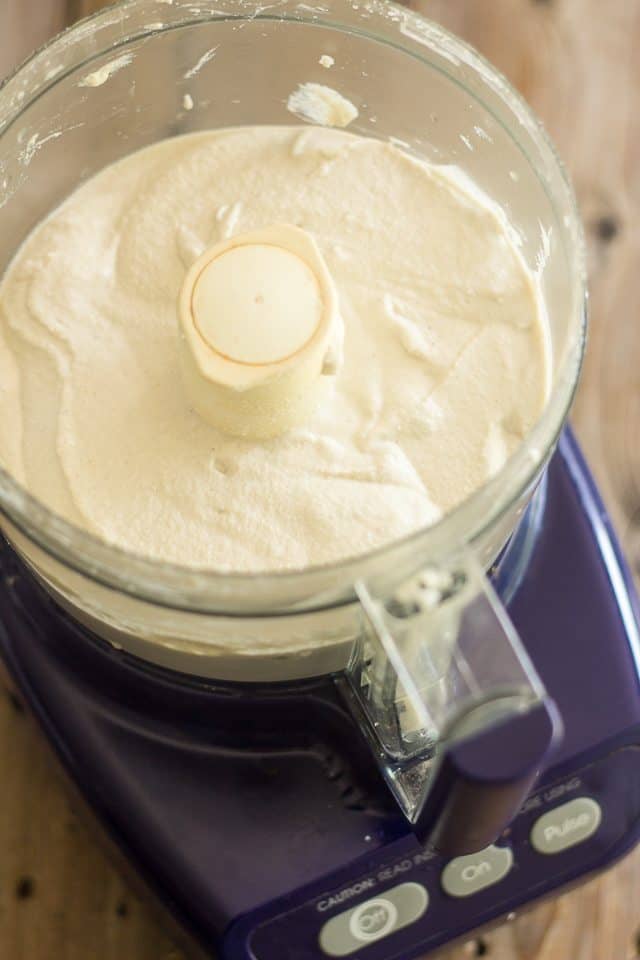
But now, let’s rinse the cashew pieces under running cold water and add them, along with the coconut milk to the bowl of your food processor. Process this until real smooth and creamy, scraping the sides a few times, about 5 minutes total.
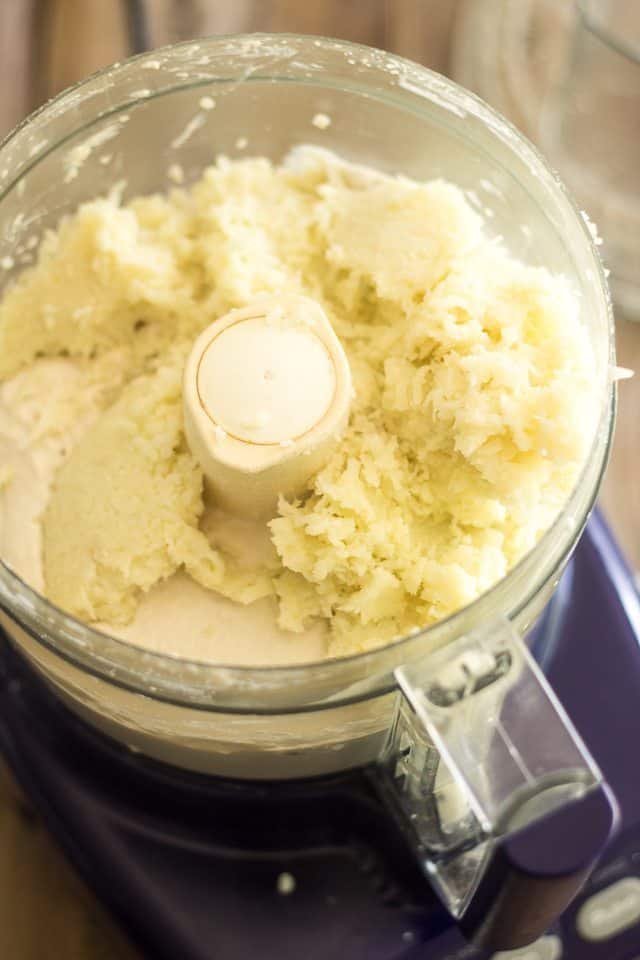
HA! Can you see that? There it is! It’s now time to add the secret ingredient. You know what that is, right? One of my ultimate favorite ingredients in the whole wide world, the super versatile, the almost magical, the wonder veggie: CAULIFLOWER!
Yes ma’am, you heard that one right. Grated cauliflower that’s been cooked and squeezed dry; the very same kind of cauliflower that I use to make Paleo Pizza Crusts, Tortillas and Creamy Fritters. (check out that last post if you need detailed instructions on how to get that cauliflower real dry)
For realz. I’m not kidding. I told you I’d had a bold idea!
Alright now pick your jaw up off the floor, we have a cake to finish. In goes the cauliflower (yes, yes, cauliflower) and the processing resumes until the batter turns really smooth again, about 3-4 minutes.
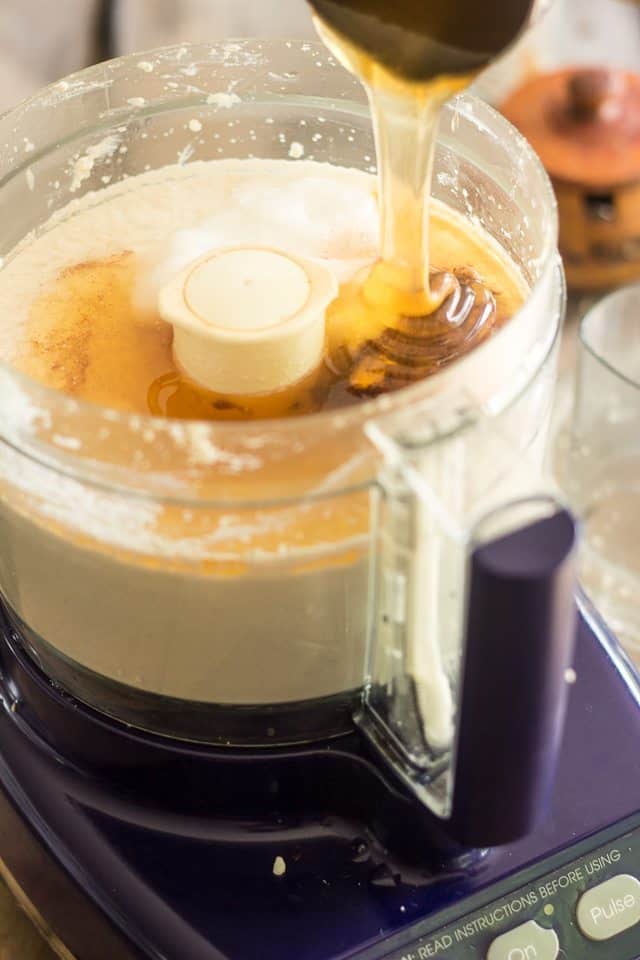
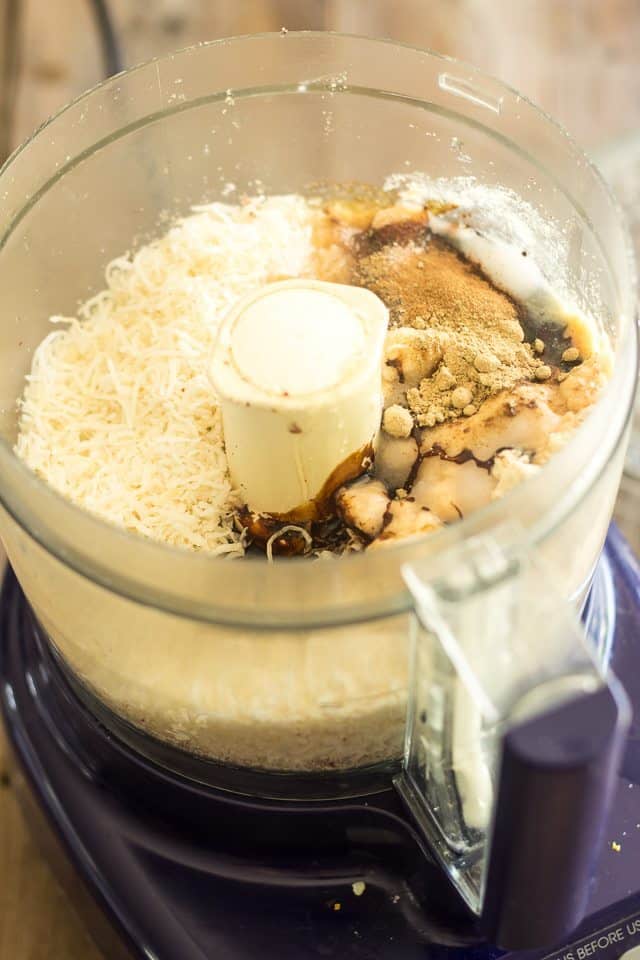
Now add the honey, coconut oil, salt, cinnamon, apple cider vinegar and vanilla and then resume processing until well combined, about 30 seconds.
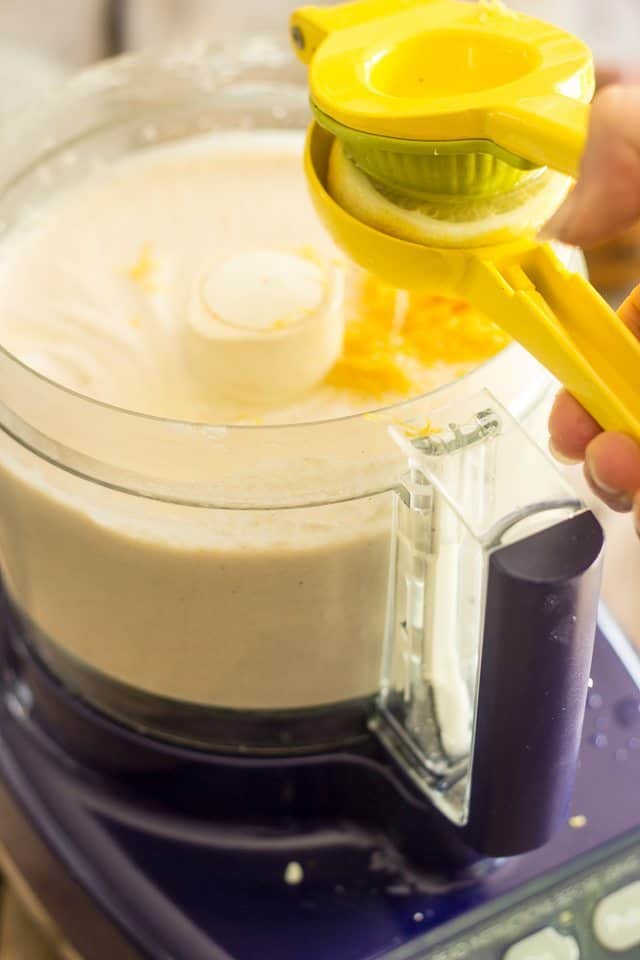
Throw in the lemon zest and juice and mix to combine.
See that little gizmo I’m using? If you don’t have one of these gadgets, you should definitely invest in one. I used to think they were totally useless, until I started using lemon and lime juice on a regular basis. This squeezes ALL the juice out of your fruits and keeps the pits out of your dish.
Plus, it keeps your hands nice and clean, too. A dream, I tell you. Totally worth the investment.
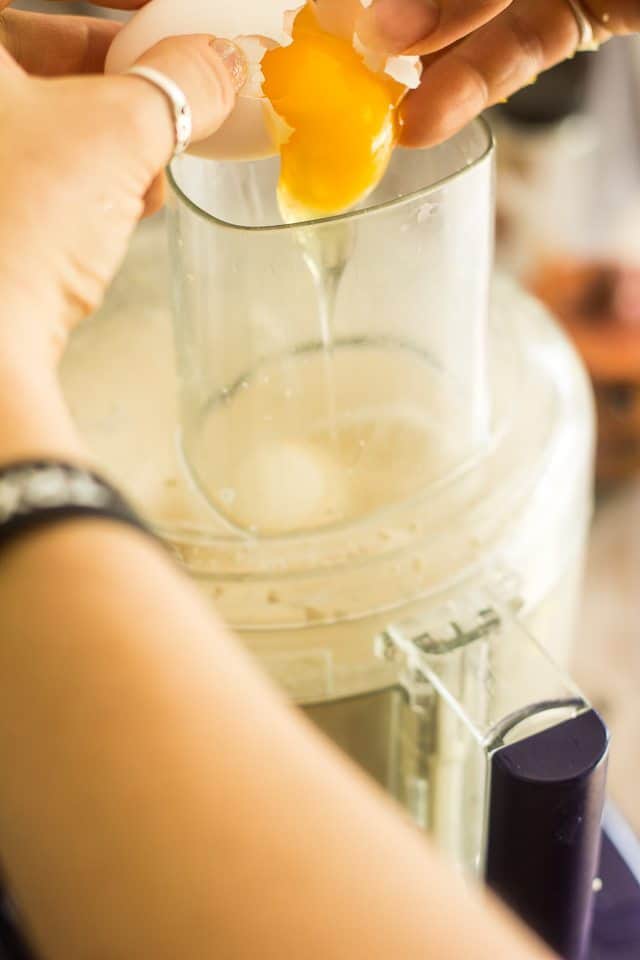
Now we need to add the eggs, one at a time, mixing for about 30 seconds between each addition.
I like to feed my eggs right through the feeding tube, that way I don’t have to stop the motor all the time. Just don’t go and drop a piece of egg shell in there, ‘cuz there’s no way you’ll ever be able to fish it out…
Lastly, you’ll want to add the tapioca flour and give your filling a final 30 second spin.
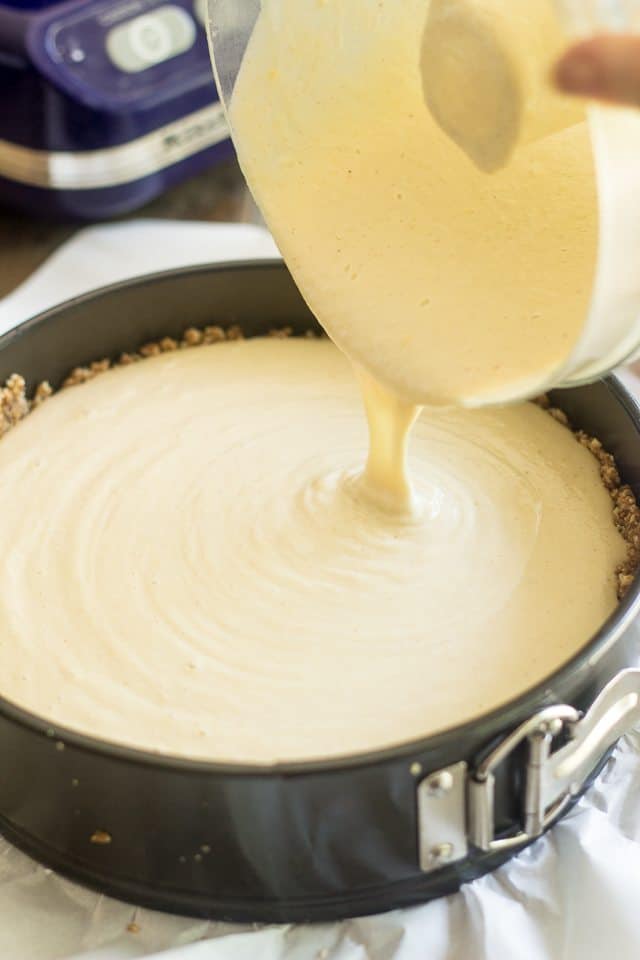
Pour the creamy filling over the reserved crust.
See? No lumps, no visible pieces of cauliflower. It’s all smooooooth and creamy, baby!
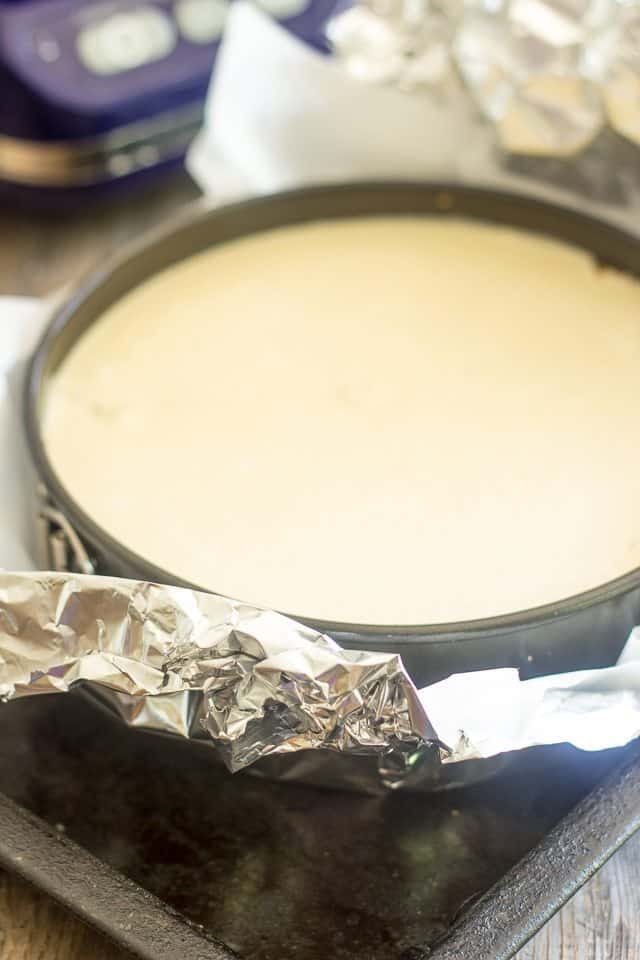
Place the cake over a piece of aluminum foil and fold it over the pan so the exterior is completely covered. Now place your cake in a rimmed roasting pan, then delicately pour some boiling water into the roasting pan so it goes to about 1/4 of the way up the side of the pan.
Your cake now has to go in the oven for a total of close to 2 hours.
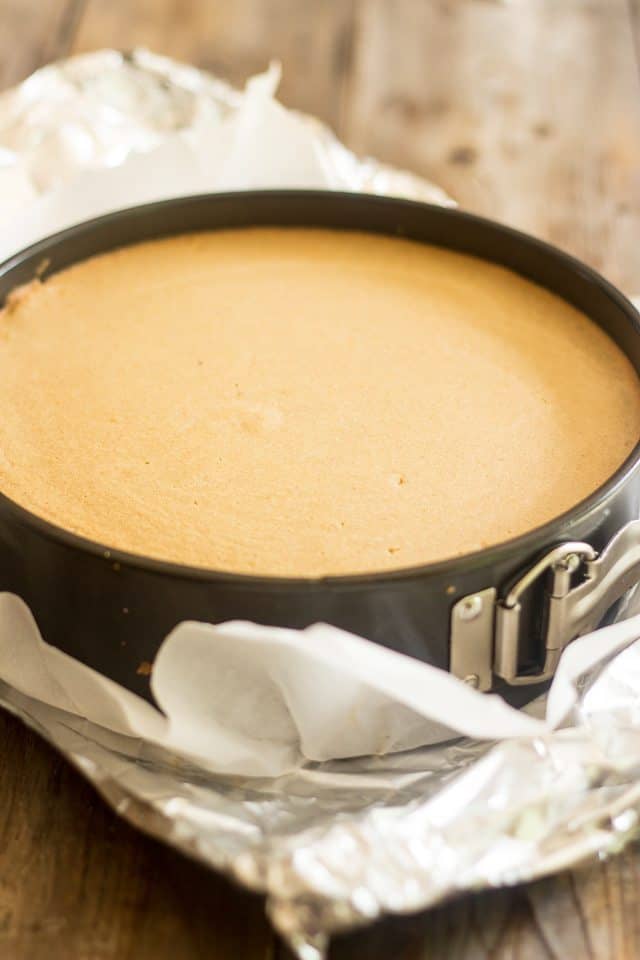
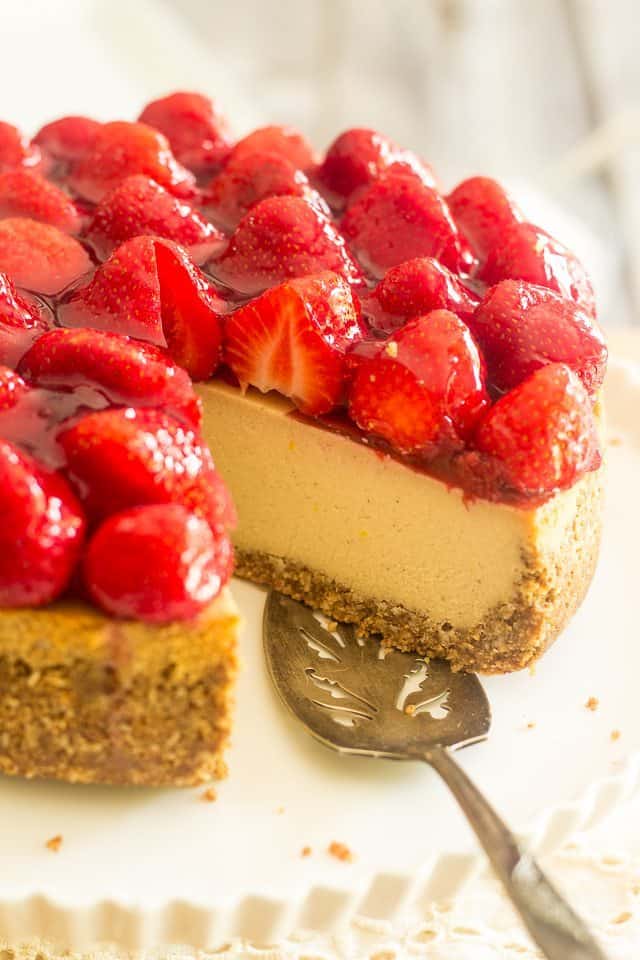
See how this came out of the oven without a single crack? BONUS! A cheesecake that doesn’t crack. I’m certainly all for that!
And wait ’til you get to feel how nice and firm yet spongy this is! Unbelievable!
You might have to pick your jaw up off the floor once again…
Alright, let’s get busy working on the finishing touch, shall we?
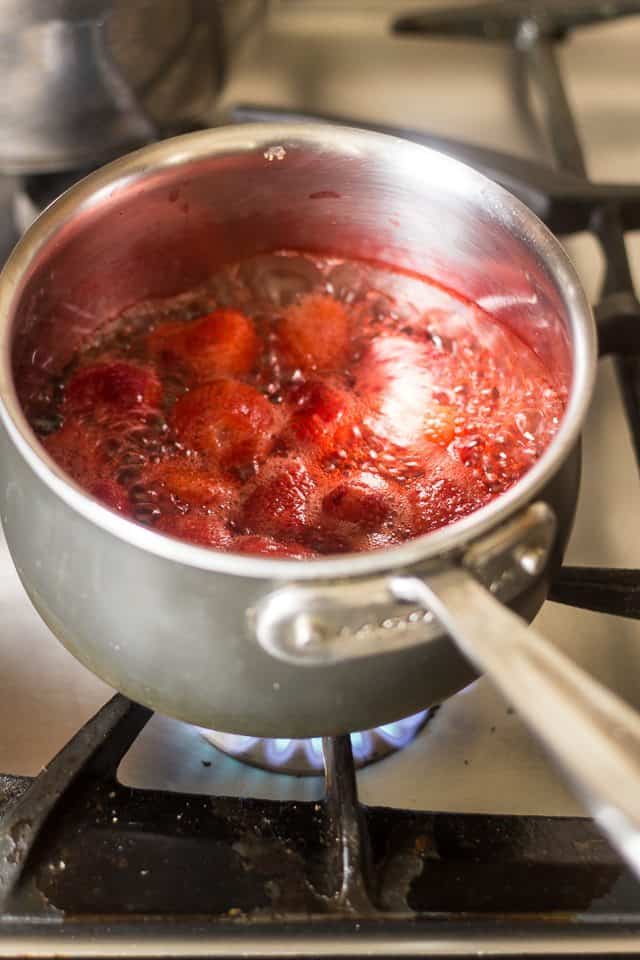
Bring 1 cup of strawberries and half a cup of water to a boil in a small saucepan. Let that boil vigorously for about 5 minutes, until the strawberries have relinquished pretty much all of their pretty red color to the water.
While the strawberries are boiling away, sprinkle some gelatin over half a cup of cold water and let it bloom for a few minutes.
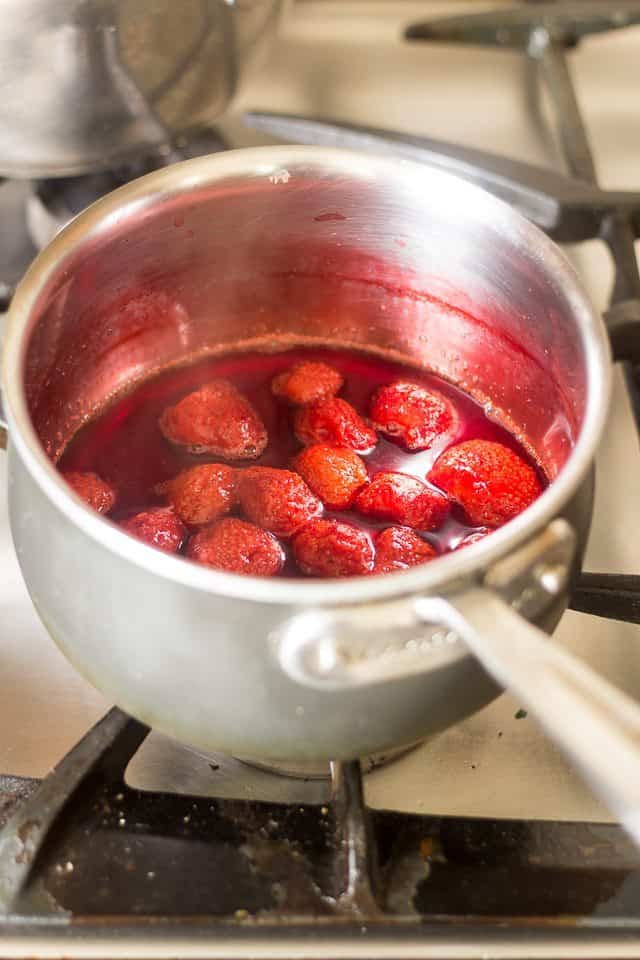
See how nice and red and syrupy that water got?
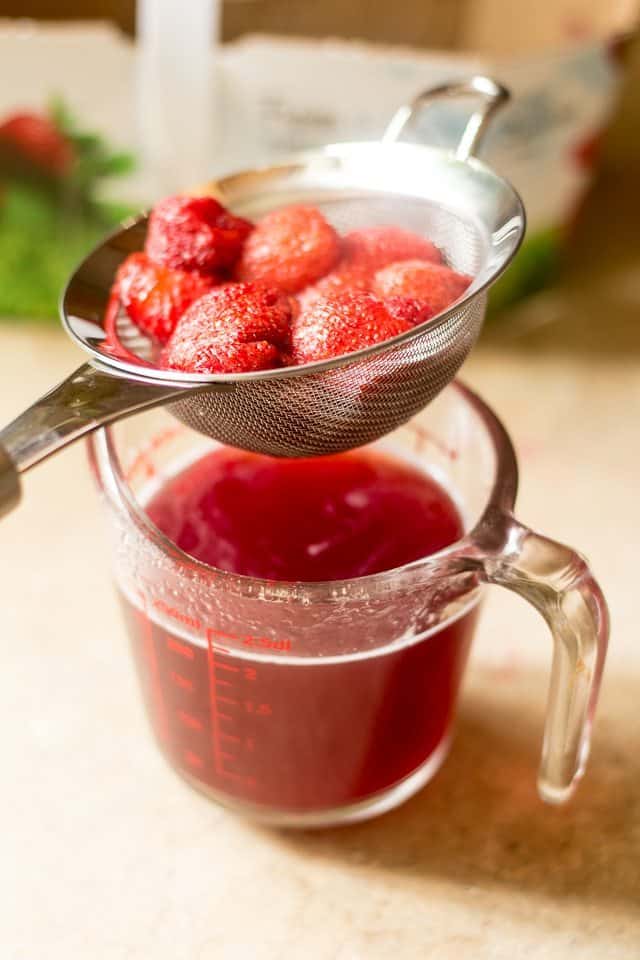
Strain the strawberry juice through a fine meshed strainer set right over the bloomed gelatin. Stir until the gelatin is completely dissolved, then stir in maple syrup, vanilla extract and salt.
Let this mixture cool until it gets thick and almost starts to set. You can place it in the fridge to speed up the process but make sure you check on it often.
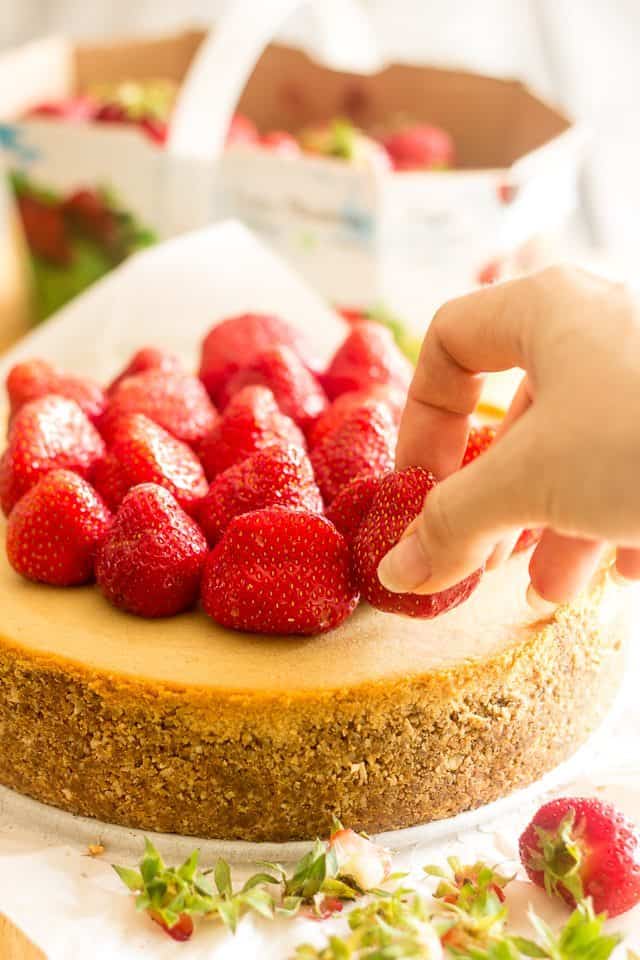
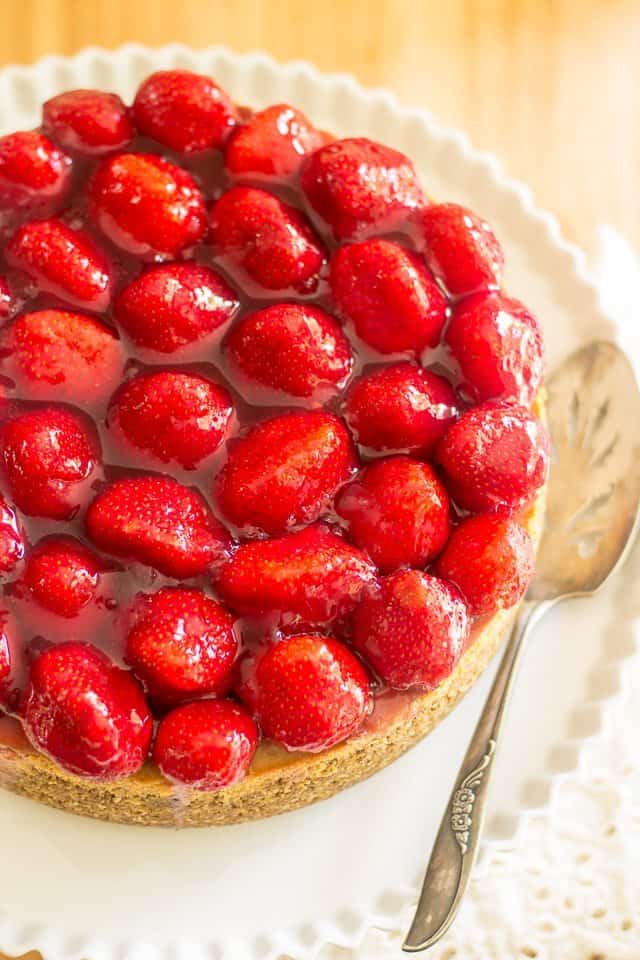
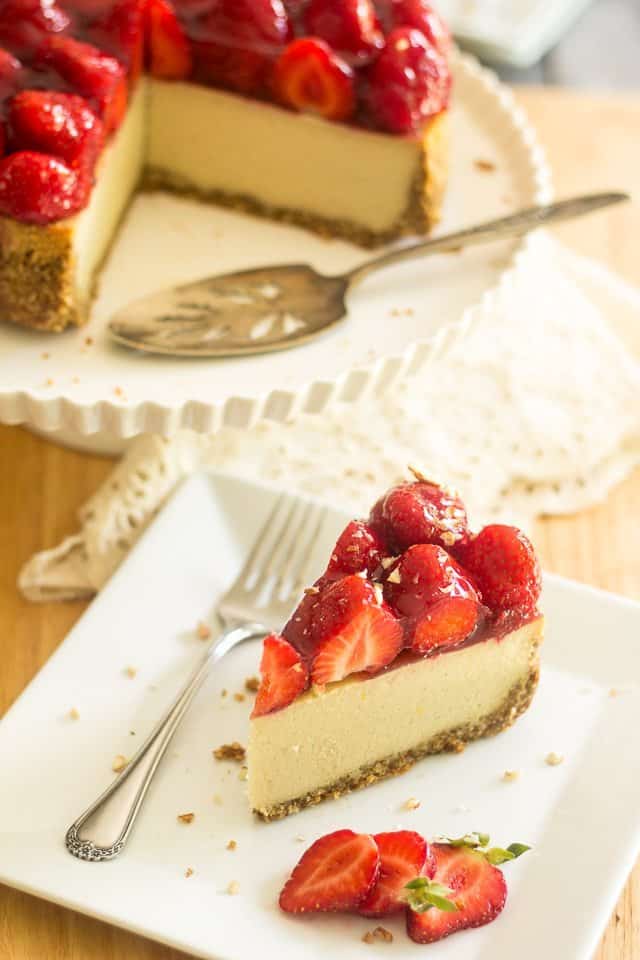
While your strawberry jelly is setting, arrange the strawberries nicely over the top of your cake
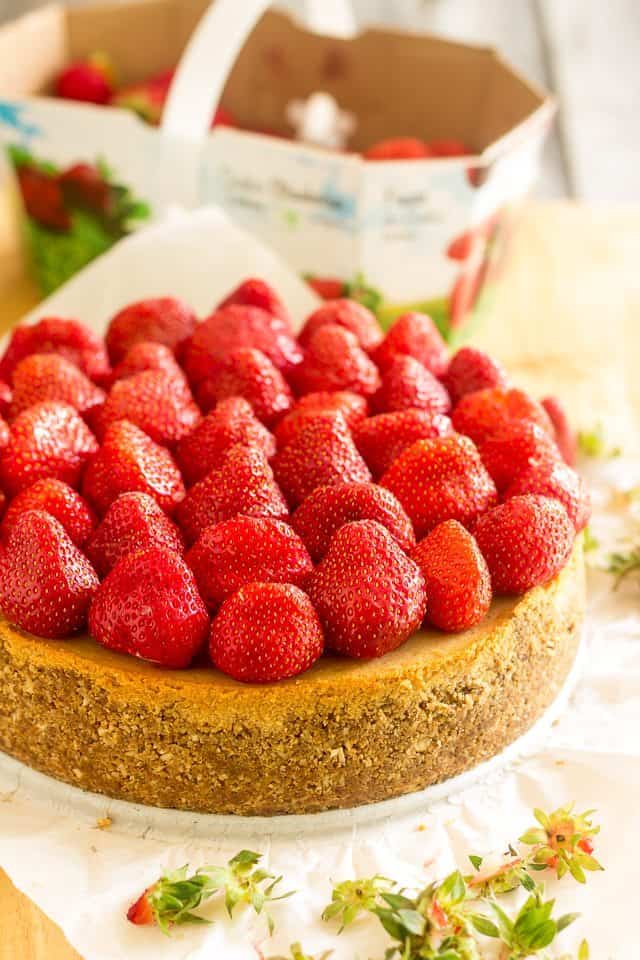
Try and arrange them so the top gets completely covered and none of the strawberries go too far off the edge. It’s almost like making a puzzle! You need to choose the right size strawberry to fit the right spot!
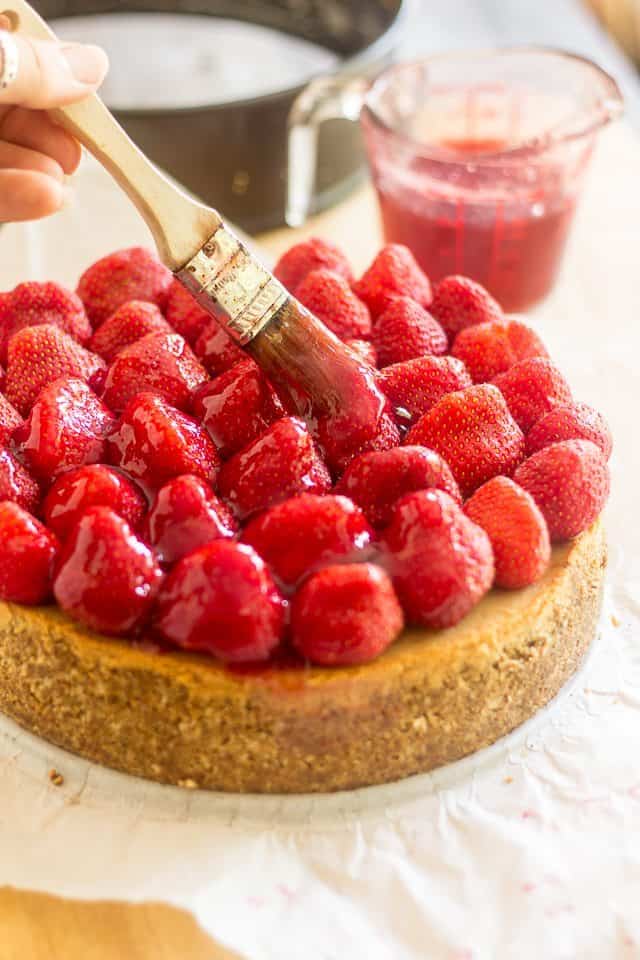
As soon as your jelly is thick enough, apply it generously over the fresh strawberries with a pastry brush. If you find that it has set a little bit too much, you can give it a few seconds in the microwave to soften it up some, but make sure you don’t leave it in there for too long. Go 3-5 seconds at a time, no more.
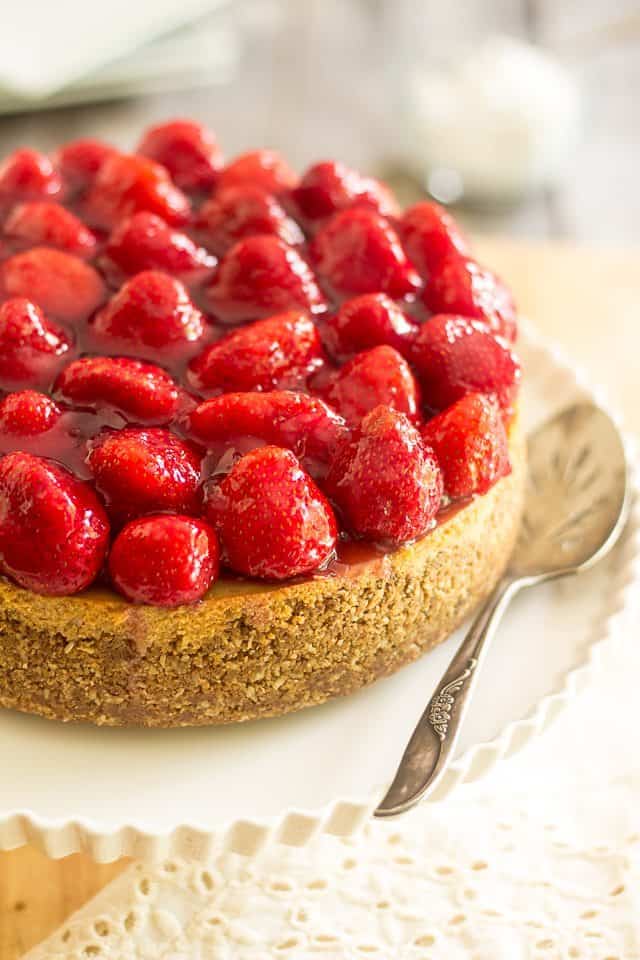
Your cake then needs to make a final trip to the fridge until that strawberry jelly is completely set.
Patience my friend… you’ll get to taste it very soon.
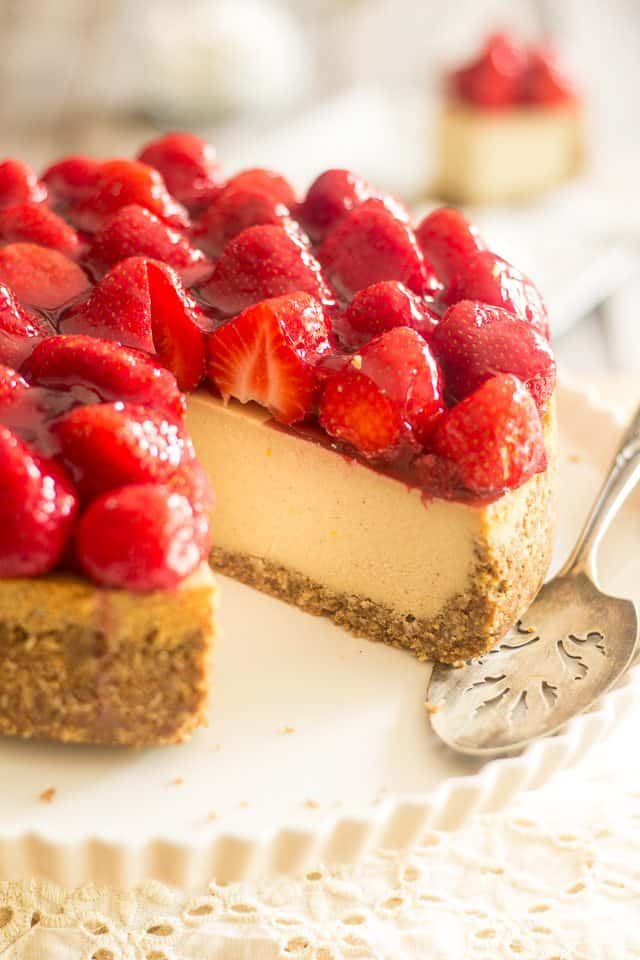
After about an hour, you’ll finally get to slice through that beauty. Now is that gorgeous or what?
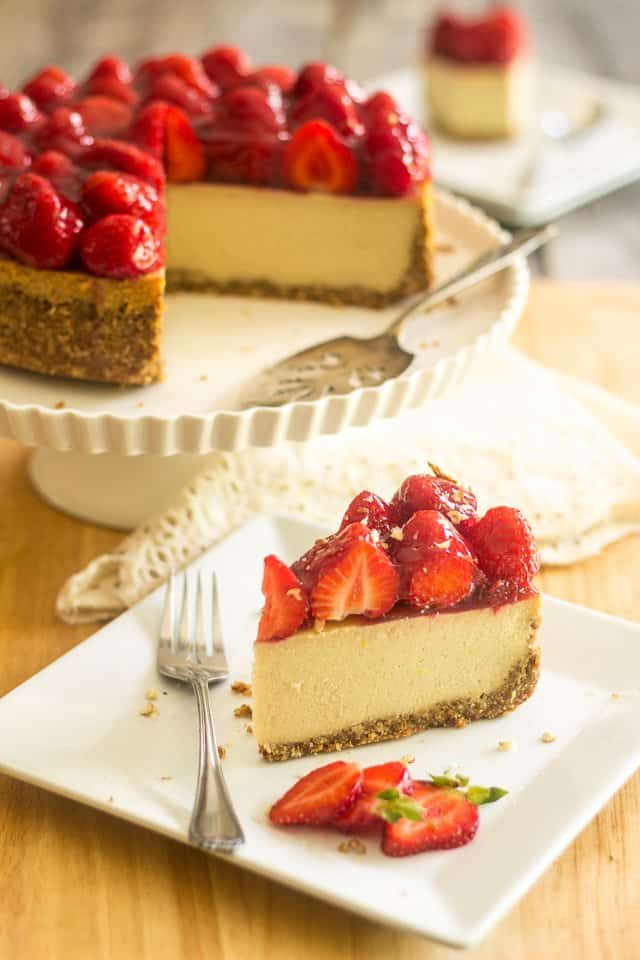
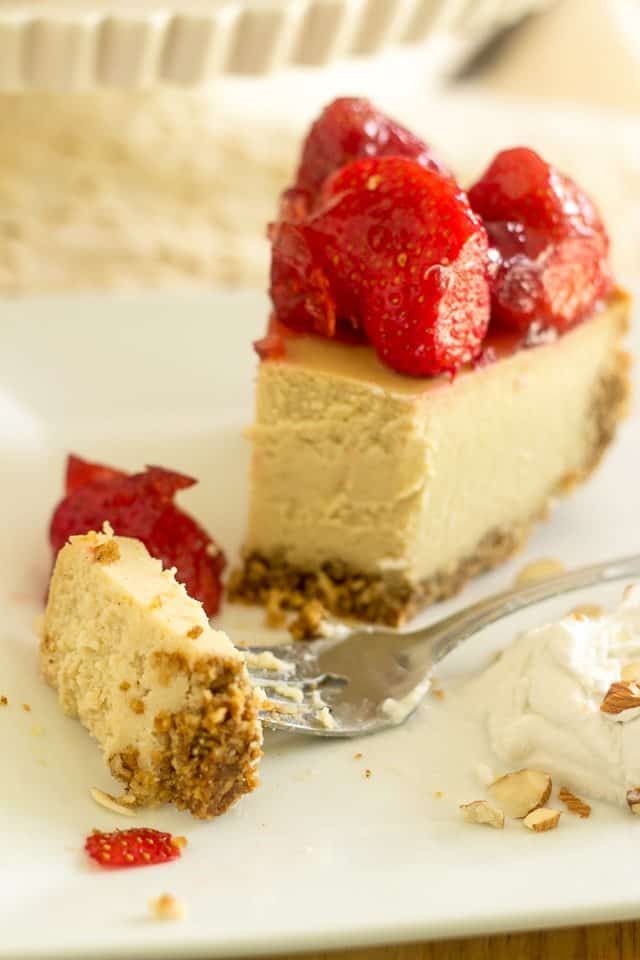
Take my word for it, this cake is simply UH-MA-ZING! I think I would even choose it over the real thing. The texture is so firm yet so creamy, and the taste is sweet yet salty and tangy at the same time, just like you’d expect a good cheesecake to be.
And no, you cannot taste the cauliflower, nor feel its presence in the least. I can guarantee that you would never ever guess it’s in there. You, or your guests, for that matter. Never. I swear.

Just look at how creamy this cake is. I’m like totally blown away. Frankly, it far exceeded my expectations. Well, considering I was half expecting that it would end up in the bin, let’s say my expectations weren’t hard to exceed.
But I just ended up loving it so much, now I’m wanting to make all kinds of different flavors, using this exact recipe as a foundation, INCLUDING the not so secret anymore ingredient, of course!
Until then, I just can’t wait to hear what you guys think!
Non-Dairy & Paleo Strawberry Cheesecake
Ingredients
The crust
- 2 cups finely shredded unsweetened coconut
- 1 cup raw hazelnuts, finely ground
- 1/4 cup coconut flour
- 1/4 cup coconut oil, melted
- 2 tbsp raw honey, melted
- 1 tbsp blackstrap molasses
- 1 tsp Himalayan salt
- 1/2 tsp ground ginger
- 1/2 tsp ground Ceylon cinnamon
The filling
- 2 cups raw cashew pieces, soaked overnight
- 1 cup full fat coconut milk
- 1.1 lb raw cauliflower, grated
- 1 cup raw honey, melted
- 3/4 cup coconut oil
- 1 tsp Himalayan salt
- 1/2 tsp ground Ceylon cinnamon
- 1 tbsp apple cider vinegar
- 1 tbsp pure vanilla extract
- 6 large eggs
- the juice and zest of 1 lemon
- 1/4 cup tapioca flour
Garnish
- 4+ 1 cups fresh strawberries, stems removed
- 1 tbsp grassfed gelatin
- 1/2 cup cold water
- 1/2 cup water
- 2 tbsp pure maple syrup or raw honey
- pinch Himalayan salt
- 1/2 tsp pure vanilla extract
Instructions
The crust
- Line the bottom of a 9” springform pan with parchment paper. To do that, remove the ring and cover the bottom with parchment paper. Fold the excess paper back under the plate and, while holding it in place with one hand, put the ring back in its position with the other hand. Bring the excess paper back from under the pan but do not cut it off.
- Grease the side of the pan with ghee or any other healthy and heat resistant fat you prefer.
- Add all the ingredients of the crust to your food processor and process on pulse until the mixture has the texture of coarse sand. Press at the bottom and side of the pan. You want to bring the crust up to about halfway up the side of the pan.
The filling
- Preheat the oven to 350°F
- Use a box grater or the grater disc of your food processor to grate the cauliflower.
- Place the grated cauliflower in a microwave safe bowl and cover loosely with plastic film; microwave for about 4-6 minutes on high. Let the cauliflower cool for a few minutes, until it can be handled safely with your bare hands, and then squeeze it as dry as you possibly can (you could do this by pressing the cauliflower down a fine mesh sieve or wringing it with a tea towel. See this post for more info). Set aside to cool.
- Bring 3-4 cups of water to a boil.
- Rinse the cashew pieces under running cold water and add them, along with the coconut milk to the bowl of your food processor. Process until real smooth and creamy, about 5 minutes.
- Add reserved cauliflower and resume processing until really smooth again, about 3-4 minutes.
- Add honey, coconut oil, salt, cinnamon, apple cider vinegar and vanilla and then resume processing until well combined, about 30 seconds.
- Throw in the lemon zest and juice and mix to combine; add eggs, one at a time, mixing for about 30 seconds between each addition.
- Finally, add tapioca starch and give your filling a final 30 second spin. Pour over the reserved crust.
- Place the cake over a piece of aluminum foil and fold it over around the pan. Now place your cake in a rimmed roasting pan, then delicately pour some boiling water into the roasting pan so it goes to about 1/4 of the way up the side of the pan. Place that rig onto the middle rack of your oven and bake for 15 minutes then decrease the temperature to 250°F and bake for another 90 minutes.
- Turn off the oven and crack the door open. Leave the cake in the oven, undisturbed, for about 1 hour, or until cool enough to be handled with your bare hands, and then slide it out of the oven.
- When the “cheesecake” is completely cooled, run a knife around the rim and refrigerate uncovered for at least 6 hours, preferably overnight.
The garnish
- Sprinkle the gelatin over 1/2 cup of cold water and let it rest for a few minutes to allow the gelatin to soak up as much water as possible.
- Meanwhile, bring 1 cup of strawberries and half a cup of water to a boil in a small saucepan. Let that boil vigorously for about 5 minutes, until the strawberries have relinquished pretty much all their pretty red color to the water.
- Strain through a fine meshed sieve right over the bloomed gelatin, then stir until the gelatin is completely dissolved. Stir in maple syrup, vanilla extract and salt and let this mixture cool until it starts to set. You can place it in the fridge to speed up the process but make sure you check on it often.
- While your strawberry jelly is setting, arrange the strawberries over the top of your cake to completely cover it.
- Apply the strawberry jelly generously over the fresh strawberries with a pastry brush. If you find it has set a little bit too much, you can give it a few seconds in the microwave to soften it up, but make sure you don’t leave it in there for too long. Go 3-5 seconds at a time, no more.
- Place the cake in the fridge until the jelly is completely set, about an hour, then slice and serve.
Nutrition
If you’ve tried this recipe, please take a minute to rate the recipe and let me know how things went for you in the comments below. It’s always such a pleasure to hear from you!
You can also FOLLOW ME on PINTEREST, FACEBOOK, INSTAGRAM and TWITTER for more delicious, healthy recipes!
Oh, and just because I dunno… I thought this cake was a very pretty subject, I got a bit carried away and took 2 million pictures, so I’m sharing a little more than usual.
I’m sure you guys won’t mind a little food porn, will you?


285 Comments on “Secret Ingredient Strawberry Cheesecake [Non-Dairy & Paleo]”
Love it!
So, it’s practically a main meal which means I can have an extra serve as dessert?!
Hidden veggies are the best. I love getting my kids to try to guess what’s in their food. Bet they’d never guess your secret ingredient.
A stunning cake with Beautiful photos.
Thank you, I appreciate your kind words! Honestly, I’d be ready to put money on that one… I don’t think anyone could ever guess by taste alone what went into the making of this cake. In fact, I’m not even sure that anyone would guess that it was non-dairy, if they weren’t told! 😉
Sonia! Wow! As soon as I get off my Zero Carb diet I am going to come to your site and see what I can get back into my body that isn’t harmful to it. I have 30 days to go. I have been on Zero Carb for 9 days and have lost 10 lbs. Your site is amazing!
Thank you Rita, that’s very kind of you to say! Congrats on the weight loss, and please, let me know how this cake turned out for you when you finally get to try it!
Can this Paleo cheesecake be frozen?
Yes, but without the strawberry topping…
wow it is shocking there is cauliflower in there! i would like to try it. that would be one healthy cheesecake!
HAHA! Thanks Dina! Please do report back if you end up trying it. Would love to hear your thoughts! 🙂
You are so talented! Thank you for taking the time to post this recipe. Can’t wait to make it myself!
Awww, thank you so much Lisa. That is incredibly nice of you to say. I really hope the cake is to your liking! 😀
Woah, I was not expecting cauliflower! Beautiful pictures too, by the way 🙂
Thank you Claudia, I appreciate that! 🙂
Genius! Cheesecake is my favourite dessert and it’s so great to finally have a healtheir option to turn to!
I certainly hope you give it a try, Nazia! Cheesecake would be my favorite dessert too, and now that I’m dairy free, this will definitely my go-to cheesecake recipe.
Mind = blown.
Seriously Sonia, you’re such a genius! This is a very creative idea that I’m dying to try! I loooove all kinds of cheesecake, but healthy ones win my heart every time! And this one is such a stunner – not even in a million of years would I tell this was healthy! Awesome job!!!
Enjoy your Sunday! xxxx
HAHAHA! Thank you so much Consuelo. Please do let me know about your experience if you do end up trying this cake. I hope that your mind will be equally blown by its actual taste! 🙂
Well that’s it. You win, forever. Nobody can ever top this, EVER. I remain in total awe of your genius (and photos.). BRAVO!!!
Mellissa, you’re the best my friend. You just made my day! Seriously. I’m at a loss for words here. You just blew my mind! THANK YOU! 😀
What is the baking temp? Directions say preheat to 250, bake for 15 then decrease to 250 for another 90. Did you mean preheat to 350? I have it in the oven right now and baked it for 15 at 250. What do I do??
I definitely meant to say preheat oven to 350! Real sorry about that, Jody!!! Thanks for pointing it out. I say just carry on, keep baking the cake for another 90 minutes. It’ll still set, I’m not worried!
Please let me know how it turned out!
AWESOME!!! This looks amazing and I’ll be making it soon! One question though. My husband is diabetic and even though we eat Paleo, some recipes are still way too high in carbs for him. Do you have any recommendations for reducing the amount of sweetener in the recipe? Normally I start off by cutting the sweetener in half, in this case, the honey would be reduced to 1/2 cup but I’m not sure what I’d use to replace the 1/2 cup of liquid lost. Any ideas or do you think changing the sweetener level would effect the overall success of the recipe too much? We both love cheesecake and this looks so delicious that I reeeeally want to make it but I don’t want to torture him if he can’t have it. Oh, and a smaller serving won’t work. That would just be mean 🙂
I’m not sure that I would go as far as reducing the honey by half, Becky, but you could probably get away with cutting down to 3/4 of a cup… would 3/4 of a serving do the trick? 😉
There’s also a lot of carbs in the strawberries and jelly. What you could do is top the cheesecake with sliced strawberries as opposed to whole, that way you would probably cut this down by half, too! Or you could also top your cheesecake with blueberries, instead!
Hope this helps, and hope you (and hubby!) enjoy the cake! 🙂
Could you just top it with fresh strawberries as opposed to making the topping? Or any fresh fruit for that matter? This looks delicious, thank you!
Absolutely! You could top it with anything you like, Kara!
I KNEW IT! GAH. The day you posted this on Instagram I said to myself “hmmm… I bet she went and used that dang cauliflower!” (Or rutabaga…. Don’t ask lol) man Sonia, you must really be starting to run off on me…
Rutabaga??? Oh my! I have a twisted imagination, but not THAT twisted! Mind you… now that I think of it… 😉
Wow Sonia you never cease to amaze me! Cauliflower? How do you even come up with these brilliant ideas of yours?? You’re a genius! I can’t wait to make this one, it doesn’t even look complicated! I’ll make a test with my BF and tell him it’s a “regular” cheesecake and I’ll report back haha.
YAY! I so can’t wait to hear. So far, everyone who’s tasted this cake absolutely LOVED it. I am really looking forward to hearing what you and your BF have to say about it! 🙂
And thank you so much for your kind words. Vous êtes trop aimable, ma chère. A real gem! 🙂
Maybe I’m just not thinking because I’m tired, but…
1) Is it 1 cup of ground hazelnuts for the crust, or measure 1 cup then grind?
2) Similarly, for the cauliflower, should I cook 500g or should I have 500g of dry cauliflower after cooking and squeezing?
I’m looking forward to trying this with my daughter. Sounds fantastic!
It’s 1 cup hazelnuts, then grind, and 500g raw cauliflower, then cook and squeeze.
Please do let me know how you liked the cake, Anit. I’d really love to hear your thoughts, as well as your daughter’s! 🙂
oh my wow! GORGEOUS. just GORGEOUS. I’m amazed at the ingenuity that went into making this cheesecake! I hope I have dinner party soon so I can make this beautiful cheesecake!
Thank you so much Alexia, that is incredibly nice of you to say! Hope the cake is to your liking if you end up making it! 😀
Oh wow, I would’ve never guessed there is cauliflower in there! Now I’m dying to try it out to see how it tastes 🙂 ! And btw, your photos are just stunning <3!
Thanks Roxy! That’s real nice of you to say! 🙂
I made this cheesecake and WOW!!! It is EVERY bit as fantastic as the photos look. My dairy-eating husband also approved. It’s light, creamy, and has the perfect mouth-feel of a cheesecake. As a cow’s milk-intolerant person, I am THRILLED to have a cheesecake back in my diet!!! This base is going to be the start of a whole new world of desserts for me.
WOW thank you so much for this awesome feedback, Jody, this is like PURE GOLD to me! I am SO happy to hear that you feel exactly the same way I do about this cheesecake! You have seriously just made my day! Thank you, thank you, thank you!
Hope you come up with many great “cheesy” creations of your own… and hey, feel free to share! 😉 😀
This tastes AMAZING Sonia!! I made it yesterday and was very sceptical as most primal/paleo “Cheesecakes” taste way too cashew-ish and basically nothing like the real deal. To my surprise it tasted nothing like cashews, cauliflower or coconut milk….it just tastes like cheesecake! I’m completely baffled at how tasty this turned out, and am so grateful that you’ve shared this recipe.
YAY!!! So happy to hear, Sally, wow, this is like music to my ear. Thank you so much for this amazing feedback, you have no idea just how much I appreciate! 😀
WOW – I am so glad I stumbled by your blog – this “cheesecake” sounds incredible!!! I have used navy beans to make some mini ones before, but this looks so much better – and you snuck cauliflower in!!! I am in awe – WOW – oh wait I said that already! Wow!
I LOVE, LOVE, LOVE your cheesecake!!!! The aroma of the filling before it even went into the oven was amazing 🙂 Unfortunately I may have to eat most of it myself (Yum), as my son won’t even look at it and my daughter has a nut allergy – so I wondered how long it’ll keep in the fridge?
I would say about a week, Mandy… maaaaaybe you could stretch that up to 10 days. You could always try freezing it without the strawberries. I suspect that would work very well.
Glad you’re loving that cheesecake, btw, and thanks a bunch for taking the time to let me know. I greatly appreciate that. (Oh, and your son has no idea what he’s missing out on… Bah, more for you, I guess!) 😉
I’ll try freezing it and see how it goes, and I couldn’t leave it in the fridge for a week, it’s all gone 🙂 All be it I did share a fair bit with friends 🙂
Please, do let me know how the freezing / thawing went. I’m very curious to find out! And happy to hear the cake is all gone. I take it that means it was good! 😀
This looks fabulous! I’ve have missed cheesecake so much…I can’t wait to try it.
Two questions:
1) We don’t own a microwave. What would be the next best method to cook the cauliflower?
2) My husband doesn’t like most nuts. Do you think substituting raw macadamia nuts for the hazelnuts would work?
You can steam the cauliflower instead of microwaving it, Joanna. That’s the method I used in this Cauliflower Fritter Recipe
As for subbing macadamia for hazelnuts, I’m not sure… the fat content of macadamia is much higher than that of the hazelnuts… if you do try it, be really careful not to over process them, as they turn to butter fairly quickly, and maybe add an extra tablespoon of coconut flour to make up for the extra fat content.
Let me know how things go if you end up making it! 🙂
I was surprised but at the same time not surprised..I have been making sushi for years using raw cauliflower instead of the usual rice and my teenage boys never knew it was cauliflower they were both amazed..Like you I love a good cheese cake..
Ooooh, why did I never even think of making sushi with cauliflower? I definitely need to try that! Thanks for the tip! 😀
Hi Sonia,
Thanks for this great recipe. I just finished slaving in the kitchen over It and it’s in the one now. I’m excited to taste it! I was wondering if you’ve ever tried freezing this cake? With no topping on it. Please let me know. Thanks!
I haven’t tried freezing it, Naomi, but I’m guessing it should freeze well, without the topping, of course! If you do end up trying it, please let me know how it turned out.
I have just made the recipe and after the full time in the oven, it still is not set. I didn’t change anything. I also squuzed every ounce of water out of the cauliflower so don’t think it is an excess liquid problem. Does it set in the 6hrs in the fridge, or should I just keep it going in the oven?
I’m real sorry to hear, Katherine. The cake should be completely set as it comes out of the oven… You’ve probably taken it out of there, by now, so hopefully it did set eventually for you! Please let me know what you did and how it turned out.
I put it back in and kept on checking it. It set eventually. Took another hour on top of the original 2. I think that maybe I put too much water in the base of the pan that the cheesecake was surrounded by. The setting process seemed to speed up once all the water had evaporated. Will add the strawberry layer tomorrow then try the following day. Fingers crossed it tastes as good as it smells!
That could very well explain it, as more water would take longer to come up in temperature. I’m real happy to hear that it eventually set, though, and I truly hope that you like the taste as much as you did the aroma! (it does smell good, doesn’t it?)
Keep me posted! 🙂
I’m so looking forward to trying this cheesecake. I just finished a cleanse and am hoping to implement new healthy ways of eating. Me and my hubby both have a sweet tooth so healthier options that tastes great too is priceless! Which makes me bring up a question. With all the sugar that goes into the cheesecake, can it be considered healthy? Gonna make it anyway, just wondering. ☺
Well, Donna, a treat is a treat is a treat! Only they are not all created equal… this one contains nothing but healthy ingredients, so as long as one doesn’t overdo it, I would say that yes, it is a healthy treat indeed! 🙂
I’ve made lots of regular cheesecakes but I’ve gone dairy & sugar free so this is wonderful, if it really does taste like cheesecake. I’ve found that using a water-bath causes to make my crust soggy (even if I use 3 layers of foil) so I boil water and put in a roasting pan on a rack underneath the cheesecake pan to create steam. If I did this would I have to adjust the baking time? Also, would unfiltered apple cider vinegar work okay or would it make the texture weird?
I don’t think that you would need to adjust baking time, Eileen… as for the apple cider vinegar, I always use unfiltered, so you’ll be fine!
I do not have the parchment paper, do I need it to complete this ? or can I do it without that?
You can do without it, Tyler, only you run a greater risk that that your cake clings to the bottom of the pan. Make sure you grease it real good!
hi! Your recipe sounds amazing! Do you think there is any chance that subbing out eggs for chia seed eggs might work? My kiddo is allergic and I’m still breastfeeding. But in dying for some cheesecake!!
To be honest, Inna, I have zero experience with chia seed eggs, so I wouldn’t be able to tell… Personally, I wouldn’t risk it, especially not with a recipe that calls for so many eggs, but perhaps someone who’s got a little bit more experience with them might be able to tell you otherwise.
Sonia!
I have to thank you for this recipe! I have made it twice – once exactly as written in the recipe and once subbing all of the cauliflower with pumpkin (cooked and dried just like the cauliflower) for a pumpkin cheesecake. O ma gawd, the best cheesecakes I have EVER eaten.
So my question is this: Could I leave out the honey to make a savory baked cheese round (crustless) with herbs?
What fantastic ideas, Harleigh! Love how you turned this into a pumpkin cheesecake, and I am absolutely certain that making this into a savory cheesecake would work just as well! Please, please do keep me posted as to what you did if you end up experimenting with this! 😀
Would this recipe work if I omit all the honey and replace it with a fruit as a sweetener, like applesauce, dates or banana?
To be honest, Rachel, I really have no idea… guess there’s only one way to find out! 😉
I have mine in the oven right now and it is still not set in the middle after 100 minutes plus 15. I did use a 10 inch round pottery pan from pampered chef because I did not have a 9 inch one and there was too much batter for an 8. 1/2 pan. I tried ! Ugh it’s late at night and its my bday tomorrow and I don’t know what to do. I can’t have regular traditional cake so I made this for my own bday-pretty sad, huh? My daughter did help me though. Should I just turn oven off and leave it in overnight? I want to go to bed! Confused and don’t know what to do!
Gah, I’ve been making my own birthday cakes for I don’t know how long, Amy. I don’t think it’s all that sad! 😉
I really don’t know what to say, I’m thinking perhaps the pan is to blame… The heat transfer wouldn’t be the same with metal vs ceramic. I think your daughter had a great idea, that’s probably what I would’ve done. Hopefully the cake will still turn out fine!
And hey, Happy Birthday to you!!!! 😀
Well I left it in till 1230 took it out and then I woke Up at 4 o’clock and put it in the refrigerator. It is all done except for the very very center however that’s okay because it’s way too much for our family to eat it is still a fabulous cheesecake ( i have taken bites this morning-LOL but it is my bday so i am allowed)! I will make it again once I go buythe right kind of pan. thank you so much for this yummy recipe.-it is to die for! By the way I’m making a caramel sauce from Against All Grains to put on top. i am not crazy about strawberry cheesecake but ii love caramel! We will see how that works and I will let you know!
Ooooooh, I love the idea of the caramel sauce! I need to try this myself, with my salted caramel sauce. That HAS to be so decadent! Thank you so much for the inspiration. And glad to hear that it turned out somewhat fine after all. Do keep me posted as to how things go if you give it another go in a different pan.
Oh, and ps, ABSOLUTELY! You are so allowed having cake first thing in the morning on your birthday. 😀
I have just made this cheese cake and everything want really well, except after two hours it is still not set and it’s also turned a beige colour. Must be the cauliflower from cooking or what else. Please help because it is amazing, taste great and I want to make it for Christmas. Thank you!!
Sorry Katja, I really wish I could help, but without knowing exactly what it is that you did, it’s hard for me to target what went wrong…
I had the same problem. It looks great and flavor is awesome, but 3/4 has a gooey pudding texture. Next time I’ll only reduce heat to 300. However, it’s worth a second shot!
Glad you think so, Karen. Hope the second try will turn out perfect!
I have a mango tree and really miss mango cheesecake, so am just going to swap strawberries for mango! I love to put the mango in the cake though so was wondering could I use half a cup of honey and half a cup of pureed mango instead of a full cup of honey, or a whole cup of pureed mango?
Honestly, I have no idea, Melissa. Personally, I don’t think the mango puree alone would be sweet enough, but perhaps half and half would work. Definitely, though, sliced mango or mango puree on top of the cake would be heavenly! Let me know how things go if you end up giving it a try!
Put little chunks of Mango in the batter? Would that work?
Just made this and it turned out beautiful. The consistency was perfect and when I saw the secret ingredient I smiled. Thank you! The flavor is still too cashew-y for me, is there another nut I could use?
Not sure, Stacey… there really isn’t another one that has the same properties. If it were me, I’d probably run a few tests with chestnuts…
Glad to hear the cake turned out good, still. Thanks for taking the time to let me know!
Hi! 🙂 I’m super keen to make this cheesecake for our Christmas get together. I also have another question though, and slightly unrelated to the recipe! haha. What type of camera do you own? I’ve been hunting around for a good camera for a while now and have had a fair bit of trouble choosing one that produces a nice image. Thanks!
– Lauren
Thank you for this wonderful recipe. I am dairy-free and slowly weening my family there. I have been trying to find a cheesecake recipe and here it is!! Question for you though, our favorite is pumpkin cheesecake – do you think adding some puree pumpkin to the filling would change anything? Have you experimented with other fillings? Going to make your cheesecake this weekend! I can’t wait to try it!! Thank you
Unfortunately, Courtney, I haven’t had the chance to experiment with other flavor combinations yet. I’m not sure about simply adding the pumpkin puree. I think what I would do is use it instead of the coconut milk and maybe add a quarter of a cup of melted ghee or coconut oil to make up for the lost fat and moisture. And then of course, I would add all sorts of pumpkin pie spices!
I really hope the cake turns out for you. Please do keep me posted as to how things went if you end up making it.
See Harleigh’s post on Nov 15th.
I only just stumbled – very happily – upon this recipe and will definitely try both Sonia’s “original” and Harleigh’s variation on it…
Good luck to you too
WOW!!! would Never Had Guessed the Secret Ingredient Can’t wait to make it
My father used to use Chokoes as substitute for either Apples or Pears in His Pies as they take on the flavours of the spices and the texture of stewed fruit when used that way …
Oh so yummy. I made this yesterday and left in the fridge overnight. The taste is really just like cheesecake, amazing. I think I either used too much of the secret ingredient, or maybe my lemon was too big , or it just needed to bake longer, because it was still a bit soft. I just sliced it and put in the freezer, and that will probably firm it up enough for me. I baked it an additional 30 minutes, and thought that would be enough. I am excited to try some experimentation of my own. Thanks for the incredibly creative recipe!
Glad to hear you liked the cheesecake, Judith! I’m curious as to why it remained that soft, though. Did you actually weigh your cauliflower? I honestly doubt that the amount of juice in a lemon would make such an appreciable difference, especially not since you gave it a whole extra half hour of baking time…
No I did not weigh the cauliflower. I am used to using “cup” measurements and have never weighed ingredients before. Is that something that you usually do?
I wondered how I would get an accurate amount using (1/2 a very large head) of cauliflower. I am so intrigued by this recipe that I will be trying it again. do you have a suggestion for the cauliflower other than by weight? Thank you for your response. I am so delighted with your recipes. I have made the “creamy vegetable soup” twice and love it. I am amazed every time I make mayonnaise using your immersions blender method, it works perfectly every time. Thanks you again for sharing your creativity!
With certain recipes, especially in with baked goods, sometimes getting an accurate weight measurement is the best, if not the only way to go. A kitchen scale can be had for a handful of dollars nowadays, which makes it a very valuable investment. I know I could never be without mine! Also, in this particular case, you need to make sure that you squeeze that cauliflower really, really dry!
Happy to hear you’re enjoying the mayo! Years after, I personally still enjoy watching every new batch come to life! And then I enjoy eating it even more, of course! 🙂
Thank you for your advice, I ordered a kitchen scale yesterday, I am sure it will be very helpful. You are right it wasn’t expensive, I’m not sure why I have put off getting one before now. 🙂 Thanks again!
Hi
I’ve just had this cooking in the oven but it is still quite runny after 2 hours!!! Argh… All that work! I’ve done everything to the letter but not sure if this can be fixed. Is it possible to overcook it if I keep it in the oven??
I don’t think that leaving it in the oven for a bit longer would be a problem. Just keep an eye on it and make sure it doesn’t burn!
Hi there! I am trying to attempt to make your cheese cake. This might be a dumb question but is the full fat coconut milk you are talking about the really thick kind that you can scoop or the one that is more liquid and just pours out. TIA
I’m referring to the canned variety, Sameera. There’s a link in the list of ingredients to the kind that I use.
The ingredients say coconut milk, but the link is to coconut cream. Which one should I use? My husband’s birthday is next Tuesday and he would love cheesecake but doesn’t think it’s possible. I am hoping to surprise him with your recipe! 🙂
What you need to use, Shelly, is the full fat, canned coconut milk. I linked to the brand I use, who happen to refer to theirs as cream in English, and milk in French… as if coconut milks weren’t confusing enough as it is!
So really… what you need to get is the canned, full fat variety. Hope this helps! 🙂
Made this cheesecake again for NYE, and it was PERFECT again!!
Tip: If your center isn’t setting, make sure you are weighing the cauliflower. My grocery store has all different sized heads so to take the guess work out of it, I use my kitchen scale.
My biggest compliant from my guests when I made this the first time was too much coconut for people’s taste (NO complaints about it not being a dairy-laden cheesecake! They never knew!). So this time I replaced some of the shredded coconut with pecans in the crust. I just made sure the consistency looked right before pressing into the pan. I also pre-baked it a little to get the toasty flavor. DELISH!
The second change I made was to skip the strawberries all together and top it with a bourbon caramel sauce from the Minimalist Baker http://minimalistbaker.com/4-ingredient-bourbon-caramel-sauce/ and made it dairy-free by using coconut cream. OMG it was GORGEOUS and so delicious. I wish I could attach a photo. THANK YOU for this fantastic recipe!!!
Please, please post a picture to my Facebook page? I would LOVE to see your cake, Jody. Sounds soooooo yummy. Now I want caramel cheesecake! 😉
And yes, you are totally right. I think that weighing the cauliflower is imperative with this recipe. In fact, I should probably only include that measurement.
I am a DJ but also the “sous chef” in my house. My wife and I are experimenting with new Paleo items almost daily right now. I found this cheesecake recipe and thought this couldn’t possibly taste the real thing. Because of my skepticism, I decided I would just make the filling as opposed making the whole thing and throw it all away. Well…I LOVE IT! The filling alone is awesome. I can’t wait to try the whole enchilada but it will have to be next time because I’m gonna eat all of this filling now!!!
Haha! I hope the whole enchilada satisfies even more than the filling alone did! Make sure you update me and let me know what you think when you’re done eating all that delicious filling and decide to give the whole thing a go! 😀
I forgot to soak the cashews last night D: What is the minimum amount of time I need to soak them? Do I then just rinse them and put in the food processor or do you dehydrate them first? This will be my first recipe using raw soaked nuts. We are new to paleo and it is my husband’s birthday.
You need to soak the cashews for at least 6 hours, then rinse and process, Shelly. No dehydrating!
I read in the recipe again about rinsing and putting in the food processor, just need to know how long to soak. Also, do you soak the hazelnuts for the crust?
Nope, you only need soak the cashews. The hazelnuts you want to keep crunchy! 🙂
This recipe looks to fit the bill for my new diet of… Gluten free, cow dairy free, chicken egg free, lemon free…. The list does go on.
Cashews, I am allergic, so can I substitute perhaps macadamia or another nut for similar results? I had tried almonds in another recipe and was unhappy with the results (I had the cashew version before knowing I was allergic).
Duck eggs vs chicken eggs. They’re abit larger, so I’m thinking of reducing by 1 to make up for the size difference.
Can I do lime instead of lemon, or is there another substitute?
I’m all rather new to my food allergies, so just trying to figure it out.
Not sure about the nuts, Jenne. Cashews have a unique, creamy texture to them and their fat content is much lower than that of the macadamia nuts. I’m thinking blanched almonds would be your best bet.
I’ve never used duck eggs, so I wouldn’t know about their size. You could weigh them to be sure. A standard “large” chicken egg weighs 50g.
As for doing lime juice instead of lemon, now that wouldn’t pose a problem, for sure!
Let me know how the cake turns out if you end up trying it! 🙂
Dear Sonia,
I have tried this cake as me and my boyfriend are love paleo food. I have done everything little by little- word by word as you written it down expecting a surprisingly good cake as you described it. Well, I don’t mean to ruin by all means the lovely comments you are getting but clearly most of them only appreciate the idea but didn’t try the recipe. I might have still done something wrong but I highly doubt it. So I would like to share my experience with your recipe. The texture of it was perfect and at the beginning I truly believed I won’t taste the cauliflower as it completely disappeared in the mixture . Everything was fine until I started to bake it. It started to smell cauliflower and then i could taste it as well. All the exact amount of ingredients I used as you and it tasted horrible and yes cauliflowery. Sadly after all this I can’t really imagine to taste any better with any changes but I’m working on it.
I don’t know what to tell you Janet. I’ve had many people taste this cake and they were all AMAZED with the taste and texture, all said that they would NEVER have guessed that there was cauliflower in there. Many people left raving reviews on here as well as on my social media pages, I’ve received several emails too and ALL said that the cake was AMAZING. The only negative comment it ever got, if you can call it that, was that it took longer to set or never completely set in the center.
Quite frankly, I find your suggesting that most people who left favorable comments on the cake visibly hadn’t actually tried it and your stating that the cake tasted HORRIBLE to be a tad insulting.
That said, I’m sorry to hear that your experience with this recipe didn’t go quite as planned and that the cake didn’t meet your expectations. I really wish I could help you pinpoint what went wrong…
hey there, just a thought… did you precook your cauliflower in the microwave then squeeze out the water? If not it would have had a cauliflower taste to it. I’m not into all these healthy recipes, I think most of them are nasty. lol… but i now have a no-dairy-at-all diet because of my nursing baby. I actually liked this recipe and so did those that I shared it with. My husband, who is forced to try my new recipes, loved it and said he liked it better than cheesecake. I don’t think it tasted just like cheesecake, but it did have a great flavor and structure to it. I really hope you try this again and that it works out cause it is a yummy cake.
OMG! Key Lime cheesecake, Brilliant!
Or you could actually make Key Lime pie.
with this recipe using a 10″
Janet I read somewhere that if you cook your cauliflower too long it has a taste to it, might that be the problem? And there are so many here who have tasted it and loved it.
I have never made ANY kind of cheesecake and only started on Paleo THIS WEEK. WHAT made me think I should tackle something this complicated already, I cannot say. It is now in the refrigerator. It smells delicious and looks BEAUTIFUL! … but I forgot to stick a toothpick in it, so it was a little loose when I did. My first question is … when do I take the cheesecake out of the spring pan? It says to run the knife around the edge when it is cooled and to stick it in the fridge… but don’t see when I take the cake out of the pan. I forgot to measure the cauliflower, so after reading these reviews while I was waiting for it to cool, I kind of expected it to be a little runny.. but not bad. I’ll make the glaze in the morning. Next time I will get all of the ingredients out and measured before I begin assembling. The instructions to begin boiling the water was WAY premature for me this first go around. I had to fill the pan and heat it three more times before I was actually ready to use it. I actually bought my first spring pan for this and had to watch a video on how to use it just for the first step of putting the parchment paper on it… and thankfully also saw a video on sticking how the cheesecake would be put inside another pan of water. I’m not sure I would have understood that with your instructions alone. You did an amazing job creating this and writing out such detailed instructions. Can’t wait to try it tomorrow! I’ve never even written a review on a recipe before.. so that tells me how much I liked and enjoyed the challenge of something special like this.
Hello,
Can you suggest a replacement for the coconut oil? Even if is not paleo? I’m allergic to everything coconut.
Thanks!
There’s much more than just coconut oil in that recipe Carol. You would need to make quite a few substitutions! I’m not sure I would risk it…
I made this “cheesecake” yesterday! I have a 4 month old that is sensitive to milk. I nurse her, but I have have dairy she breaks out with horrible rashes that even bleed 🙁 Anyways, cheesecake is my favorite so I thought I would make this. WONDERFUL! I don’t think it tastes like cheesecake, but it is good. My husband said it tastes like the pumpkin cheesecake that I make for the holidays. Overall, I would give this recipe a full rating. We shared with my friends who are also on food restrictions. Everyone loved it! Sorry I didn’t take any pictures… maybe next time since we will be doing this again!
Wow, thank you so much for taking the time to leave this FANTASTIC feedback, Rochelle, you have no idea just how much I appreciate! You absolutely, positively, totally ROCK! Also, I’m real happy to hear that this recipe ended up being to your liking and to that of all who tried it. Please, do immortalize your creation next time you make it, I would LOVE to see it! 😀
Wow – this looks amazing! I can’t wait to try making it.
Is there anything that I can use as a substitution for the tapioca flour?
Arrowroot flour will work just as well, Gracie.
I cannot tolerate coconut. Are there any substitutions you could recommend?? this looks amazing!!!
There are quite a few coconut components in this cake, Debbie. That would make for a lot of substitutions. I’m not sure I would risk it…
I love this cheesecake. I own a small cheesecake company here in Fort Bragg, CA. I’d been searching for a gluten/dairy free baked cheesecake. This one is absolutely perfect. The cauliflower ads an element of texture and creaminess that was delightful. The only thing I do that’s different from you is that I use a Kuhn Rikon push pan instead of a spring-form. I NEVER EVER have to worry about leaking. The pan is a bit pricey. But since I’ve switched to push-pans, I’ve not lost a single cheesecake to leaks. By the way, this cheesecake is delicious and all of my customers who require dairy-free thought that it still tasted very much like a standard cheesecake. Thank you for this one, Absolutely brilliant.
Interesting pan… I’d never heard of it, and it looks pretty great indeed, but unfortunately I don’t think I make enough cheesecakes to justify the expense. Plus, I find that lining the pan with parchment paper works perfectly well! Thanks for the tip, though, I’ll keep it in mind.
Oh, and thank you so much for the amazing feedback, I greatly, greatly appreciate you taking the time to write this. It really is music to my ears! 😀
WHY??????
I pledge allegiance, to the cauliflower flag, and the one cheesecake for which it stands. One deliciousness, under Sonia, with slices of paleo justice for all.
Wow.
This tasted absolutely amazing! Even if I did have to scoop it off the floor. Ahem, let’s just say that my springform tin sprung a leak… 😮 I had to handle my precious into the oven and out of it again, but all was well. Thank you so much for confusing my family’s brain into thinking it was normal cheesecake! <3
OMG, that is music to my ears! What amazing feedback. I oughta have it printed and framed, then hang it on a wall.
Thank you so much for that, Emma, you totally rock and absolutely, positively made my day! 😀
Looks SO amazing!! Along with dairy I cannot tolerate eggs… I imagine there’s no substitution for that? Do you think an egg replacer could do the trick? Love the creativity & pictures in this post, keep up the good work!
I’ve never worked with egg substitutes, so I really wouldn’t be able to help you with that Jaya. And the recipe calls for a lot of eggs, so I’m not sure I would risk it. Hopefully someone else who has a little more experience with egg replacement could offer some insight…
Thanks for your kind words, that’s really nice of you to say! 🙂
Can raw almonds be substituted for the hazelnuts?
Absolutely, Annie!
Sonia just wanted to say my daughter made this for a friend who is lactose intolerant but loves cheesecake. We were pleasantly surprised how it came out. To me it tastes almost caramel/dulce de leche like. I am assuming from a combo of the raw honey, coconut milk, and the cinammon. Bottom line is she loved it. My daughter did not have time to make the homemade crust but bought a pre-made graham cracker crust instead and it still came out just fine! I was happy my 17 year old daughter pulled it of on her own as I was working. She was so proud of herself to be able to give this food gift to a friend for her birthday! By the way her friends whole family loved it and she had extra to make a second cheesecake for us:) Thanks for a great recipe!
Thank YOU Edelyn, for taking the time to share this amazing feedback! I’m so happy to hear that you all enjoyed the cake so much, and that your daughter was the one who made it on her own! That is like pure music to my ears. 🙂
Ok going out today to get ingredients so I can make it for my husband. NOT going to tell him it isn’t real cheesecake. He gets an upset stomach every time he eats cheesecake – just loves it. It could be the dairy in it or the fruit. Will find out. I can’t try it since I am on the Zero Carb diet, but just figured out I can make these recipes for Him so he can eat healthy.
Oh, I so can’t wait to hear your thoughts, and his!!!
Ok! I did practically everything wrong on this recipe – and would you believe it it turned out great. The only thing I substituted was Celery Root for the Cauliflower same gram amount (I do that for anything that says cauliflower, haven’t tried doing for pizza. Probably wouldn’t work). My husband thought it was great.
I used my useless blender to puree the cashews and celery root (separately), took forever.
I beat the eggs too long, too much air, made the cake get done sooner, put it in the fridge to moisten up the hot cake with the frigid air. I turned the frig to colder to compensate. It would take too long to list all I did wrong, but in spite of this it was wonderful!
You are a magician Sonia!
erm…even though I am in the middle of Zero Carb diet I took a piece to test before giving it to my husband. Yummmmm.
HAHAHA! Thank you so much Rita! I think you’re the magician for having this cake turn out despite all the “substitutions”! And celery root, really? OMG, to say I am intrigued would be an understatement. Now I NEED to try it for myself! 🙂
So tell me… what did hubby think of the cake?
He thought it was great. Neither one of us are really what you would call sweet eater’s, but every now and then we like something sweet. This is pretty healthy.
Yes, fiddle around with the celery root, I used it gram for gram the same as the cauliflower. I did not have to squeeze it dry. I got the idea of using celery root from Mellissa at: ibreatheimhungry.com. She used it for hashbrowns, so good! It is very hard to peel and you have to make sure you cut most of that fibrous material off at both ends. I then fished out a few that made it into the batter.
I also made a cookie crust made from detoxinista.com site (grain-free shortbread cookies). Baked one big cookie, cooled it, then crumbled it into a bowl with a little more honey and butter and spread it in the cheesecake pan. This would make a wonderful chocolate crust.
Anyway I bet if you fiddled with the celery root you would come up with something fantastic!
I’m in the middle of this recipe. It is looking and tasting amazing as I go along, but there should be a warning: THIS RECIPE TAKES HOURS OF PREP!!! Seriously, I’m out of time and will have to put the filling & crust in the fridge to bake later!!
Sorry to hear you ran out of time to finish the cake Kim. I agree that it does require a little bit of prep time, although I think that about an hour should do the trick, not including baking time, of course… I hope that your cake turned out in the end, even though you had to let the batter sit overnight (which I really don’t think should be a problem.)
Hi! would definitely try to bake this gorgeous cake, but have a few questions.. Sorry if you already had to answer them, i couldnt read all comments (too impatient to start baking):
1. Crust: can i add other nuts, for example pecans or walnuts along with hazelnuts? if yes then what proportion would be right?
2. Grassfed gelatin: i have difficulties finding gelatine in the place i live (believe it or not!) and would like to know if there is anything at all to replace it…
3. The springform pan: I’m a total beginner in baking so i don’t have all forms and shapes of pans for baking.. just yet Would like to know if a pie pan would do? its same size but a bit shallow comparing to your pan..
thanks a ton!
Hi.
I was soo interested in making this cheesecake for father’s day, but i didnt realize it needs to sit in the fridge for at least 6 hours after baking and i started late. Can it be less time? Why does it need to go in the fridge for that long.
I really want to eat it already lol.
Any cheesecake needs to chill completely before you can eat it, Valerie. It needs to firm up, for one, and it tastes much better when it’s cold! 😉
Do you have a vegetarian equivalent for the leaf gelatine?
The only one I can think of is agar agar, but I’ve no experience working with it, so I wouldn’t know how to use it… It should get the job done, though.
Thank you so much for this recipe!! It is the only dairy free cheesecake recipe I have found (and believe me, I’ve looked for hours) that sounded worth the time to make. I have it in the oven as we ‘speak’! I’m dairy and gluten free, and I am taking it to a family 4th of July party that also includes two Paleo’s and three diabetics. I won’t be able to taste it before presenting it, but I really am not worried. I’ll let you know how it went over! Thanks again!
Can’t wait to hear! Hope the cake was a hit!
I really want to try this but I’m not a fan of coconut flakes. Is there a replacement for that in the crust? Another kind of nut?
That’s a lot of coconut to replace! I really wouldn’t know what to suggest, Tiffany. Perhaps ground almonds would do the trick?
WOW this looks so good! I’ve been hoping for a recipe like this for a long time! I can’t wait to try making it except for one thing: is there a substitute for tapioca flour other than arrowroot flour? I’m not strict paleo so if just regular all-purpose flour could work than that would be the best! Or maybe more coconut flour?
Thank you for developing this amazing recipe!
You can use cornstarch, Becky. That would be your best bet!
That’s great! Thank you so much!
Hi I have a really quick question. I am in the store and I cannot find Ceylon cinnamon is there a substitute? I really want to make this.
Regular cinnamon will do the trick!
Ok thanks excited to try it!
One other question Sonia instead of tapioca flour is rice flour ok? And should I do a different proportion or the same amount?
I’ve never used rice flour, but I don’t see why it wouldn’t work, since it’s also a starch. I’d use the same amount, or maybe just a tad more.
Ok thanks I just didn’t want to ruin the cheesecake taste of the cake but I also couldn’t find the tapioca flour.
Hi again I know I am asked nah a lot of questions but do I have to use raw cashew or can I use roasted because raw cashews are like totally way too expensive!
Not sure I would do it, really… firstly, most roasted cashews have been roasted in oil, and I’m not sure how well that would work for soaking, and secondly, it would definitely change the flavor some. But seriously, I don’t understand why raw cashews should be more expensive than the roasted ones. Have you tried looking for cashew pieces instead? Those are usually super affordable!
Not yet but I will definitely look into it. Thanks.
Hi Sonia I promise this will be my last comment and questions. Ok so I made the cheesecake finally and everyone liked it but it did not taste as I had expected but I think the reason is because I change some things about the recipe so I have my last set of questions for you.
1. When you soak the cashews are you supposed to chop them into pieces and then soak them or are whole ones okay. If there is no difference or if you never tried which way do you do it?
2. If I did not use tapioca flour will it change the taste? Same if I did not use Ceylon cinnamon. Also same for blackstrap molasses versus just regular molasses.
Sorry for the questions I just really want to impress my family with a paleo dessert that is healthy and tastes like a dairy cheesecake.
Oh yay, I’m happy to hear that the cake was a success after all! But what was it about the flavor that wasn’t quite like you expected?
To answer your questions, it doesn’t really matter whether you chop the cashews since you reduce them to a puree eventually… so as long as you soak them long enough, it’s all the same, really. I prefer to use pieces only because they are much cheaper.
Not using tapioca flour will not affect the flavor, as this stuff is pretty flavorless. What did you end up using? Same goes for cinnamon. Celyon vs standard doesn’t change the taste all that much, although Ceylon cinnamon is a bit milder and sweeter than the other variety. As for the molasses, again, not a major game changer. Blackstrap has a stronger, more intense flavor than the fancy variety, but using the latter wouldn’t completely modify the flavor profile of the final product.
The cheesecake was good but it didn’t taste like cheesecake. It tasted more like pumpkin pie.
And as a substitute to tapioca flour I ended up using a rice blend which has tapioca starch in it and some other starches.
Pumpkin pie? Really? Wow! Now where in the world would this flavor be coming from? You got me scratching my head big time, here!
I know right. I will try again though maybe I didn’t put enough cauliflower in it.
Thank you so much for this recipe, Sonia! I can’t imagine how much work it took to develop…I’m exhausted after making it just once! But it was totally worth it.
My family was really surprised to hear that it was dairy-free, and didn’t guess that there was cauliflower even after knowing that there was no cream cheese. My brother even said that it was a “very cheesy cheesecake.”
The texture was definitely my favorite part. It was so creamy but just firm enough.
I think next time I’ll skip the glaze for the strawberries…it’s just too hard too wait an extra hour and a half!
Hahaha! But that glaze is soooooo good! I could never pass on it… 🙂
Thank you very much for your awesome feedback, Becky. That is pure music to my ear. Honestly. I am so super happy to hear that you and yours enjoyed this cheesecake. Testimonials such as yours are what make all that time spent coming up with new recipes worth the while. You are a real gem! 🙂
This is AMAZING. Think they’d work as minis in a cupcake tin?
Not sure, Amy… I’ve never tried it personally, so I can’t say for sure, but I really wouldn’t see why not. Of course, you will need to adjust cooking time, but I say it’s very well worth a try.
I loved this recipe!! I turned it into a turtle cheesecake for my birthday, (linked a picture for you on my Instagram) and it was a huge hit! Both of my parents, who don’t eat paleo, loved it and had no idea what the secret ingredient was!! Thank you 🙂
TURTLE CHEESECAKE??? OH MY YUMMY! Please tag me on that picture? I don’t remember seeing it in my feed, and I’d LOVE to see it!
And thank you so very much for taking the time to leave this awesome feedback. It’s always such lovely music to my ears! 🙂
Hi
I want to try this today for a friend’s birthday dinner but haven’t got much time. Is it imperative that the cashews soak overnight?
Super excited after reading everyone’s comments!!!
Do you think one could bake these in a muffin tin? Like mini cheesecakes?
I think I’ll try that.
The cashews will not become as creamy if they haven’t soaked for at least 6 hours… unless you have a vitamix, in which case soaking becomes unnecessary.
As for making them in to mini cheesecakes, the question has been asked before but I don’t know if it’s ever been attempted (no one ever reported back). Honestly, I really don’t see why it wouldn’t work, although you will have to adjust cooking time. Please do let me know how it turned out if you end up trying it! 🙂
I apologize if this has already been covered in the comments above. Could you substitute cashews for almonds? I prefer the taste of almonds over cashews, so I was just curious.
Thanks!
I wouldn’t do it, Melanie. Almonds won’t give you the same smooth and creamy texture that cashews have. Besides, you won’t get to taste the nuts all that much…
Thanks!! I am excited to give this recipe a try.
Hi! I read your responses to coconut substitutions and even though it is risky, I’ve decided to try your recipe coconut free. Most dairy/gluten free cheesecake recipes call for coconut of some sort, and yours looks the healthiest/tastiest. Here’s what I’m thinking: red palm oil (or avocado oil?) for the coconut oil, almond milk+ a dash of gelatin for the coconut milk, and ground almonds or walnuts for the shredded coconut, and almond flour for the coconut flour. If you have any suggestions about changes in ratio or other ideas I’d love to hear them! Thank you so much
Honestly, Tess, I really don’t know… that’s a lot of substitutions, and some of those ingredients don’t behave in the same way at all. I’m very curious as to what the final result will be like.
Please do let me know how the cake turned out if you do attempt it!
Best Food Blog in the Whole Wide World !!!
Oh my! Thank you so very, very much! To say that you have made my day would be an understatement! 😀
Hello,
would absolutely like to try out this recipe since I want to make it as a little gift for a party (introduction to my BF friends), however am a bit confused about cup to gramm conversion. You mention 150 grams (2 cups)…. but 1 cup is 227grams? would it mean 500? Or which cups did you mean?
I am obviously coming from Europe… 🙂
Marina
Oh oh, never mind 🙂 went blond and figured out US cups for butter, rice, liquids differ in volume. So… on my way to do some ingredient shopping!
Marina
Haha! You’re funny, Marina. Actually, pretty much all volume measurements will differ in weight. For example, a cup of feathers would not weigh the same as a cup of pebbles…
Hope the cake is to your liking! If you have any more questions, send ’em my way! 😀
Do you think this recipe would work as a pumpkin cheesecake? So if I added 1 cup pumpkin, along with the spices and omitted the lemon, do you think it would set?
Some people have done it successfully, Lisa. If you search through the comments for the word pumpkin, I think that you will find quite a few tips to help you turn this cake into a pumpkin cheesecake.
Please do share your experience if you end up giving it a try! 🙂
Would this cheesecake filling work in a mini cupcake pan as mini cheesecakes? If so, would you do the same, place the mini cupcake pan on a rimmed pan with water while baking?
I can’t tell for sure for I haven’t tried it, but I really wouldn’t see why not… I would probably do what you said, and obviously adjust cooking time accordingly. Let me know how the cakes turn out if you end up trying it! 🙂
All I can say is…I’ve never been so proud to be a food porn addict! Keep it coming!???
HAHAHA! Thank you Gia! You rock! 🙂
Thank you for recipe! Just made this for thnx giving dinner and tricked two die hard cheesecake fans!. Couple of changes, as we were trying to find a good GF DF chz cake.
For the crust, we skipped your part and did GF ginger snap cookies with nature’s own butter and toasted pecans. Was way easier and added a nice touch. ALSO, we served ours with a pecan praline sauce, amazing. I would say though, the cooking time wasn’t correct we noticed. The middle, like others have said, although set, an inserted toothpick didn’t come out clean. We ended popping it back into an oven at 350 for about another 30 min. Still is a little bit too soft on the middle, but VERY tasty! I wish I knew how to post pics!
Thanks for sharing your insight, Chris! Glad to hear the “cheesecake” recipe worked for you and your guests. And that pecan praline sauce sounds heavenly!
I would LOVE to see pics! Can you post them on my FB page?
I am making this cheesecake for my sons birthday this weekend. I am excited to try it! I have a question though would it affect the setting time or make a big difference in the cake if I used an 8″ springform pan rather than a 9″ springform pan? I do not own a 9″ pan only the 8″ one – thank you for your amazing website and amazing recipes I have tried a few already and they have all been the best paleo recipes ever!! Looking forward to the cheesecake.
It should work just fine, Deborah. However, you may end up having a little too much filling…
Thank you so much for your kind words, this feels so good to hear. Hope you like the cheesecake just as much! 🙂
Hello Sonia,
I’m from Italy and I have to admit, that it wasn’t easy for me to do this recipe.
Most of the ingredients are not so easy to find and I’m not accustomed with your standard cooking measurements (cups, tsp, tbsp, …) I’m pretty sure I have done something wrong (eg. 3/4 cup coconut oil means 180 ml, or 1 cup raw honey means 240 ml- aren’t too much?), but the result was great. Today I’ve offered a slice of cake to a friend that hates cauliflower. He can’t believe that he has eaten it. On the contrary he’s asked for a second slice! 🙂
Thanks Sonia!
For the next time, I’d like to do a Paleo version of the key lime pie. Should I just replace the lemon with 2/3 limes ?
A second slice, really? That’s awesome, Mark! Wow, thank you so much for taking the time to share this with me, you have no idea just how much I appreciate it!
As for your measurements, the ones you described sound right to me, so I’m guessing you didn’t do anything wrong at all. Besides, the important thing is that the cake turned out. 🙂
I’ve never done a key lime pie, not even the real deal, so I’m afraid I won’t be of much help in that department… sorry about that! I’m real curious to hear about your experiment, though. Please, feel free to share!
This was the first recipe I tried off your blog (I’m a vegetarian) and certainly won’t be the last! I was really excited to make this recipe because of the stellar reviews. I was still very skeptical about the authenticity of the taste and figured it would be close to what I’ve tried in regards to vegan cheesecake recipes. I was BLOWN away!!! I am a huge cheesecake fan and the filling in this not only tasted authentic, but the texture was bang on! I must admit, I was not much of a fan of the crust, but the filling is something that I will absolutely be making again. THANK YOU for this incredible recipe. You can’t taste the cauliflower one bit. This is well worth the effort!
Wow, thank you so much for your amazing feedback, Lisa! I’m really super happy to hear that the cheesecake was to your liking. Sorry you didn’t care much for the crust, though. I really wish I could come up with one that tastes EXACTLY like the real graham thing. I’m such a HUGE fan of it. HA! Hopefully someday, I will! 🙂
It might just be my personal preference with the crust – my sister seemed to like it. But I will be trying a vegan graham cracker crust that I’ve used before with your filling. I’ll let you know if it turns out! 🙂 Thanks again for the fabulous recipe!!!
We have a family party tomorrow for extended family I don’t know well and need to impress. My specialty is cheesecake, but some of them have dairy or gluten dietary restrictions (some by choice, some medical). I am so glad this was all over Pinterest! I was so reluctant.. There are a lot of ingredients I’ve never used and of course the cauliflower threw me off. But boy am I glad I trusted everyone’s reviews because it is delicious! My husband obviously knew it wasn’t my usual New York but had no idea it was such a healthy alternative! And that I got him to eat a vegetable lol ?
Fantastic recipe, I’ve already recommended it to so many friends and I’m bookmarking, pinning, printing, etc. It’s a keeper!
Thank you, Amber, thank you so much! Coming from a real cheesecake specialist/enthusiast, I take this as one MAJOR compliment!
That said, I myself may be tempted to give your usual “New York” a try… would you happen to have a recipe for that? 😉
Hi Sonia! I am excited to try this recipe (again). I have three questions for you, though!
1. Can I use corn starch instead of tapioca?
2. Do I weigh the cashews before I soak them or after?
3. I’m scared to make the “bain de marie” (or whatever it’s called) in the same pan as my cheesecake because I tried this recipe before and it didn’t work because water leaked in and made the crust soggy. Can I just put the water in a pan under my pan? Even with the aluminum foil it still leaked (my springform kinda sucks…)
I really hope this time it takes! I was so excited to make this for my husband’s grandma and I was so sad when it got ruined I even cried. I know, overreaction… But it’s a lot of ingredients and a lot of work!!
Let’s see…
#1 – That’s a definite yes.
#2 – Before
#3 – The bain-marie helps in gently cooking the custard while keeping it creamy and unctuous. Having the water in a separate pan would kind of defeat the purpose, but I suppose it wouldn’t hurt to try. When doing the bain-marie thing, you’re supposed to “wrap” your pan in aluminium foil, so the water doesn’t seep in… but if your pan leaks, the aluminium foil won’t be of much help. Perhaps it would be a good idea to invest in a new pan. Like you said, lots of ingredients and a lot of work! 😉
Best of luck with your second try, hope it goes better this time. Please, do keep me posted as to how things went!
Fingers crossed for you!
Hi, going to attempt your recipe for by birthday tomorrow and in celebrating having my last round of chemo today for breast cancer! I’m no longer having sugar or honey. Do you know if maple syrup would be a safe substitute for the honey and molasses? Also, you mention that soaking the cashews isn’t necessary if one has a Vitamix. I have a Vitamix and limited time. Do I just dump the cashews in the Vitamix and give it a whirl? Thanks for sharing!
It should do the trick, Nikki, although it will change the flavor some. As for using the Vitamix to process the cashews, while soaking them won’t be necessary, you will need to add water to them while processing, just enough to turn them into a very creamy and velvety base, something that has a consistency similar to hummus, I would say.
Hope this helps, and please, do let me know how your cake turned out.
I made this for my cheese intolerant son, and gluten intolerant girlfriend, on his birthday. it was an experiment for sure. Probably one of the more complicated things I’ve baked. Things like wringing out the cauliflower was an exercise in frustration. What a huge mess I made. A few more details on how to accomplish this would have been great. The crust is delicious and could be used for any cheese cake. The filling set up mostly well, but my center went soft after the fact. Maybe I should have cooked it a bit longer at 350 and my fault for not testing it but it looked very stiff. Like the author says, there is no taste of cauliflower in the filling, but there certainly isn’t any taste of cheesecake either (I make a lot of cheesecake over the holidays). It does have the consistency, and mouth feel, but a different kind of taste. I guess if you can’t eat cheesecake maybe it’s a good substitute. My son and his girlfriend said they loved it, but what else could they say. I don’t normally eat dairy or gluten free so I’m just comparing it to my normal fare.
This looks awesome! I am getting ready to make it now! Any idea how many cups of shredded precooked cauliflower 500 g equals?
Sorry I don’t. This measurement needs to be precise, that’s why I only included the weight measure. Cups could vary way too much!
This looks amazing. Please tell how can I turn it into a chocolate cheesecake? Should I use coconut powder in the batter or melted chocolate and how much?
I’m a big fan of melted chocolate, Sana. If I was to attempt this myself, I would probably add something like 300g of melted cacao paste (aka unsweetened chocolate) and pour it down the feeding tube with the motor is running at the very end of the process.
Let me know how it turns out if you do give it a try! 🙂
Thanks for a prompt reply. You truly care about your readers. Going to try it now. My cashews are soaked. To be honest I’m scared to attempt it. As it’s my first attempt at “cheesecake” Too many ingredients too much work. I hope it turns out well. Will sure update you with the results 🙂
No news good news? I hope everything went fine and that you’ll be eating delicious chocolate “cheesecake” today! 🙂
Hi!! beautiful recipe! I want to make that cake for my daughter’s birthday tomorrow and I have a question . what do you do with the 3 cups boiling water… it is not very clear
thank you so much
You get to use the boiling water in step 13, Sandrine.
This looks great – and its in my oven! I am a seasoned cook/baker, so I am not sure what is going on with my head today but here is how I messed up:
– poured batter in, got cake in oven. Realized I forgot the eggs. Fortunately it was in the oven for just 3 min or so. I pulled it out and got as much batter up off the crust as I could and got my eggs in
– put back in oven – 10 minutes in realized the oven was turned off and had lowered to abut 250. Guessed and gave it another 10 minutes the rest of the preheat plus a few minutes at 350 before lowering it down.
I have no idea how its going to turn out. Wish me luck!
Nicole
Oh boy! Guess it was one of those days… hopefully the cake will turn out, still! Fingers crossed for you… 🙂
Wow this looks incredible. Thanks for sharing this deliciois recipe.
Simon
Thank you for sharing THE secret.
Shared secret are worth double.
hi! great recipe, i’m super excited to try it!
you mentioned above that it could work as mini cheesecakes… any idea what the revised baking time would be if i was using a standard muffin tray?
Unfortunately, I really have no idea Susan, as I’ve never tried it. In fact, I’ve never even made “regular” mini cheesecakes… I’m afraid I won’t be of much help with that one. Real sorry about that.
I made this recipe for passover yesterday and it was a hit! With no wheat and no dairy, it is the perfect passover sweet! Thank you!
Real happy to hear, Lisa! And thank you for taking the time to let me know, too. I greatly appreciate that! 🙂
LOVED IT!!!
Made this for my husbands birthday and we were all thrilled with the texture and flavor. But being real, we’re all whole 30/paleo/aip people on the regular so a lot of things seem normal and delicious to us, that still get the side eye from “normal” folks.
Enter mainstream teen lifeguard. Who in passing, I told him what I made. He was just straight up curious. So I happily shared, and figured even if it was gross he could shock people by telling them he ate a cauliflower cheesecake….alas. He was FLOORED. And LOVED IT!
Haha! That’s totally awesome, Jenn! Thank you so much for taking the time to share this with me. You totally made my day! 🙂
Hello Sonia,
Only learned about paleo a few months ago and from your recipe it looks like I’m late to the party! But this cheesecake sounds like it will party on forever 🙂
I have a question about the aluminium foil: Do you also cover the top of the tin?
When I read the description I thought I should, but the top is left open in the photo’s, plus the cake looks a nice golden brown after baking.
Also, when you process the cashews, do you keep going until they turn in to a sort of nut butter?
Thank you for your wonderful website!
You don’t need to cover the top of the pan with aluminium foil, just the sides. As for the cashews, you process them until super smooth and creamy.
Hope this helps and that your cake turns out fantastic!
Could you adapt this recipe to make different flavors? Such as chocolate cheesecake or raspberry swirled through the top instead of the fresh strawberry topping? I would just like to know what my options are! 🙂
My boyfriend can’t have dairy and he used to love cheesecake! I would love to be able to make this for him as a special treat! I am currently trying to make him dairy free ice cream with a coconut base. The banana base is getting a bit old! haha!
I’ve never tried it personally, Jennifer, but I’m sure it can be done! Perhaps you should try the original version first, and then it’ll be easier for you to modify it as you like!
Hi there. I don’t have anything to measure my cauliflower with. How many heads of cauliflower is 500 g/1.1 lb? Thanks!
Unfortunately, Katie, I don’t. This measurement needs to be really precise, that’s why I only included the weight measure. Any other measurement could vary way too much!
Made this a couple months ago (with a caramel apple topping instead) for a dinner party and it came out wonderfully! I have a good friend who is dairy free and misses cheesecake desperately, so I was happy it came out so well. I also had some fun trying to get them to “guess the vegetable.”
One note: Make sure it has plenty of time to chill before serving. I ended up being in a hurry, so it hadn’t chilled quite as much as I would have liked by the time we ate it, and it would have a been better if it was completely cold.
I’m going to attempt adapting this recipe to my bite-size cheesecake pan this weekend. Wish me luck!
That’s really good to hear, Sarah, thanks much for taking the time to leave such great feedback. Yes, I totally agree with you, this cake (just like any cheesecake, I think) needs to chill completely before you eat it. That’s why I mention in the recipe to let it chill for at least 6 hours, or better yet overnight. I’m a big fan of overnight!
That said, I can’t wait to find out how the bite-size cheesecake turned out. Many people have asked if it was possible to make them, but as far as I know, nobody has tried it as of yet. Please, do keep me posted as to how things went for you! I would greatly appreciate that.
This recipe looks incredible! Thank you for posting it with such great detail, I’m looking forward to trying it out! I’m having trouble getting hold of Tapioca flour – would the same quantity of coconut flour be an acceptable alternative?
Just out of curiosity – why cauliflower? Fascinating choice to be sure, but what is its effect on the recipe?
I really don’t recommend using coconut flour, Claude. Its profile is totally different and I really don’t think that it would give good results. You could sub arrowroot flour, or even corn starch if weren’t absolutely resolute on keeping the cake grain free.
As for your question about the cauliflower, I’m not really sure I understand what you mean by effect on the recipe?
Just made it last night! I’m a novice cheesecake maker and this went so well. The filling filled my food processor to capacity but the flavor, density and moisture are so like cheesecake! What a treat! Only modification I made was putting just fresh strawberries on top.
AWESOME! It’s so good to hear that the recipe was a complete success for you, Jeni! Thanks a lot for the great feedback, I sincerely appreciate your taking the time to let me know!:)
Small bit of trivia – raw cashews are not actually raw (and you wouldn’t want them to be). They’re actually steamed and boiled in oil during the process of removing them safely from the fruit. The fruit is actually toxic and contains the same substance as poison oak – so all that processing is necessary just to be able to safely extract the seed.
They call them ‘raw’ only because they aren’t roasted after all that. 🙂
Yeah, I’m very well aware of that, Donna, but the thing is you see, cashews that haven’t been roasted are being sold and labeled as “raw” cashews. Unless this eventually changes, it would kinda hard to refer to them as anything else than what is in fact indicated on the label. Plus, since they aren’t commercially available, I don’t believe that anyone could get their hands on truly raw cashews unless they lived in the right part of the world… 😉
Can you use beaten eggs?
I made this for Christmas and it was amazing! The recipe is spot on! I wish I could upload my picture because it was as beautiful as it tasted!
So very happy to hear, Misty! Can you share your picture on my FB page? I sure would love to see it! 🙂
https://m.facebook.com/story.php?story_fbid=10154355714061589&id=517936588
Yummy in the tummy … thank you so much ????
Looks fantastic, Joyce!!! Thanks you so much for sharing the pics! Glad to hear the cake was to your liking. 🙂
The other day our son sent me a link and a picture to a DF,GF cheesecake he wants to try and make for his girlfriend. I clicked on it and it is this one. HAHAHA!! I text him and said I read your blog. Soooo many questions have been ask, but don’t think this has been mentioned. What do you do with the cooked strawberries after you drain them?
Hahaha that’s too funny Charlotte! And you are so right, I never mentioned what to do with those strawberries. In fact, they don’t get used in the cake, so you can either munch on them, use them in another recipe or just plain discard them.
Please let me know how the cake turned out! 🙂
This sounds so good and I’m hoping to try to make it on Friday for Saturday. I have a couple of questions. Can I use a 10″ spring form pan as that is the size I have and what adjustments would you recommend? Also, I prefer not to use the microwave, can I prep the cauliflower on the stove top? Any suggestions on that?
Tried this for my birthday as a health alternative to my unhealthy cheesecake. It looked fantastic. So much so, the whole family wanted it instead of the chocolate cake I had for the non health food eaters! Sadly, the taste wasn’t close wniugh Tina cheesecake for them. Too bland and not sweet and tart like a real cheesecake. It tasted more like an entree than a dessert. Sis I do something wrong? It looked amazing, just tasted…meh
Sorry to hear the cake wasn’t to your liking… I’m a bit puzzled by the fact that you found it to taste more like an entree, though. With all the honey that the cake contains, it definitely should have a very noticeable sweet taste to it…
Sorry if this question was asked but can i leave out the cauliflower? Have you tried it without? Will it sffect the taste/texture? Please let me know. It looks fantastic
This would pretty much be like leaving the eggs out of an omelette… I would definitely not recommend it!
I want to give this recipe a try. I just made a lime avocado cheesecake that is frozen not baked, but I don’t enjoy the taste. Hoping this one is closer to cheesecake.
I hope it’s to your liking, Marlene. Let me know your thoughts!
I purchased bags of grated cauliflower from the frozen food section of the grocery. Do you think it will work instead of grating raw? I can’t wait to try this cheesecake!
Oh this is so yummy! I’ve made 2 of these so far. My husband, daughter and grandkids love it and have already requested one for thanksgiving!
My daughter requested one for her baptism celebration. Everyone who tasted it loved it and requested the recipe!
Every time I think of fiddling with the recipe I just stick with the recipe but change the toppings.
Thank you so much for sharing this recipe with us!!
I really want to make this. I cannot find Tapioca Flour though so need to order online but won’t come for a few days. Is there an alternative to Tapioca Flour please?
If you’re not paleo and don’t care to keep this totally grain free, you can use corn starch, in a 1 to 1 ratio.
How long will this cake last? Can it be made a couple of days before you need it? thinking of doing some baking a few days before Christmas.
It can definitely be made a couple of days in advance. Maybe just don’t do the strawberries too long in advance: one day ahead would be fine.
This looks amazing and I can’t wait to try it! Have you used frozen riced cauliflower? Do you think I could use that instead of fresh? Thank you in advance!
Not sure, Alysa; I’ve never tried it so I can’t guarantee the results…
Hi!! My friend made your delicious cheesecake for me and WOW! Its amazing! I attempted to make it myself, but I don’t have a microwave so I tried to bake the cauliflower and my cake tasted like cauliflower…eek. What do you recommend instead of a microwave? Should I steam or boil it? How long you think? I’m going to try making the cake again soon! Thank you!!
I would definitely opt for steaming, until really tender.
Thank you! Will do!
Hi. Have a birthday coming up and yours is on the menu :). Still it is a good idea to use agar instead of gelatin. Then it is vegatarian as well
Hi, I was wondering if the middle part is jiggly and firm on the sides? Hahhaa, pretty much confused now xD
Hi , what can I use if I’m allergic to cauliflower and cashews? Good grief right 🙁
Thank you! 😉
I’m afraid these are key ingredients in the recipe, so it would be kind of hard for me to suggest replacements… sorry I can’t be of more help!
Made this for people with slight dairy allergy not Paleo so I made some changes and it turned out awesome.
Crust- 2 cups nilla wafers blitzed in processor with 1/4 cup almonds and 5 TBL melted Earth Balance original cooked in oven at 350 for 10 min and cool while blitzing cake ingredients
Blue berry syrup- 18 oz blueberries, 6 1/2 TBL brown sugar 1 TBL maple syrup cooked in foiled rimmed pan in oven @ 400 for 15 min. Cool 15 min and blitz in processor.
Added 1 cup of this to cake mix when added honey and reserved the rest in fridge for topping on pieces of cake.
Reduced honey to 1/2 cup
Reduced vanilla to 1 tsp
Reduced lemon to 2 TBL
Reduced eggs to 4 eggs
Cooked in water bath at 350 for 15 min then 300 for 45 min. Followed the remaining directions as listed in recipe.
Its in the oven, hope for the best cause I just realize I forgot to add the cider vinegar and its sits here on the counter in front of me. UGH! hope it still works out.
I hid the cauliflower so my husband doesn’t know what in it.. ssshhhh what he doesn’t know wont hurt him.
Fingers crossed… Keep me posted, Paula!
Hi Sonia, I am planning to make your cheesecake today and am just wondering, whether I can substitute maple syrup for the honey in the filling as well as crust? Or Agave syrup? many thanks! Can’t wait to try it!!
I haven’t tried it personally so can’t guarantee that it’s going to work 100%, but I really can’t think of a reason why not. Please do report back and tell me how it went if you do decide to give it a try?
I can’t find hazelnuts is there anything I can sub?
Almonds should do the trick!
Sonia,
I am truly amazed since I found the recipe. Are you some kind of cooking wizard? My 2years old son is on almost-everything-free-diet. It is obligatory for me to put some veggies in most of his meals. And now I can even put it in cake! Better! He can eat cheesecake now! I made it today, tried hot, because couldn’t wait to try it. I also tried raw filling to make sure there is no taste of cauliflower( My son hates cauliflower). Now I am amazed even more! No taste of cauliflower! Only lemon zest and little, little coconut. My husband and brother asked me while trying the cheesecake if I added that cauliflower, cause it tastes like real cheesecake!!! Recipe looks quite difficult to make, but it was easier than I thought. I was exited and afraid while making it, and now I am exited and my belly is full as I couldn’t stop trying hot cheesecake 🙂
Sonia, you are my cooking guru from now on! I will definitely try other recipes of yours! Greetings from snowy Poland!
High five!!!! I’m so very happy to read that the cake was such a great success for you, Magdalena, and thank you so much for your kind words and vote of confidence! I am SUPER flattered! 😀
Any idea how long you would cook this in an instant pot?
Looks great, recipe working well. Expensive mistake as it tasted awful. The secret ingredient is not very secret. No one liked it and I won’t make it again. I realise most of the comments on here are from people who didn’t actually make the recipe.
I’m really sorry to hear that your experience with this cake wasn’t a success, Chelsea… not sure what went wrong, but something definitely did. If you take the time to go through the comments and read those from people who actually made the cake, most have nothing but real good things to say about it. But again, I’m sorry your experience wasn’t what you expected.
Thanks for your reply. I’m an experienced cook and have made plenty of healthy, hidden ingredient recipes that have turned out great and are now staples in our house. I followed the recipe exactly – though I used honey and not maple syrup as the option was provided. We are also used to the taste of food sweetened with honey and not sugar etc. It all worked just as it should have, the one disappointment was the taste.
I’m glad I did a test run, I was going to make this for my mother in law’s birthday!!! That would have been a disaster.
I hope you are doing well.
I have made this cheese cake before and it came out incredible! Is there a vegan version I can try and bake?
I wish!! Replacing the eggs in this recipe is a real challenge, though! I’m really not sure what else would work to bind everything together… Maybe this? https://www.ju.st/eat/just-egg
The rest of the stuff is easy substitutions, really: maple syrup for honey and agar agar for gelatin…
Now you got me wanting to give it a try! 🙂
Hi Sonia, I’ve made this recipe several times and it works great! Taste is awesome. Made it for a wedding sweet table, and even one guest who said is highly allergic to gluten, could eat this with no problem at all. I now would like to alter the recipe a bit, since I need to make this for a person that cannot have anything coconut. Could you please help me out and let me know what I can use instead of heavy coconut milk and coconut oil? I much appreciate it. Thank you.
Love,
Esmeralda Skverer
It’s hard to make recommendations / suggestions without trying them first with a recipe so specific, but I would think that soya cream or cashew cream might do a good job at replacing the coconut cream. As for the oil, I guess it could be replaced with any neutral tasting oil. My biggest concern is that this would mean completely eliminating the flavor of the coconut, which probably plays a role in covering the flavor of the cauliflower…
I have some already cooked and pureed cauliflower I’d like to use in this recipe… do you know a cup amount of how much it calls for? I have tried it before and even my picky husband couldn’t tell it wasn’t “regular” cheesecake. Now I want to use this cauliflower I have on hand….