
Toasted Almond Hazelnut Butter
I know I’ve been giving you a lot of nut butter recipes lately, and I really hope that you don’t mind because I happen to still have a few more in store! What can I say? I am truly passionate about them! A little obsessed, even…
One thing I just realized, however, is that I tend to share more of my intricate, unique flavor combination recipes.
Yet, I do make “standard” nut butters much more often than I make the fancy varieties.
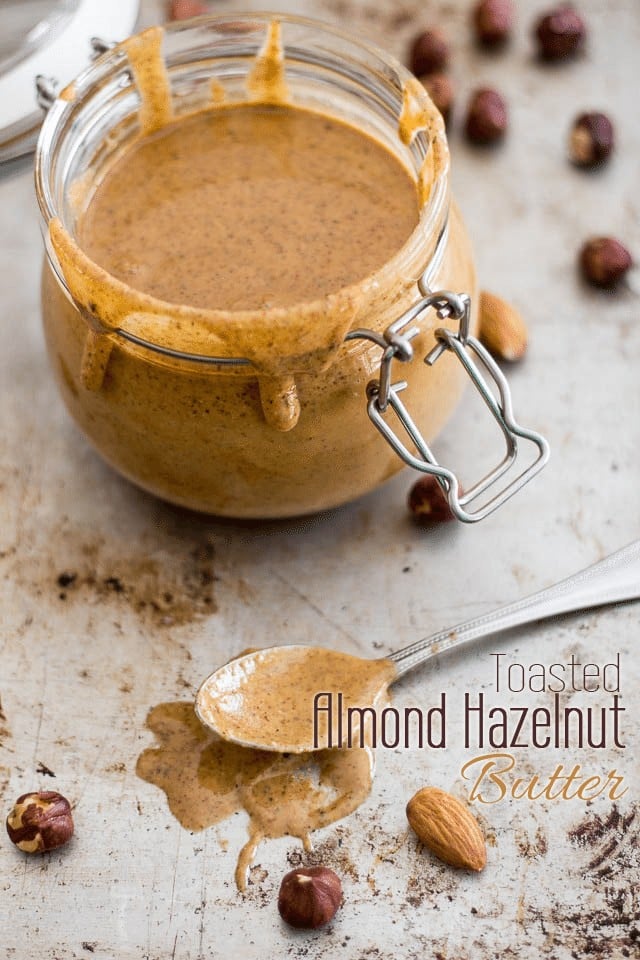
This Toasted Almond Hazelnut Butter Combination is one that I happen to be making on a very regular basis. I kind of think of it as my standard peanut butter replacement.
To make it, I tend to use a combination of toasted almonds and hazelnuts, because I find their flavor profiles go so well together, but I also like to throw in a good amount of raw almonds, to help slightly thicken the final consistency of the nut butter.
Toasted nuts, having a much lower moisture content, tend to produce much thinner butters, whereas raw nuts yield thicker butters. Also, toasted nuts taste smokier, nuttier, whereas raw nuts tend to be a little bit more on the sweet side. So I like to mix things up a little to achieve the desired flavor and consistency.
I find this recipe’s ratio works great for me, but don’t be afraid to play with it until you find one that really works for you.
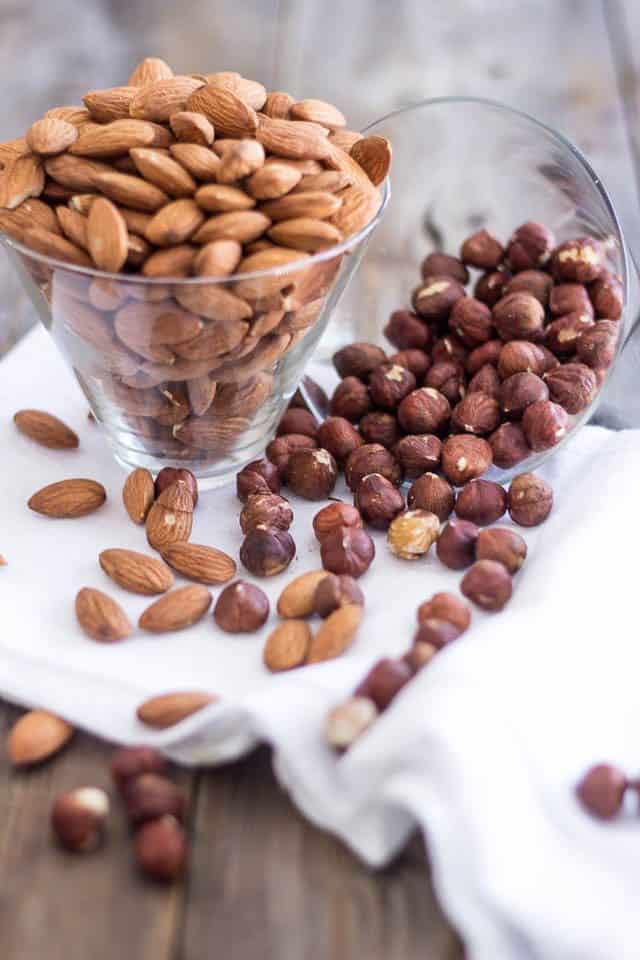
As always when making nut butter, I like to start with raw, unsalted nuts. In this case, we’ll be using a combination of almonds and hazelnuts.
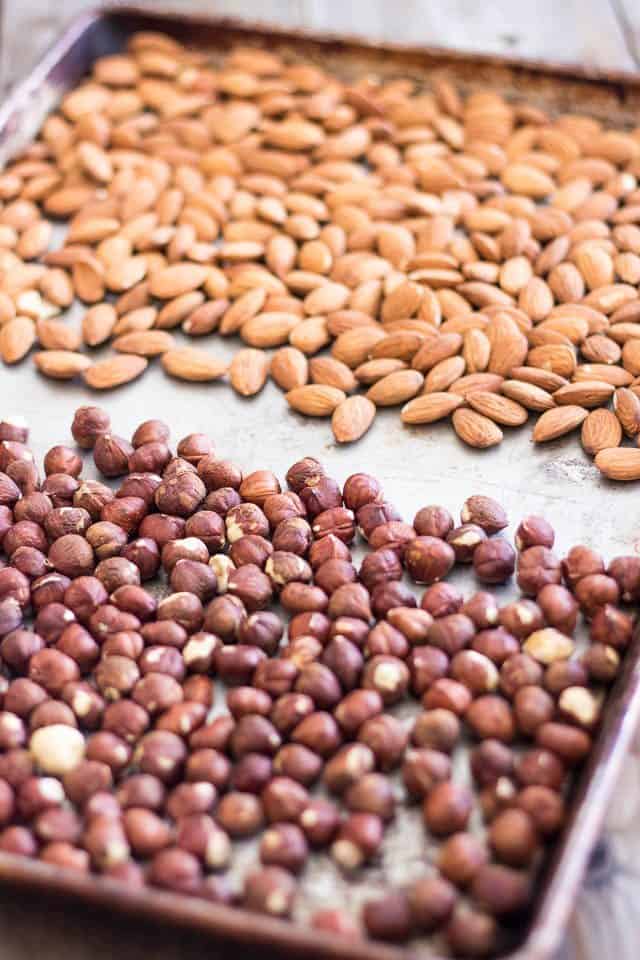
We’re gonna be toasting half the almonds and all of the hazelnuts; I find hazelnuts taste SO much better after they have been toasted. Also, I like to peel them because their skin can have a bit of a bitter taste to it and toasting them makes removing that skin a breeze.
Let’s lay the nuts on a baking sheet in two distinct patches. You don’t want to mix them because then that would make peeling the hazelnuts a tad trickier.
So let’s keep ’em nuts separated!
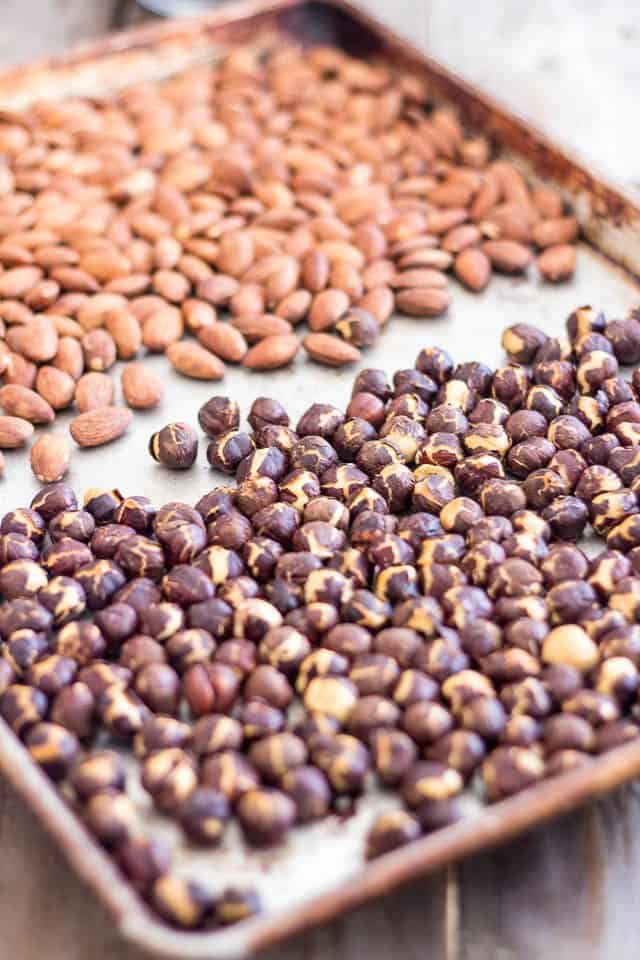
See how the skin has cracked, shrunk and lifted after the hazelnuts come out of the oven? It’s like magic!
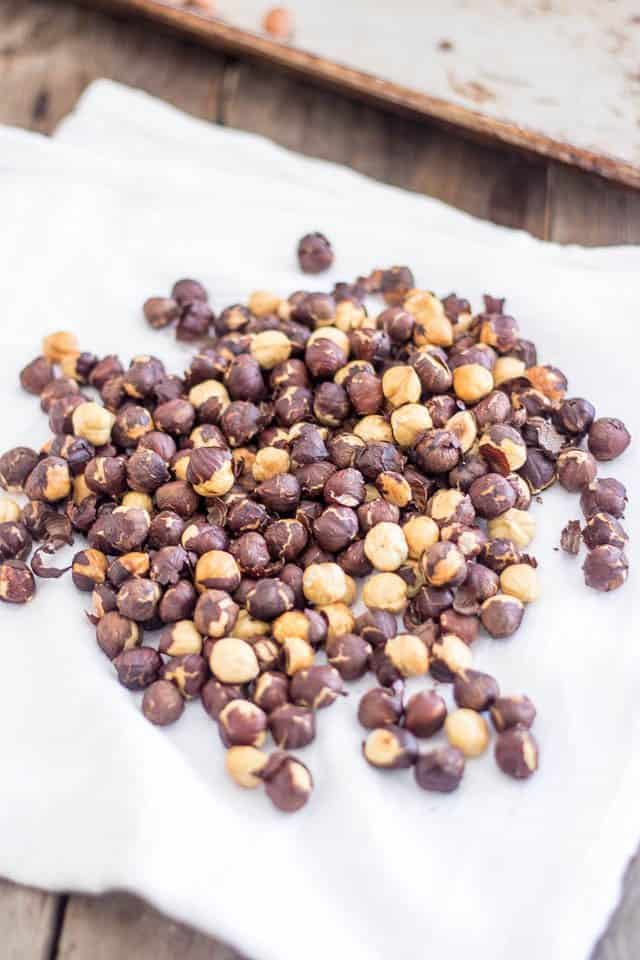
As soon as they are cool enough to handle, transfer the hazelnuts onto a clean tea or flour sack towel.

Fold the towel into a little bundle like this. Hold it firmly in one hand and with the other hand, wiggle the nuts around so that they grind against each other. Do that for a good minute or so…
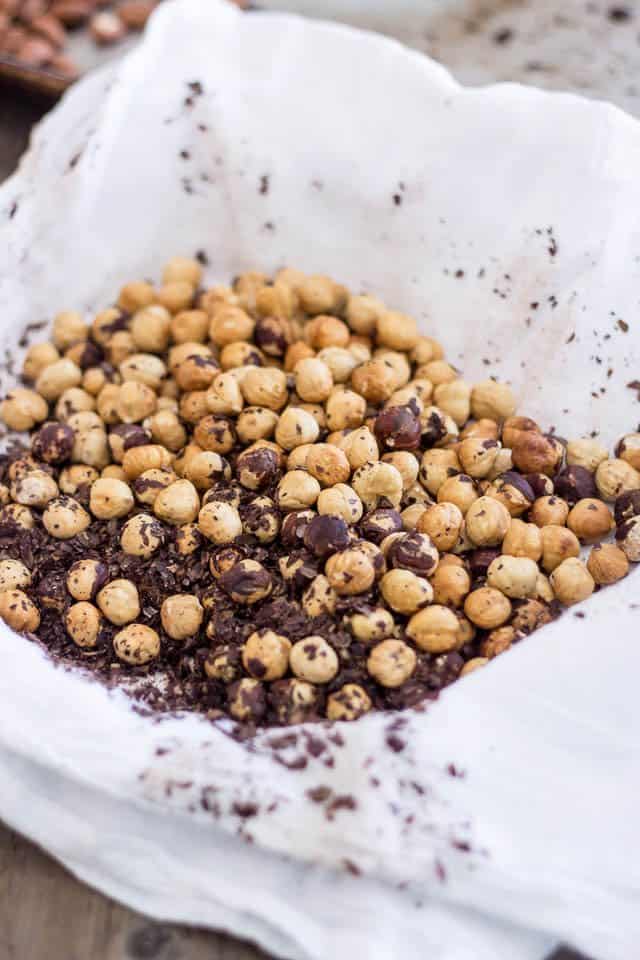
…and when you open up your little bundle, your hazelnuts will be totally skinless!
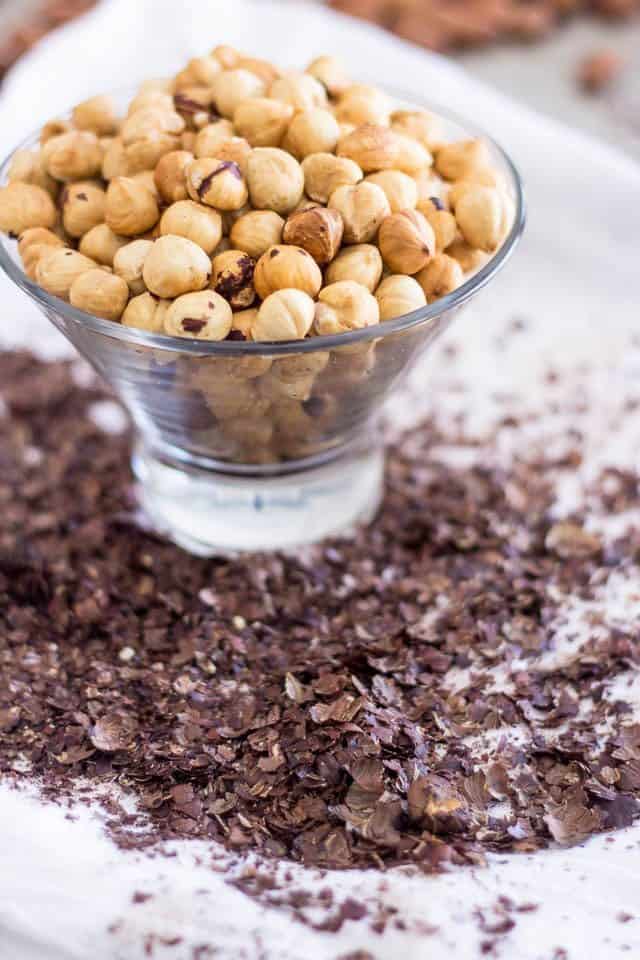
Now carefully pick the nuts out, leaving the skins behind.
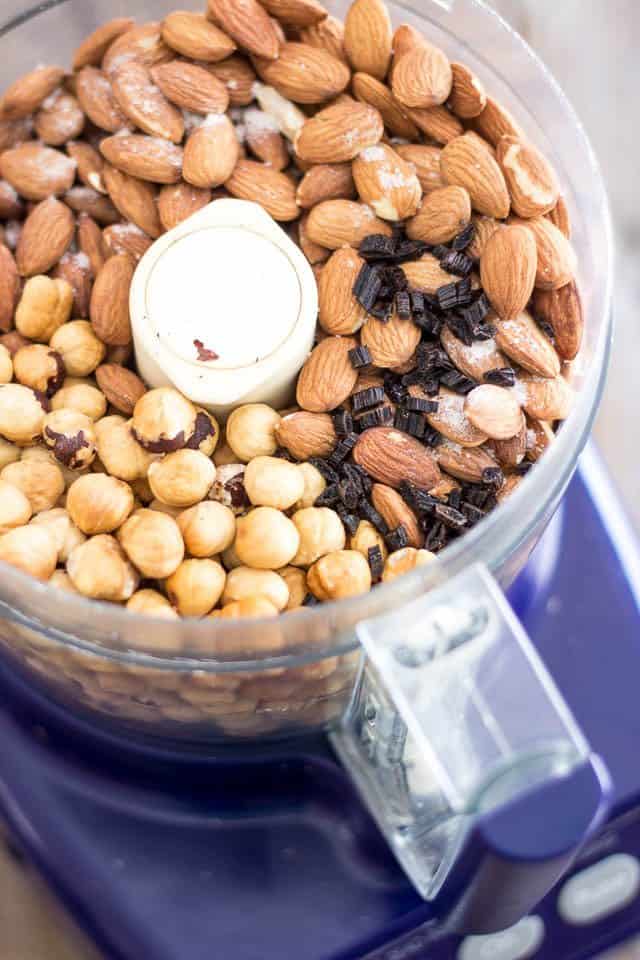
Add the toasted almonds, hazelnuts and raw almonds, as well as the salt and chopped vanilla beans to the bowl of your food processor.
Yes, I actually throw the whole vanilla beans in there, not just the seeds. I only take care to remove the dry ends, then chop the whole vanilla beans fairly finely before adding them to the food processor. They’re going to get pulverized, anyway… so why waste?
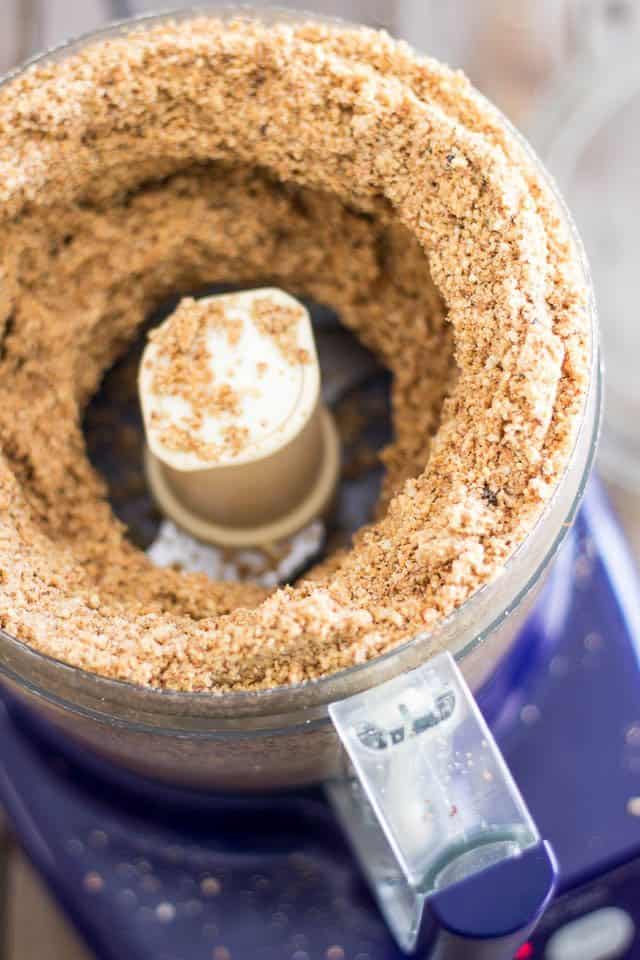
The nuts will have to be processed for a total of about 20 minutes, but you will want to stop from time to time to break down the mass that will invariably form and scrape the sides, too.
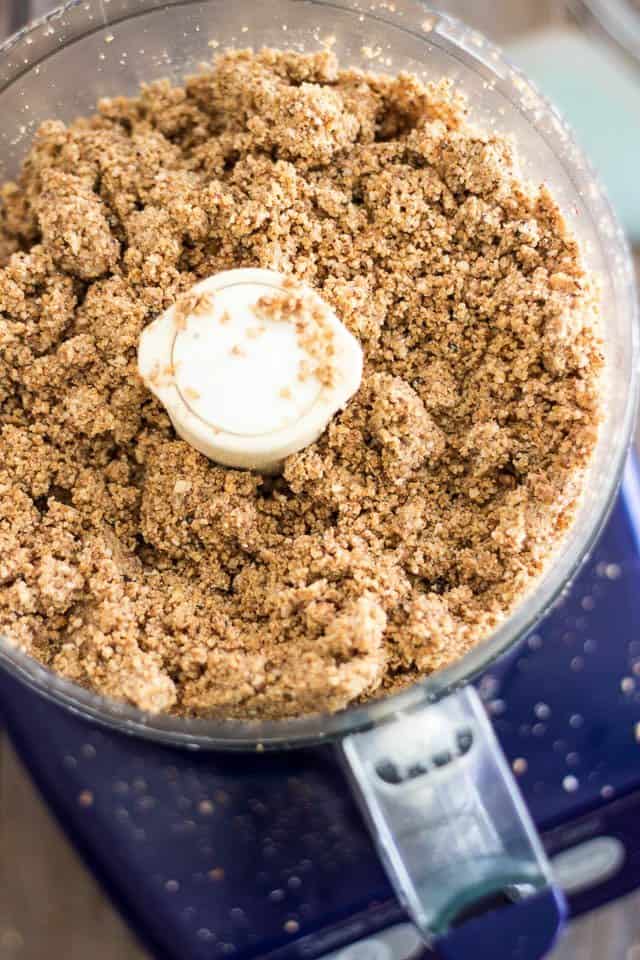
In the early stages, you will have to stop more often as the nuts will want to lump up into a solid mass strangely resembling cement.
After about 5 minutes, the nuts will start to release some of their oil, making the mass more pliable and more inclined to stay within the path of the spinning blade, so you won’t have to stop as often.
Still, it might be a good idea to stop from time to time, if only to give your food processor a little break if you feel it needs one…
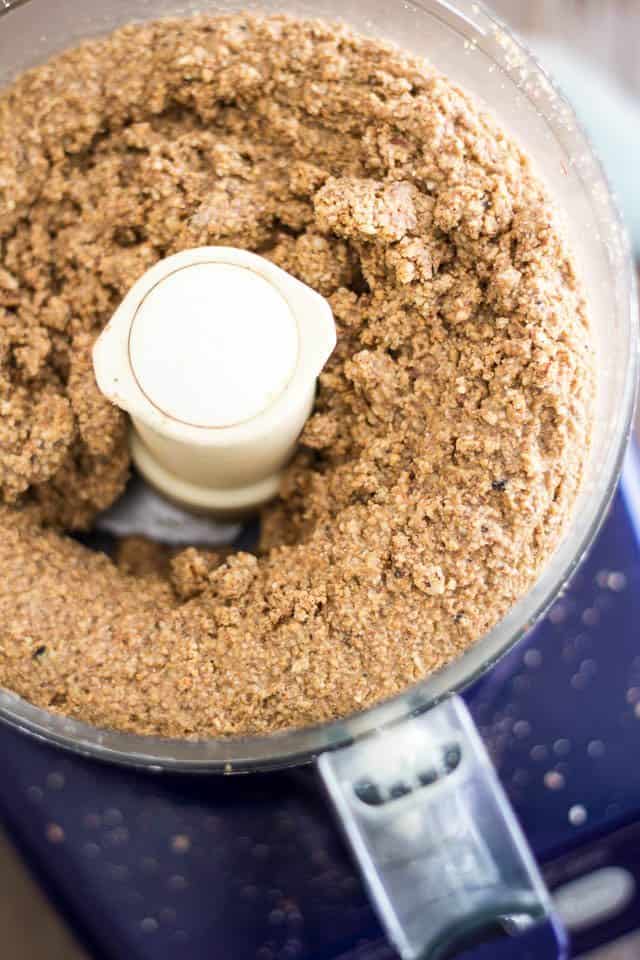
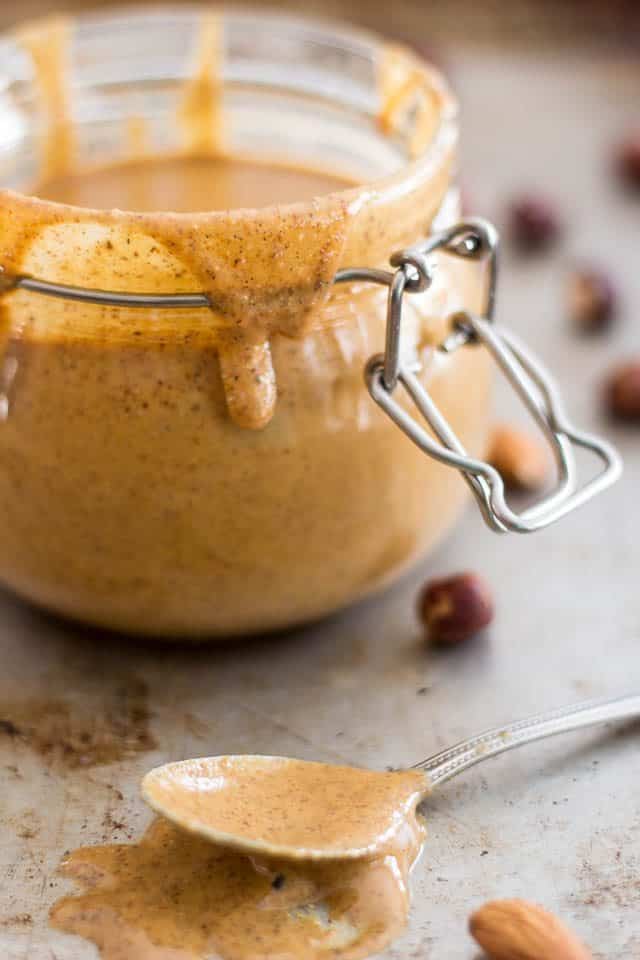
After 10 minutes, the mixture will start to look a lot more like nut butter! Still, it’s a tad too rough for my taste, though. I think it needs to spin some more!
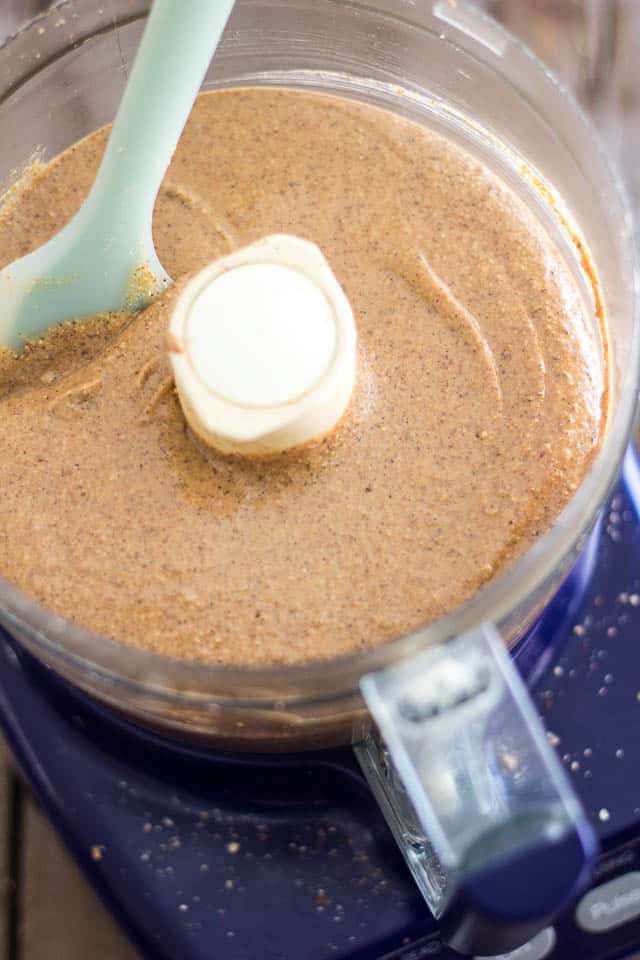
Another 5 minutes in the making and you really have what looks like creamy nut butter now. You could very well stop here if you wanted to. But I like my nut butter to be as smooth as can be, so I like to give it a little bit more time, still.
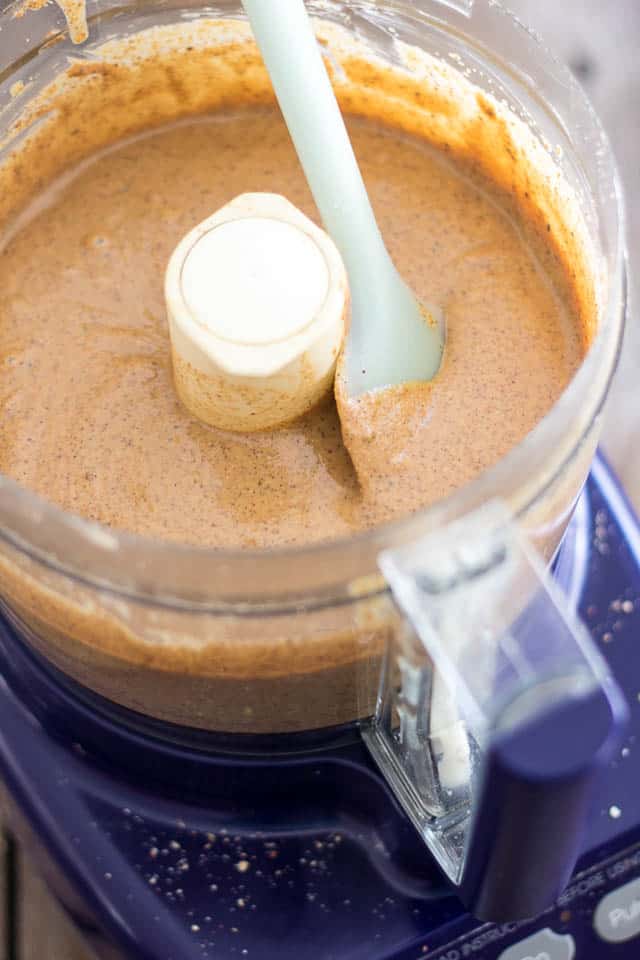
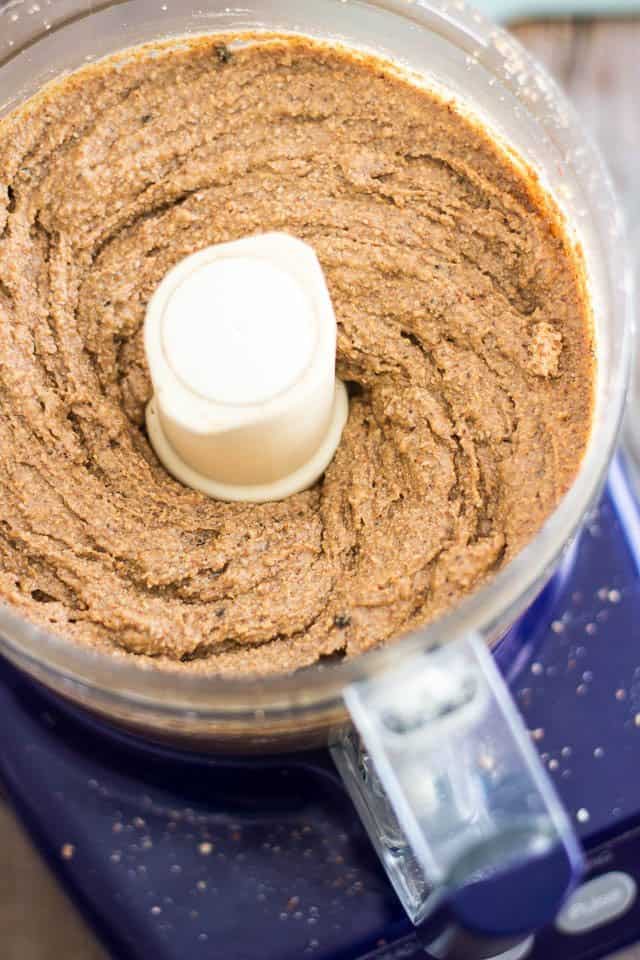
Aaah! There we have it. Can you see the difference? I think we’re good to go, now.
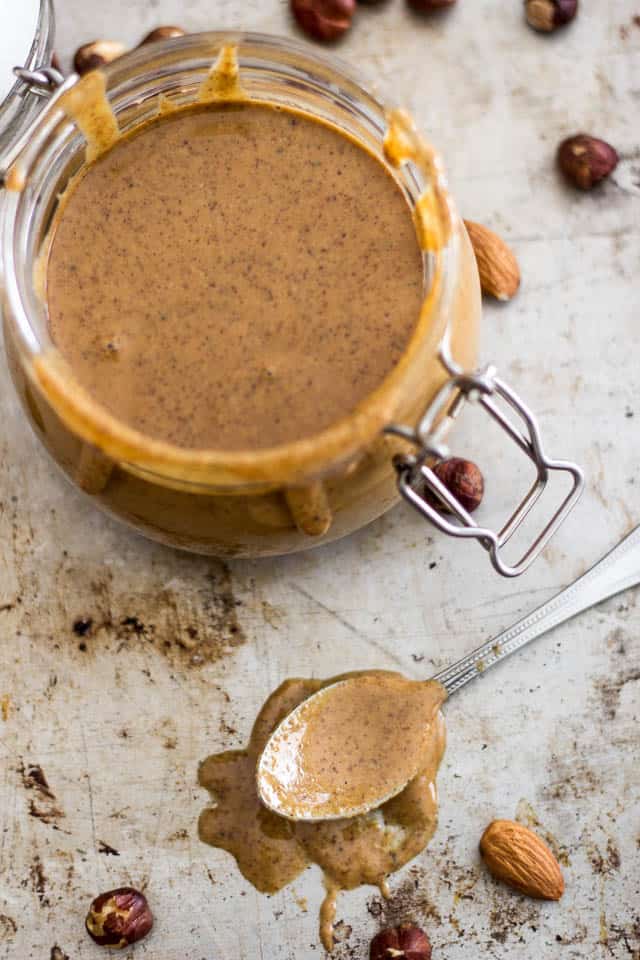
Does this look smooth and creamy enough for you? Looks very good to me, I must say.
And just you look at those little black specks of vanilla. Gawd I love ’em!
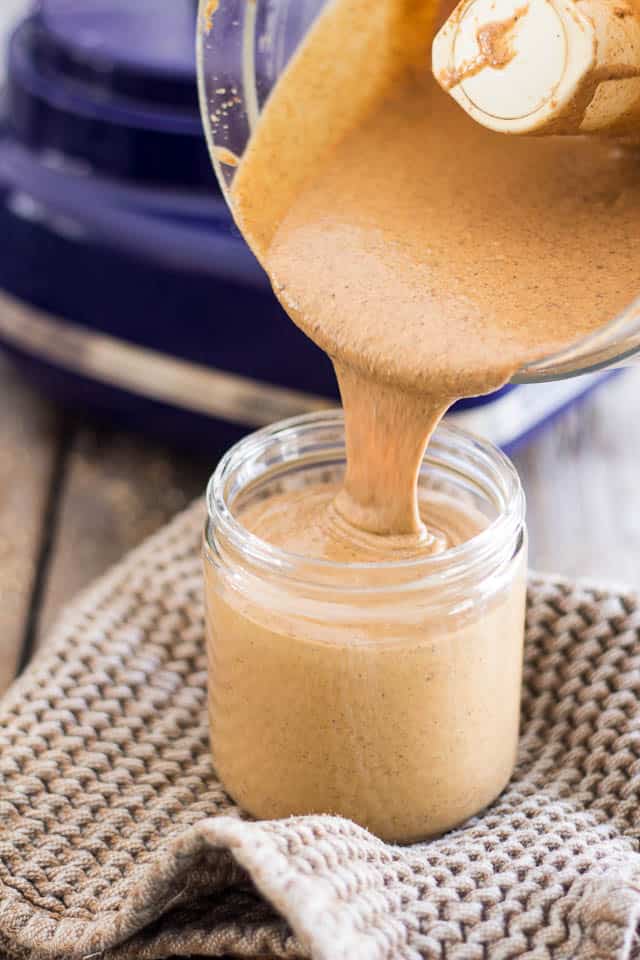
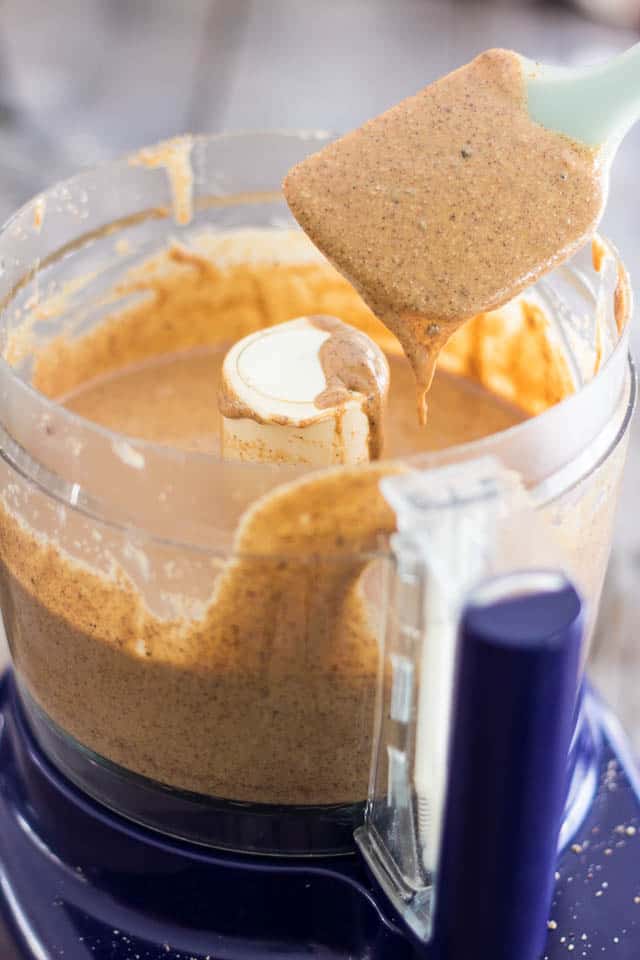
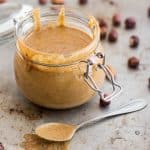
Time to transfer your creamy nut butter into glass jars.
Ideally, you want to let that rest for a wee bit now. As good and tempting as it looks in this very moment, all that friction from the blade makes the nut butter become fairly warm and takes away from its overall deliciousness.
I find it’s always much better after it’s had a little time to come back to room temperature as well as give a chance to all the flavors to get to know each other a little bit better.
But of course, I can never resist getting a little taste at this point, you know. I mean, that bowl does have to be scraped really clean, doesn’t it? And what are spatulas for, if not to be licked?
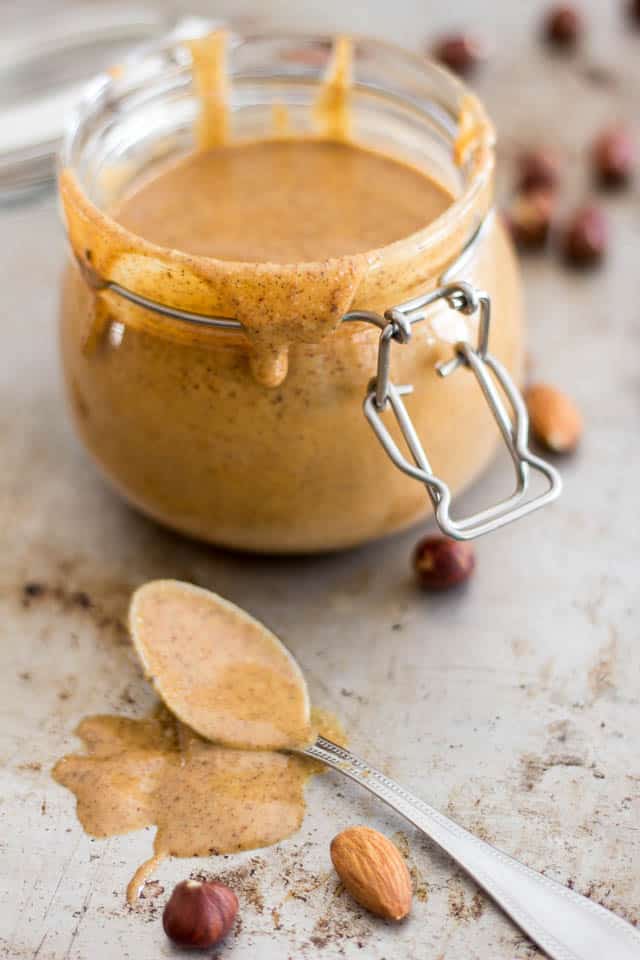
Now, after your nut butter has had a chance to rest for a while, as in about 24 hours, it’s finally time to whip out a spoon and go right to town.
Just close your eyes, dig in and enjoy!
You know, the principle of making nut butter is pretty much always the same, so don’t be afraid to experiment. Try different nut combinations, try mixing raw with toasted, try different ratios and try adding different flavorings and spices. I sometimes like to add a little bit of cinnamon, nutmeg, or ginger, or even coconut, or a hint of honey or maple syrup…
Hey, you could even make savory nut butters and add garam masala, curry powder, Ras el Hanout, cayenne pepper or even smoked paprika, why not?
I think I need to start experimenting with that myself! “Spreadable Spicy BBQ Peanuts”, anyone?
Hmmm, that can’t be bad now, can it?
Toasted Almond Hazelnut Butter
Ingredients
- 2 + 2 cups raw almonds
- 2 cups raw hazelnuts
- 1/2 tsp himalayan salt
- 2 whole vanilla beans, finely chopped
Instructions
- Preheat oven to 350F
- Place 2 cups of almonds and the 2 cups hazelnuts on a large baking sheet, making sure to keep them well separated so the nuts don't mix.
- Toast in the oven for 15 minutes, moving the nut around a few times during the process.
- Place the hazelnuts in a clean tea towel and close that up into a little bundle. Now hold that package in one hand and, with the other hand, wiggle the nuts around so that they grind against each other. Do that for a good minute or so and when you open up your little bundle, your hazelnuts will be totally skinless. Now carefully pick the nuts out, leaving the skins behind.
- Add the toasted almonds, hazelnuts and raw almonds, as well as salt and chopped vanilla beans* to the bowl of your food processor
- Process for a total of about 20 minutes, stopping to scrape the sides from time to time, until the butter is very smooth and creamy and almost liquid in consistency. It will return to a firmer consistency once it's had a chance to rest and cool down.
- Transfer to clean air tight glass jars or containers.

Notes
If you’ve tried this recipe, please take a minute to rate the recipe and let me know how things went for you in the comments below. It’s always such a pleasure to hear from you!
You can also FOLLOW ME on PINTEREST, FACEBOOK, INSTAGRAM and TWITTER for more delicious, healthy recipes!


36 Comments on “Toasted Almond Hazelnut Butter”
Looks delicious! Where do you keep it and how long will it stay safe?
I keep mine in the pantry, but some people firmly believe that nut butters should be kept in the fridge. It will keep for a couple of months unrefrigerated, no problem.
Wow!! This looks so delicious and not too difficult! Pinning!
Looks great! I love making my own nut butters but have never tried hazelnuts yet!
Oh, Kim, you don’t know what you’ve been missing! By all means, you HAVE to give this a try! 🙂
I bought a bag of hickory roasted almonds the other day.
I wonder if they could be used? If so, would you rinse the salt off first?
Oof, to be honest, I have no idea, Maija. I mean, for sure, they would turn into butter, but I’m not sure the taste would be so great? I don’t know. Could be a matter of personal preference, too, but I get the feeling it would be VERY pungent. If you do rinse off the salt first, make sure you then dry your nuts in a low temp oven (like 175F – 200F) for a couple of hours to make sure all the water has evaporated.
That looks delicious but what do you spread it on if you’re following a Paleo diet?
HA! I don’t really “spread” mine, Trish, I tend to use this in recipes or eat it by the spoonful or use it as garnish or fruit dip. Sometimes, though, I like to enjoy it on muffins or bread…
Oh Sonia! You’ve done it again… Taste buds are doing cartwheels just from reading this post and whatever I had planned tomorrow is now deferred until I safely have a spoon in one hand and jar in the other!
Quick Question, what type of food processor do you use to make your butters? Mine doesn’t seem to come together in the time frames that are cited in your posts.
HAHA Callie, you’re too funny! Make it happen, girl! 🙂
To answer your question, I have a KitchenAid, something similar to this model, although not exactly this one, as mine is probably well over 12 years old now. It’s a fairly powerful little thing and despite all the action that it’s seen over the years, it’s still working perfectly fine! Definitely worth the investment!
> well over 12 years old now
Good time to underscore that it’s a good idea to give the food processor a chance to cool off a little if you feel it’s getting too warm. For motors, a little warm is OK, but too warm and the electrical insulation on the motor windings starts to degrade (smoke, smell, burn). When that happens, it’s time to start shopping for a new processor —
it won’t have much time left before it totally fails.
It sounds like the “cement stage” at the beginning of the processing that’s going to give the motor the most resistance, which will make it heat up faster than the later, smoother stages. Be most patient at the beginning. Let the heat-build-up be your guide.
Of course, with planned obsolescence, food processors will go bad after a while, anyway, depending on how well they’re made. Don’t blame yourself when that happens. Consider Consumer Reports, or something. This is the 2nd time in a couple of weeks that I’ve heard good things about KitchenAid. This time from Sonya. Hmmm, searching… Last week, I happened across this: http://www.consumerreports.org/dishwashers/kitchenaid-dishwasher-with-window-lets-you-watch-the-washing/ Obviously, there are occasional high points in China’s manufacturing quality.
I’ve just been eating some Diamond Mixed un-shelled hazelnuts / almonds / brazils, walnuts, pecans. Of course, I shell them, first, ha ha. Not the first time, and it has always struck me that the hazelnuts have no flavor. Obviously, roasting them after they’re shelled and turning them into butter must be an improvement over roasting them in the shell. I’m looking forward to it. 350, 15 mins. 350, 15 mins… Never met a nut I didn’t like.
Thanks for the nut-butter heads-up. So easy. So natural. And nuts are the new health food now that most fats have been moved from the Dangerous column to the Healthy column since you put this recipe online.
Sound delicious! Looks kind of like mustard when it’s done. I think I’ll try this for dipping fruit into – yummy!
What temperature do you use to toast the nuts? And do you turn them at all?
I covered all this in the recipe, Karen…
Oh wow, this sounds absolutely amazing. I’ve never seen a homemade nut butter drippy like that. Now I just wonder if using a Vitamix would result in the same consistency. Do you happen to know how well it works? I don’t have a food processor or else I’d try it that way.
I think a Vitamix would result in an even better consistency, honestly! Plus, the process should be much faster, too! I really wish I did own one of those. One day, I will definitely invest in one. When my trusty food processor dies on me, that is what I’ll do for sure!
Sonia… Just wondering if there’s any reason you don’t make raw almond butter.Love the raw cashew butter recipe you posted. Thank You!
Ah, but I do make raw almond butter, too, although I tend to go half and half… half toasted, half raw.
The funny thing is… this recipe is scheduled to be posted tomorrow! Looks like you read my mind!
Just been reading that raw cashews might be a problem. Searching… here:
http://dailyhealthremedies.com/8-poisonous-foods-commonly-eat/7/
They say:
> Cashews (which are actually a seed) contains a compound called urushiol…, the same compound found in the leaves of the poison ivy plant. Ingesting or touching them can cause a similar reaction. Most cashews that are sold are steamed, roasted or cooked in some manner, making them safe to eat. It is only the raw variety that can cause problems.
On a tangent, that suggests that cooking poison ivy makes it edible. Any recipes for that?
If no one has actually gotten a reaction from raw cashews, then dailyhealthremedies.com might not know what they’re talking about. Of course, some people need a certain amount of exposure to the poison over time before actually having a reaction. Some people react right away. It implies a little Russian Roulette. Be careful out there.
This is by far the BEST nut butter recipe I’ve ever made! Thank you so much! I’ve made it twice now and used my 14 cup Cuisinart food processor and it has been awesome. (I find it difficult to get all the butter out of my Vitamix and prefer the processor). Thanks so much for posting this! My whole family thanks you! =)
Ha! Thank you so much for this, Heather. Glad you and your family like it!
I totally hear you on the butter being hard to get out of the Vitamix. Also too, I find that you can’t really get a smooth butter unless you add some kind of oil in the Vitamix. In most cases, anyway. But it does make an incredibly smooth butter, though. However, I too often much prefer to use my food processor for nut butters. It’s just so much more fun! 🙂
Hi! I’ve made this recipe a few times and never had a problem, but for some reason I can no longer get it to but consistency! Once it reaches Play-Doh consistency, it stays there and didn’t smooth out! Do you know what could be causing this?
Have you been adding anything else to the recipe, Raechel? Vanilla extract, honey, maple syrup or any other kind of sweetener?
Thank you so much for the quick response!! I did add some honey, which I read can separate the oil 🙁 Could it also be my blades? Do you think I might need to sharpen them, as well? The results make really good protein balls (with chia and flax seeds!), but I have some cashews waiting for the processor that I really want to be butter!
It’s definitely the honey, Raechel. If you’re going to add anything that contains any kind of moisture to your nut butter, you’ve got to do so at the very end of the process, once the nuts have released all their oil and have been completely broken down into a smooth butter. Be warned though. As soon as you add said ingredient, your nut butter’s consistency will change and get considerably thicker!
Quite frankly, I don’t think that sharpening your blades would change much of anything…
Dang! Well my cashew butter won’t get the same treatment, then. Thanks so much for the info!
Cashew butter is especially thick to start with, so adding the honey wouldn’t be the best idea… if you want to add honey to it, you might want to try this recipe for honey roasted cashew butter.
And anytime, really! Nut butters are my passion, so it’s a real pleasure to help! 🙂
These sound so delicious. Thaanks for sharing this recipe.
Simon
Have you tried adding Cacao to this nut butter mix? I am curious how it would turn out, hopefully a delicious nutella like taste (I miss that taste very much so)
If Nutella is what you are after, I suggest you try this recipe Adam https://thehealthyfoodie.com/hazelnut-butter-meets-dark-cocoa-powder
Super easy, healthy and delicious. Instead of oven-heating the hazelnuts, I put them in a saucepan without oil and heat them until the skins cracked. Salt, cinnamon and ginger are a must.
Thank you for sharing. It was easy to follow and the taste was awesome.
Delicious nut butter, the best I have ever made. Thanks for sharing 😊